5 Homemade Dressings

🥗🌿 5 Homemade Dressings 🌿🥗

Ingredients:

Lemon and Basil Dressing:

– 1/4 cup of fresh lemon juice

– 1/2 cup of olive oil

– 2 tablespoons of chopped fresh basil

– 1 clove minced garlic

– Salt and pepper to taste

Honey Mustard Dressing:

– 2 tablespoons of Dijon mustard

– 2 tablespoons of honey

– 1/4 cup white wine vinegar

– 1/2 cup of olive oil

– Salt and pepper to taste

Ginger and Soy Dressing:

– 2 tablespoons of soy sauce

– 1 tablespoon of rice vinegar

– 1 teaspoon of freshly grated ginger

– 1 teaspoon of honey

– 1/4 cup sesame oil.

– Salt and pepper to taste

Avocado and Lemon Dressing:

– 1 ripe avocado

– 1/4 cup of fresh chopped cilantro

– 2 tablespoons of lemon juice

– 1 clove minced garlic

– 1/4 cup of olive oil

– Salt and pepper to taste

Mint and Yogurt Dressing:

– 1 cup of natural yogurt

– 2 tablespoons of fresh mint

– 2 tablespoons of lemon juice

– 1 clove minced garlic

– Salt and pepper to taste


Instructions:

1. In a small container, combine all the ingredients of the selected dressing until well combined.

2. Taste and adjust the flavor to your preference, adding more salt, pepper or lemon if needed.

3. Refrigerate the dressing for at least 30 minutes before serving to allow the flavors to mix properly.

4. Serve over your favorite salads and enjoy these delicious homemade dressings.

5. Accompany your meals with these homemade dressings and delight your palate with their freshness and unique taste! 🥗✨


Vegetable Pan Pizza Recipe Delicious and Healthy

Vegetable Pan Pizza Recipe Delicious and Healthy

Are you prepared to take a culinary trip yet? Today, I’m going to share my tried-and-true recipe for a guilt-free, delicious veggie pan pizza. Bid farewell to oily delivery and welcome to filling, vegetable-rich deliciousness. Now let’s get started!

Getting the Ingredients Ready

  1. One broccoli
  2. One trimmed and sliced zucchini
  3. One peeled and sliced carrot
  4. One chopped bell pepper
  5. One onion, chopped finely
  6. two eggs
  7. Three tablespoons of flour
  8. 220 milliliters of milk
  9. 80 g of grated cheese
  10. and 100 g of cubed light mozzarella
  11. Two tsp olive oil
  12. To taste, add parsley, salt, and pepper.

Getting the Vegetables Ready

  • To begin, blanch the broccoli florets for two minutes in salted water, then drain and set aside. Sauté the in a pan. When soft, add onion, carrot, zucchini, and bell pepper. For extra taste, season with salt, pepper, and a pinch of parsley.
  • Blending the Cake
    Mix the eggs, milk, pepper, and salt in a bowl. Mix in the parsley, olive oil, flour, and grated cheese until smooth. Your pizza will have the ideal base thanks to this batter.
  • Pizza Assembly Lightly oil and line a baking dish with parchment paper. Evenly distribute the broccoli and sautéed veggies on the bottom. Make sure the veggies are well coated after you pour the batter over them. Add cubed mozzarella over top for that ultimate cheesy flavor.
  • Cooking to a Perfect Finish
    Pizza should be baked for 25 to 30 minutes at 180°C in a preheated oven, or until the cheese is bubbling and the dough is golden brown. The scent Your kitchen will become irresistibly filled!
  • Providing and Gratifying
    After baking, cut your veggie pan pizza into squares and serve it hot. With its impressive tastes and textures, this pizza is guaranteed to please whether it is served as a main course or a delectable snack.

Benefits of Vegetable Pizza for Health
Enjoying this veggie pan pizza will not only please your palate but also provide your body with much-needed nutrients. Full of fiber, vitamins, and minerals from the fresh veggies, this pizza promotes a healthy lifestyle without sacrificing flavor.

Easy and Delicious Potato Delights Perfect for Potato Lovers

Easy and Delicious Potato Delights Perfect for Potato Lovers

Ingredients:

  1. 1 pound of potato burger mix
  2. — six 800 gram potatoes
  3. One 100-gram glass of starch
  4. – 150 grams of grated cheddar cheese
  5. One parsley pinch and
  6. one teaspoon (8 g) of salt

Regarding Coating:

  • One egg,
  • one cup of bread crumbs

For frying:

  • – Vegetable oil 🫏

Guidelines:

In regards to the Potato Patties:

  • Grate and peel the potatoes.
  • 2. Using a fresh kitchen towel, squeeze off any extra moisture from the shredded potatoes.
  • 3. Combine the starch, shredded cheddar cheese, chopped parsley, grated potatoes, and salt in a basin. To get a homogenous mixture, thoroughly mix.
  • 4. Form the mixture into patties or any other form that you choose.

Regarding Coating:

  • 5. Beat the egg in a small basin.
  • 6. Transfer the bread crumbs to a different, small bowl.

For frying:

  • 7. Warm up the vegetable oil heat up to medium-high in a skillet.
  • 8. Make sure every potato patty is completely covered by dipping it into the beaten egg.
  • 9. Next, lightly press the bread crumbs onto it to ensure they stick.
  • 10. Gently drop the covered patties into the boiling oil.
  • 11. Fry for two to three minutes on each side, or until they are crispy and golden brown on both sides.
  • 12. Take the patties out of the pan and lay them down to drain any extra oil on a paper towel.

Savor the treats you’ve cooked with potatoes!

Pro Tip: Pair these crunchy potato patties with your preferred sour cream or ketchup for dipping.

Call to Action: Use this simple and delectable potato dish, then share it with others.

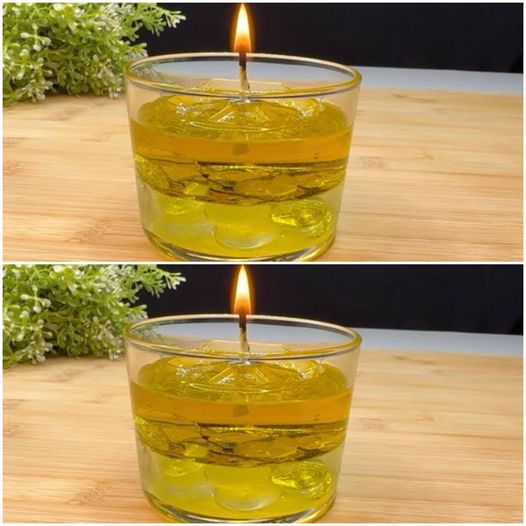
Discover the Magic of the Everlasting Candle: A Light That Never Fades

Discover the Magic of the Everlasting Candle: A Light That Never Fades

Picture a candle that never goes out, filling your house with a steady, reassuring brightness. Though an actual “forever” candle could still be confined to science fiction, there are creative substitutes that remarkably approximate an unending burning. Let’s discuss the idea of a long-lasting candle and how it might improve the atmosphere and usefulness of your home.

1. The Allure of a Candle That Lasts
Long-lasting candles have the following benefits:

  • Consistent Ambiance: It gives out a constant, pleasant light that makes any space seem cozier.
    Safety and Convenience: Long-lasting candles reduce the hazards of open flames and frequent refills, unlike conventional candles.
  • Environmental friendliness: Long-lasting candles frequently employ eco-friendly components, which lowers waste and the need for regular purchases.

2. Long-Lasting Candle Types

  • Certain varieties of candles are made to survive far longer than regular candles, even though no candle can burn indefinitely.
  • LED Candles: These rechargeable or battery-powered candles simulate the flicker of genuine flames without requiring a real flame. LED candles are extremely safe and don’t require recharging or changing out the batteries for hundreds of hours.
  • Beeswax Candles: Compared to paraffin substitutes, beeswax candles burn longer and with a cleaner burn. Larger beeswax candles are more robust as they may burn for several hours.
  • Liquid wax candles: Compared to solid wax candles, these candles burn far longer and use a refillable liquid paraffin container. Due of their durability and reliability, they are frequently utilized in restaurants. look.

3. Crafting an Experience with a Lasting Candle
Try the following advice to get the most fun out of your candle for as long as possible:

  • Proper Care: To prolong the life of the candle, trim the wick, remove any debris from the wax pool, and make sure the candle burns evenly.
  • Strategic Positioning: To avoid uneven burning and hasten melting, position your candle away from drafts.
  • Rotate candles: To prolong the life of each candle, rotate it between several.
  • 4. Candles’ Future
    Candle design innovations are always evolving. To further increase the lifespan of a candle, scientists and designers are experimenting with different kinds of wax mixtures and wick materials. In the future, imagine candles that may burn for months or even years between “fillings”!

In summary
As the concept Though the idea of a candle that never goes out is more fantastical than practical, there are several choices for long-lasting candles that may add beauty to your house for longer periods of time. A long-lasting candle may provide comfort and beauty every day, whether you go for an LED for maximum safety or a huge beeswax candle for its organic and slow-burning properties. Incorporate these timeless lights’ timeless beauty and brilliance into your everyday existence.

Unveiling the Potent Benefits of Garlic Milk: An Ancient Elixir for Your Health

Unveiling the Potent Benefits of Garlic Milk: An Ancient Elixir for Your Health

There is an interesting historical tradition of combining milk and garlic to make a unique elixir that has been highly valued for its medicinal properties by several cultures. This special blend of calming milk essence and potent garlic qualities works wonders for a variety of health problems. You may gain several advantages by including it into your daily routine, which might greatly enhance your health.

Fighting Off Bacteria and Viruses

Due to its well-known natural antiviral and antibacterial properties, garlic is a powerful tool against colds and influenza. Garlic has more therapeutic effects when coupled with milk. Garlic’s main ingredient, allicin, is released as it boils, increasing its availability to fight germs and viruses. By drinking garlic milk on a daily basis, you can reduce the severity and length of your cold and flu symptoms.

Asthma Symptom Relief

  • Another well-known benefit of garlic milk is its supposed capacity to ease asthma symptoms. If you presently suffer from this respiratory condition, adding garlic milk to your diet can help reduce your symptoms.
  • Since it has been used for generations, this natural remedy has been appreciated for its ability to enhance lung health.
  • Don’t pass up garlic milk’s fantastic advantages. Discover the benefits of this age-old concoction and start living a healthy lifestyle right now!

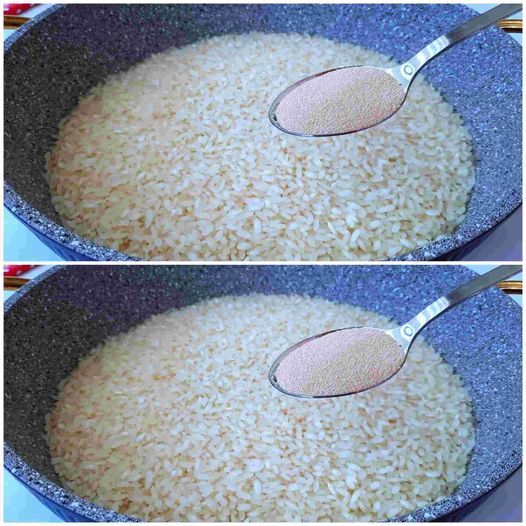
Just Mix Rice And Yeast! My Grandmother Told Me This Secret

Just Mix Rice And Yeast! My Grandmother Told Me This Secret!

My grandmother taught me one of her most intriguing secrets, which is the mixture of rice and yeast. Grandmothers always appear to have the greatest tricks under their sleeves. This easy concoction may be used for many things, from beautifying treatments to improving gardens. Let’s explore this potent mixture and discover practical applications for it in daily life.

Benefits of Natural Facial Cleanser for Beauty 1.

You may use rice and yeast as a great all-natural skin cleaner. While yeast can aid in cell regeneration and the treatment of acne, rice is well recognized for its calming and brightening qualities.

How to Apply:

Ingredients:

  1. 1 teaspoon yeast,
  2. 1 tablespoon rice flour,
  3. and a small amount of water.

Procedure:

  • Blend the components into a silky paste. Use it for  gently massage your face in circular movements. After letting it sit for ten minutes, rinse it off with some warm water. It will feel rejuvenated and glowing on your skin.
    2. Treatment for Hair Growth Also, this mixture may encourage hair growth. Rice’s vitamins and minerals, together with yeast’s health benefits, nourish the scalp and fortify hair follicles.

How to Apply:

Ingredients:

1 cup fermented rice water (1 teaspoon yeast, 1 cup rice soaked in water for overnight, and then strained).

Procedure:

  • Stir the yeast into the rice water that has fermented and let it settle for half an hour.
  • After applying the mixture to your scalp and hair, rinse it off with cold water after 20 minutes.
  • For optimum effects, use this therapy once every seven days.
  • Usages in the Home 3.

Organic Fertilizer

Yeast and rice may work wonders for your garden. By acting as a natural fertilizer, this mixture gives your plants the vital nutrients they need.

How to Apply:

Ingredients:

  1. 1 liter of water,
  2. 1 teaspoon yeast,
  3. and 1 cup cooked rice.

Method:

Grind the rice with the water and yeast, and then leave it for a full day to ferment. Use it to water your plants after diluting it with extra water. With this nutrient-rich boost, your garden will flourish.

Advantages for Health
4. Nutritional Support Yeast and fermented rice both help your digestive system by encouraging the growth of good bacteria in your digestive tract.

How to Apply:

Ingredients:

  1. 2 cups water,
  2. 1 teaspoon yeast,
  3. and 1 cup cooked rice.

Procedure:

Blend the yeast with the rice, cover with water, and let overnight to ferment. On an empty stomach, have a small glass of this combination first thing in the morning. It facilitates better digestion and gut health maintenance.

How To Utilize This Secret To Its Fullest

  • The Secret Is Consistency: Whether you use it for health, beauty, or gardening, the finest effects come from regular usage.
  • Storage: To keep leftover combinations fresh, store them in the refrigerator.
  • Try this: To maximize the benefits, feel free to experiment with different amounts and natural substances such as aloe vera or honey.

In summary
My grandma taught me the simple yet effective trick of mixing rice with yeast. Whether you want to improve your garden, your beauty regimen, or the health of your digestive system, this combination is not without its benefits. Try it out and see for yourself the amazing advantages. You’ll be astounded at the impact that even a small mixture can have!

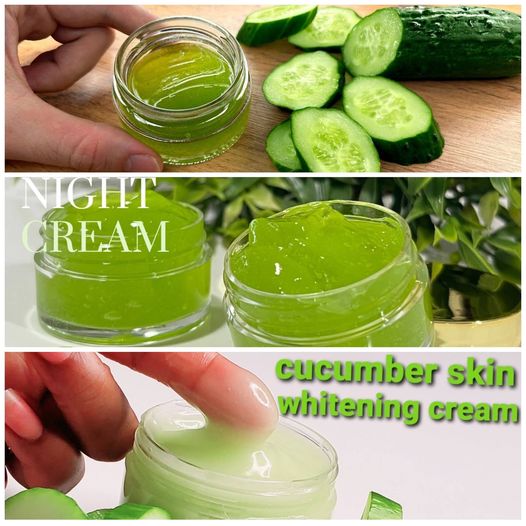
Discover the Secret: Homemade Collagen Emulsion with Cucumbers

Discover the Secret: Homemade Collagen Emulsion with Cucumbers

Make a DIY collagen emulsion with cucumbers for a natural, refreshing approach to boost the suppleness and young radiance of your skin. It may become your new go-to beauty remedy. This easy recipe makes a cream that is ideal for daily use by fusing the skin-firming properties of collagen with the moisturizing power of cucumbers. This is how to create it and the reason it works so well.

More than simply a side dish for salads, cucumbers are a skin-hydration powerhouse. Packed with vitamins and minerals, they moisturize, soften, and calm the skin to give it a more young, supple appearance. Conversely, collagen is a protein that contributes to the suppleness and rigidity of the skin. As we welcome additional life’s events, our Since the skin produces less collagen naturally, external treatment can be beneficial.

Ingredients Required:

  1. One little cucumber
  2. One spoonful of powdered collagen (found at health shops)
  3. Two teaspoons gelled aloe vera
  4. One teaspoon of vitamin E oil (optional; add more nutrition if desired)
  5. One tablespoon of your preferred carrier oil, or coconut oil

Guidelines:

  • To prepare the cucumber, begin by giving it a good wash. Chop it finely and process until you get a nice purée.
  • remove the Juice: To remove the juice from the cucumber puree, use a fine mesh strainer. This is going to be your emulsion’s foundation.
  • Combine Ingredients: Combine the coconut oil, aloe vera gel, collagen powder, and cucumber juice in a bowl. Add the vitamin E oil, if using. Blend well until all ingredients are properly combined and the product has a smooth, creamy consistency.
  • Keep Your Cream Stored: Transfer the cream into a resealable container. To keep it fresh, keep it in the refrigerator. When applied, the cold cream will also aid in skin soothing.

Use:

After cleansing your skin, use this lotion in the morning and evening. Use gentle upward strokes across the face and neck to improve absorption and boost blood flow. This cream is a great way to reduce puffiness around the eyes because of the cooling action of the cucumber.

In summary:

In addition to being reasonably priced, this DIY collagen emulsion with cucumbers is a delightfully natural approach to promote the health of your skin. You’ll find that your skin feels more moisturized, renewed, and and robust. Why not give it a shot and see how it changes your regimen for skincare?

Look and Feel Refreshed with a Simple Cornstarch and Water Anti-Aging Collagen Mask

Look and Feel Refreshed with a Simple Cornstarch and Water Anti-Aging Collagen Mask

Are you eager to add a young glow to your skin? Perhaps all you need is a homemade anti-aging mask made with cornstarch and water. This inexpensive, simple-to-make mixture works wonders to give your skin a more radiant, smoother appearance. Here’s how to make this easy DIY treatment and reap its benefits.

Why Use Water with Cornstarch?

Cornstarch is a hidden gem in skin care that is waiting to be uncovered; it is more than simply a thickening agent. Cornstarch may be used as a mask to tighten and tone the skin, which helps to minimize wrinkles and fine lines. Blended with essential ingredients and water, it creates a paste that plumps and revitalizes the skin.

What You’ll require:

  1. One tablespoon of corn flour
  2. One teaspoon of collagen powder
  3. One egg
  4. white
  5. Two tsp plain yogurt (extra hydration optional)
  6. Water

Guidelines:

To make the cornstarch mixture, put the cornstarch and enough cold water in a small pot and stir until a homogeneous paste forms. Stirring constantly, cook the mixture over low heat until it thickens. Turn off the heat and let it to cool.

  1. Add the Collagen and Egg White: After the cornstarch mixture cools, whisk in one egg white and the powdered collagen. These components are great for suppleness of the skin and for giving your complexion a youthful bounce.
  2. provide Yogurt: To provide more moisture to the recipe for people with dry skin, toss in some plain yogurt. To make sure all the ingredients are combined, thoroughly mix.
  3. Put on the Mask: Make sure your face is really clean before putting on the mask. Spoon the mixture evenly over your face, taking care not to get any in your mouth or eyes. After relaxing, give the mask around twenty minutes to settle.
  4. Rinse Off: Use warm water to remove the mask, gently dry your face, and then apply your preferred moisturizer.
  5. Advantages: The skin gets tightened and revitalized admirably by this mask. While collagen increases elasticity, cornstarch helps to smooth out small wrinkles. Yogurt is a great source of nutrients when consumed, and egg whites are well renowned for its ability to tighten skin.

In summary:

Including this cornstarch and collagen mask in your daily beauty routine may help you appear younger and more refreshed. It’s a quick and easy fix that will work well for anyone wishing to incorporate a natural touch. elevate their skincare regimen.

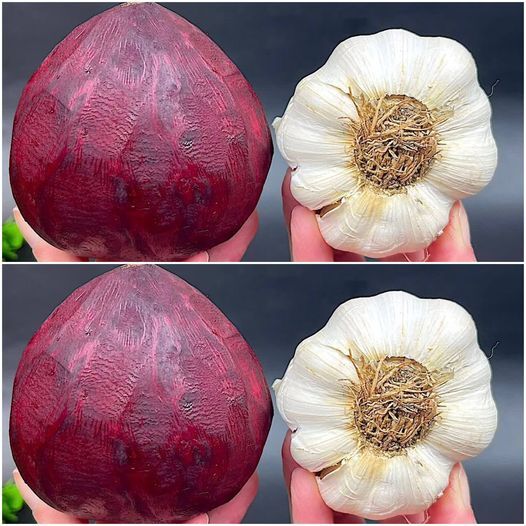
They Will Disappear in 1 Minute They Are a Real Bomb Quick and Easy Recipe

 They Will Disappear in 1 Minute  They Are a Real Bomb  Quick and Easy Recipe 

This recipe with beets and garlic is great if you’re searching for a fast and delicious dinner that will go as soon as it’s prepared! Not only are these tasty morsels wonderful, but they’re also really simple to make. They will quickly become a favorite whether served as a snack or a side dish. Now let’s get started on this easy and delicious meal.

Components

  1. Three medleys of beets
  2. two minced garlic cloves
  3. Two tsp olive oil
  4. One-third cup balsamic vinegar
  5. To taste, add salt and pepper.
  6. For garnish, use fresh parsley (optional).

Guidelines

1. Get the beets ready:

  • Peel and Slice: To begin, peel the beetroot. Cut them into little cubes or thin rounds, depending on your choice.

2. Put Beets in Season:

Combine the Ingredients:

  • Using a big basin, mix together the balsamic vinegar, olive oil, chopped garlic, salt, and pepper. Slices or cubes of beets should be added to the basin and mixed until well coated.

3. Prepare the Beets:

  • Set the Oven’s Temperature to 400°F (200°C) before using it.
  • Bake: Spread out the beets on a parchment paper-lined baking sheet in a single layer. Bake, rotating them midway through, for 20 to 25 minutes, or until they are soft and beginning to crisp up around the edges.

4. Present and Savor:

  • Finishing Touch: After the beets are cooked, move them to a platter. If desired, garnish with fresh parsley.
  • Serve: Warm up these garlic and beet nibbles. They make a delicious snack, side dish, or even appetizer.

Advice for the Best Outcomes

  • Equal Parts: To guarantee that the beets cook evenly, make sure the slices or cubes are the same size.
  • Extra Flavor Boost: Before baking, sprinkle in some of your favorite herbs, such as rosemary or thyme, for an extra flavor boost.
  • Crispy Edges: You may use the broiler for the final two to three minutes of baking to get even more crispiness. Observe them closely to avoid burning them.
  • Nutrient-Rich Benefits for Health: Beets are a great source of vitamins, minerals, and antioxidants that promote general health.
  • Low Calorie: This meal is a good option because it is flavorful and low in calories.
  • Digestive Health: Beet fiber helps keep the intestines healthy and encourages proper digestion.

In summary

These garlicky nibbles with beets are a real treat for the senses and will quickly go from the table. They are a true taste and nutrition explosion with their deep, savory flavor and crunchy texture. This dish is quick and simple to prepare, making it ideal for any gathering. Try them and savor the flavor of garlic and beets in every bite. Have fun in the kitchen!

The Essential Vitamin for Keeping Acne at Bay

The Essential Vitamin for Keeping Acne at Bay


Dealing with acne isn’t just a teenage dilemma—it can be a concern at any stage of life. However, there’s good news for those seeking a clearer complexion. Among the various remedies and lifestyle changes, one of the simplest and most effective ways to combat acne is by ensuring you’re getting enough of a crucial vitamin: Vitamin A.


Vitamin A, commonly found in a variety of foods, plays a significant role in maintaining healthy skin. It’s not just about keeping your skin looking youthful; this vitamin is essential for the repair and maintenance of the skin tissue. Foods rich in Vitamin A include carrots, sweet potatoes, and leafy greens like kale and spinach. Incorporating these foods into your daily diet can help keep your skin healthy and can reduce the occurrence of acne.


Why is Vitamin A so beneficial? It helps prevent the overproduction of cells in the skin’s outer layer, reducing the likelihood of pores becoming clogged with oil and dead skin cells, which is a primary cause of acne. Additionally, Vitamin A has anti-inflammatory properties, which can reduce the visibility of acne.


It’s not only about what you eat, though. Topical retinoids, derived from Vitamin A, are widely recommended by dermatologists for acne treatment. These substances help promote cell turnover and prevent the clogging of hair follicles. If you’re considering this option, it’s best to consult with a skincare professional who can advise based on your specific skin needs.


For those who prefer a more natural approach, simply adjusting your diet might suffice. However, remember that moderation is key, as too much Vitamin A can lead to toxicity. The balance is crucial, and sometimes, a daily multivitamin supplement might be all you need.


Lastly, while Vitamin A can significantly help manage and prevent acne, it’s also essential to maintain a balanced diet, stay hydrated, and follow a consistent skincare routine. All these factors contribute to skin health and can enhance the benefits of Vitamin A.


Embrace these tips, and you might find that achieving clear, healthy skin is simpler and more natural than you think. So, why not give it a try and see how a little change in your diet can make a significant difference in your skin’s health