Discover the Incredible Healing Powers of Sage

Discover the Incredible Healing Powers of Sage Sage is a highly valued plant in both the culinary and medical domains, providing exceptional therapeutic effects that outweigh several traditional therapies. Sage, well-known for its strong taste and unique perfume, has a lot going for it in terms of health benefits. Let’s explore the reasons behind the saying “better than any pill” for sage and how to fully use this plant for healing.

Sage, why?
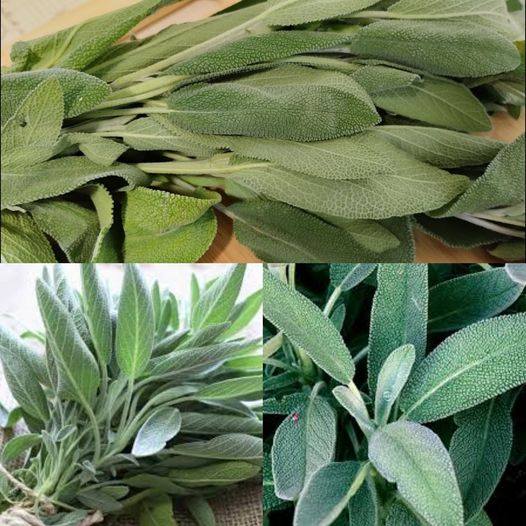
Because of its antibacterial, antimicrobial, and anti-inflammatory qualities, sage (Salvia officinalis) is highly valued. Rich in vitamins, essential oils, and antioxidants, it promotes overall health and well-being. Sage has been used historically to cure a wide range of conditions, from digestive issues to mental exhaustion.

Advantages of Sage Cognitive Enhancement for Health

  • Sage is well known for its ability to improve memory and guard against neurological conditions. Research indicates that sage is a useful plant for preserving brain health since it may enhance memory and cognitive performance.
  • gastrointestinal health: In the past, sage tea was used to treat stomach problems. It relieves gas, bloating, and indigestion symptoms. Additionally, the stomach lining may be soothed by its anti-inflammatory qualities.
  • Advantages of Respiratory: Sage’s antibacterial properties make it a great choice for respiratory health. It may relieve the symptoms of asthma, colds, and the flu as well as sore throats. Drinking sage tea or breathing in sage steam helps relieve sore throats and unclog sinuses.

Antimicrobial Characteristics

  • Sage can fight viral and bacterial illnesses because to its inherent antibacterial properties. This makes it an effective natural treatment for preventing infections and recovering from wounds.
  • Encourages the Health of Women: Because of its estrogenic properties, sage is especially helpful for women, since it may lessen menopausal symptoms like hot flashes and profuse perspiration.

How to Make Sage Tea and Use It for Healing

  • Ingredients: one cup of boiling water and one or two tablespoons of dried sage leaves.
  • Sage leaves should be steeped in boiling water for five to ten minutes. Pour through a strainer and enjoy warm. If desired, you may add honey or lemon to flavor.

Sage Infusion for Gargling

  • Use: Sage gargles are helpful for sore throats and oral health.
  • Preparation: Steep the sage leaves longer to create a stronger infusion, which may then be gargled.

Uses in Cooking

  • Use: Incorporate dried or fresh sage into food preparations. It enhances the taste and nutritional content of meats, soups, and stews.

Take Care

  • Although most individuals may use sage safely, it should be used sparingly. Sage contains a chemical called thujone, which may have adverse effects if consumed in excess. Before taking sage as a medicine, those with renal or epileptic issues and pregnant women should speak with a healthcare practitioner.

In summary
When it comes to plants that heal “like crazy,” sage really stands out. Sage provides a safe, natural substitute for many pharmaceutical drugs, whether it is used in food preparation, brewed as a tea, or used topically as an oil. Include sage in your regimen to directly see its many therapeutic properties.

Affordable Solution for Toenail Fungus

An Easy and Affordable Solution for Toenail Fungus

Fungal infections under the nails can be an annoying condition that is embarrassing and uncomfortable. But don’t panic, there is an easy and affordable fix that you can make in a minute with items you probably already have in your kitchen. Let’s investigate this simple recipe that calls for just three everyday ingredients: apple cider vinegar, baking soda, and an egg.

The Power of Simple Ingredients

Every component used in this therapy has specific advantages of its own:

  • Egg: The egg serves as a binding agent to ensure that the mixture sticks to the nail well for optimal efficiency, even if it doesn’t directly fight fungus.
  • Baking soda: Well-known for its antifungal qualities, baking soda combats toenail fungus and helps eliminate foot odour, giving it a two-pronged effect in your fight against this bothersome issue.
  • Apple Cider Vinegar: Fungal infections can alter the skin’s natural acidity, which is why apple cider vinegar’s acetic acid acts to destroy fungus while also restoring it.


How to Prepare Your Toenail Fungus Remedy

Ingredients:

  1. One egg
  2. One tsp baking soda
  3. One tsp of vinegar made from apple cider

Guidelines:

  1. Crack the Egg: To begin, crack the egg and take out the insides. You can cook with the egg to save it from going to waste—you only need the eggshell for this treatment.
  2. Combine the Ingredients: Using a small bowl, blend together the apple cider vinegar and baking soda until a paste is formed. You can thin out the mixture by adding a small amount additional vinegar if it’s too thick.
  3. Apply the Remedy: Fill a small basin with your concoction by using the cleaned eggshell. Directly apply the paste to the toenail that is damaged. The eggshell is the ideal applicator because it is the right size for the job.
  4. Allow It to Operate: After a few minutes, let the liquid sit on the toenail and then rinse it off with warm water. Using a fresh towel, carefully pat the area dry.

Embrace the Simplicity:

This simple, quick, and inexpensive treatment for toenail fungus is proof of the effectiveness of common, everyday substances. This at-home remedy can be a great starting step towards treating the problem, but in severe or enduring situations, it’s crucial to speak with a healthcare professional.

Recall that the keys to treating toenail fungus, or any other health issue, are consistency and patience. Without investing a lot of time or money, you can have healthier, cleaner nails with this easy cure. Make little but significant progress towards bettering your well-being!

pastry cream secret recipe

pastry cream secret recipe

Preparation Time: 15 minutes
Cooking Time: 10 minutes
Total Time: 25 minutes
Difficulty Level: Easy
Yield: About 2 cups

Ingredients:

  1. 2 cups (480ml) whole milk
  2. 1/2 cup (100g) granulated sugar
  3. 1/4 cup (30g) cornstarch
  4. 4 large egg yolks
  5. 2 tbsp (28g) unsalted butter
  6. 1 tsp (5ml) vanilla extract
  7. Pinch of salt

Method:

  1. In a pot of medium size, bring the milk to a simmer over medium heat. Warm the milk until it reaches the desired temperature. Do not allow it to come to a boil.
    Stir the dry ingredients together:
  2. You should combine the sugar, cornflour, and salt in a separate basin and mix them together.
  3. Use in conjunction with Egg Yolks: In a separate bowl, whisk the egg yolks until they are completely smooth. Using a whisk, gradually incorporate the sugar mixture into the egg yolks until they are well blended.
  4. To temper the eggs, slowly add about half a cup of the hot milk into the egg yolk mixture while whisking continually. This will allow the eggs to become more temperate. They will not get curdled as a result of this.
  5. While continuously whisking, gradually pour the egg mixture that has been tempered back into the pot that previously contained the remaining hot milk.
  6. The cream should be cooked by continuing to simmer the mixture over medium heat while whisking it
  7. continually until it starts to bubble and thickens. This ought should take approximately two to three minutes.
    After the mixture has thickened, take the pot from the heat and whisk in the butter and vanilla extract until the mixture is completely smooth.
  8. To avoid a skin from developing on the surface of the pastry cream, transfer it to a bowl and cover it with plastic wrap. Press the wrap directly into the surface of the cream. This will allow the cream to cool.
  9. After it has reached room temperature, place it in the refrigerator for at least two hours, or until it is completely cold.

Nutritional Information (per 1/4 cup serving):

  • Calories: 120
  • Protein: 3g
  • Carbohydrates: 17g
  • Fat: 5g
  • Fiber: 0g
  • Sugar: 13g
  • Sodium: 50mg

How to Make Clove Oil at Home – Simply & Easily

The medical benefits of clove oil are well known, and they include pain relief, better digestion, and antibacterial activity. It’s really easy to make your own clove oil at home with only a few staple items. This is a straightforward recipe for making this potent essential oil.

Pain Relief: Clove oil is frequently used to treat pain, especially headaches and dental discomfort.

antibacterial: It effectively combats bacterial infections due to its potent antibacterial qualities.

Antioxidant: Clove has a lot of antioxidants that support cellular protection and well-being maintenance.

Ingredients Needed:

  1. 1/2 cup of whole cloves
  2. 1 cup of carrier oil (olive oil, coconut oil, or almond oil are good choices)

Equipment Needed

  • Glass jar with a tight-fitting lid
  • Saucepan or slow cooker
  • Strainer or cheesecloth

Instructions:


  1. , first carefully crush each entire clove to liberate its essence. The flat side of a knife or a mortar and pestle can be used for this.

  2. Combine with Carrier Oil: Transfer the crushed cloves into a glass jar and cover them fully with the carrier oil.
  3. Heat the combination: Warm the oil and clove combination to promote infusion. There are two approaches to this.
  4. Method for the Slow Cooker: Put the jar into a slow cooker and add water to cover the jar by about half of its height. For around three to four hours, place the cooker on low heat and allow the mixture reheat.
  5. Stovetop Method: The jar can also be warmed on the stovetop in a water bath. After placing the jar in a pot and adding enough water to cover the jar by half, simmer the mixture gently for two to three hours. Take care not to bring the water to a rolling boil as that might shatter the glass.
  6. Allow the oil to cool entirely after heating it before straining it. After that, drain the mixture to get rid of the cloves and any other debris using cheesecloth or a fine sieve. To get the most oil out of the cheesecloth, squeeze it.
  7. Storage: Pour the squeezed oil into a jar or glass bottle that has been cleaned. Put the contents and the date on the jar’s label. Keep the clove oil somewhere cold and dark. It ought tojar.

Usage Tips:

For Dental Pain: To assist lessen pain and inflammation, apply a tiny quantity of clove oil directly to the gums around a hurting tooth.

For Skin Care: For antibacterial and calming effects, blend a few drops of clove oil with a carrier oil and use it as a massage oil.

Aromatherapy: Fill your house with a cosy aroma and help cleanse the air by using clove oil in a diffuser.

Since clove oil is strong, it should not be applied straight to the skin without first diluting it. Always dilute before using topically with a carrier oil.

Before taking clove oil, those with certain medical issues and pregnant women should speak with a healthcare practitioner.

Not only can making your own clove oil at home save you money, but it also gives you access to cloves’ natural advantages in a concentrated and easily accessed form. Savour the procedure and the finished oil!

Erase Age Spots with a Simple Kitchen Staple


Erase Age Spots with a Simple Kitchen Staple

Your skincare regimen may take a complete turn around if you find that a basic kitchen staple like baking soda can significantly minimise the appearance of age spots. Here’s how to use this multipurpose, low-cost lotion to help even out your skin tone and lighten age spots.

The Benefits of Baking Soda

Because of its somewhat abrasive qualities, baking soda (sodium bicarbonate) softly exfoliates the skin, eliminating the outermost layer of dead skin cells. Over time, this procedure can aid in the fading of age spots. Baking soda can also aid in balancing the pH levels of the skin, which is advantageous for keeping skin clear and health

How to Use Baking Soda to Treat Age Spots:

Ingredients:

  1. 1 tablespoon of baking soda
  2. 2 tablespoons of water
  3. Optional: a few drops of lemon juice for additional lightening effect


Guidelines:

Create a Paste:

Create a smooth paste by combining the baking soda and water in a small basin. Add a few drops of lemon juice for additional skin-lightening benefits. Vitamin C, an antioxidant that helps lessen skin damage and discolouration, is abundant in lemon juice.

Put the Paste in Place:

Using your fingertips, carefully apply the paste to the ageing areas. For one to two minutes, massage the paste into the skin in circular motions. Take care not to irritate the skin.

Keep it turned on:

Give the paste five to ten minutes to rest on the skin. This will allow plenty of time for the baking soda to do its job.

Wash It Off:

After using lukewarm water to remove the paste, gently towel dry your skin.

Hydrate:

Because baking soda may be drying to the skin, use a moisturiser afterward to keep your skin moisturised.

Top Techniques:

To make sure you don’t have an adverse reaction, conduct a patch test on a tiny section of skin before using baking soda on your hands or face.

Use this therapy no more frequently than once or twice a week. Overuse can cause irritation and upset your skin’s natural pH balance.

Sun Protection: Use a broad-spectrum sunscreen every day to shield your skin from additional UV damage, as the treatment may make it more susceptible to the sun’s rays.

Top Techniques:

Although some people find success with baking soda, it might not be a good fit for all skin types, particularly those with sensitive skin. Should you encounter any redness, burning, or irritation, stop using it right once and get advice from a dermatologist.


An easy, low-cost way to help minimise the appearance of age spots is to use baking soda. The clarity and evenness of your skin may significantly improve with careful, consistent application.

Annoyed Little white bumps on skin

Annoyed Little white bumps on skin Do you have any little white pimples on your skin, especially around your nose? For many people, these ugly markings may be a major cause of aggravation and even worry. Even while it’s easier to write these lumps off as blackheads or pimples, knowing what they may be is essential for both efficient treatment and peace of mind. Managing these little skin defects may be greatly aided by being aware of the typical causes and solutions.
These little white pimples are often milia, a kind of acne. Milia are tiny, white or yellowish lumps that are packed with keratin that develop immediately under the skin. Because milia lack an opening, they are more difficult to treat with over-the-counter acne treatments and are not readily squeezed like typical acne. It is crucial to have an accurate diagnosis and treatment since using the wrong tools might make the issue worse or possibly result in permanent damage.

Do I need to worry?

  • Innocent In general, nature mimosas are safe and non-toxic. They are not so much a medical concern as a cosmetic one. However, you may need to see a doctor if you have further symptoms including redness, discomfort, or swelling.
  • Resilience Milia are generally benign, however they have the potential to persist. They may last for months or even longer if treatment is not received. Treating them proactively often results in their removal sooner.
  • Fundamental Problems Milia may sometimes be a sign of underlying medical issues, particularly if they develop unexpectedly and in huge quantities. If the lumps don’t go away over time or if you have concerns, you should see a dermatologist.

How do I get rid of them?

  • Professional Extraction Professional extraction is one of the most dependable ways to get rid of milia. Dermatologists and other certified skincare specialists has the necessary equipment and knowledge to remove them without leaving behind scars or infections.
  • Retinoids topically The natural exfoliation process may be accelerated using prescription therapies like as retinoid creams, which will facilitate the release of trapped keratin and the resolution of milia. For this kind of therapy, a dermatologist’s advice is advised.
  • Exfoliants Sold Over-the-Counter Alpha hydroxy acid (AHA) and beta hydroxy acid (BHA)-containing products may assist exfoliate the skin and promote skin cell turnover, which will facilitate the disappearance of milia. For the finest effects, consistent usage is essential.
  • Do-at-home remedies Some individuals find that employing natural therapies, such as heating their skin to expand their pores or using mild face washes, helps. To prevent irritation, these techniques should be used cautiously.
  • Steer clear of oily and thick creams. Products that block pores may be a factor in the development of milia. To reduce the danger, use skincare products that are non-comedogenic.

    Little white pimples on your skin might be uncomfortable, but they are usually benign and curable. Knowing what they are and selecting the appropriate treatment options can help you have smoother, more even skin. When in doubt, get individualised guidance from a healthcare expert.

white Bumps on my skin

Do you have any little white pimples on your skin, especially around your nose? For many people, these ugly markings may be a major cause of aggravation and even worry. Even while it’s easier to write these lumps off as blackheads or pimples, knowing what they may be is essential for both efficient treatment and peace of mind. Managing these little skin defects may be greatly aided by being aware of the typical causes and solutions.
These little white pimples are often milia, a kind of acne. Milia are tiny, white or yellowish lumps that are packed with keratin that develop immediately under the skin. Because milia lack an opening, they are more difficult to treat with over-the-counter acne treatments and are not readily squeezed like typical acne. It is crucial to have the right diagnosis and treatment since using the wrong techniques might make the condition worse or possibly result in permanent damage.

Do I need to worry?
1. Innocent In general, nature mimosas are safe and non-toxic. They are not so much a medical concern as a cosmetic one. However, you may need to see a doctor if you have further symptoms including redness, discomfort, or swelling.

2. Resilience
Milia are generally benign, however they have the potential to persist. They may last for months or even longer if treatment is not received. Treating them proactively often results in their removal sooner.
3. Fundamental Problems
Milia may sometimes be a sign of underlying medical issues, particularly if they develop unexpectedly and in huge quantities. If the lumps don’t go away over time or if you have concerns, you should see a dermatologist.
How do I get rid of them?
1. Professional Extraction
Professional extraction is one of the most dependable ways to get rid of milia. Dermatologists and other certified skincare specialists has the necessary equipment and knowledge to remove them without leaving behind scars or infections.
2. Retinoids topically
The natural exfoliation process may be accelerated using prescription therapies like as retinoid creams, which will facilitate the release of trapped keratin and the resolution of milia. For this kind of therapy, a dermatologist’s advice is advised.
3. Exfoliants Sold Over-the-Counter
Alpha hydroxy acid (AHA) and beta hydroxy acid (BHA)-containing products may assist exfoliate the skin and promote skin cell turnover, which will facilitate the disappearance of milia. For the finest effects, consistent usage is essential.
4. Do-at-home remedies
Some individuals find that employing natural therapies, such as heating their skin to expand their pores or using mild face washes, helps. To prevent irritation, these techniques should be used cautiously.
5. Steer clear of oily and thick creams.
Products that block pores may be a factor in the development of milia. To reduce the danger, use skincare products that are non-comedogenic.

Little white pimples on your skin might be uncomfortable, but they are usually benign and curable. Understanding what they are and choosing the right treatment methods can help you achieve clearer, bump-free skin. If in doubt, always consult a healthcare professional for personalized advice.

Easy Rice and Egg Recipe

Easy Rice and Egg Recipe This rice and egg dish is a great option if you’re searching for a quick and easy dinner that tastes great. It’s not only fast and simple, but also fulfilling and adaptable. Here’s how to prepare this tasty recipe, which will quickly become a weekly mainstay in your kitchen.

Ingredients For Easy Rice and Egg Recipe:

  • 1 cup of cooked rice (preferably day-old rice as it fries better)
  • 2 large eggs
  • 2 tablespoons of olive oil
  • 1 small onion, finely chopped
  • 2 cloves of garlic, minced
  • Salt and pepper to taste
  • Optional: chopped vegetables such as bell peppers, carrots, or peas
  • Optional: a dash of soy sauce or hot sauce for added flavor

Mehtod By; Green Tricks

Instructions For Easy Rice and Egg Recipe:

Get the ingredients ready:

  • To ensure that veggies cook fast and evenly, cut them finely if you want to add them.
  • In a bowl, gently beat the eggs and add a pinch of salt and pepper to taste.

Sauté the garlic and onion:

  • In a big skillet or frying pan, warm the olive oil over medium heat.
  • Add the chopped onion and simmer for 3–4 minutes, or until transparent.
  • When aromatic, add the minced garlic and sauté for an additional minute.

Include the rice:

  • After the rice is done, raise the heat to medium-high and combine it with the skillet. Mix well with the garlic and onion.
  • After roughly two minutes of undisturbed cooking, mix the rice one more. Continue doing this a few times until the rice is well toasted and begins to take on a hint of color.

Prepare the Eggs:

  • Move the rice to the skillet’s side. After clearing the area, pour the beaten eggs into it and give it a minute to start setting.
  • Stir the eggs into the rice just a little bit while you gently scramble them. Stir the eggs constantly as they cook until they are well cooked and mixed into the rice.

Last Words:

  • Stir everything together after adding the chopped veggies, if using. Cook the veggies for a further two to three minutes, or until they are soft.
  • Depending on your taste, add more salt, pepper, soy sauce, or spicy sauce to the rice and egg combination.

Serve:

If preferred, top with a sprinkling of fresh herbs, such as parsley or green onions, and serve hot.

Advice:

  • This recipe is quite adaptable. For more protein, feel free to add any leftover chicken, or shrimp.
  • You may avoid soggy fried rice by using rice that has been sitting for a day. When fried, freshly prepared rice may become excessively wet and clump together.

This dish for rice and egg is inexpensive, pleasant, and simple to prepare. It’s a useful recipe for any home as it works well for hectic weeknights and can be customized to utilize any ingredients you have on hand.

Top 5 Benefits of Moringa Tea

Top 5 Benefits of Moringa Tea Because of its many health advantages, moringa tea, a superfood beverage prepared from the leaves of the Moringa oleifera tree, is becoming more and more well-liked. This nutrient-dense tea is a great addition to your daily routine since it is full of vitamins, minerals, and antioxidants.

The top five advantages of regularly consuming moringa tea are listed below.

1. Packed with Antioxidants
Antioxidants including beta-carotene, chlorogenic acid, and quercetin abound in moringa leaves. These substances aid in shielding the organism from the damaging effects of free radical oxidative stress. Antioxidants play a critical role in preserving overall health and averting chronic illnesses such as diabetes and heart disease.
2. Raises Vitality Levels
The natural energy boost from moringa tea is more consistent and long-lasting than that of caffeinated beverages, which can cause sudden spikes and drops in energy. This is because of its high iron and magnesium content, both of which are essential for the synthesis of energy.
3. Encourages Mental Wellness
Because of its high vitamin E and C concentration and antioxidant qualities, moringa is recognised as a cognitive booster. Frequent use of moringa tea may boost memory, lessen tiredness symptoms, and improve brain function.
4. Inhibitory Effects
Numerous health concerns, including as obesity, respiratory disorders, cardiovascular disease, and arthritis, are associated with chronic inflammation. Isothiocyanates, which are included in moringa tea, are well-known for having anti-inflammatory properties that aid in controlling inflammation in the body.
5. Enhances Digestive Wellbeing
The antibacterial, antifungal, and antimicrobial qualities of moringa tea help to maintain a healthy digestive system. Regular consumption may aid in the management of digestive problems such as ulcerative colitis, gastritis, and constipation.

Ingredients:

  • 1-2 teaspoons of dried Moringa leaves
  • 1 cup of boiling water
  • Optional: honey, lemon, or mint to taste

Method:

  • Steep the Leaves: Put the dried leaves of the moringa plant in a cup or a tea infuser. After covering the leaves with boiling water, let them steep for five to ten minutes. The tea becomes stronger the longer it steeps.
  • Flavour as Desired: You may add some honey, lemon juice, or mint leaves to your moringa tea to make it taste better. These extras not only enhance flavour but also provide extra health advantages.
  • Have fun: Pour heated moringa tea or let it cool for a revitalising herbal drink. A regular intake of one to two cups may have major health advantages.

Article By: well-ness tips

In summary
Tea made from moringa leaves is a potent beverage that has several health advantages. The benefits of including this tea into your daily routine are many, ranging from increasing energy levels to reducing inflammation and promoting brain health. Moringa tea has a moderate flavour and many health advantages, making it an easy and efficient approach to enhance your general well-being.

Mix SALT with STARCH

Mix SALT with STARCH and you no longer need to spend money at the pharmacy (Did you know that?)

A simple DIY treatment for minor health and household difficulties may be developed by combining starch and salt. This combination may be very helpful for cleansing and caring for skin, and it can be a more affordable option than certain over-the-counter treatments. Here are several useful uses for this combination as well as instructions on how to make and utilise it:
How to Make the Starch and Salt Combination:
Components:
one portion table salt

two parts potato starch or cornflour

Guidelines:

Combine the ingredients:

  1. In a bowl, mix together the starch and salt. Mix them well until properly combined.

Hold the Blend:

Move the blend into a sealed receptacle. To keep it effective, store it somewhere cold and dry.

Salt and Starch Mixture Uses:
1. Rashes and Skin Irritations:
Use: On the afflicted regions, apply a paste prepared with a little amount of water and the salt-starch combination. While the salt functions as an antimicrobial, the starch helps calm the skin and heal rashes.

Benefits: Good for minor skin irritations and for treating nappy rash and heat rash.

2. Natural Cleaning Scrub: Use the dried combination as a mild abrasive to clean surfaces, including pots and pans. For stubborn stains, you may also mix with a little amount of water to create a paste.

Benefits: Grease and filth are absorbed by starch, while dirt and grime are removed by the abrasive properties of salt.

3. Carpet and shoe deodoriser:
Use: Sprinkle the mixture into shoes or on carpets, let sit for several hours or overnight, then vacuum or shake out.

Advantages: Starch absorbs moisture and smells, while salt helps destroy germs that generate odours.

4. Stain Remover: Application: Before washing, apply a paste made of the salt and starch combination to any spots on clothes. Give it a few hours to absorb and dissolve any stains.

Advantages: Works well on sweat and oil stains.

5. Dry Shampoo: To use, apply a tiny bit of the mixture to your hair’s roots and brush it out.

Benefits: Salt helps maintain the health of the scalp, while cornflour absorbs oil.

Take precautions:
Patch Test: Prior to applying the mixture to your skin, always do a patch test, particularly if you have sensitive skin.

Avoid on Broken Skin: Do not apply salt directly to open wounds or severely irritated skin as it can cause burning and further irritation.

Conclusion:
While the salt and starch mixture is not a substitute for professional medical treatment, it offers a variety of practical, low-cost solutions for everyday problems. This DIY approach can reduce the need for more expensive, commercial products for certain household and personal care needs. However, for serious health issues, it’s important to consult healthcare professionals.