9 Natural Secrets for a Brighter Smile

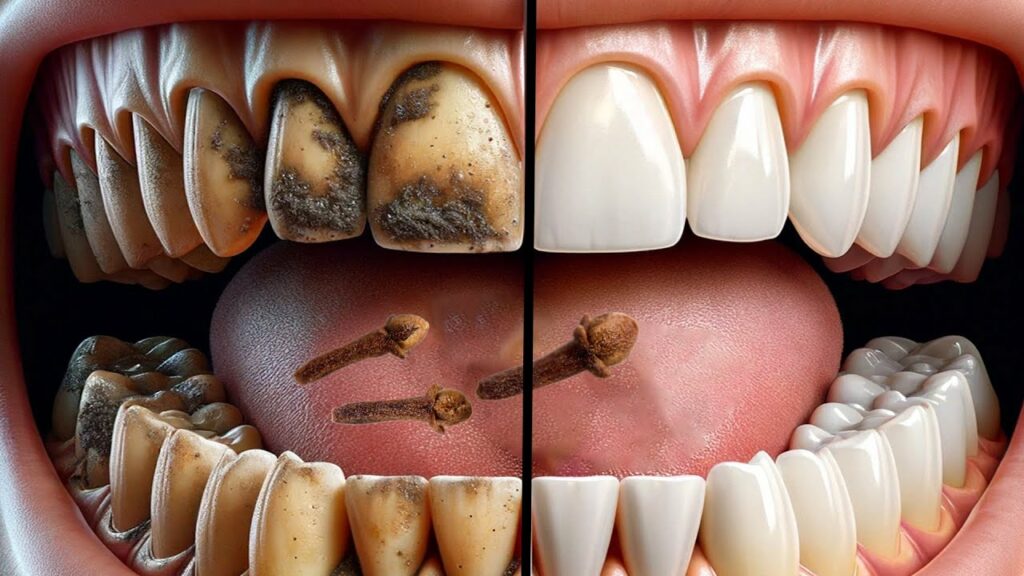
9 Natural Secrets for a Brighter Smile Removing Plaque and Tartar

It’s not as difficult as you might imagine to keep your smile bright and constant. These nine all-natural methods for removing tartar and plaque can keep your teeth spotless and your smile shining.

  • 1. Baking Soda Magic: Before brushing, dab your toothbrush with a little baking soda. Because baking soda has a slight abrasiveness, it can gently remove plaque. Moreover, it neutralizes dangerous acids that are produced by oral bacteria.
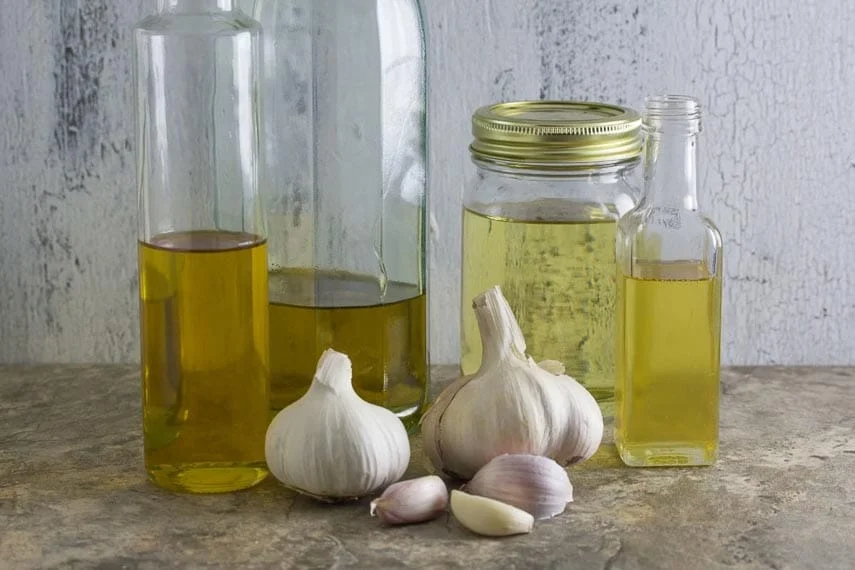
  • 2. Oil Pulling Wonders: Swish a spoonful of coconut or olive oil around your lips for ten to fifteen minutes at the beginning of the day. This age-old method aids in breath freshening and bacteria removal.
  • 3. Aloe Vera Cleanse: on take advantage of aloe vera’s antibacterial properties, apply the gel on your teeth and gums. After a few minutes, gently brush and rinse to lessen the accumulation of plaque.
  • 4. Vinegar Solution: Use a small amount of vinegar and water to rinse your mouth. The acidic qualities of vinegar can aid in tartar dissolution. To preserve your enamel, use this treatment sparingly.
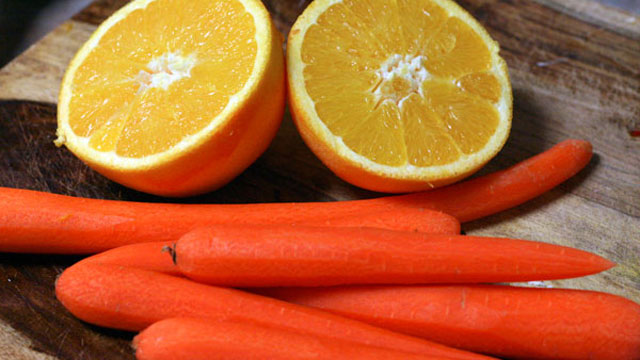
  • 5. Crunchy Clean: Eating foods high in crunch, such as apples, carrots, and celery, naturally cleans teeth. When you chew, these foods work like organic toothbrushes, rubbing against your teeth and gums.
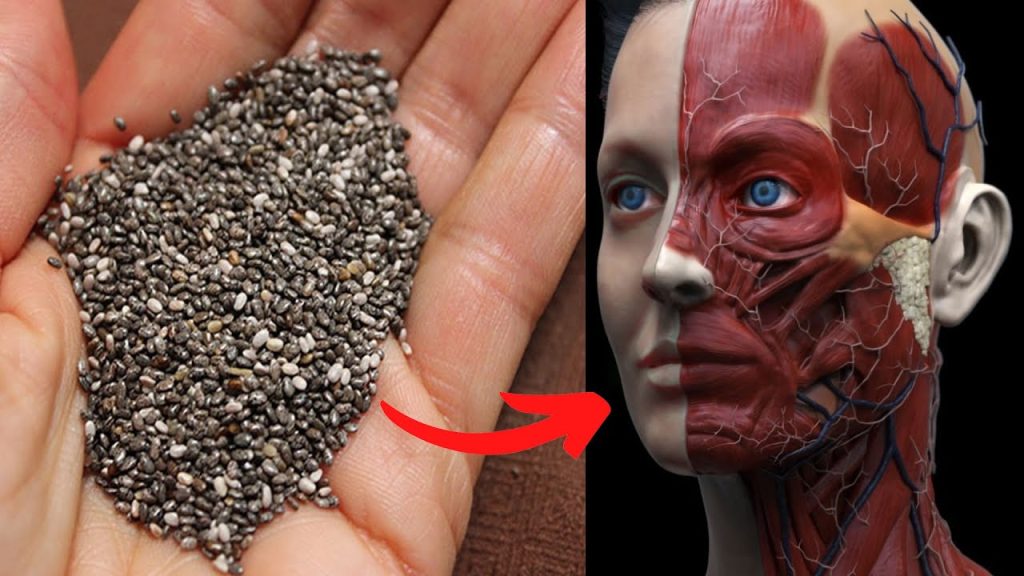
  • 6. Chew on a few sesame seeds for a sesame seed scrub. These small seeds provide calcium to strengthen your teeth and function as an exfoliant to aid in the removal of plaque.
  • 7. Herbal Tooth Powders: Use natural tooth powders made from herbs such as mint or neem. These powders offer a pleasant, chemical-free method of maintaining dental hygiene.
  • 8. Lemon Juice Rinse: The naturally occurring acid in lemon juice can dissolve tartar. To prevent acid damage, apply it to your teeth, let it remain for a minute, and then thoroughly rinse.
  • 9. Diligent Brushing and Flossing: Nothing can match the efficiency of diligent brushing and flossing, even though it’s not a cure. To stop plaque and tartar buildup, floss every day and use a brush with soft bristles.

in summary

You can progressively and successfully improve your dental health by adding these all-natural techniques to your regular oral hygiene regimen. Never forget that routine dental exams are essential to preserving your oral health and identifying any problems early. Maintain your radiant smile with these natural beauty suggestions!

Rejuvenate Your Hands with Vaseline and Tomato

Does the sensation of your hands being rough and dry? Please don’t be concerned; we have a straightforward answer for you! It is possible to restore the suppleness and smoothness of your hands with only a few things that you have in your kitchen. First things first: let’s get started on learning how to make this powerful treatment.

Why Vaseline and Tomato were Used?
Vaseline is a time-honored skincare product that has been relied upon repeatedly throughout the years due to the moisturising and protecting features it has. By forming a barrier on your skin, it ensures that moisture is retained, so facilitating the healing process and preventing dryness and fractures.

Tomatoes: Tomatoes are an excellent source of vitamins A, C, and E, all of which are very important for the health of your skin. Antioxidants, which are found in them, are responsible for reducing the appearance of wrinkles and promoting a more youthful complexion. Tomatoes include natural acids that may both exfoliate and brighten your skin with their properties.
Directions for Preparing and Utilising the Remedy Ingredients:

  1. 1 tomato that is fully ripe
  2. Vaseline, one tablespoon’s worth

Details to follow:

  1. The tomato should be prepared by first being well washed and then being sliced in half.
  2. You may either use a blender to get a smoother consistency or squeeze the juice and pulp from one half into a small dish from the other half.
    Incorporate with Vaseline:
  3. Once the tomato liquid and pulp have been combined, add the tablespoon of Vaseline.
  4. Mix well until you obtain a consistency that is uniform and smooth.
    Use in practice:
  5. Begin by washing your hands with a gentle soap and warm water, and then dry them with a towel.
  6. Apply the tomato and Vaseline mixture generously to your hands, ensuring to cover all areas, including the fingers and cuticles.
  7. After applying the mixture to your skin, massage it in using circular movements that are gentle. In addition to ensuring that the nutrients are absorbed effectively, this serves to increase circulation.
  8. For best results, leave the mixture on your hands for at least 20-30 minutes. You can even wear cotton gloves and leave it on overnight for an extra intensive treatment.

Moisturise and rinse the area:

Rinse your hands with lukewarm water and gently pat them dry.
Follow up with your regular hand cream or lotion to seal in the moisture.
Benefits and Tips:
Regular Use: To maintain soft, wrinkle-free hands, use this remedy 2-3 times a week.
Patch Test: Before applying any new remedy, perform a patch test to ensure you don’t have an allergic reaction to the ingredients.
Additional Care: Protect your hands from harsh detergents and extreme weather conditions by wearing gloves. Regularly moisturizing your hands also helps maintain their softness and smoothness.

Discover the Wonders of Chia Seeds: Everyday Benefits for Your Health

Discover the Wonders of Chia Seeds: Everyday Benefits for Your Health

Have you ever thought about include chia seeds in your regular diet? These little seeds have a surprisingly high nutritional content and can provide numerous health advantages. Let’s investigate what happens when you start consuming chia seeds on a daily basis, from improving digestion to strengthening heart health.

Powerhouse of Nutrition

Chia seeds are an excellent way to get a number of important nutrients. They are abundant in omega-3 fatty acids, which are essential for preserving heart health and lowering body-wide inflammation. Chia seeds are also a great addition to any diet because they are full of fiber, calcium, magnesium, and antioxidants.

gastrointestinal health

The influence of chia seeds on digestive health is among their most noteworthy advantages. Chia seeds’ fiber aids in promoting regular bowel motions and wards off constipation. Because of the soluble fiber they contain, chia seeds when eaten form a gel-like substance in the stomach that can function as a prebiotic, promoting the growth of beneficial bacteria in your digestive system.

Heart Conditions

Chia seed consumption on a regular basis may also be heart-healthy. By assisting in the reduction of blood pressure, inflammation, and cholesterol, omega-3 fatty acids may lessen the risk of heart disease. Because fiber lowers cholesterol, it also contributes to heart health.

Bone Density

Unexpectedly, chia seeds are a good source of calcium, which is essential for strong bones. They also include phosphorus and magnesium, two elements that are critical for preserving bone strength and density.

The Metabolism and Energy

You can increase your energy by include chia seeds in your meals. They offer a well-balanced source of lipids, carbs, and protein—all necessary for maintaining energy levels throughout the day. Chia seeds can also assist control blood sugar levels, which will stabilize your energy and promote healthy metabolism.

How to Eat Chia Seeds if You Want to

It is really easy to incorporate chia seeds into your diet. You may mix them into yoghurt, blend them into smoothies, or sprinkle them over your morning porridge. They can also be added to baked goods like bread, muffins, and pancakes to give them an extra nutritional boost.

To Sum Up

Consuming chia seeds on a regular basis is a minor adjustment that can yield substantial health advantages. Chia seeds are a simple and adaptable addition to any meal, offering a delicious crunch along with added nutritional value due to their mild flavour. To reap the advantages directly, try adding chia seeds to your regular routine!

Pour Olive Oil into Milk:

Pour Olive Oil into Milk: A Simple and Delicious Homemade Alternative

To make dairy products that taste better and are healthier than those you can buy at the supermarket, try adding olive oil to milk. Your ordinary milk may be transformed into a rich, creamy treat with this quick and simple procedure. Let’s examine how to make this amazing DIY project and its advantages.

Why Mix Milk with Olive Oil?

  • Nutritional Tip: Olive oil is a rich source of vitamins, antioxidants, and good fats. It improves the nutritional profile of milk and gives your body vital nutrients.
  • Smooth and Creamy Texture: Milk becomes smooth and creamy when olive oil is added, which makes it ideal for a variety of recipes or for enjoying on its own.
  • Enhanced Flavour: Milk becomes more palatable and adaptable for baking and cooking when olive oil is added, giving it a light, pleasant flavour.

How to Prepare Milk Spiked with Olive Oil

Components:

  1. One cup of milk (you can use plant-based, skim, or whole milk)
  2. One-third cup olive oil


Guidelines:

  • Select Your Milk: Begin with the milk type that you like best. This process works well with all kinds, whether you use dairy or a plant-based substitute.
  • Measure the Olive Oil: Stir into the milk one tablespoon of extra virgin olive oil of the highest caliber. This enhances the milk just enough to not dominate its inherent flavour.
  • Blend Well: Using a blender or whisk, thoroughly blend the milk and olive oil. Making a homogenous, smooth mixture is the aim. Use a blender and blend for 20 to 30 seconds.
  • Cool and Savor: Refrigerate the mixture for a minimum of half an hour prior to serving for optimal flavour. This enables the flavors to harmonies harmoniously.

Uses for Milk With Olive Oil Infusion

  • Coffee and Tea: For a wonderful twist, add a splash of this creamy milk to your tea or coffee.
  • Smoothies: To improve the texture and nutritional value of smoothies, use it as a basis.
  • Cooking & Baking: To add flavour and creaminess to your favourite recipes, replace conventional milk with this enriched version.
  • Direct Consumption: Sip a glass of this wholesome milk by itself for a cool, healthful beverage.

Final Thought: Handcrafted Quality in a Glass

Making milk with olive oil is an easy and quick approach to improve your daily intake of nutrition. Compared to many store-bought alternatives, this homemade substitute is not only more tasty but also healthier. Try it and get the advantages of this delicious combination—it’s rich and creamy. With this delicious and simple homemade milk, you may continue to lead a lively and healthy life!

Carrot & Orange Juice: Drink for Brighter Skin and a Glow from Inside Out

Carrot & Orange Juice: Drink for Brighter Skin and a Glow from Inside Out

Look no farther than carrot and orange juice for a tasty method to bring out the natural glow in your skin. Nutrient-rich, colourful drink that supports glowing, healthy skin. Let’s discuss the advantages of this cool beverage and how to quickly prepare it at home.

Carrot and Orange Juice Benefits

1. Promotes Skin Health

Rich in Vitamin A: Beta-carotene, which the body metabolises into vitamin A, is abundant in carrots. This vital vitamin aids in inflammation reduction, skin tissue repair, and complexion maintenance.

Packed with Vitamin C: Vitamin C is essential for the synthesis of collagen, and oranges are a great source of it. Collagen maintains the firmness, elasticity, and youthful appearance of your skin.

2. Boosts Natural Radiance

Antioxidant Powerhouse: Rich in antioxidants that shield the skin from damage caused by free radicals, carrots and oranges are excellent sources of antioxidants. This shield keeps your skin looking young and helps against premature ageing.

Hydration: Carrot and orange water content keeps your skin moisturised from the inside out, leaving it with a naturally radiant, healthy glow.

3. Encourages General Health

Boost Your Immune System: The vitamins and minerals in carrot and orange juice assist your body fend off infections and illnesses by fortifying your immune system.

Enhances Digestion: The dietary fibre in this juice facilitates better digestion and supports gut health. Clearer skin might result from a healthy digestive system.

How to Juice Orange and Carrots

Components:

  1. four big carrots, sliced and peeled
  2. Two big oranges, cut into segments and peeled
  3. Half a cup of water (for mixing only, optional)
  4. Cubes of ice (optional; to garnish)

Guidelines:

  • Get the ingredients ready: To begin, wash, peel, and cut the carrots. Section and peel the oranges.
  • Juicing: Just put the oranges and carrots into your juicer, if you have one. Pour the juice into a pitcher.
  • Blending: Add the diced carrots, orange segments, and ½ cup of water to a blender. Process till smooth. If preferred, you can strain the mixture through cheesecloth or a fine mesh screen to get rid of the pulp.
  • To serve, transfer the juice into a glass and, if desired, top it off with ice cubes. To maximise the flavour and nutritional value, consume right away.

In conclusion, hydrate to achieve radiant skin.

A tasty and nourishing method to promote the health of your skin and give it a natural glow is to drink carrot juice mixed with orange juice. You may reap the whole benefits of antioxidants, hydration, and vitamins A and C by making this easy drink a part of your regular practice. So go ahead and treat yourself to a glass of this cool juice and continue to live a bright, healthy life with skin that glows!

Natural Remedy to Get Rid of Joint and Bone Pain

Natural Remedy to Get Rid of Joint and Bone Pain

Pain in the joints and bones can make daily tasks seem laborious. You’re in luck if you’re seeking for a natural solution to relieve the pain in your aching bones and joints. This simple concoction of baking soda, salt, mustard, and honey may be exactly what you need to get some relief. Here’s how to quickly feel better by making this easy-to-make yet effective salve.

Why Are These Ingredients Used?

  • Baking soda: Using baking soda, which has anti-inflammatory qualities, can help lessen joint pain and swelling.
  • Salt: Epsom or sea salts are excellent for relieving pain and soothing achy muscles and joints.
  • Mustard: Mustard is a fantastic food for sore joints since it includes components that can reduce pain and stimulate circulation.
  • Honey: Helping to bind the combination together and intensify its calming benefits, honey is a naturally occurring humectant and anti-inflammatory.

How to Prepare the Herbal Medicine Balm

Components:

  1. One spoonful of baking soda
  2. One spoonful of sea salt or Epsom salt
  3. One tablespoon mustard
  4. One tsp honey

Guidelines:

1.Combine the Ingredients: Put the baking soda, honey, mustard, and salt in a small bowl. Until all the ingredients are properly combined and a smooth paste forms, stir vigorously.

2. Apply the Balm: Take a large portion of the concoction and rub it straight onto the bones and joints that are harmed. Work the balm into the skin in gentle circular motions to assist it start to work on the pain.

3.Let It settle: Give the balm fifteen to twenty minutes to settle on your skin. You can unwind and allow the natural ingredients to do their job during this time.

4. Rinse Off: Use warm water to rinse the balm after 15 to 20 minutes. Dry your skin using a fresh towel.

Advantages of Regular Use

Use this natural treatment balm once or twice a day for optimal benefits. These potent substances work together to increase circulation, lessen inflammation, and ease joint and bone pain.

Extra Advice on Joint Health

  • Keep Yourself Hydrated: Getting enough water keeps your joints lubricated and in good working order.
  • Regularly engaging in mild physical activity, such as swimming or walking, can help maintain the flexibility and reduce stiffness in your joints.
  • Healthy Diet: To promote joint health, include anti-inflammatory items in your diet, such as fatty salmon, leafy greens, and berries.

9 Effective Ways to Remove Skin Tags at Home

9 Effective Ways to Remove Skin Tags at Home

Skin tags, those harmless little growths that frequently show up where the skin folds, can be a little annoying. Even though they are perfectly safe, a lot of us would rather take them out for aesthetic purposes or because they get in our clothes or jewellery. The following nine easy-to-follow home remedies will help you treat skin tags on your own:

1. Tea Tree Oil: Well-known for its antibacterial qualities, tea tree oil can be used as a mild exfoliation technique for skin tags. A clean cotton ball should be soaked with a few drops of the solution, attached to the skin tag with a bandage, and left overnight. Continue every night until the tag comes off.

2. Apple Cider Vinegar: Cover the skin tag with a cotton ball that has been soaked in apple cider vinegar and fastened with a bandage. If you follow this routine every day for a few weeks, the tag may ultimately darken, dry up, and fall off.

3. Garlic: Due to its inherent antiviral and anti-inflammatory qualities, garlic is a useful skin tag remover. Make a paste out of crushed garlic cloves, apply on the tag, and leave it on overnight. Remove it with a morning wash. Continue till the skin tag gets smaller and goes away.

4. Banana Peel: Save your banana peels for later! Enzymes from the peel can aid in the removal of skin tags. Overnight, cover the tag with a bandage and place a small piece of banana peel over it. Continue until the tag comes off.

5. Vitamin E Oil: Rich in antioxidants, vitamin E oil helps maintain healthy skin and may be useful in the removal of skin tags. After applying the oil, place a tiny bandage over the skin tag. Replace it every day until the tag eventually comes off.

6.Duct Tape: Use a tiny bit of duct tape to cover the skin tag. Every few days, replace the tape, and continue to cover the area until the tag comes off.

7. Baking Soda and Castor Oil: Combine baking soda and castor oil to form a paste, apply it to the skin tag, and wrap it with a bandage. Continue doing this every night until the tag vanishes.

8. Lemon Juice: Skin tags can be dried off by the citric acid in lemon juice. Using a cotton swab, apply fresh lemon juice to the skin tag once a day until it dries out and falls off.

9. Iodine: Applying liquid iodine can aid in the breakdown of the tag’s skin cells. After directly applying a drop of iodine to the skin tag, wrap it in a bandage. To prevent irritation, take care to apply it solely to the skin tag.

Make sure the development is a skin tag and nothing else before attempting any home remedies. Speak with a healthcare professional if you are unsure, the skin tag is abnormally large, or it is in a sensitive area. You may probably find the supplies for each of these easy DIY projects in your kitchen or medical cabinet. Let’s celebrate getting clear skin at your convenience and in comfort!


For Strong Bones and Joints:

For Strong Bones and Joints: Only 2 Ingredients! Garlic and Olive Oil

You need look no farther than your kitchen for a natural solution to promote strong bones and joints. When combined, the potent components of garlic and olive oil can yield substantial advantages for the health of your skeleton and joints. You can add this easy-to-make treatment into your daily routine and find it to be simple yet effective. Let’s examine how olive oil and garlic interact to strengthen bones and joints.

The Advantages of Garlic
A well-known superfood with a host of health advantages is garlic. Allicin, one of the sulphur compounds found in it, has antioxidant and anti-inflammatory qualities. These substances support the body’s natural reduction of oxidative stress and inflammation, two important aspects of strong, healthy bones and joints.

Olive Oil’s Power
Extra virgin olive oil, in particular, is abundant in monounsaturated fats and antioxidants, such as oleocanthal, which has been demonstrated to have ibuprofen-like anti-inflammatory properties. Additionally beneficial to the absorption of calcium—which is essential for strong bones—is olive oil.

Olive Oil and Garlic Together
Garlic and olive oil work together to form a powerful natural treatment that can promote joint and bone health. Here’s how to get ready for and utilise this potent combo:

How to Prepare the Ingredients for Garlic-Infused Olive Oil:

  1. ten fresh garlic cloves
  2. Extra virgin olive oil, one cup
  3. a dry, spotless jar with a lid

Guidelines:

  • Peel and lightly crush the garlic cloves to liberate their juices before preparing the garlic. Crushing garlic aids in the beneficial chemicals’ activation.
  • Mix with Olive Oil: Fill the container with the smashed garlic cloves. Drizzle the garlic with olive oil, making sure all of the cloves are covered.
  • Infuse: Tightly seal the jar and place it in a cool, dark spot for approximately two weeks. Every few days, give the jar a gentle shake to aid with the infusion process.
  • drain and Store: To get rid of the garlic pieces, drain the oil after two weeks. Garlic-infused olive oil should be kept in a cool, dark area in a clean bottle.
  • Using Garlic-Infused Olive Oil on a Daily Basis Every day, take one teaspoon of olive oil flavoured with garlic. For more taste and health advantages, you can eat it plain or mix it with salads, spaghetti, or bread.
  • Topical Application: To assist reduce inflammation and provide relief from joint discomfort, you can also massage the garlic-infused olive oil directly onto the affected regions.

In summary
Two basic nutrients that have a big impact on maintaining strong bones and healthy joints are garlic and olive oil. This is a versatile, simple-to-make natural medicine that can also add some deliciousness to your diet. You may proactively preserve the health of your bones and joints by introducing garlic-infused olive oil into your everyday routine. Take a look and see for yourself the advantages of this dynamic pair.

The Remarkable Health Benefits of Drinking Coffee Daily

The Remarkable Health Benefits of Drinking Coffee Daily

Coffee is a delicious beverage that may be the secret to several health advantages, including a possible lower risk of dementia, heart attacks, and strokes. It’s more than just a morning habit. While many people love their daily cup of coffee for its immediate energy boost, new research indicates that it may also have longer-term health advantages. Let’s explore the reasons why having a cup of coffee every day could be a delicious method to promote general health.

Coffee and the Health of the Brain

Coffee’s link to a lower incidence of dementia is among its most persuasive possible health benefits. Coffee contains a lot of anti-inflammatory and antioxidant substances, which may help shield the brain from inflammation and oxidative stress, two things that lead to cognitive impairment. Frequent coffee consumption has been associated with improved cognitive performance and a possible decreased risk of dementia, including Alzheimer’s disease.

Coffee and Cardiovascular Disease

Research shows that moderate coffee use can be a part of a heart-healthy lifestyle, despite myths that coffee’s heart-stirring properties make it potentially harmful to the heart. In order to avoid heart attacks and preserve general cardiovascular health, coffee can enhance blood flow, lessen inflammation, and even assist control blood sugar levels.

Coffee and the Prevention of Strokes

Additionally, research indicates that coffee’s chemical composition may help reduce the incidence of stroke. Frequent ingestion can help prevent blood clots that cause strokes by improving vascular function and reducing inflammation. Coffee use in moderation may be a fun and simple approach to help prevent strokes.

How to Drink Coffee to Improve Your Health

To optimise coffee’s health advantages:

Select High-Quality Beans: To stay away from chemicals and pesticides, go for organic, premium coffee beans.

Reduce the amount of sugar, heavy creamers, and flavoured syrups in your coffee as they can offset its health benefits.

The Key Is Moderation: One to three cups should be consumed each day. This range is frequently linked to the best health outcomes.

In summary

Including a daily cup of coffee in your routine is not only a fun way to start your day, but it also has a lot of potential health benefits. Coffee provides more benefits to your health than just warmth and alertness. Whether you drink it black, decaf, or with milk, it may also act as a shield against dementia, heart attacks, and strokes. So enjoy that cup of coffee, knowing that it may be doing more good than you realise!

Magic Cracked Heels Home Remedy: The Potato Cure

Magic Cracked Heels Home Remedy: The Potato Cure

Although cracked heels can be painful and ugly, potatoes are a simple and unexpected remedy found in nature! This common kitchen tool has several uses outside of cooking; it can be used to treat and enhance the appearance of your feet. Let’s look at how to utilize potatoes to get smooth, white feet and get rid of cracked heels.

  1. . Natural Moisturizer: Starch, which is abundant in potatoes by nature, is a great moisturizer. Applying potato moisture to damaged heels helps moisturize and soften the skin, minimizing flaking and dryness.
  2.  Skin-Lightening Properties: The enzyme catecholate, which is found in potatoes, is recognized for its ability to lighten skin. Frequent use can help skin tone become more even and lighten dark areas on the foot, leaving them smoother and more uniformly coloured.
  3. Exfoliation: The somewhat acidic nature of potatoes aids in the gentle removal of dead skin cells that give cracked heels their harsh appearance. This encourages the growth of fresh, healthy skin cells, leaving your feet smooth and silky.

How to Treat Cracked Heels with Potatoes:

  • Potato Poultice: grate a raw potato and rub your heels with the mash. After covering your feet with a fresh cloth, leave the poultice on for approximately half an hour and then wash it off with warm water. Regularly perform this to soften the skin and mend cracked heels.
  • To make a Potato Juice Foot Soak, squeeze the juice from one or two potatoes into a basin of warm water. Give your feet a 15- to 20-minute soak. Use a pumice stone to gently scrub the heels after soaking in order to get rid of dead skin. Rinse your feet and put on a moisturizer to finish.
  • Potato and Honey Mask: Using a spoonful of honey and shredded potatoes, make a thick paste. After applying this mask on your heels, let it sit for around half an hour before rinsing it off. Extra moisturizing and antibacterial properties are added by honey.
  • You can have the smooth, velvety feet you’ve always wanted and heal your cracked heels by incorporating potatoes into your routine for taking care of your feet. This treatment not only works well, but it’s also affordable and simple to make at home. Step into ease and confidence by providing your feet with the natural health of potatoes!