black cumin seeds

Overview Have you ever thought about adding black cumin seeds to your everyday diet? Known as a “miracle seed,” this little but potent spice has been utilised for millennia in many civilizations due to its amazing medicinal properties. Let’s explore the ways in which black cumin seeds might improve your well-being and energy.

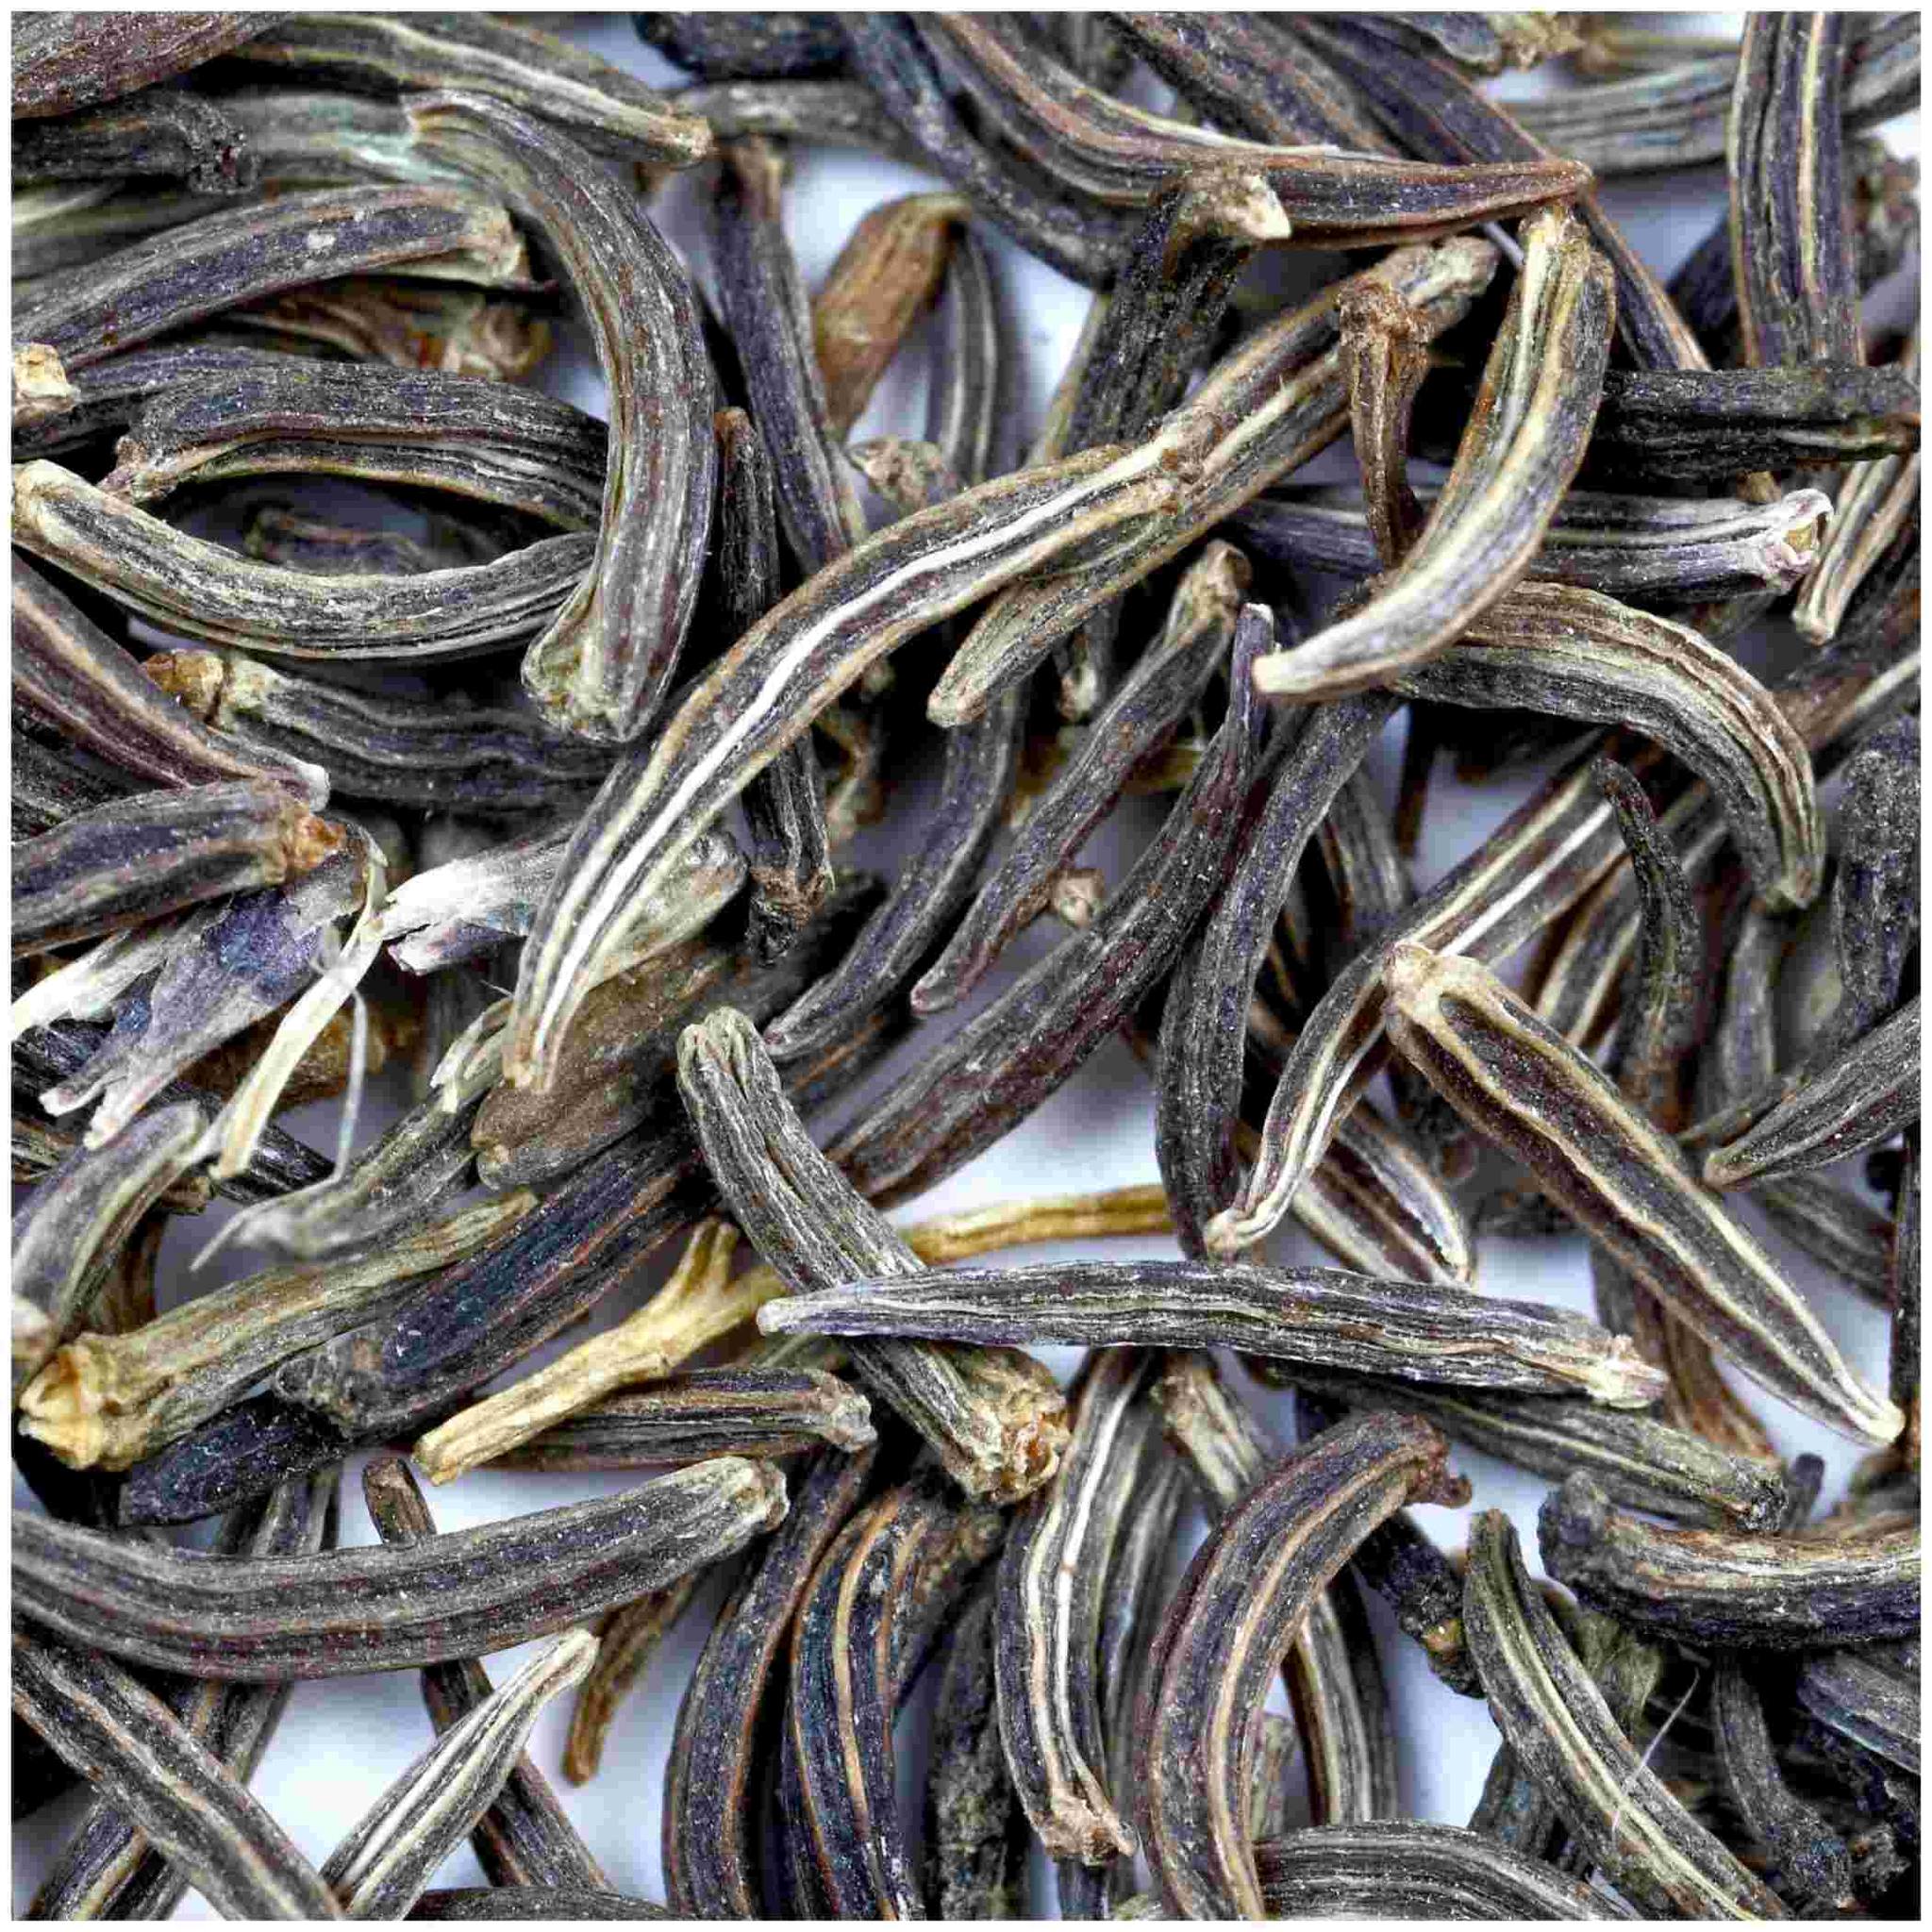
Black cumin seeds: What Are They? Nigella sativa, often known as black cumin seeds, are small, black seeds with an oregano-like fragrance and a mildly bitter flavour. For thousands of years, they have been utilised in traditional medicines in the Middle East, South Asia, and Africa.

Important Health Advantages of Black Cumin Seeds

Boosts Immune System: The immune system is thought to be strengthened by black cumin seeds. They contain anti-inflammatory properties and are high in antioxidants.

Promotes Digestive Health: By lowering gas, bloating in the stomach, and the risk of ulcers, these seeds can aid in the management of digestive problems. They also support the preservation of a balanced gut flora.

Enhances Heart Health: Thymoquinone, an active ingredient found in black cumin seeds, helps lower blood pressure and cholesterol, improving cardiovascular health.

Anti-Inflammatory Properties: Black cumin seeds have anti-inflammatory qualities that can help reduce joint and muscular pain, improving the comfort and enjoyment of daily activities.

Enhances Skin Health: Packed with vital fatty acids, these seeds plump up the skin, making wrinkles and fine lines less noticeable and encouraging a more youthful appearance.

How to Utilise Cumin Seeds, Black Black cumin seeds are easy and diverse to include in your diet:

As a Spice: To add taste and nutrients to your meals, such as salads, soups, and stews, sprinkle ground black cumin seeds on top.

Oil: To enhance the health of your skin, apply black cumin seed oil topically or as a dietary supplement.

Tea: To produce a soothing tea that aids with digestion, steep the seeds in hot water.

In summary A modest dietary addition of black cumin seeds can have a big impact on your health. With their potent therapeutic qualities, these seeds can be added to food, taken as a supplement, or brewed as tea to support a healthy, active lifestyle. Why not try black cumin seeds and witness their amazing advantages for yourself?

How to Make St. John’s Wort Oil (Macerate) and Its Uses

How to Make St. John’s Wort Oil (Macerate) and Its Uses

It’s easy to make your own St. John’s Wort oil, which is known for its healing properties. This flexible oil can be used for many things, from soothing skin irritations to healing burns and cuts. Let us learn more about how it was made and all the great things it can do for us.

How to Make St. John’s Wort Oil

What do you need?

  1. St. John’s Wort flowers that have just been picked
    You could use olive oil, sunflower oil, or almond oil as the carrier oil.
  2. Glass jar that is clean and has a lid

How to Make St. John’s Wort Oil:

1. Pick up the flowers
Get some fresh St. John’s Wort flowers on a warm day. Also, make sure the flowers are completely dry and free of any wetness.

2. Get the jar ready
Put these fresh flowers in the glass jar in a loose way.

3. Put in the oil
Pour the chosen carrier oil over these flowers, making sure they are completely covered in it. Don’t forget to leave some room at the top of the jar.

4. How the mixture is made
Once the lid is on tight, give the jar a light shake to mix the flowers and oil.

5. Mix the Oil
Put the jar somewhere warm, preferably on a shelf, and let the oil steep for four to six weeks. Don’t forget to give the jar a little shake every two days.

6. Pour out the oil
After the soaking time, strain the oil through a fine mesh strainer or cheesecloth to separate the flowers and get rid of them. Put the oil that has been squeezed into a clean glass bottle to keep it fresh.

7. Keeping things
To keep the oil working well, keep it in a cool, dark place. You can use it for a year.

How St. John’s Wort Oil Can Be Used in Many Ways
1. The ability to heal skin
St. John’s Wort oil is great for treating small cuts, scrapes, burns, and bruises. It speeds up the mending process because it reduces inflammation and kills germs.

2. Getting rid of pain
By rubbing the oil into sore muscles and joints, you can ease the pain and reduce swelling. It works especially well for people with diseases like arthritis.

3. Dealing with skin problems
Keep in mind that the oil can help soothe skin irritations, such as eczema, psoriasis, and dry, itchy skin. The oil helps soothe and moisturize skin that is feeling dry.

4. Taking away nerve pain
Nerve pain, such as that caused by sciatica and neuralgia, has been shown to improve with St. John’s Wort oil. By massaging the area gently with this oil, you can feel better.

5. Use it as hair oil
As a regular massage oil, this oil can also be used to relax and wake up the body because it has calming properties.

By making and using St. John’s Wort oil, you can take advantage of its natural healing properties for a wide range of skin and health problems. Experience how this DIY plant oil can help you relax and heal.

At sixty years old, I no longer have wrinkles Using cream from onion peels, my grandmother removed all of the wrinkles from her face.

At sixty years old, I no longer have wrinkles Using cream from onion peels, my grandmother removed all of the wrinkles from her face.

If you want a natural and quick way to fight wrinkles, this great cream made from onion peels is just what you need. At age 60, my grandmother swears by this fix because it makes her skin smooth again. Find out how to make this wonderful anti-aging cream at home and get skin that looks young and healthy.

Feels Good Two big onions’ worth of peels

  • One cup of water
  • 1 tablespoon of olive oil
  • One tablespoon of coconut oil
  • One tablespoon of beeswax
  • Two pills that are full of vitamin E

Hints

One should get the onion peel tea ready.

  • Put one cup of water in a small pot and bring it to a boil.
  • When the water starts to boil, add the onion peels. Turn down the heat and let it cook slowly for at least ten minutes.
  • Take it off the heat and pour the juice into a new container. Throw away the peels. Let the onion peel tea cool down.

2. Get the cream base ready:

  • Mix the olive oil, coconut oil, and beeswax in a double pot until they melt. Gradually heat until everything melts and is well mixed.
  • Take the mixture off the heat and let it cool down slowly, but not so much that it solidifies.

3. Mix the Parts:

  • Pour the cooled onion peel infusion into the oil mixture little by little, stirring all the time to mix. The mixture should start to thicken slowly as it cools.
  • Once you’ve poked holes in the vitamin E pills, you can squeeze their contents into the liquid. Well mix to connect.

4. Put the cream away.

  • Put the cream in a clean, germ-free jar. Before you close the lids, let it cool all the way down.
  • Place the cream in the fridge. It might last two weeks.

How to Fill Out

  • Put some cream on your face and neck every night before bed. Use light, rolling strokes to rub it into your skin.
  • For best results, use the cream on a frequent basis. If you use it every day for a few weeks, your skin should start to feel better and lines should get less noticeable.
  • What Makes Up the Parts: onion peels Onion leaves fight free radicals that cause age and reduce inflammation
  • because they are full of quercetin and antioxidants.
  • Olive oil moisturizes and feeds the skin with vitamins and antioxidants. This makes the skin more flexible and less wrinkled.
  • Coconut oil makes skin soft and smooth and is known for its ability to keep it moist.
  • Beeswax protects the skin by adding a layer that keeps wetness in and keeps it from evaporating.
  • Vat E is a strong antioxidant that helps protect the skin from damage by fixing it.

To sum up
This cream made from onion leaves is a simple but effective way to get rid of wrinkles. The fact that my grandmother looks young at sixty shows how successful she was. Try using this natural cream as part of your skin care routine and see how much younger and smoother your skin looks. Look at this smooth, glowing face!


The Secret Cleaning Hack Using Toothpaste and Boiling Water for Sparkling Results

The Secret Cleaning Hack Using Toothpaste and Boiling Water for Sparkling Results

You might be shocked to learn about a secret trick that the rich have been using to clean that is both strange and useful. There are some surprising things that can happen around the house when you add toothpaste to hot water. It might sound strange, but this easy trick can help you get great results with very little work. We’ll talk about how to use this simple method and why it works so well.

Why Toothpaste and Hot Water? Toothpaste has cleaning agents, soaps, and other active ingredients that help keep teeth clean and germ-free. When mixed with hot water, these things can do a lot more than just clean your teeth.

This strange mixture can be used in the following ways:

Why and how it works

Keeping drains clean and smelling good

  • One tablespoon of toothpaste and hot water are needed.
  • Step 1: Put a tablespoon of toothpaste down the drain by pressing it down. After that, put a kettle of water on to boil. This mix helps get rid of small clogs, cleans, and leaves a fresh smell.
  • Toothpaste, hot water, and a soft cloth are needed to make silverware shine.
  • Step 1: Bring a pot of water to a boil. Use a soft cloth to rub a little toothpaste onto your silverware at the same time. Put the silverware in the hot water for a short time, then rinse and dry with a soft cloth. Tarnish is taken off of the silver with toothpaste, which also makes it shine.
  • Toothpaste, hot water, and a toothbrush are all you need to clean tile grout.
  • Step 1: Put toothpaste on the lines where tiles meet on the walls or floors. Use an old toothbrush to scrub. Run hot water over the spot to get rid of the toothpaste and dirt.
  • This will leave the grout clean and bright.
  • How it works
  • Abrasive Action: Toothpaste has gentle abrasives that help scrub away dirt and spots without hurting the surface.
  • Properties That Kill germs: Toothpaste often has antibiotic ingredients like triclosan and fluoride that help kill germs while you clean.
  • Fresh Smell: Toothpaste’s minty freshness leaves a nice smell that makes your home smell clean.

How to Get the Best Results

  • Simply paste your teeth: Don’t use gel or whitening toothpastes because they might have extra chemicals that aren’t needed for cleaning.
  • First, test: Test a small area with toothpaste to make sure it doesn’t hurt or change the color of a new surface before you use it all over.
  • Maintenance Tasks: This method can be used as part of your normal cleaning practice to keep drains and surfaces clean.

In conclusion
It might seem strange, but using toothpaste and hot water together to clean is a quick and easy way to save time and effort. To clean drains, polish silverware, and scrub floors, this method uses toothpaste’s cleaning power in ways you might not expect. Try it, and you’ll be surprised at how sparkling it turns out. Rich people might not tell anyone, but you now know how to do it!

This oil will save your hair Hair Grows Like Crazy Using Mint Oil

This oil will save your hair Hair Grows Like Crazy Using Mint Oil

Without a doubt, mint oil is the secret tool you need to naturally make your hair grow faster and better overall. This strong oil not only helps your hair grow, but it also makes it feel clean and refreshed. Here are some ways that mint oil could change the way you care for your hair and the best way to use it.
What Mint Oil Can Do for Your Hair

  • Helps Hair Grow: The menthol in peppermint oil and other types of mint oil increases blood flow to the head, which helps hair grow. The hair glands are stimulated by the extra blood flow, which helps hair grow faster and better.
  • The energizing properties of mint oil stimulate hair roots and stop hair loss by improving the health of the skin.
  • Mint oil can help calm an itchy, swollen head because it is cooling. It also kills bacteria and fungi, and it keeps dandruff and other hair problems at bay.
  • By using mint oil on a regular basis, your hair may naturally get more shiny and soft, which will make it easier to style.

How could mint oil help hair grow?

  • Two teaspoons of mint oil, peppermint oil is best.

Two teaspoons of lighter oil, like coconut oil, olive oil, or jojoba oil specifics:

  • Begin by making the oil mix.
  • In a small dish, mix two drops of mint oil with two tablespoons of a neutral oil. Mint oil is very strong, so this is very important to keep you from getting any pain.
  • 2. Put it on your hair and scalp.
  • Massage it in: Run a small amount of the oil blend over your hair with your hands. Pay extra attention to areas where you want your hair to grow or where it is getting thinner.
  • Once the oil is all over your head, rub it down the length of your hair to make sure it’s spread out evenly.
  • 3. Just let it sit.
  • For best results, leave the oil in your hair for at least thirty minutes. Leave it on overnight while covering your hair with a shower cap to keep your pillow from getting dirty. This will give you a better treatment.
  • Fourth, wash your hair and rinse.
  • After the treatment, wash your hair normally and rinse it out fully with warm water. You might have to shampoo twice to get rid of all the oil.

Some extra ideas

  • This mint oil fix works best when used once or twice a week.
  • Do a patch test first to make sure you won’t have an allergy reaction before putting the oil mixture on your hair.
  • To get the most out of mint oil, use it with other natural hair products like honey or aloe vera masks.

Finally,

mint oil is a strong natural remedy that could change the way you take care of your hair. You can get the thick, healthy hair you’ve always wanted by using mint oil. It helps hair grow, soothes the head, and adds shine. See how fast your hair grows after using this simple but effective treatment!

Do You Have 1 Orange and Milk Make This Delicious Dessert A New Way to Eat Flan with Few Ingredients

Do You Have 1 Orange and Milk Make This Delicious Dessert A New Way to Eat Flan with Few Ingredients

You’re going to love this if you have an orange and milk at home. This simple and tasty flan recipe is a twist on the original. It only needs a few simple ingredients and no extra sugar. With this method, you can enjoy a sweet treat that is also good for you. Let’s get started on this interesting and tasty recipe.

ingredients

WHAT YOU NEED:

  1. 1 big orange
  2. 2 cups milk (vegetable or dairy)
  3. 3 big eggs
  4. 1/4 cup honey or maple syrup (choice, for natural sweetness)
  5. 1 teaspoon of vanilla powder
  6. A little salt

guidelines

HOW TO DO IT

  • Get the orange ready:
  • Zest the Orange: To begin, zest the orange. Leave the zest alone To get the juice out of the orange, cut it in half and squeeze it. About half a cup of fresh orange juice is what you  need.
  • Get the flan mix ready:
  • Set the Milk Warm: Put the milk in a small pot and set it over medium-low heat. Keep it warm but not boiling. Take it off the heat.
  • Mix the ingredients: Mix the eggs, orange juice, honey or maple syrup (if using), vanilla extract, and a pinch of salt in a big bowl using a whisk.
  • Strain and mix:
  • Mix it together: Slowly pour the warm milk into the egg mixture while mixing all the time to keep the eggs from curdling.
    Strain: To make sure the texture is smooth, strain the mixture into another bowl through a fine-mesh screen.
  • Get the baking dish ready:
  • Warm Up the Oven: Warm up your oven to 325°F (160°C).
  • Pour the mixture: Pour the mixture that has been squeezed into ramekins or a big flan dish.
  • Make the flan:
  • Water bath: Put the flan dish or ramekins in a bigger baking pan. Put hot water in the baking pan until it comes halfway up the sides of the ramekins.
  • Put the flan in an oven that has already been warm. Bake for 45 to 50 minutes, or until it is set and a knife stuck in the middle comes out clean.

Let it cool down and serve:

  • Take the ramekins out of the water bath and let them cool down until they are room temperature. Put it in the fridge for at least two hours, or until it’s cold.
  • Spread out the flan on a plate and run a knife around the edges to serve. I hope you enjoy your zesty, creamy flan!

HOW TO GET THE BEST RESULTS

  • Consistent Mixing: To keep the mixture from curdling, make sure to whisk the warm milk into the egg mixture all the time.
  • Smooth Texture: To make sure the flan is smooth and creamy, strain the ingredients before baking.
  • Optional Sweetness: If you’d like a tad more sweetness in your dessert, you can add honey or maple syrup, which are naturally sweet and don’t contain refined sugar.

IN THE END
This easy and tasty flan recipe with orange and milk is a great way to enjoy a dessert that is good for you with few ingredients. It’s simple to make, naturally sweet, and tastes great with fruit. You will love this recipe for flan from now on. Have fun cooking!

Add Cinnamon to Coffee

cinnamon and coffee

Add Cinnamon to Coffee

Do you love coffee and want to improve the quality of your daily cup without spending a lot of money on expensive coffee blends? Here’s a little tip for you: mix in a small amount of cinnamon! This will not only improve the taste of your coffee but also provide a number of health advantages, making your daily ritual tasty and nourishing.

The warm, sweet, and woodsy flavour of cinnamon is a wonderful spice that goes well with coffee. But cinnamon isn’t only for flavour; it also has a number of health advantages that might enhance your cup of coffee:

Packed with Antioxidants: Your body is shielded from oxidative stress brought on by free radicals by the abundance of antioxidants found in cinnamon.

Anti-Inflammatory Properties: Eating cinnamon on a regular basis can help lessen your risk of heart disease, diabetes, and other conditions by reducing inflammation.

Helps Control Blood Sugar Levels: You may enhance insulin sensitivity and reduce blood sugar levels by mixing cinnamon into your coffee. Because of this, it’s a great option for sustaining consistent energy levels all day.

Depending on your preferences, there are a few different methods to add cinnamon to your coffee, and it’s really simple:

Sprinkle Ground Cinnamon: Before brewing, just sprinkle a small amount of ground cinnamon over your coffee grinds. This will allow the cinnamon to permeate right into your brew, adding a subtle, smooth taste to it.

Cinnamon Stick Stirrer: Use a cinnamon stick to stir your newly brewed coffee if you’d like a softer cinnamon flavor. A more regulated and subtle infusion of flavor is possible with this technique.

Boil Cinnamon with Water: If you want your coffee with a stronger cinnamon taste, you can boil a piece of cinnamon stick in water and utilize the resulting infusion.

In addition to enhancing the flavor profile of your coffee, cinnamon helps you live a better lifestyle by lowering the need for artificial sweeteners or flavors. It includes a naturalnatural sweetness and depth that can transform your ordinary cup into a gourmet experience.

Quality Counts: Use premium, organic cinnamon for optimal flavor and health benefits. Because of its greater flavor and lower coumarin concentration, Ceylon cinnamon, sometimes referred to as “true cinnamon,” should be used.

Taste and Adjust: Take a small bit of cinnamon at first and add more or less to suit your taste. A tinge of cinnamon flavor may be preferred by some, while others may like a stronger flavor.

If you want to add some spice to your morning routine without breaking the bank on flavored coffee, try adding some cinnamon to your coffee. This small change improves your health in many ways and also saves you trips to the grocery shop. Enjoy the deep, warming flavors and rich aroma that cinnamon adds to your regular cup of coffee. I hope you begin your day with a little more spice!

Natural Remedy for Cracked Heels

Natural Remedy for Cracked Heels: The Potato and Lemon Foot Mask

Hi there! Everything you need for a quick and easy fix for cracked heels is in your kitchen pantry. You may prepare a soothing and effective foot mask using a potato and a lemon to treat dry, cracked skin. The majority of the components for this simple recipe are probably already in your cupboard, and it will nourish your skin as well.

Why would you put a potato with lemon? Eat potatoes for skin that is mending and healthy. Potassium, magnesium, and vitamins C and B6 are abundant in them. On the other hand, owing of their high vitamin C concentration and natural astringent properties, lemons help with exfoliation and cell regeneration.

Materials and Ingredients

  1. a single big potato
  2. one lemon
  3. Juicer or grater
  4. Scrub the basin
  5. Warm liquid
  6. Lotion for the feet or skin

How to Make Your Own Foot Mask:

A Comprehensive Guide The potato and lemon foot mask recipe is as follows:

First Step: Prepare the Potato

  1. Make sure to thoroughly wash the potato
  2. To get more nourishment, peel the skin off, or leave it on.
  3. Grate the potato or purée it in a blender to produce a homogeneous paste.
  4. You then have to add the lemon.
  5. Juice from one lemon, minced, should be added to the shredded potato.
  6. Combine all ingredients and stir until well combined.

Section 3: Putting on the Mask

  1. Your feet should first be soaked in warm water and then dried with a towel.
  2. Apply a thin layer of the potato and lemon mixture to your cracked heels
  3. Cotton socks may aid in the mask’s retention and increased moisture absorption.

Step 4: Cleanse and Put on a moisturiser

  1. Wear the mask for approximately thirty minutes.
  2. For washing feet, warm water works best.
  3. After giving your feet a gentle pat dry, use a foot lotion or moisturiser to keep them moisturised.

To sum up This potato and lemon foot mask is a cheap, natural remedy for damaged heels. If you use it frequently, you could have softer, smoother feet without using harsh chemicals. Give your feet a quick yet efficient natural treatment and you’ll be proud to show off your revitalised heels.

Fresh Avocado Tomato Bruschetta

Fresh Avocado Tomato Bruschetta

Ingredients:

1 French baguette, sliced into 1/2-inch thick slices

2 ripe avocados, diced

2 cups cherry tomatoes, quartered

1/4 cup red onion, finely chopped

2 cloves garlic, minced

2 tbsp fresh basil, chopped

2 tbsp olive oil, plus more for brushing

1 tbsp balsamic vinegar

Salt and pepper, to taste

Fresh basil leaves, for garnish (optional)

Instructions:

Prepare the Baguette: Preheat your oven to 400°F (200°C). Arrange the baguette slices on a baking sheet. Brush each slice lightly with olive oil. Toast in the oven for 5-7 minutes, or until golden and crispy. Remove from the oven and set aside to cool slightly.

Prepare the Topping: In a medium bowl, combine the diced avocados, quartered cherry tomatoes, finely chopped red onion, minced garlic, and chopped fresh basil. Drizzle with the olive oil and balsamic vinegar. Season with salt and pepper to taste. Gently toss to combine, being careful not to mash the avocados.

Assemble the Bruschetta: Spoon the avocado and tomato mixture onto each toasted baguette slice. Make sure each slice is generously topped.

Garnish and Serve: Garnish with additional fresh basil leaves, if desired. Serve immediately.

Prep Time: 15 minutes

Cooking Time: 5-7 minutes

Total Time: 20-22 minutes

Calories: 120 Kcal per serving

Servings: 12 servings

Oranges are not only delicious and nutritious

Oranges are not only delicious and nutritious, but their peels have many practical uses as well.

-Steps to Make a Natural Cleaner with Orange Peels:

1.Peeling the Orange:

Peel the orange into long strips. Cut off the ends, loosen the peel with a spoon, and make a vertical cut to remove it in one piece.

2.Preparing the Peels:

Wash the peels with water and a pinch of salt to remove pesticide residues and parasites.

3.Creating the Cleaning Solution:

Place the cleaned orange peels into a clean plastic bottle, filling it halfway.

Add 1 teaspoon of baking soda (5 ml).

Fill the bottle with water, leaving some space at the top for fermentation.

4.Fermentation Process:

Let the mixture sit in a dry place out of direct sunlight for about 3 days.

Open the cap daily to release built-up gas.

Once the fermentation is complete, your homemade cleaner is ready to use. This natural cleaner is effective for washing dishes and cleaning kitchen surfaces, offering an affordable and eco-friendly alternative to commercial products.