minced chicken cutlets recipe

The delicate, tasty patties known as minced chicken cutlets have a crunchy outside and a juicy inside. They make a delectable snack or main course.

Preparation Time

  • Prep Time: 15 minutes
  • Cook Time: 20 minutes
  • Total Time: 35 minutes

Ingredients

  • 1 lb (450g) minced chicken
  • 1 small onion, finely chopped
  • 2 cloves garlic, minced
  • 1/2 cup breadcrumbs
  • 1/4 cup grated Parmesan cheese
  • 1 egg
  • 1/4 cup fresh parsley, chopped
  • 1 teaspoon dried oregano
  • 1/2 teaspoon paprika
  • 1/2 teaspoon black pepper
  • 1/2 teaspoon salt
  • 1/2 cup all-purpose flour (for dredging)
  • 1/2 cup breadcrumbs (for coating)
  • 1/4 cup vegetable oil (for frying)

Guidelines:

  • Get the Chicken Mixture Ready:
    Chicken mince, finely chopped onion, minced garlic, 1/2 cup breadcrumbs, Parmesan cheese, egg, chopped parsley, dried oregano, paprika, black pepper, and salt should all be combined in a big bowl. Blend until all components are well blended.
  • Form the Cutlets: Separate the ingredients into eight equal parts, then form each part into a patty or cutlet.
  • Apply Coat to Cutlets:
  • Sort the breadcrumbs into a shallow dish and the flour into another. After brushing off any excess flour, lightly coat each cutlet in breadcrumbs. To make sure the breadcrumbs adhere to the cutlets, lightly press them.
  • Cook the Cutlets in oil:
    In a big skillet, warm the vegetable oil over medium heat. When the oil is heated, carefully add the cutlets to the pan in stages, being careful not to crowd it.
  • The cutlets should be cooked through and golden brown after 4–5 minutes of cooking on each side. A temperature of 165°F (75°C) should be reached inside.
  • Empty and To serve, take out the cutlets from the pan and put them on a platter covered with paper towels to absorb any extra oil.
  • Serve: Top the hot minced chicken cutlets with a side of veggies, a crisp salad, and your preferred dipping sauce.
    These tasty minced chicken cutlets go well with a range of side dishes, sandwiches, and just by themselves. They’re a fantastic choice for an easy dinner that tastes well!

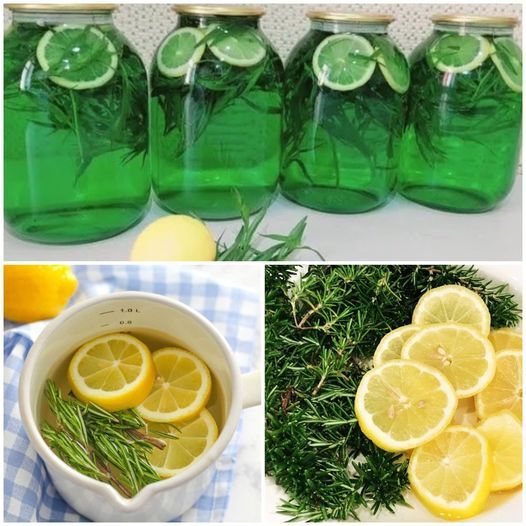
The Delightful Rosemary-Infused Beverage

The Delightful Rosemary-Infused Beverage

A drink with rosemary infusion could be the ideal choice for you if you enjoy unusual tastes and reasonable prices. The flavorful and aromatic herb rosemary is used for more than just cooking. It can also elevate an unremarkable drink into something spectacular without going over budget.

Why Go with Rosemary?

  • Rosemary is a great addition to cocktails since it is a versatile herb that goes well with both salty and sweet flavors. It is not only widely available and simple to cultivate, but it is also a great source of antioxidants that are good for your general health.

Components of a Drink with Rosemary Infusion

  1. Making a drink with rosemary infusion is easy and only needs a few ingredients:
  2. fresh sprigs of rosemary
  3. The base of your choosing (such apple cider, sparkling water, or lemonade)
  4. Add-on sweeteners, such as honey
  5. Slices of orange, lemon, or lime are optional but add flavor.

How to Make a Rosemary Cocktail

  • Prepare the rosemary by giving a few fresh sprigs a quick rinse in cold water and patting them dry. To release the essential oils and enhance the flavor of your drink, gently bruise the leaves.
  • Infuse the Base: Put the rosemary sprigs and your preferred drink base in a pitcher. If you like your drinks sweetened, stir in as much sugar as you like to fully combine the flavors.
  • Let It Sit: In the refrigerator, let the mixture absorb for at least an hour. The flavor of the rosemary will become more noticeable the longer it rests.
  • To serve, take off the rosemary sprigs and transfer the infusion into glasses. Add some fresh citrus slices, such as orange, lemon, or lime, for an extra refreshing touch.

Advice for the Greatest Rosemary Drink

  • Try Different Bases: Rosemary works nicely with a wide range of bases. Squeeze some lemon juice into some sparkling water for a delightful non-alcoholic alternative. Choose homemade lemonade or apple cider if you’re craving something sweet.
  • Enhance with Fruit: Adding fresh fruit to your drink not only makes it look better, but it also enhances the flavor of the rosemary, making it even more delicious.
  • Modify Sweetness: Everyone’s taste in sweetness is different. To suit your taste, start with less sweetener and work your way up.

Finally

  • A drink with a hint of rosemary is a great option for anyone looking for something tasty and affordable. Rosemary can transform an ordinary beverage into a delicious treat that is both aromatic and refreshing because to its rich flavor and health benefits. Try this rosemary cocktail to appreciate the rich flavors of rosemary whether you’re entertaining or just spending a relaxing afternoon!

Why Add Cinnamon to Coffee

Why Add Cinnamon to Coffee

Do you love coffee and want to improve the quality of your daily cup without spending a lot of money on fancy coffee blends? Here’s a little tip for you: mix in a small amount of cinnamon! This will not only improve the taste of your coffee but also provide a number of health advantages, making your daily ritual tasty and nourishing.

  • The warm, sweet, and woodsy flavor of cinnamon is a wonderful spice that goes well with coffee. But cinnamon isn’t only for taste; it also has a number of health advantages that might enhance your cup of coffee:
  • Packed with Antioxidants: Your body is shielded from oxidative stress brought on by free radicals by the abundance of antioxidants found in cinnamon.
  • Anti-Inflammatory Properties: Eating cinnamon on a regular basis can help lessen your risk of heart disease, diabetes, and other conditions by reducing inflammation.
  • Helps Control Blood Sugar Levels: You can enhance insulin sensitivity and reduce blood sugar levels by mixing cinnamon into your coffee. Because of this, it’s a great option for sustaining consistent energy levels all day.
  • Depending on your preferences, there are a few different ways to add cinnamon to your coffee, and it’s really simple:
  • Sprinkle Ground Cinnamon: Before brewing, just sprinkle a small amount of ground cinnamon over your coffee grinds. This will allow the cinnamon to permeate right into your brew, adding a subtle, smooth taste to it.
  • Cinnamon Stick Stirrer: Use a cinnamon stick to stir your newly brewed coffee if you’d like a softer cinnamon flavor. A more regulated and subtle infusion of flavor is possible with this technique.
  • Boil Cinnamon with Water: If you want your coffee with a stronger cinnamon taste, you can boil a piece of cinnamon stick in water and utilize the resulting infusion.
  • In addition to enhancing the flavor profile of your coffee, cinnamon helps you live a better lifestyle by lowering the need for artificial sweeteners or flavors. It enhances natural sweetness and depth that can turn an average cup of coffee into a fine dining experience.
  • Quality Counts: Use premium, organic cinnamon for optimal flavor and health benefits. Because of its greater flavor and lower coumarin concentration, Ceylon cinnamon, sometimes referred to as “true cinnamon,” should be used.
  • Taste and Adjust: Take a small bit of cinnamon at first and add more or less to suit your taste. A tinge of cinnamon flavor may be preferred by some, while others may like a stronger flavor.

If you want to add some spice to your morning routine without breaking the bank on flavored coffee, try adding some cinnamon to your coffee. This small change improves your health in many ways and also saves you trips to the grocery shop. Enjoy the deep, warming flavors and rich aroma that cinnamon adds to your regular cup of coffee. Let’s add a little more spiciness to your morning routine!

Air Fryer Cheesy Beefy Rolls

Air Fryer Cheesy Beefy Rolls

A tasty and filling recipe that works well for supper or a snack is Cheesy Beefy Rolls. Here is a basic recipe that you may create at home!

Ingredients:

  • 1 lb ground beef
  • 1 small onion, finely chopped
  • 2 cloves garlic, minced
  • 1 tsp Worcestershire sauce
  • 1 tsp Italian seasoning
  • Salt and pepper to taste
  • 1 cup shredded cheese (cheddar, mozzarella, or a blend)
  • 1 can (8 oz) refrigerated crescent roll dough
  • Optional: Fresh parsley for garnish

Instructions:

Detoxify Your Body with a Refreshing Pineapple Cleanse

Detoxify Your Body with a Refreshing Pineapple Cleanse

Are you trying to find a strong and all-natural technique to clear your kidneys, liver, and intestines? There’s nowhere else to look! This cure made with pineapple is exactly what you need. You can assist your body in eliminating pollutants and feeling revitalized in just three days. Pineapple is an excellent fruit for detoxing because of its abundance of nutrients and built-in enzymes. Let’s investigate how to make this powerful cleanse and take use of its incredible advantages.

Components

  • One raw pineapple
  • One cucumber
  • a 1-inch-long segment of raw ginger root
  • One lemon
  • two glasses of water
  • Leaves of fresh mint (optional)

Guidelines

1. Get the ingredients ready.

  • Cut the pineapple in half and remove the core. Chop it up into pieces.
  • After giving the cucumber a good cleaning, slice it. (If you’d like, you can leave the skin on.)
  • Slice the ginger root thinly after peeling it.
  • Juice the lemon by pressing it.

2. Mix the Concoction

  • To a blender, add the pineapple chunks, cucumber slices, ginger, water, and lemon juice.
  • Mix all ingredients in a blender until smooth.

3. Pour through and proceed to serve.

  • Strain the mixture through a fine mesh strainer to get rid of any pulp or fibers for a smoother drink.
  • Transfer the beverage into glasses.
  • Garnish with fresh mint leaves, if preferred.

4. Have fun

  • It’s great to consume this detoxifying beverage fresh.
  • For three days straight, have a glass in the morning on an empty stomach and another in the evening before going to bed.

Advantages for Health

a pineapple

  • This fruit from the tropics is a nutritional powerhouse that contains vitamins, minerals, and the digestive enzyme bromelain. Pineapple supports:
  • Detoxify the Liver: Pineapple promotes healthy liver function by dissolving and eliminating toxins.
  • Enhance Digestive Health: Pineapple’s bromelain aids in better digestion and lowers intestinal inflammation.
  • Encourage Hydration and Kidney Health: The high water content of pineapples helps your kidneys stay healthy by encouraging the production of urine and eliminating toxins.

cucumber

  • Cucumber, which is well-known for being moisturizing, adds more advantages to this cleansing. It facilitates:
  • Flush Toxins: As a natural diuretic, cucumber helps the kidneys and liver rid themselves of toxins.
  • Calm the Digestive Tract: Cucumber minimizes bloating and pain by supporting the upkeep of a healthy digestive tract.

Ginger

  • This potent root gives the cleansing a burst of energy and facilitates both digestion and purification by:
  • Stimulating Digestion: Ginger helps in digestion by encouraging the passage of food through the intestines.
  • Reducing Inflammation: The anti-inflammatory qualities of ginger help to lessen kidney and liver inflammation.

Lemon

  • Lemons are rich in vitamin C and offer the following advantages:
  • Boosting Detoxification: The liver’s detoxification capabilities are strengthened by lemon juice.
  • Improving Digestion: It promotes the synthesis of digestive enzymes, which enhances digestion in general.

Advice for the Best Outcomes

  • Take into consideration the following advice to get the most out of this cleanse and speed up your detoxification process:
  • Keep Yourself Hydrated: To aid in the detoxification process, sip lots of water throughout the day.
  • Well-Balanced Diet: To enhance the cleansing process, consume a diet high in fruits, vegetables, and whole grains.
  • Steer clear of Processed Foods: To get the most out of the cleanse during the three days, limit your intake of sugar, alcohol, and processed foods.

In summary

  • Including this pineapple-based cleanse into your regimen for a mere three days will aid in the successful detoxification of your kidneys, liver, and intestines. This potent drink, made with pineapple, cucumber, ginger, and lemon, promotes your body’s natural detoxifying processes. Toxins, say farewell, and welcome to a better, cleaner you! Try this energizing and nutritious detox and experience the restorative effects. Salutations!

How to Dissolve a Bar for a Versatile Cleaning Solution

Make the Most of Your Soap How to Dissolve a Bar for a Versatile Cleaning Solution

One tip that sticks out while looking for effective and affordable DIY treatments is dissolving a bar of soap in hot water. This simple technique gives you a flexible cleaning option for your house while also saving you money and cutting waste. Let’s explore how to get the most use out of a single bar of soap and why it is worthwhile to attempt.

What Makes Soap Dissolve in Boiling Water?

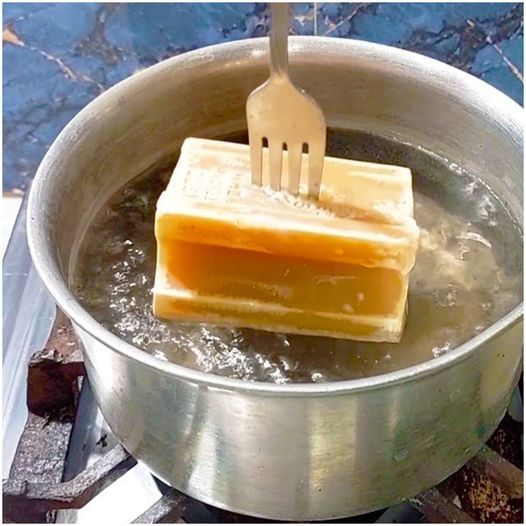
  • Boiling water and a soap bar dissolve to produce concentrated liquid soap that can be utilized in your house in a variety of ways. This approach is cost-effective since it extends the life of a single bar of soap. Additionally, the liquid soap you manufacture in this manner is eco-friendly and does not require the plastic containers that come with liquid soaps purchased from stores.

How to Use a Bar to Make Liquid Soap

  • It’s easy to make your own liquid soap. Here’s a how-to manual to get you going:
  • Assemble Your Supplies: Obtain some water and your preferred soap bar. Pick a soap that meets your demands; for example, go for a scented type for a pleasing scent or a mild recipe for skin that is sensitive.
  • Prepare the Soap: To make the soap bar dissolve more readily in water, grate or finely chop it.
  • Water Boiling: Heat up a kettle of water to a rolling boil. Depending on how concentrated you like your soap, you can adjust the amount of water you use. Use one quart of water for every four ounces of soap, as a general rule of thumb.
  • Dissolve the Soap: After the water reaches a rolling boil, turn down the heat and gradually stir in the grated soap. Stir continuously until the soap dissolves entirely.
  • Chill and Store: After letting the mixture cool, transfer it into an airtight container. If the soap gets too thick after chilling, you can reheat it a little bit and then add more water to get the right consistency.

Applications for Your Handmade Soap

  • The uses for your homemade liquid soap are endless. Here are some applications for it:
  • Use it as a hand and body wash in the restroom or as a body wash in the shower.
  • Household Cleaning: It is excellent for cleaning bathroom and kitchen surfaces. Just use a sponge or towel to apply it, then rinse it off.
  • Laundry Detergent: For fragile fabrics, use it as a gentle detergent.

In summary

  • You can embrace a more sustainable way of life and make a useful household product by dissolving a bar of soap in boiling water. This easy technique will keep your house fresh and clean while saving you money and lessening your impact on the environment. See how far one bar of soap can travel by giving it a try!

Garlic Cauliflower and Mushrooms

Garlic Cauliflower and Mushrooms

 introduction Option 1: Savory Delight

“Experience the ultimate savory fusion with our Garlic Cauliflower and Mushrooms recipe, where the deep, earthy flavors of sautéed mushrooms meet the tender crunch of roasted cauliflower, all infused with the aromatic punch of garlic.”

Option 2: Healthy Indulgence

“Indulge in the guilt-free goodness of our Garlic Cauliflower and Mushrooms, a flavorful and nutritious side dish that combines the health benefits of roasted vegetables with the rich, satisfying taste of garlic and mushrooms.”

Option 3: Umami Explosion

“Unlock the depth of umami flavor with our Garlic Cauliflower and Mushrooms recipe, where the meaty texture of mushrooms and the subtle bitterness of cauliflower are perfectly balanced by the pungency of garlic and a hint of herbs.”

Option 4: Vegan Delight

“Discover a plant-based paradise with our Garlic Cauliflower and Mushrooms, a hearty, satisfying dish that showcases the versatility of vegan cuisine and the natural affinity between roasted vegetables and aromatic spices.”

Option 5: Simple yet Elegant

“Elevate your weeknight meals with our Garlic Cauliflower and Mushrooms recipe, a surprisingly simple yet elegant side dish that’s perfect for special occasions or everyday dining.”

Option 6: Flavorful Pairing

“Explore the harmonious pairing of cauliflower and mushrooms, elevated to new heights with the aromatic essence of garlic and a touch of olive oil, resulting in a dish that’s greater than the sum of its parts.”

Option 7: Roasted Perfection

“Master the art of roasting with our Garlic Cauliflower and Mushrooms recipe, where the transformative power of heat coaxes out the natural sweetness of vegetables and the savory depth of garlic and mushrooms.”

Ingredients:
  1. – 1 head cauliflower, cut into florets
  2. – 2 tbsp olive oil
  3. – 3 cloves garlic, minced
  4. – 8 oz mushrooms, sliced
  5. – Salt and black pepper, to taste
  6. – 1/4 tsp red pepper flakes (optional)
Instructions:
1. Preheat the oven to 400°F (200°C).
2. In a large bowl, toss the cauliflower florets with 1 tbsp of olive oil, minced garlic, salt, and black pepper until evenly coated.
3. Spread the cauliflower mixture on a baking sheet in a single layer and roast in the oven for 20-25 minutes, or until the cauliflower is slightly browned and tender.
4. In a large skillet, heat the remaining 1 tbsp of olive oil over medium heat. Add the sliced mushrooms and sauté until they are browned and tender, about 5-7 minutes.
5. Once the cauliflower is roasted, add it to the skillet with the mushrooms. Mix well to combine and season with additional salt, black pepper, and red pepper flakes if desired.
6. Cook for another 2-3 minutes to allow the flavors to meld together.
7. Serve the Garlic Cauliflower and Mushrooms hot as a delicious side dish or over rice as a vegetarian main course.
110 calories
Serving:

Fig Leaves Nature’s Answer to Diabetes

Fig Leaves Nature’s Answer to Diabetes

We frequently overlook the amazing potential of everyday items like fig leaves when it comes to maintaining good health organically. While fig fruits are highly prized for their flavor and nutritional content, fig tree leaves also provide a variety of therapeutic benefits that are particularly advantageous for people with diabetes.

  • For those with diabetes, fig leaves are a useful natural medicine because they contain chemicals that can help control blood glucose levels. Studies have indicated that including fig leaves in a diabetic’s diet on a regular basis may even lower the amount of insulin required. Not only that, but fig leaves also contain a wealth of antioxidants, which strengthen the immune system and guard against oxidative stress, which has been connected to a number of chronic illnesses.
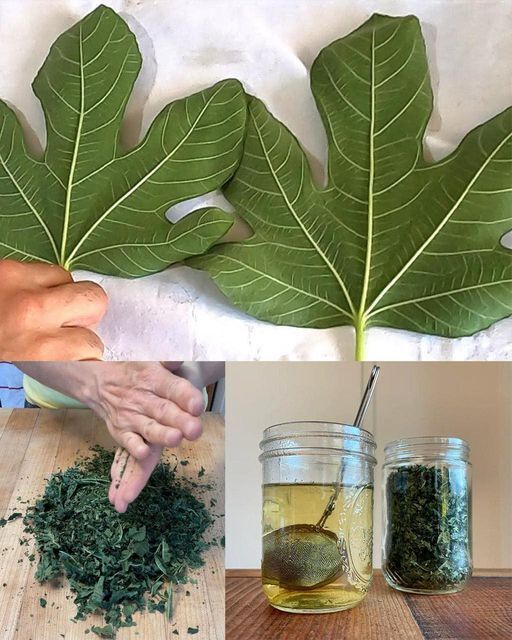
  • Making fig leaf tea is one of the simplest and most powerful methods to use fig leaves. Enjoyable for its general health advantages, it’s also a perfect addition to a diabetes treatment regimen. The following is a basic recipe for fig leaf tea:

Components:

  1. Fig leaves, fresh or dried
  2. Water

Guidelines:

  • Cut the fresh fig leaves into smaller pieces if you’re using them. If the leaves are dried, they can already be in a form that is good for brewing.
  • For every cup of tea, measure out approximately one teaspoon of chopped fig leaves.
  • Place the fig leaves in a pot of boiling water. Give them a good fifteen minutes to simmer. This procedure aids in removing the advantageous substances from the leaves.
  • Once the tea has simmered, drain it to get rid of the leaf fragments.
  • Warm tea should be served. Drinking one to two cups per day is advised to help control blood sugar levels.
  • Fig leaf tea is a nice beverage to sip at any time of day because it not only lowers blood sugar levels but also has a calming impact on the body.
  • In addition to being antidiabetic, fig leaves provide a number of other health advantages. They have natural laxative and diuretic properties that improve the digestive and urinary tracts’ well-being. They can even help lower blood levels of cholesterol and triglycerides, as well as relieve ulcer symptoms.
  • Because of its proteolytic enzymes, fig leaf sap, the milky liquid that is removed from the leaves, is well recognized for its capacity to eradicate warts. It is frequently applied topically as a safe and natural substitute for pharmaceutical therapies.
  • Even though fig leaves are typically safe to eat, it’s crucial that people with diabetes who are currently taking medication or receiving insulin therapy speak with their doctor before adding fig leaf tea to their regimen. This guarantees the balance and efficacy of their entire treatment strategy.
  • Fig trees are more than just trees with delicious fruits growing on them. They have a plethora of positive health effects, especially for people with diabetes. A more natural approach to health and wellness can be adopted by include fig leaf tea in your diet. Fig leaves present a viable and adaptable solution, whether your goal is to control your blood sugar levels or just learn more about the advantages of natural therapies.

Butter Pecan Keto Ice Cream

Butter Pecan Keto Ice Cream

Components:

Regarding the Ice Cream:

  1. Two cups of heavy cream
  2. One cup of unsweetened coconut or almond milk
  3. Half a cup of powdered erythritol, or your favorite sweetener that is keto-friendly
  4. One teaspoon vanilla extract
  5. Four huge yolks from eggs
  6. 1/4 cup butter, ideally from grass-fed cows
  7. chopped pecans, 3/4 cup
  8. A dash of salt

Guidelines:

1. Let the pecans toast:

  • Melt the butter in a small skillet over a medium heat. Add a dash of salt along with the chopped pecans. Cook, stirring periodically, until the pecans become fragrant and brown, 3 to 5 minutes. Take off the heat source and leave it to cool.

2. Get the ice cream base ready:

  • The almond milk and heavy cream should be combined in a saucepan. Don’t let it boil; instead, heat it to a gentle simmer over medium heat.

3. Beat the Yolks Out:

  • Whisk the egg yolks and powdered erythritol in a another bowl until the mixture is smooth and has a hint of color.

4. Calm the Yolks in the Egg:

  • While whisking continuously, slowly add about 1/2 cup of the heated cream mixture into the egg yolks. This keeps the eggs from curdling and helps to temper them. Next, gradually return the egg mixture, whisking constantly, to the saucepan containing the remaining cream.

5. Condense the Concoction:

  • Stirring frequently, cook the mixture over low heat until it thickens slightly and coats the back of a spoon, which should take approximately three to five minutes. Keep it from boiling to prevent scrambling of the eggs.

6. Include vanilla

  • After taking the pot off of the burner, whisk in the vanilla essence. Give the mixture ten to fifteen minutes to cool.

7. Let the Blend Cool:

  • Cover and chill the mixture for at least two to four hours, or overnight. This stage is crucial for bringing out the flavors and guaranteeing a smooth consistency.

8. Whisk the frozen yogurt:

  • Once the liquid has cooled, transfer it to an ice cream maker and process it as directed by the manufacturer, which should take between 20 to 30 minutes.

9. Include the pecans:

  • Stir in the buttered pecans during the last five minutes of churning. Let them blend in evenly.

10. Let the ice cream cool:

  • To firm up the ice cream, transfer it to an airtight container and freeze it for at least two hours.

Serving:

  • If you’d like, top your scoop of Butter Pecan Keto Ice Cream with additional toasted nuts!

Advice:

  • Lacking an Ice Cream Maker: Transfer the cold mixture into a shallow dish and freeze it, moving it every 30 minutes for two to three hours to break up any ice crystals.
  • Sweetener: Powdered erythritol is the ideal option for a smooth texture, but you can modify the sweetness to your preference.
  • Storage: For up to a week, keep any leftovers in the freezer in an airtight container. Since keto ice cream tends to solidify more quickly than traditional ice cream, let it sit at room temperature for five to ten minutes before scooping.

Rich and buttery, this Butter Pecan Keto Ice Cream is ideal for a guilt-free low-carb treat!

Cucumber Bites with Herbs Cream

Cucumber Bites with Herbs Cream

Parts and pieces:

  1. a single huge cucumber
  2. 3 tablespoons of cream cheese, softened
  3. One-fourth of a cup of Greek yogurt or sour cream
  4. One tablespoon of chopped fresh dill or one teaspoon of dried dill
  5. Chopped fresh chives, one tablespoon sized
  6. 1. One tablespoon of chopped fresh parsley
  7. a single clove of garlic, minced
  8. 1 milliliter of vinegar
  9. To taste, season with salt and pepper
  10. If desired, cherry tomatoes can be used as a garnish.

Details to follow:

First, get the cucumber ready:

  • Wash the cucumber and cut it into thick circles that are approximately half an inch in diameter.

Get the Herb Cream ready by:

  • Cream cheese, sour cream (or yogurt), dill, chives, parsley, garlic, lemon juice, salt, and pepper should be mixed together in a bowl until the mixture is smooth and well integrated for optimal flavor.

Putting Together the Bites:

  • Dollop of the herb cream should be placed on each slice of cucumber using a spoon or a pipette.

Adorn with:

  • When using cherry tomatoes, cut them in half and place one half on top of each slice of cucumber. This will provide both color and flavor to the combination.

Provide:

  • The cucumber bites should be arranged on a tray, and they should be served right away. Before serving, they can also be stored in the refrigerator for a brief period of time.

Have fun!

  • Light and tasty, these bite-sized cucumbers are sure to be a favorite at whatever occasion you attend. Excellent for serving as a light appetizer or when the weather is warm!