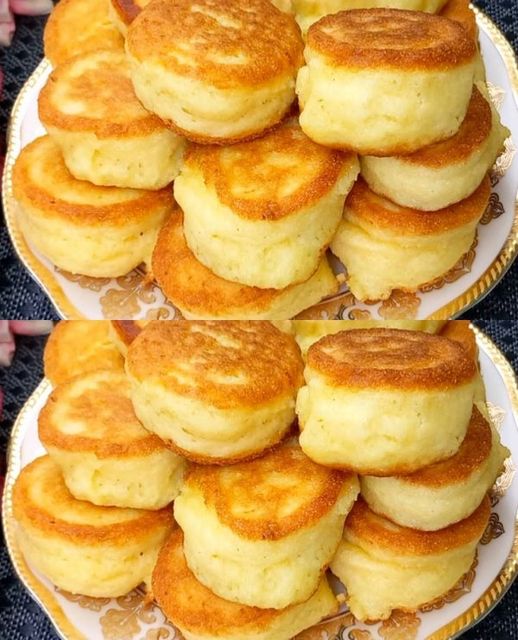
WITHOUT FLOUR In 10 minutes A glass of Yogurt and a whole mountain of yummy food is ready
Ingredients:
Let’s gather our ingredients first before we get started on the dish. What you’ll need is
- two eggs
- Two tsp sugar
- A small amount of salt
- 250 milliliters of kefir
- 250 grams of semolina
- One teaspoon baking soda
- Apples (or any other desired fruit for stuffing)
- (For frying)butter
GETTING READY
We are ready to begin making these delicious pancakes now that we have everything we need.
Steps to prepare: 1. Make the batter
- First, crack two eggs into a bowl for mixing.
- To the eggs, add two tablespoons sugar, a sprinkling of salt, and a big dollop of vanilla extract.
- Add 250 milliliters of kefir and stir everything well until the sugar is fully dissolved.
- Now, thoroughly incorporate in 1 teaspoon of baking soda into the mixture.
2. Include cottage cheese and semolina.
- Stir in 250 g of semolina little by bit into the batter.
- After that, incorporate the cottage cheese into the mixture and thoroughly mix it in.
- The finished dough ought to be uniformly smooth.
3. Get the Filling ready.
- Core and peel the apples, or any other fruit of your choice, and cut them into little cubes.
- Add the diced apples to a separate pan with some melted butter.
- After covering the apples with sugar, boil them for three to four minutes, or until they are soft and start to caramelize.
4. Cook the pancakes.
- Spoon the dough into a pastry bag or a plastic storage bag, cutting off the corner.
- Grease a frying pan lightly and heat it over medium heat.
- Form tiny cakes by pressing tiny bits of the dough onto the pan.
- Top each pancake with a dollop of the prepared apple filling.
- Lastly, place another layer of dough over the apples.
5. Allow to cook until golden brown.
- Cook the pancakes until they are crispy and golden brown on both sides.
- To ensure that they cook through, carefully flip them.
Savor Your Flourless Joy!
There you have it: easy and delectable apple fritters that don’t require any flour at all. The end product is a delicious blend of light pancakes and caramelized apples that will quickly sate your desires. To generate a range of flavors, you can also experiment with other fillings, including pears, berries, or other fruits. Thus, keep this recipe in mind the next time you need a delicious treat but are in a hurry. You may have a plate of delicious flourless pancakes in only ten minutes.