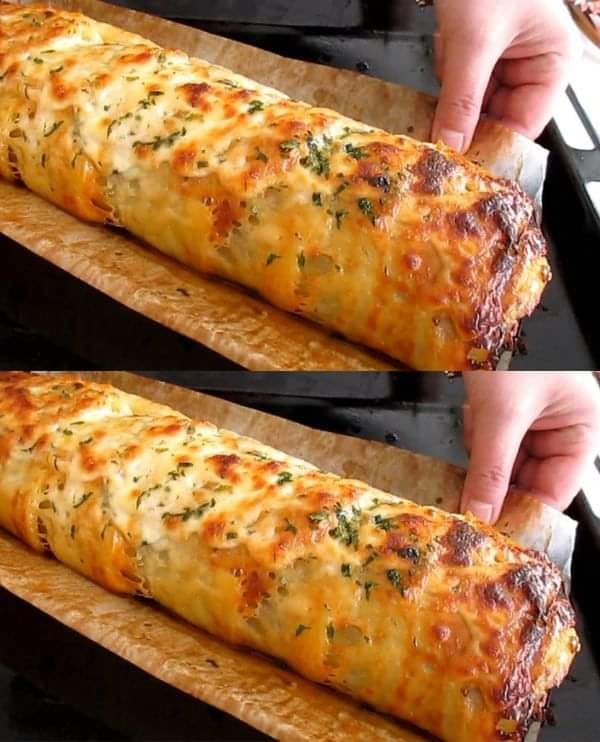
Cheesy Stuffed Potatoes with Savory Beef Filling
Ingredients:
- – Three large potatoes (around 900 gm) for the potatoes
- 300 gm of cheddar cheese and two teaspoons (20 milliliters) of vegetable oil
- – Four gm of salt
To make the beef filling,
- combine 500 gm of ground beef,
- 2 tablespoons vegetable oil (20 ml),
- one finely chopped onion,
- three finely chopped green peppers,
- and three minced garlic cloves.
- Two tsp tomato sauce (twenty-five gm)
- – 20 gm or 1 teaspoon of tomato paste
- – 3–4 chopped parsley sprigs – Paprika, black pepper, cumin, thyme, and salt, to taste
Guidelines:
- Set the oven’s temperature to 200°C (392°F).
- To get rid of any dirt, give the potatoes a good wash and scrub.
- To make a sturdy base, trim a tiny slice from the bottom of each potato. Additionally, cut off the top to create a “lid.”
- Remove the potato flesh, leaving a 1/4-inch (0.5 cm) border around the potato. Keep the potato flesh that you scooped out for later.
- Apply a thin layer of vegetable oil and a small amount of salt to the potato shells.
- Transfer the prepared potato shells to a baking sheet and bake for 30 minutes at a temperature that has been preheated, or until the edges are beginning to crisp up.
- Prepare the beef filling and bake the potatoes at the same time.
- Heat two teaspoons of vegetable oil in a pan over medium-high heat. Add the minced garlic, green peppers, and finely diced onion. Cook them until they become tender.
- When the ground beef is well cooked and browned, add it and continue to cook.
- Add tomato paste and sauce, stir, and season to taste with salt, black pepper, cumin, thyme, and paprika.
- Stir in the finely chopped parsley.
- Take out of the oven the partially cooked potato shells.
- Tightly pack the prepared meat contents into each potato shell.
- Add a liberal amount of cheddar cheese on top of each loaded potato.
- Return the stuffed potatoes to the oven and bake for a further 10 minutes at 200°C (392°F), or until the potatoes are cooked through and the cheese is bubbling.
- Serve this cheesy stuffed potato with savory meat stuffing for a meal so good the neighbors will be envious!