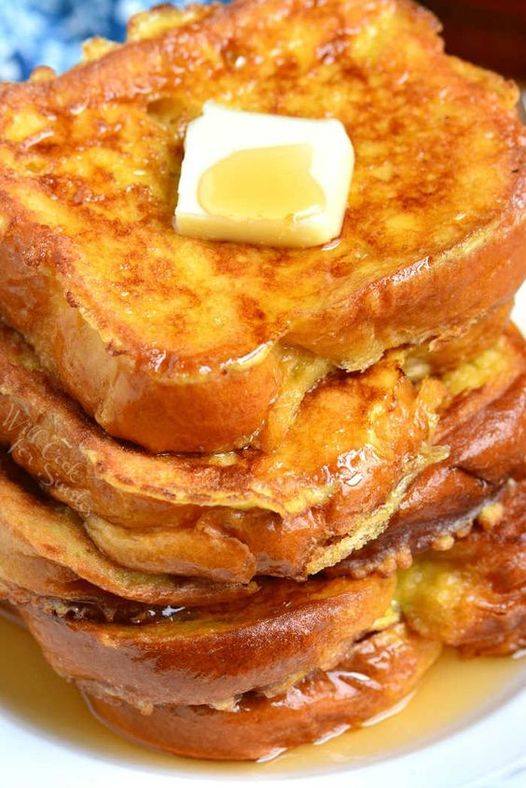
AIR FRYER CINNAMON FRENCH TOAST
French toast is a breakfast staple everyone adores. It can be oily and unhealthy if made in a standard frying pan. The air fryer makes French toast healthier and lower in fat. The cinnamon and sugar topping makes this dish taste great and leave you wanting more. Try this Air Fryer Cinnamon French Toast recipe for a unique brunch!
- I cooked Air Fryer Cinnamon French Toast today because French Toast is the best breakfast.
- Simple and excellent air-fried French toast for breakfast. You can make delicious French Toast in minutes.
- This air fryer-friendly classic is simple to make. Whenever I visited on weekends, my grandmother made this meal.
- True comfort food. Kids and relatives will ask you to cook it again.
French toast making tips
- You can skip the pan. You can prepare multiple batches in a pan without cleaning the air fryer. Rinse the baking dish before starting the next batch.
- For a thicker batter, heavy cream works well.
- I used lactose-free milk, but you may use oak, almond, or soy milk.
- Check on your French Toast periodically while cooking since air fryers cook at varying periods.
Storage of Leftovers
- For making ahead, this is a great dish. Store leftovers in an airtight jar for 2–3 days.
Heat them in the microwave or air fryer.
- Freezing Air Fryer French Toast
You might wish to make this beforehand. One batch of doubled recipe is frozen for later. - After cooling to room temperature, lay French Toast on a parchment-lined baking sheet. Freeze the baking sheet until the French toast is firm.
Get them off the baking sheet and into a freezer bag.
How to air fry frozen french toast
Place frozen French toast in the air fryer basket and air fry for 5 minutes at 400 degrees F, seated.
Ingredients
- 4 slices bread
- 2 eggs
- 2/3 cup milk
- 1 tsp vanilla
- 1/2 tsp cinnamon
Instructions
- Spray olive oil on your pan liberally.
- Mix eggs, milk, cinnamon, and vanilla in a small bowl.
Beat until well mixed. - Dip each piece of bread into the mixture and soak for 30 seconds to absorb the batter. Shake the bread gently to remove excess.
- In the prepared pan, place french toast.
- 3 minutes at 320 degrees F, air fryer setting.
- Flip them and do 3 more minutes.
- Serve with maple syrup or garnishes.
- Plate, serve, enjoy!