pumpkin soup

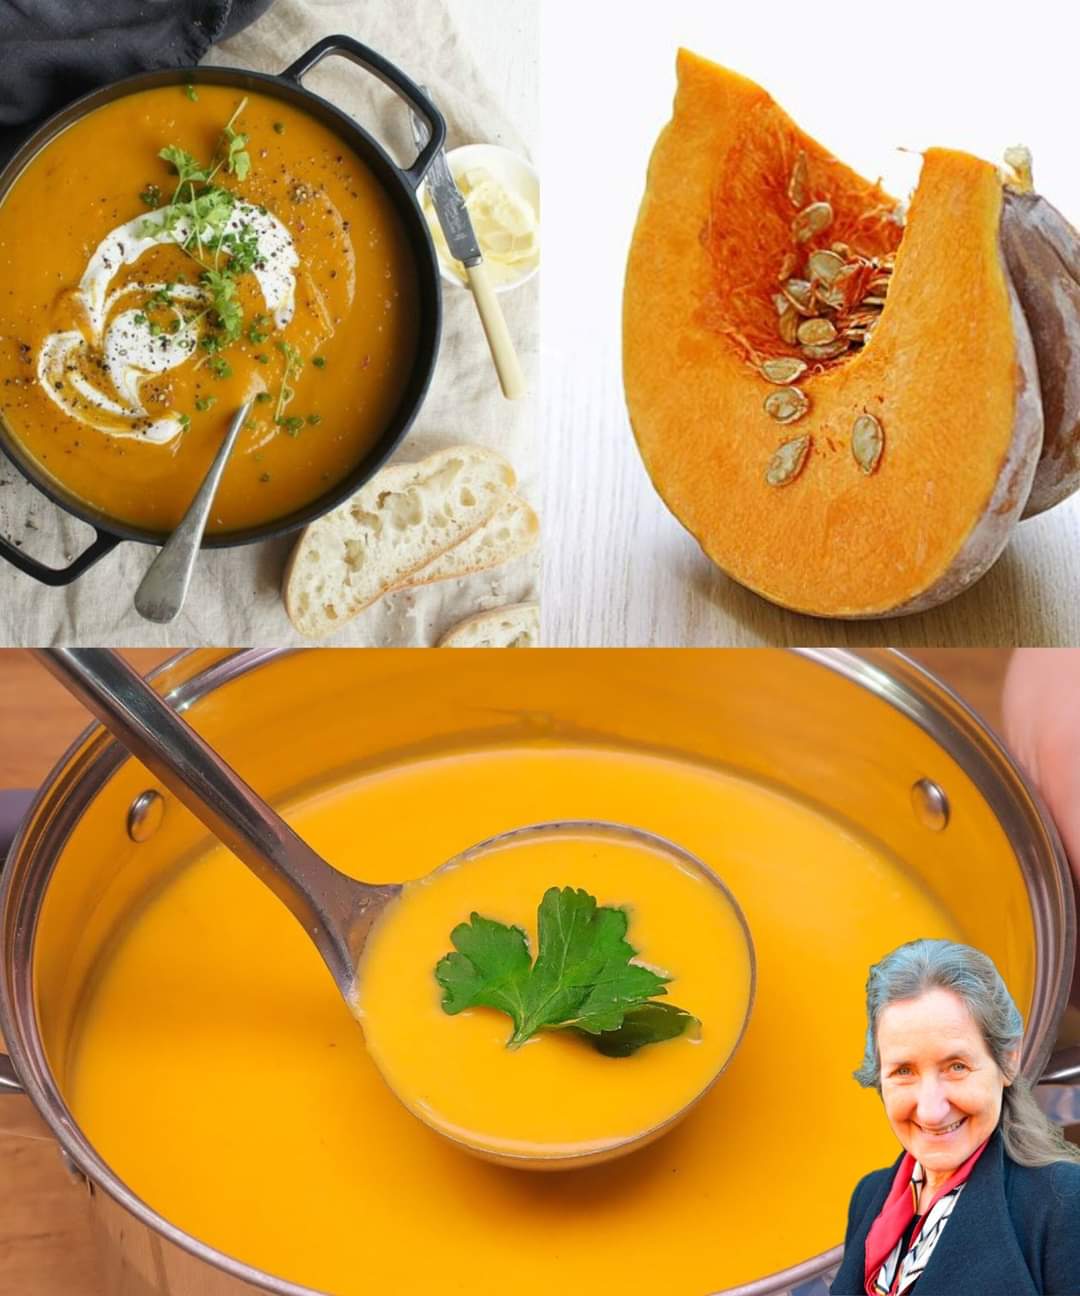
This pumpkin soupt is so delicious that I make it every day! Vegetable soup in 30 minutes!

Pumpkin offers numerous benefits, including:

1. *Rich in Vitamins and Minerals*: Pumpkin is a good source of vitamins A, C, and E, as well as minerals like potassium and iron.

2. *Antioxidant Properties*: Pumpkin contains antioxidants that help protect cells from damage and reduce inflammation.

3. *Supports Eye Health*: The vitamin A in pumpkin makes it an excellent food for supporting eye health and preventing age-related macular degeneration.

4. *May Help Regulate Blood Sugar*: Pumpkin contains fiber and antioxidants that may help regulate blood sugar levels.

5. *Supports Healthy Digestion*: Pumpkin is high in fiber, making it a great food for promoting healthy digestion and preventing constipation.

6. *May Help Reduce Cancer Risk*: The antioxidants and other compounds in pumpkin may help reduce the risk of certain cancers.

7. *Supports Healthy Skin*: Pumpkin is rich in vitamins and minerals that support healthy skin and may help reduce the signs of aging.

8. *May Help Reduce Anxiety*: The tryptophan in pumpkin may help reduce anxiety and promote relaxation.

Remember to consume pumpkin in moderation and as part of a balanced diet. Enjoy the benefits of this nutritious food!

-Ingredients:

  1. Olive oil
  2. 1 onion, chopped
  3. 2 garlic cloves, minced
  4. 1 small pumpkin, peeled and diced
  5. 2 carrots, diced
  6. 2 stalks of celery, diced
  7. Vegetable stock
  8. Salt and pepper
  9. Cream (optional for garnish)
  10. Fresh herbs like parsley or thyme for garnish

Steps:

1.Heat olive oil in a large pot over medium heat. Add chopped onion and garlic, cooking until soft and golden.

2.Add diced pumpkin, carrots, and celery. Stir to coat vegetables in the onion and garlic mixture, letting them sauté slightly.

3.Pour in enough vegetable stock to cover the vegetables. Bring to a boil, then reduce heat and simmer for about 20 minutes until vegetables are tender.

4.Use an immersion blender or transfer soup to a blender to puree until smooth. Return mixture to the pot if necessary.

5.Season soup with salt and pepper. Optionally, stir in a splash of cream for extra richness.

6.Ladle soup into bowls and garnish with a swirl of cream and some fresh herbs.

Herbal Hair Oil

Mix all ingredients in a blender until smooth, creating an oil that is finely blended for maximum vitamin absorption.

How Ways to Apply Herbal Hair Oil:


Directly apply the oil to your scalp and hair, gently rubbing it in for a few minutes to promote equal distribution and increase blood flow.

To optimize nutrient absorption, let the oil in your hair for at least an hour, or better yet, overnight.

Use your usual shampoo to rinse. To get rid of all the oil, you might need to shampoo twice, particularly if your hair absorbs a lot of the combination.

Advantages of Frequent Use:

Regular use of this organic herbal oil may greatly enhance the look and health of hair. It’s an easy, efficient method of giving your hair the richest nutrients found in nature, which will promote a robust, shiny mane. Savor the procedure and enjoy the outcomes of well-fed, robust hair!

Discover the Natural Wrinkle-Reducing Powers of Onion

Discover the Natural Wrinkle-Reducing Powers of Onion

Onions are not only a common ingredient in the kitchen due to their flavour, but they also provide remarkable advantages for your skin, especially when it comes to minimising the appearance of wrinkles and fine lines. Despite its unassuming appearance, this vegetable is loaded with a wide variety of nutrients and chemicals that may serve as a natural alternative to beauty treatments. Let’s investigate how the use of onions might assist in the preservation of skin that seems smooth and young.

Vitamins A, C, and E are all antioxidants that are known to protect the skin from premature ageing caused by free radicals. Onions are high in all three of these vitamins’ antioxidant properties. Moreover, onions contain sulphur compounds that contribute to an increase in the formation of collagen, which is necessary for the preservation of the skin’s suppleness and firmness.

How to Use Onions for Skin Care

A Mask Made of Onion Juice:

One little onion is included in the ingredients.

The preparation involves using a blender or grater to extract the juice from the onion, and then straining the mixture to get the juice that is clear.

The application process involves using a cotton pad to apply the onion juice to your face, paying particular attention to regions that have wrinkles and fine lines. It should be left on for about ten minutes before being washed off with water that is lukewarm. Applying it once a week will get the finest effects.

Face pack including onion and honey:

  1. A single little onion and one spoonful of honey are the ingredients.
  2. First, make a puree out of the onion, and then fully combine it with honey that has been blended.
  3. Applying this mixture to your face and allowing it to sit for twenty minutes is the application method. In addition to its moisturising properties, honey has the ability to lessen the pungent odour of onions. Rinse off with water that is warm.

Warnings and recommendations

In spite of the fact that onions are typically safe for topical application, it is essential to do a patch test before putting them directly to your face, particularly if you have skin that is sensitive. Furthermore, the natural potency of onion may cause irritation to the eyes, thus it is prudent to apply it cautiously and to avoid the region around the eyes while doing so.

Keeping to a Regular Schedule

Utilisation on a regular basis is essential while utilising natural medicines. You can start to notice a smoother skin texture and a decrease in the appearance of fine wrinkles if you use it on a consistent basis. In order to improve the health of your skin from the inside out, you should combine this natural therapy with a diet that is well-balanced and abundant in other antioxidants.

It is possible that onion is not the first item that springs to mind when thinking about skin care; yet, the potent characteristics that onion has may in fact assist in maintaining the appearance of your skin as being renewed and revitalised without the use of harsh chemicals. Put this natural treatment to the test and discover how it may improve your beauty regimen by giving it a go!

CAULIFLOWER NUGGETS

CAULIFLOWER NUGGETS

Calendula nuggets are one of the ingredients.

  1. 1 (one and a half pounds) head of cauliflower, chopped into florets measuring 2 inches
  2. salt, kosher, two teaspoons, divided
  3. Panko bread crumbs, number two
  4. 1/4 percent neutral oil
  5. 1 cup (120 grammes) all-purpose flour powder
  6. Soy milk, one cup
  7. Garlic powder, one teaspoon
  8. paprika, half a time
  9. half a teaspoon of freshly ground black pepper
    ASSEMBLY AND HONEY SAUCE THAT IS HOT
  10. half a cup of honey
  11. four tablespoons of unsalted butter or butter made from plants
  12. 1 teaspoon of cayenne pepper
  13. 1/2 milligramme of garlic powder
  14. paprika, half a time
  15. Salt that is Kosher
  16. Salt from the sea that is flaky

NOTES DIRECTIONS bookmarks SAVE TO MY RECIPES

THE NUGGETS OF CAULIFLOWER

  • 1. Position a rack in the middle of the oven and warm it to 400 degrees. To prepare the cauliflower, place it in a large basin and add 1 1/2 tablespoons of kosher salt. Relax for fifteen minutes.
  • In a second large bowl, combine the panko and oil and toss to combine. Spread on a metal baking sheet that has not been lined. Bake for four to six minutes, checking on it periodically and stirring it every three minutes, until it reaches a golden brown colour. Transfer to the bowl and allow it cool down somewhat.
  • The third step is to combine the flour, soy milk, paprika, garlic powder, pepper, and the remaining half teaspoon of salt in a medium bowl on a whisk. Using one or two cauliflower at a time, dip each cauliflower into the flour mixture and then shake off any excess. Coat in panko and press down to ensure adhesion. Place cauliflower on a baking sheet that has been lined with parchment paper.
    Step Four: Bake the nuggets for 25 to 35 minutes, or until they are soft in the middle.

ASSEMBLY AND HONEY SAUCE THAT IS HOT

  • In the meantime, combine honey, butter, cayenne pepper, garlic powder, and paprika in a small pot and cook it over medium heat. Season with a touch of kosher salt. Take about two minutes to cook, swirling the mixture often, until the butter has melted and the sauce has become smooth. Allow to moderately cool. (When it is hot, the sauce will be runny, but as it cools, it will become more thick.)
  • The second step is to place the cauliflower on a dish. Drizzle with warm honey, and then season with salt from the sea.

Air Fryer Jalapeno Poppers

Air Fryer Jalapeno Poppers

It just takes fifteen minutes to prepare these Jalapeno Poppers on the Easy Air Fryer! Bacon, cream cheese, and melted cheddar cheese are the ingredients that are crammed into this spicy appetiser. When it comes to parties, gatherings, or events, this is the ideal appetiser or snack to bring along.

Could You Prepare Them in Advance?
It is possible to prepare the poppers twenty-four hours in advance and then store them in the refrigerator with a firm lid and a seal.


  • Reheating: A Guide
    Using an air fryer set to 350 degrees, reheat any leftovers until they are warm. The texture will be different if you use the microwave, but you are free to do so if you so like.
  • Guide to Freezers
    You are able to freeze these for up to four months if you cover them and seal them tightly.

Components

  1. ten jalapenos that are still fresh
  2. Cream cheese, six ounces In my diet, I used low-fat
  3. one-fourth of a cup of ground cheddar cheese
  4. Spray cooking oil on two pieces that have been cooked
  5. and crumbled.

Details to follow

  • To generate two halves of each jalapeno, cut the jalapenos in half vertically and repeat the process.
  • Put the cream cheese in a bowl and shake it up. In order to soften, microwave for fifteen seconds.
  • Take the seeds out of the jalapeno and remove the insides instead. The cream cheese, crumbled bacon, and shredded cheese should be mixed together in a bowl. If you like your poppers hot, you should save some of the seeds. Combine thoroughly.
  • For poppers that are even more spicy, add some of the seeds that were mentioned earlier to the cream cheese mixture and thoroughly combine them.
  • Fill the cream cheese mixture into each of the jalapenos and set them aside.
  • The poppers should be loaded into the air fryer. Cooking oil should be sprayed across the poppers.
  • Put an end to the Air Fryer. Poppers should be cooked at a temperature of 370 degrees for five to eight minutes.
  • Take the food out of the air fryer and allow it to cool before serve.

THE BEST Air Fryer Brussels Sprouts

THE BEST Air Fryer Brussels Sprouts

ere is a good chance that Brussels sprouts are the best vegetable that can be prepared in an air fryer. The leaves of the Brussels sprouts become brittle and pleasantly crunchy. There, they are accompanied by slivers of garlic, which, as they cook, transform into chips that have a spicy and golden flavour. The whole thing is then seasoned with lime juice for its freshness and soy sauce for its complexity, and then it is finished with a mixture of balsamic vinegar that has been cooked until it has thickened. This can be served as a side dish or as a snack with drinks; however, you should make sure to have a sufficient supply of napkins available.

Components

  1. 1 pound of brussels sprouts which have been trimmed and cut in half through the stems (bigger sprouts should be chopped in quarters).
  2. Olive oil, extra-virgin, three tablespoon measures
  3. a half teaspoon of kosher salt
  4. Two cloves of garlic, sliced very thinly
  5. Half a cup of balsamic vinegar
  6. Fresh lime juice, one teaspoon, plus additional lime juice for serving
  7. 1/2 teaspoon of soy sauce

Details to follow

  • If preheating is required, bring the temperature of the air fryer up to 400 degrees.
  • To prepare the brussels sprouts, place them in the basket of the air fryer and drizzle them with one tablespoon of oil and salt. Fry the sprouts for fifteen minutes, shaking the basket or stirring them halfway during the cookingtime.
  • Garlic should be ground into the sprouts. Continue to sauté the garlic for another two to four minutes, or until it reaches a golden brown colour.
  • A small pot should be used to bring the balsamic vinegar to a simmer while this is going on. Simmer the mixture for two to three minutes, or until it has thickened and begun to take on a syrupy appearance, making sure to increase the heat as required to keep it from burning. It will go from being reduced to being burned very quickly, so make sure you keep a close eye on it. Remove the pan from the heat and add two tablespoons of oil, lime juice, and soy sauce to the pan using a whisk.
  • The brussels sprouts should be transferred to a serving tray, and then balsamic dressing should be mixed in.
  • Additional lime juice should be squeezed on top to taste.
    It is recommended that you prepare the brussels sprouts by heating them in the microwave for a few minutes with a cup of water before air-frying them. Through the use of this hack, it will be perfectly sensitive and soft. Have fun with it.

AIR FRYER TOAST AND EGGS

AIR FRYER TOAST AND EGGS

Egg in Hole made in an air fryer is a simple breakfast dish that everyone appreciates. Toasted bread with an over easy egg placed in the middle of the sandwich is the filling.

The recipe for the Toad in the Hole Egg
The Air Fryer Egg in Hole is the ideal meal for the summer, and it is also one of the dishes that my children enjoy eating for breakfast the most.

This is a delicious classic egg dish that can be prepared with only a slice of toast and features an egg inserted into a bread hole to provide you with a savoury breakfast alternative.

Although this egg in bread hole is known by a number of titles, including Toad in the Hole Egg, the preparation of this dish is actually pretty straightforward. Made in a matter of minutes using an air fryer! You will quickly find that it is one of your family’s favourites because it is so delicious.

It is important to take note that the recipe might be printed on the third page.

How About Now?

The preparation time is five minutes.
Time to Cook: ten minutes
A total of fifteen minutes

Components

  1. only one slice of toast
  2. 1 egg, seasoned with salt and pepper

Details to follow

  • Non-stick cooking spray should be sprayed onto the air fryer-safe pan you are using.
  • Put the piece of bread you want to fry down inside the pan that is safe for the air fryer.
  • The bread should then be removed after a hole has been created using a cup or a cookie cutter.
  • The egg should be broken into the hole.
  • After six minutes of air frying at 330 degrees Fahrenheit using the air fryer setting, flip the egg with a spatula and continue air frying for another three to four minutes.

AIR FRYER HASSELBACK POTATOES

AIR FRYER HASSELBACK POTATOES

These Air Fryer Hasselback Potatoes are a fantastic side dish for your supper since they are so simple to prepare in the air fryer and they are also very straightforward to make.

Only thirty minutes is all that is required to cook these hasselback potatoes in an air fryer, and the end result is potatoes that are extremely tender in the middle while having a very crunchy exterior.

There is no question that you are missing out on something if you are a fan of potatoes and you have not yet tried them. The best thing about potatoes is that they actually have two different textures, both of which complement each other quite well. As a result of this, the hasselback potato is the ideal method for serving potatoes. When they are cooked, the interior becomes mushy and soft, while the exterior becomes quite crisp.

In order to prepare these potatoes, you do not require any specialised equipment. To cut even slices in the potato without cutting all the way through, all you actually need is a knife that is sharp enough to do the job.

For this recipe, you can use any size potato you choose, although I personally prefer a potato that is on the smaller side. One that is approximately three inches in diameter is ideal. When it is thicker in the middle, the amount of time it will take to cook will increase.

One more thing that I’ve discovered is that the ideal potato to use as a side dish is a smaller one.

Components

  1. 2 potatoes of a medium size
  2. a half tablespoon of butter that has been melted
  3. tablespoon and a half of olive oil
  4. One-fourth of a teaspoon of salt and one-eighth of a
  5. teaspoon of powdered black pepper
  6. Cloves that have been chopped and sour cream, if desired

Details to follow

  • The potatoes should be washed and dried with a towel. You should use a knife that is sharp and cut the potato into ¼-inch slices, making sure not to cut all the way through the potato.
  • A bowl should be used to combine the butter, olive oil, salt, and pepper. Incorporate the mixture into the slits and onto the potatoes using a brush.
  • Make sure the air fryer is preheated to 350 degrees Celsius (175 degrees Celsius) for three minutes. After placing the potatoes in the basket of the air fryer, allow them to cook for fifteen minutes. Continue boiling the potatoes for an additional 15 minutes after brushing them with the mixture once more (extending the cooking time for potatoes that are larger).
  • To remove the potatoes from the air fryer, remove them. Coat with the remaining mixture and set aside. In the event that you so wish, garnish with chives and sour cream.
    The wattage of each air fryer is varied, and various air fryers may cook at different rates.
  • The best results may need you to make adjustments to the time or the temperature.

AIR FRYER MEXICAN STREET CORN ON THE COB

AIR FRYER MEXICAN STREET CORN ON THE COB

A side dish of Mexican street corn on the cob prepared in an air fryer is the ideal choice for the summertime. One of the greatest methods to prepare corn on the cob is to use this method, which is packed with a wide variety of flavours.

Corn on the cob, which is everyone’s favourite way to prepare it, can now be prepared in a matter of minutes. With the assistance of the air fryer, it is not only simple, but it is also quite tasty!

If this is something you have never tried before, you will be left wondering why you didn’t make it sooner because it is so easy to make and tastes so good all at the same time.

The following is a list of foods that are typically served with street corn: I typically serve this with a hamburger, hot dog or ribs meal. The flavours, in my opinion, are a good complement to barbecue foods.

That being said, you could also serve this as an appetiser, or you could serve it alongside handmade tortillas or salsa. It is a lot of fun to eat, and it works really well with a lot of other foods. Air Fryer Mexican Street Corn On The Cobs are great.

Everybody like this gluten-free and kid-friendly side dish, which is perfect for any occasion!

Components

  1. Corn with four ears
  2. Olive oil, two tablespoons’ worth
  3. a quarter cup of Cotija pepper
  4. 2 teaspoons of fresh cilantro,
  5. in addition to salt and pepper to taste

Details to follow

  • When the corn is ready, spray it with oil using a pastry brush. Preheat the oven to 400 degrees Fahrenheit and set it to the air fryer setting for five minutes. Add the maize after that.
  • The corn on the cob should be placed within the basket of the air fryer, and the time should be set for ten minutes.
  • Additionally, the corn should be flipped approximately midway during the cooking period.
  • After the corn on the cob has been air-fried for a further two to three minutes, sprinkle the cheese over it and continue to air-fry until the cheese begins to melt.
  • Enjoy, plate, and serve the food!

AIR FRYER CHEESY MASHED POTATO PUFFS

AIR FRYER CHEESY MASHED POTATO PUFFS

Our family kitchen has turned into a safe place where we share meals and show love. These Cheesy Mashed Potato Puffs are the new star of the show. On one night, the food that made everyone laugh and smile bigger was golden-brown potato puffs filled with cheese that were straight from the air fryer. Our family dinner was one to remember because every bite was a mix of creamy and crunchy.

WHY DO YOU WANT THESE POTATO CHEESE PUFFS?
These Potato Cheese Puffs aren’t like other potato foods; they’re a cheesy masterpiece that elevates a beloved snack to a gourmet level. These puffs are full of flavour thanks to the tangy cheddar cheese, the sharp garlic, and the fresh onions that are mixed with the chilled mashed potatoes. When baked until golden, they’re the ideal comfort food with a tasty twist.

What’s inside.

  1. 710 ml of mashed potatoes
  2. 3 cups of cheese, cooled 240 ml of cheese 1 cup, cut up
  3. One big egg
  4. 60 ml of chives
  5. 1/4 cup chopped all-purpose flour 60 ml of flour 1/4 cup
  6. Half a teaspoon of garlic powder
  7. To taste, add salt and pepper.
  8. Size of 120 ml Parmesan cheese A half cup, chopped
    Put some grease on the muffin pan.

Tips and Advice

  • To start, heat your air fryer to 400°F (200°C) and grease a small muffin pan.(I use an oven air fryer, but you can also use a basket air fryer)
  • Shred the cheddar cheese, add the onions, flour, garlic powder, salt, and pepper to the cold mashed potatoes. Blend well after adding the egg.
  • For the muffin cups, roll the mix into balls, then press them into the pan.
  • It will take about 15 to 20 minutes of baking until the edges turn golden.
  • Let it cool down a bit, then serve and enjoy the cheesy goodness.