Using Baking Soda to Control Pests

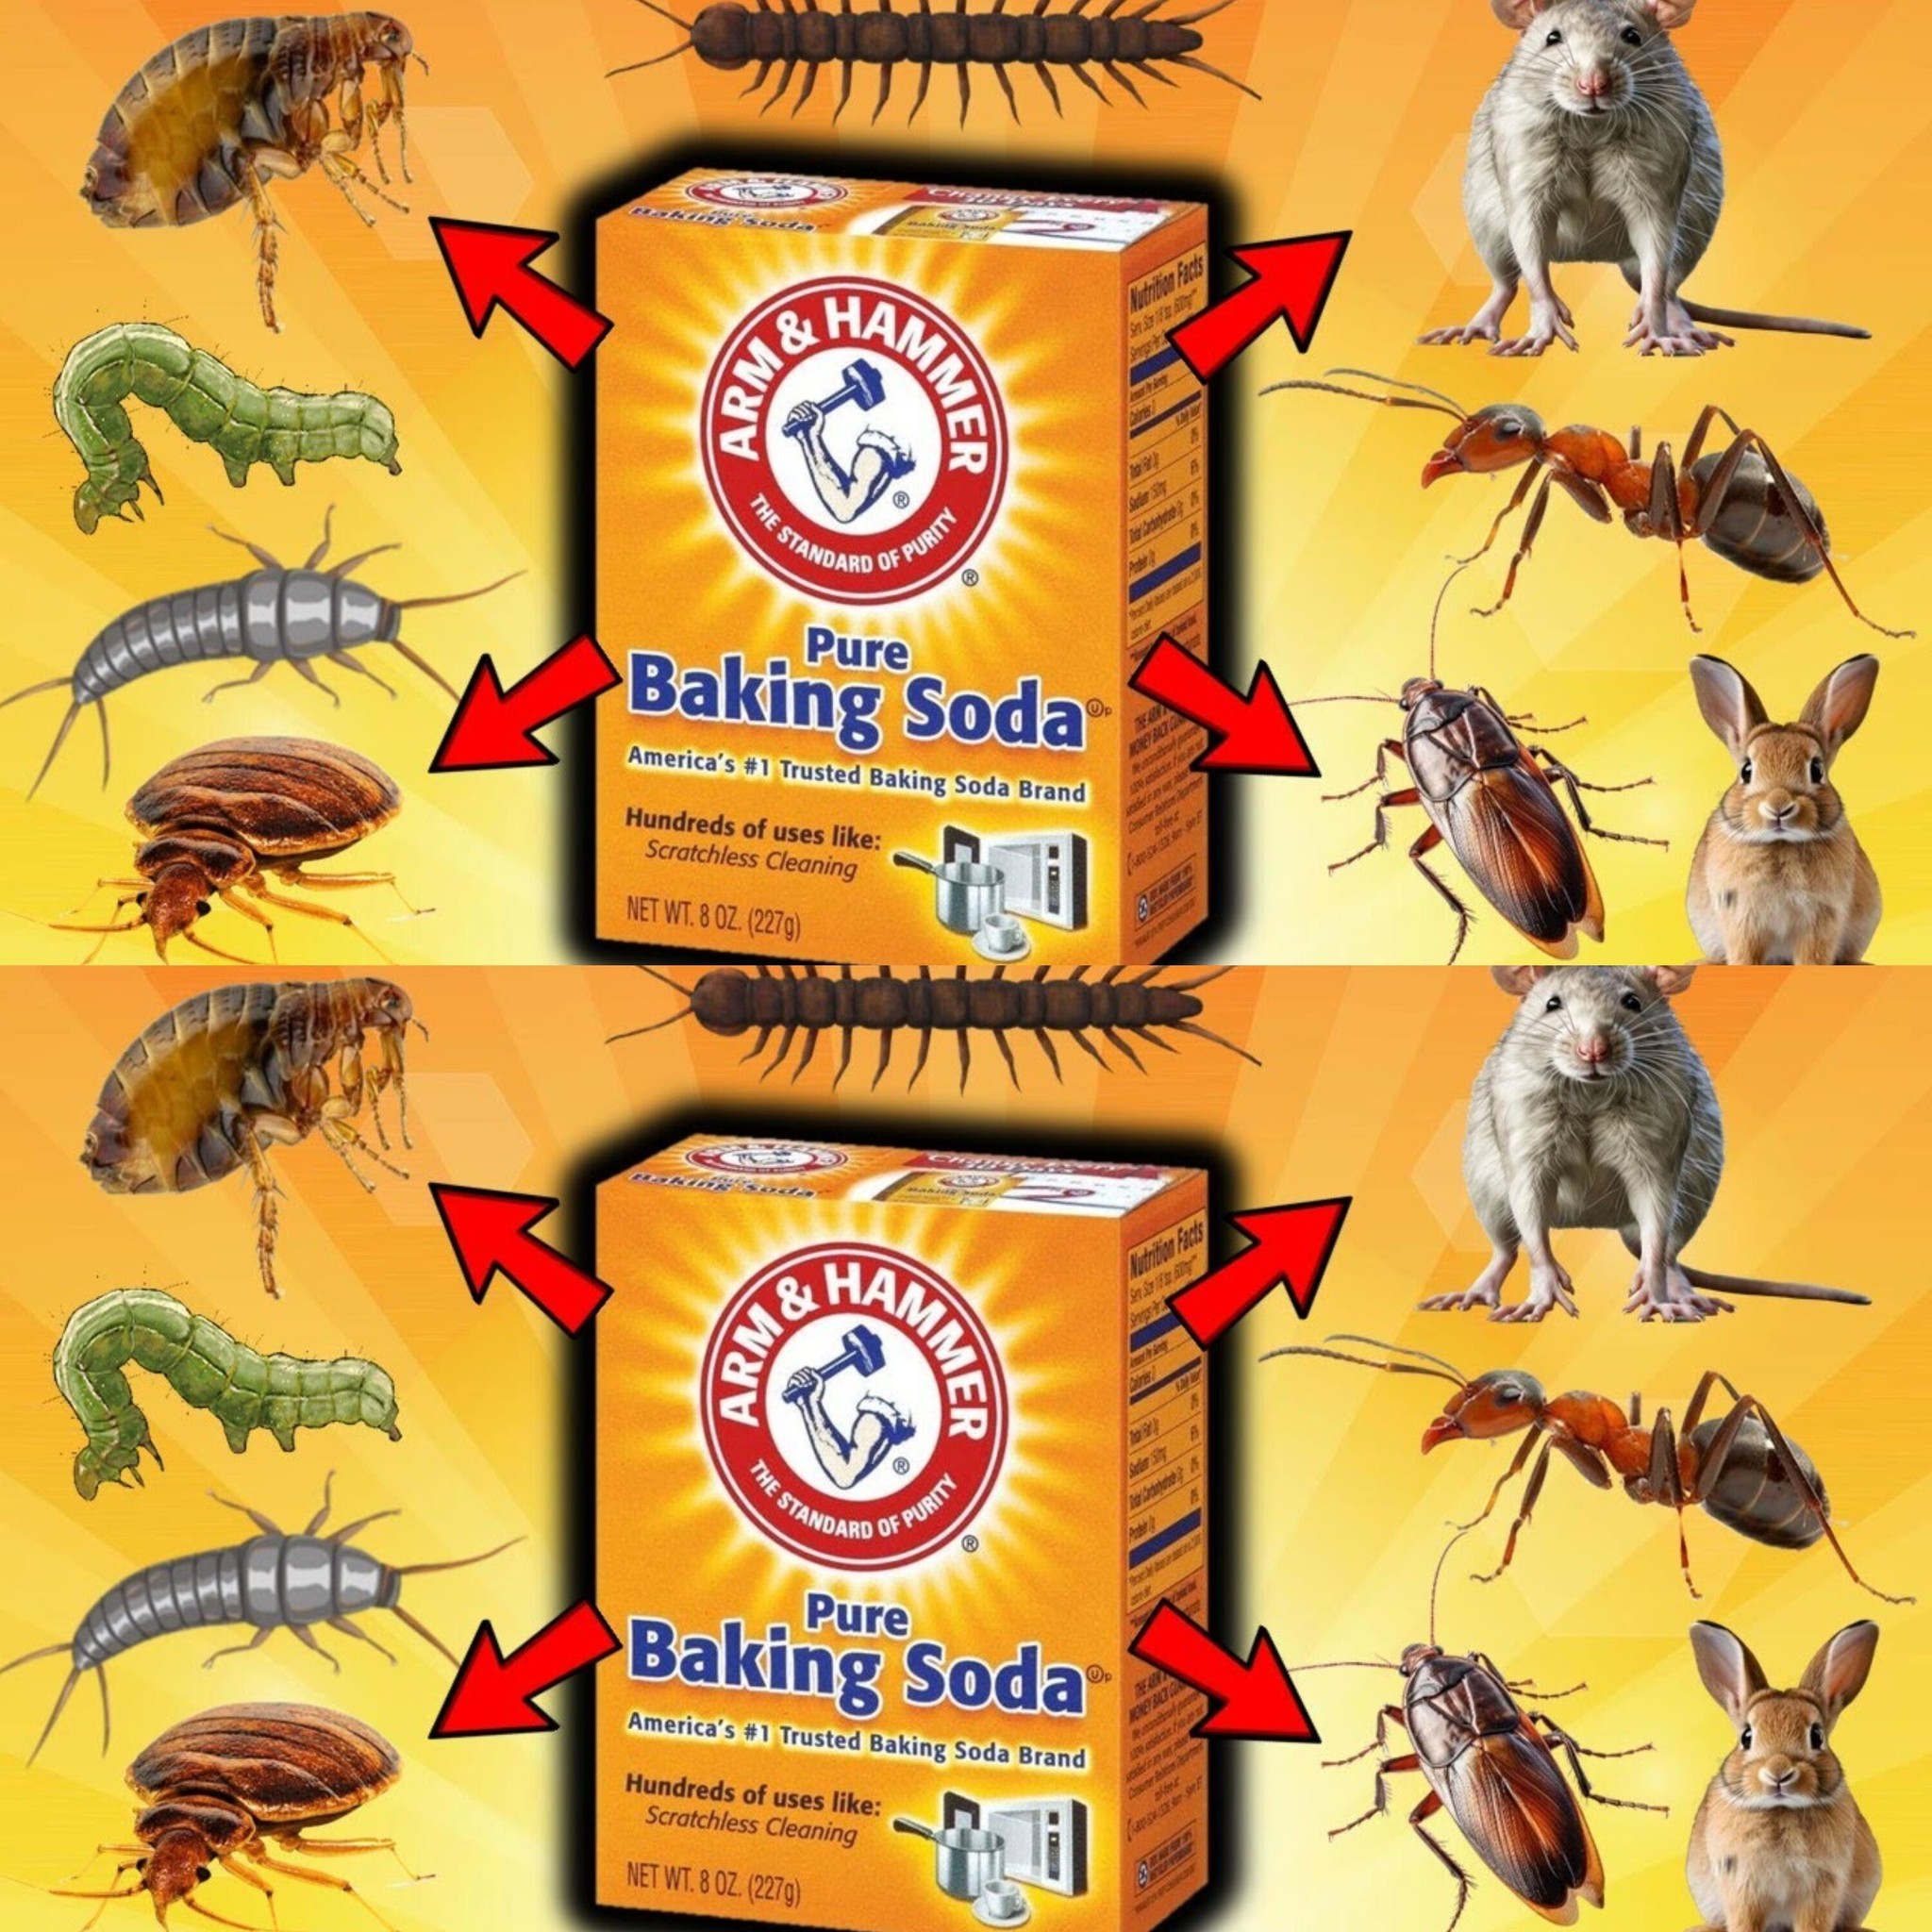
Have you considered utilising baking soda as a means of deterring bugs from entering your kitchen? Beyond just fluffy cakes and housecleaning, that little box of baking soda has other uses. It is very effective in controlling pests. Baking soda may be useful if you have flea, mouse, or ant infestations.

1. Fleas: If you have pets at home, fleas can be a nuisance. Mix the same amount of baking soda and salt, then apply the mixture to your carpets and pet bedding to get rid of fleas. The mixture kills the fleas by causing their bodies to dry out. A few hours later, thoroughly clean the area to get rid of all the fleas and their eggs.

2.mice and rats:The taste and smell of baking soda is extremely repulsive to mice and rats. Place baking soda in areas you believe mice and rats frequent, or combine it with a small amount of sugar to attract them to the bait. When insects consume it, the baking soda reacts with the acid in their stomachs, creating internal issues.

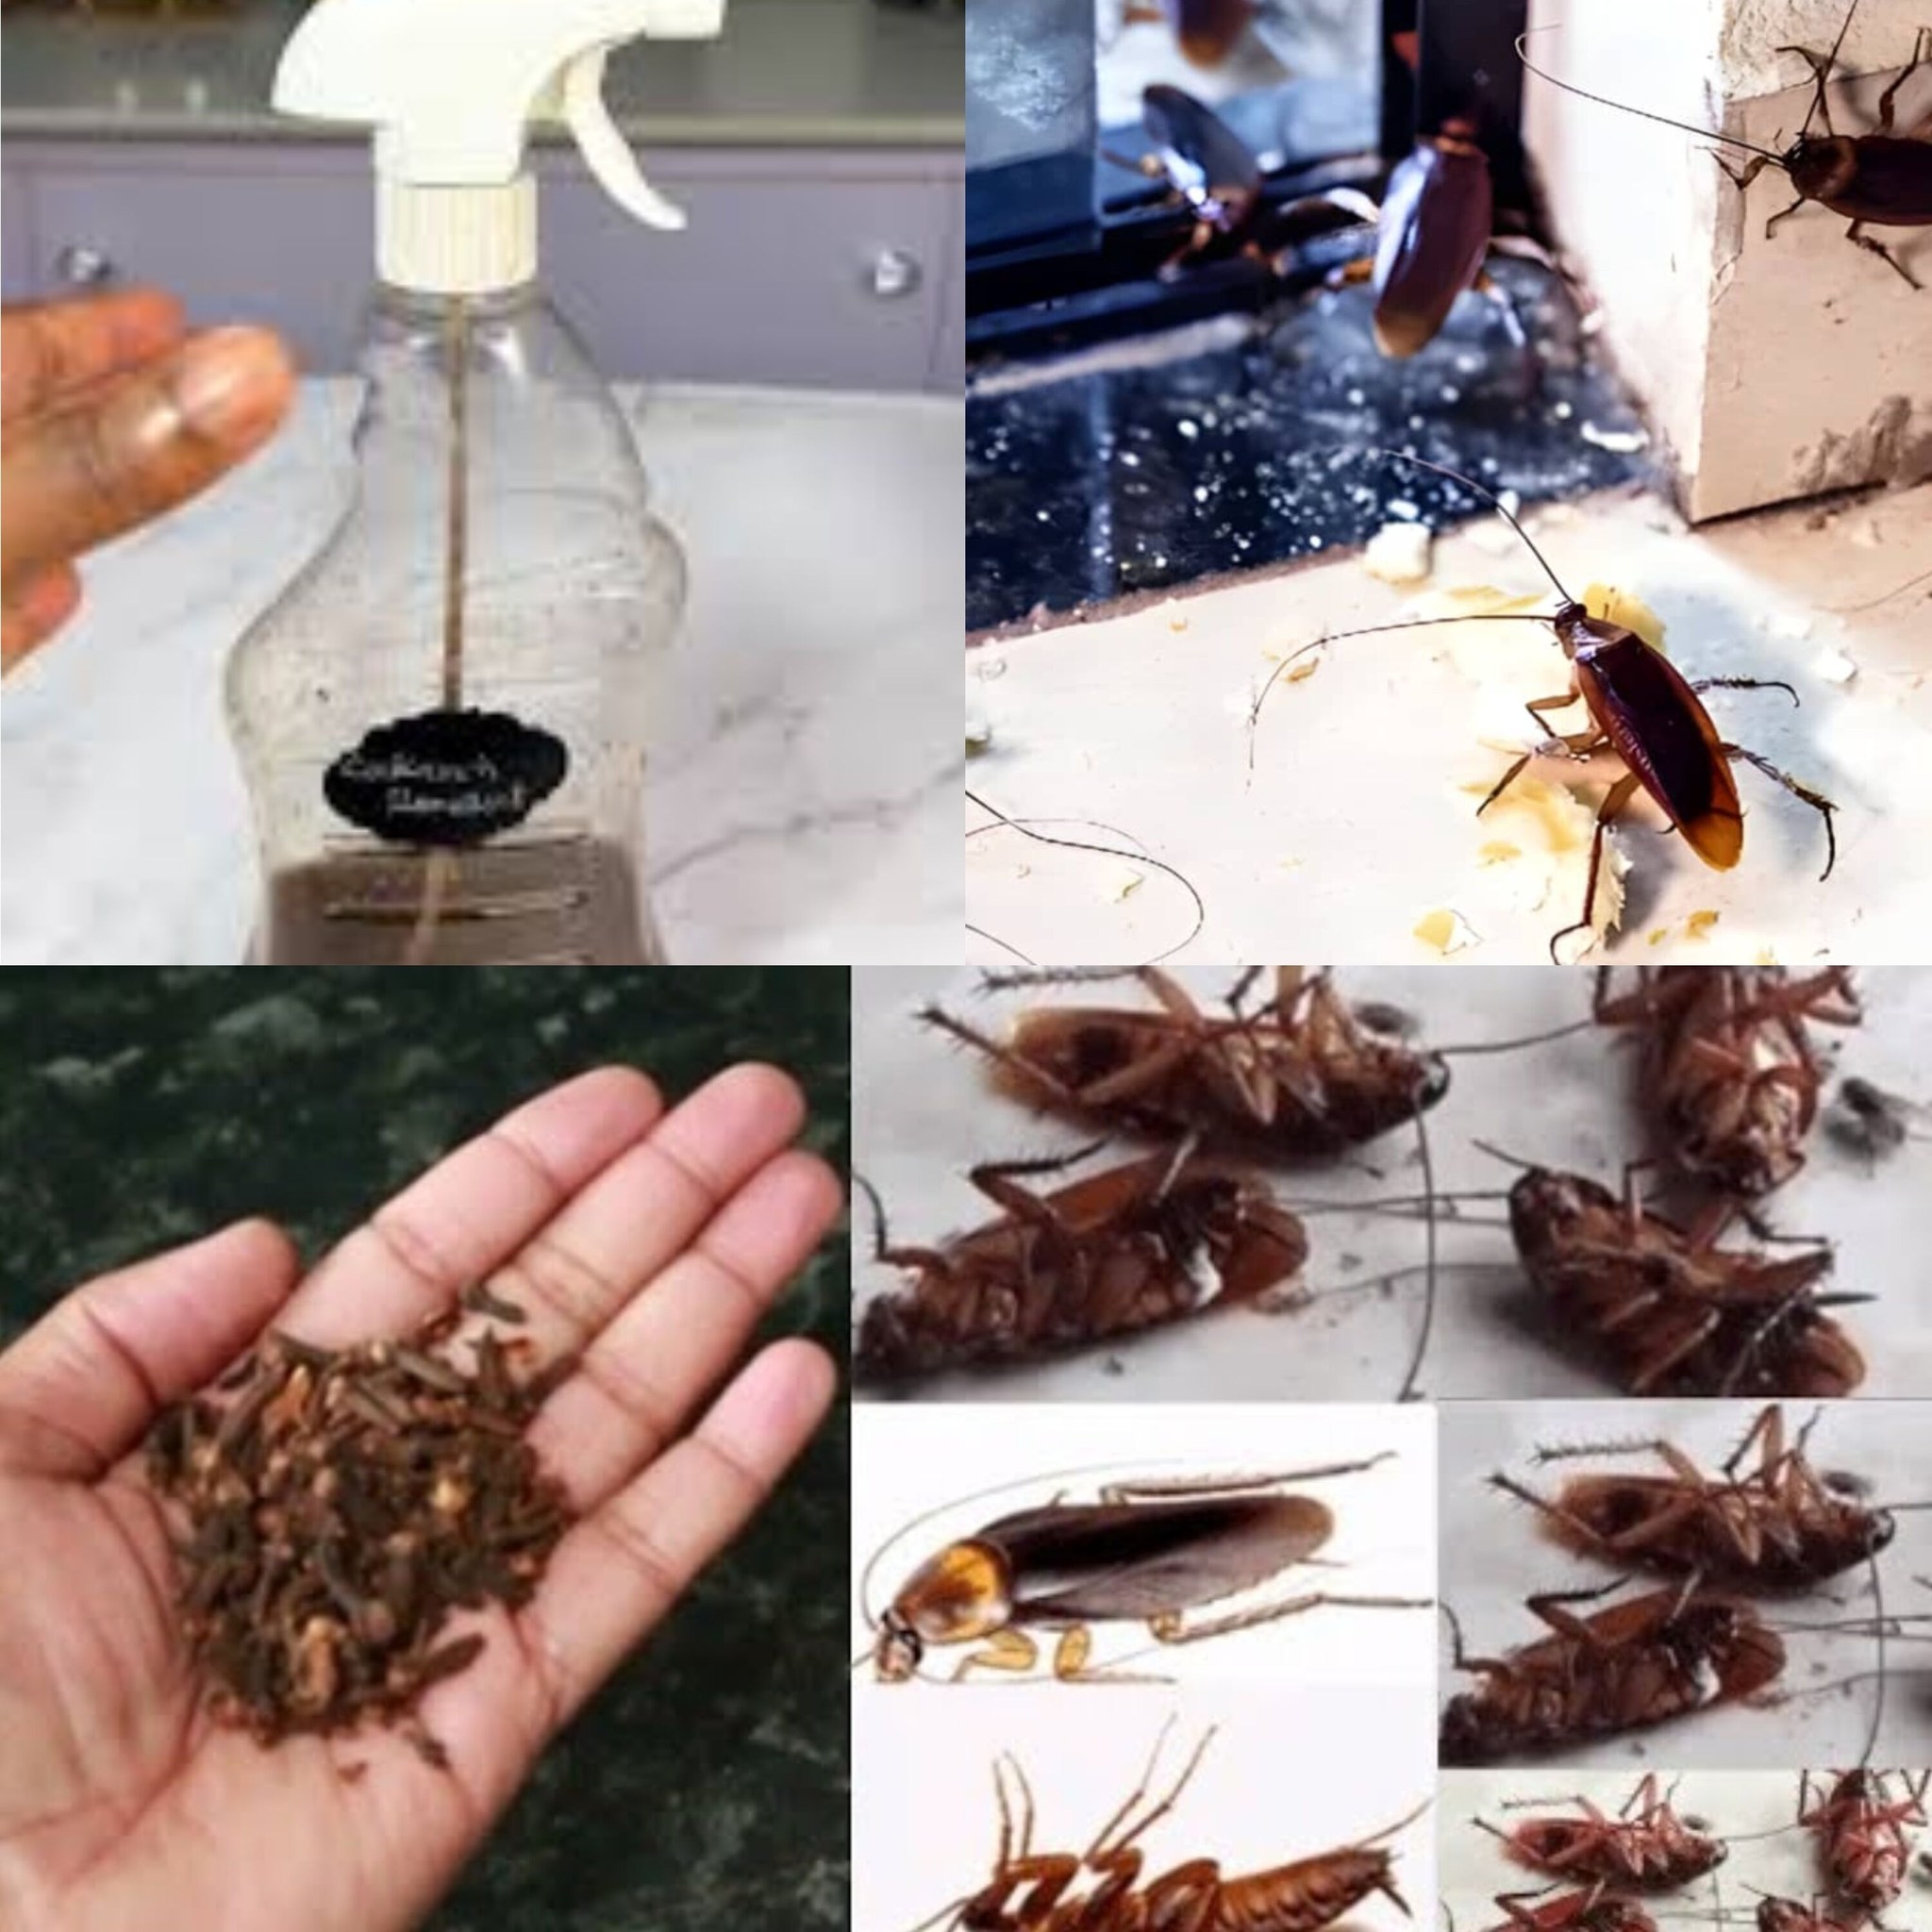
3. Cockroaches: Although they can be challenging to get rid of, baking soda can also be helpful in this regard. To attract cockroaches, mix sugar and baking soda to the equal proportion. Due to their attraction to the sugar, they may unintentionally consume the baking soda, which could be fatal to them. Place this mixture in the vicinity of any suspected pest entry points or hiding places.

4. Like cockroaches, ants are attracted to sweet materials. To reduce the number of ants, combine powdered sugar and baking soda and place it where you see them. The little bits are carried by the ants to their dwelling, assisting in ant population control.

5. Centipedes and bedbugs: Sprinkle baking soda on beds, bed frames, and other bedbug-infested areas. Bedbugs are dried out by baking soda because it absorbs moisture from their bodies. Dust the locations where centipedes reside with baking soda to keep them away.

Using Baking Soda Safely: Use caution when using baking soda, even if it’s safer than chemical pesticides. When using it for pest management, make sure there is adequate ventilation and keep it out of the reach of children and dogs.

By using these simple tips, baking soda can be an effective pest-controlling solution that leaves your home bug-free and more livable. The next time you visit the store, think about purchasing one extra box. This works well for eliminating bugs in addition to baking.


What Happens To Your Body When You Eat Cinnamon Every Day

What Happens To Your Body When You Eat Cinnamon Every Day

Many meals benefit from the warmth and flavour that cinnamon brings, but did you know that it also has several health benefits? Your body will benefit greatly from including a small amount of cinnamon in your daily routine. Let’s investigate the effects of consuming cinnamon on a daily basis.

instructions

  • Enhances Weight Loss and Metabolism
    Since cinnamon is known to increase metabolism, it may aid in managing weight. It has ingredients that help the body better metabolise carbs, which results in more stable blood sugar levels and lessened cravings for sweets. A dash of cinnamon mixed into your breakfast will help you maintain a consistent level of energy all day.
  • Encourages Heart Health
    Maintaining heart health is important, and cinnamon can help. It has been demonstrated that this spice lowers bad cholesterol (LDL) while maintaining steady levels of good cholesterol (HDL). Additionally, it contains anti-inflammatory qualities that may aid in the prevention of heart disease-causing illnesses. Taking a regular amount of cinnamon may be a very easy method to help your heart.
  • Boosts Mental Performance
    Antioxidants found in abundance in cinnamon can shield the brain from oxidative stress, a factor in cognitive loss. According to certain research, cinnamon may help with memory and brain function in general. Including cinnamon in your diet may assist maintain mental clarity and alertness.
  • Combats Infections
    Because of its inherent antibacterial qualities, cinnamon can help ward against fungus and bacteria. Because cinnamon kills dangerous germs in the mouth, it can prevent cavities and lessen bad breath, which can be especially helpful for preserving dental health.
  • control levels of blood sugar
    Blood sugar regulation is one of cinnamon’s most well-known health advantages. For people who are controlling their diabetes, this is really crucial. Cinnamon increases the hormone insulin’s sensitivity, which regulates blood sugar. By incorporating cinnamon into your diet on a regular basis, you can help prevent blood sugar spikes and crashes.
  • Cuts Down on Inflammation
    Numerous medical conditions, such as arthritis and several types of cancer, are associated with chronic inflammation. By reducing inflammation in the body, cinnamon’s anti-inflammatory qualities may help prevent these disorders from occurring in the first place and ease the symptoms of individuals who are already afflicted.

How to Include Cinnamon in Your Meal Plan
It’s simple and tasty to incorporate cinnamon into your everyday routine. You can use it in baking, in coffee or tea or sprinkled over cereal or muesli in the morning. Significant health advantages can be obtained even in modest doses.

In summary
There are several ways that eating cinnamon on a daily basis can improve your health, including blood sugar regulation, brain function, and heart health support. It’s an easy, delicious addition to your diet that can have a significant impact. So go ahead and add a dash of cinnamon to your meals and enjoy the health benefits it provides.

Ginger Tea 100% Relief in 2 Minutes The Best Home Remedy for Cold, Cough & Sore Throat

Ginger Tea 100% Relief in 2 Minutes  The Best Home Remedy for Cold, Cough & Sore Throat

There’s nothing quite like a warm, comforting cup of ginger tea to help when you’re sick with a cold, cough, or sore throat. This straightforward yet effective home cure, which is sometimes improved with turmeric, can offer prompt and significant relief. Let’s examine the benefits of ginger tea and how to prepare it at home for these prevalent illnesses.

  • GINGER’S HEALING POWER
    For millennia, ginger has been utilised for its therapeutic qualities. Its abundance of anti-inflammatory and antioxidant-rich ingredients can help reduce cold and flu symptoms. This explains why ginger tea works so well:
  • RELIEVES PAIN AND TUNSIFIES THROAT
    Ginger is ideal for relieving nasal congestion since it includes substances that function as natural decongestants and antihistamines. Its warming qualities offer nearly immediate relief from sore throats.
  • ELIMINATES COUGH
    Ginger’s anti-inflammatory qualities ease coughing and facilitate mucus expulsion by reducing respiratory tract inflammation. The calming properties of ginger might also lessen the discomfort that causes coughing.
  • IMPROVES IMMUNITY
  • Antioxidants included in ginger help to bolster the immune system. Frequent ingestion helps decrease the duration of colds and keep them from returning by enhancing your body’s ability to fight against infections.
  • TURMERIC: THE IDEAL COUPLE
    Ginger tea’s therapeutic properties are enhanced by adding turmeric. The strong anti-inflammatory and antioxidant qualities of turmeric can help the tea better ward against cold and flu symptoms. It also gives the tea a lovely golden hue and a comforting, earthy flavour.
  • RECIPES FOR TURMERIC GINGER TEA
    It is really simple and takes only a few minutes to make turmeric ginger tea at home. To help you get started, consider this easy recipe:

Components:

  1. One-inch slice or grated fresh ginger (or one-teaspoon ground ginger)
  2. Half a teaspoon of powdered turmeric (or a little slice of fresh turmeric)
  3. two glasses of water
  4. Taste-tested honey and lemon (optional)

Guidelines:

  • In a pot, bring the water to a boil.
  • To the boiling water, add the ginger and turmeric.
  • After lowering the heat, simmer it for ten minutes.
  • In a cup, strain the tea.
  • If you want even more flavour and calming effects, add some honey and lemon.

savoring your tea
Drink this aromatic, warm tea all day, especially when you start to feel sick, cough, or have a sore throat. Turmeric and ginger act together swiftly to provide comfort and relief, making you feel better quicker.

FINAL VERDICT
Turmeric and ginger tea together make a great home cure for sore throats, coughs, and colds. Within a few minutes, its potent anti-inflammatory and immune-stimulating qualities can provide about 100% alleviation. This is a simple-to-make, delicious tea that should be a staple in your natural medicine cupboard. Make yourself a cup of turmeric ginger tea and experience its calming effects. To your well-being, cheers!

Magic Clove

Magic Clove: How to Kill Cockroaches Within 5 Minutes || Home Remedy

Introduction to the Clove Remedy

It can be a frustrating and unpleasant experience to deal with cockroaches. These hardy bugs can be dangerous to your health in addition to being an annoyance. Cockroaches can be killed in a matter of minutes using a natural remedy that uses cloves, even if there are numerous commercial alternatives available. Let’s examine the effectiveness of this miracle clove treatment and how to apply it to prevent roaches in your house.

Why Cloves Are Effective Against Roaches

Eugenol, a potent substance with insecticidal qualities, is found in cloves. Cockroaches are strongly repelled by the potent clove scent, and contact with the eugenol can result in their death. Because of this, cloves are a great natural substitute for chemical insecticides.

How to Use Cloves to Kill Cockroaches

Ingredients:

Whole cloves

Clove essential oil (optional, for enhanced effect)

Instructions:

1. Identify Problem Areas: Determine which locations are most frequently visited by cockroaches. Usually found in bathrooms, kitchens, and moist, gloomy areas of your house.

2.Spread Whole Cloves: Disperse whole cloves throughout the cockroach-infested locations. Particular attention should be given to any cracks or crevices, beneath sinks, behind appliances, and corners.

3. Use Clove Oil (Optional): You can improve the cure by adding clove essential oil for a more potent result. Use a spray bottle to combine a few drops of clove oil and water, then mist the affected regions.

4. Watch and observe: You ought to observe effects in a matter of minutes. The eugenol will immediately kill the cockroaches while the cloves’ potent fragrance will drive them away.

After the cockroaches have died, tidy up the area and get rid of the leftovers. To prevent new cockroaches from entering your home, maintain using cloves as a preventive precaution.

Extra Tips

Mix with more Natural Remedies: To take a more thorough approach, mix cloves with neem oil or bay leaves, two more natural repellents.

Preserve Cleanliness: Food and moisture draw cockroaches. To lessen their appeal, keep your house tidy, store food in airtight containers, and repair any leaks.

Frequent Application: To keep clove oil effective, swap out the cloves on a frequent basis and reapply it as necessary.

Conclusion:

Cloves work well and are safe and non-toxic as a natural way to get rid of cockroaches. Without using harsh chemicals, you can rapidly get rid of these pests by using this easy procedure. Try this miracle clove treatment and enjoy your home free of roaches. It’s a cheap, simple, and effective natural solution. Cheers to a life without pests!


AIR FRYER APPLE RING DOUGHNUT

AIR FRYER APPLE RING DOUGHNUT

Make sure you try these Air Fryer Apple Ring Doughnuts this autumn! Although they are easy to prepare, these apple ring doughnuts are a delicious treat for everyone. Apple rings are air-fried, covered in cinnamon sugar, then dipped in vegan batter. These tasty and crispy plant-based fritters are great for a snack or dessert.

The most wonderful time of year has here; in addition to the vibrant and happy holidays of Navratri, Diwali, and Halloween, autumn also heralds bountiful crops such as apples, pumpkins, and cauliflower that are available for purchase.

These “Air Fryer Apple Ring Doughnuts” ingredients were inspired by the way the light is shifting in colour and the cosiness that follows.


ingredients

Two apples
100 grammes of flour that self-raises
One spoonful of sugar
50 ml plant-based milk
A 40–50 ml sparkling water bottle
One teaspoon of powdered cinnamon
one-third cup sugar
Four tablespoons of oil

instructions

  • Combine 1 TBSP sugar and flour in a bowl, mixing thoroughly.
  • One tablespoon sugar and 100 grammes of self-raising flour
  • Mix the cinnamon powder and sugar in a separate bowl.
  • 1/3 cup sugar and 1 tsp powdered cinnamon
  • After cleaning and drying the apples, use an apple corer to extract the core and a sharp knife to peel them.
  • Don’t cut the apples too thin or too thick.
    Two apples
  • After beating in the milk and flour combination, gradually stir in the sparkling water; you may not need to use all of it.
  • 40–50 ml sparkling water and 50 ml milk
    Avoid Prepare the thin batter.
  • Make sure the apple rings are thoroughly covered after dipping them in the batter.
  • Wrap round parchment paper around the air fryer.
  • Give the paper a generous coating of oil, and then carefully place one coated apple ring at a time.
    Four tablespoons of oil
  • Dredge the apple rings in oil using a pastry brush.
    For 10 to 12 minutes, air fried at 370 degrees Fahrenheit (190 degrees Celsius), rotating halfway through. Reapply oil if needed.
  • When finished, take them out and immediately roll them in the cinnamon sugar.

AIR FRYER ROASTED CASHEWS

AIR FRYER ROASTED CASHEWS

These straightforward and easy air fryer roasted cashews are the ideal little treat—crunch and just the right amount of salt. Perfectly roasted in just a few minutes with an air fryer, while keeping your kitchen cool.

I’m constantly on the lookout for new and varied snacks. a tasty and entertaining new method of feeding my clan. This is made possible by the air fryer. Nuts make an enjoyable snack. This is a simple and quick recipe that yields delicious cashews that you can eat on their own or as a topping for salads. You just need a handful of cashews to get started, as they are an excellent source of protein.


I know that when I roast nuts in my air fryer—in this example, cashews—I’m providing my family with a tasty and nutritious snack that goes well with salads. With the air fryer, you may combine flavours and nuts in countless ways. The finest aspect of it is

It’s easy: just pick your nuts, sprinkle them with some olive oil and pepper, and voila!
Simple: No need for a complex, in-depth combination. What your family like, do it.
Delicious: With so many flavours available, customise the flavour so that everyone in your family would love it and want more.

Components

  1. two cups uncooked cashews
  2. Two tsp olive oil
  3. one tsp powdered garlic
  4. One tsp of lemon pepper
  5. One tsp salt

Guidelines

  • Olive oil and cashews should be combined in a big mixing basin.
  • Stir until every cashew has a uniform coating.
    Once the seasonings are equally spread, sprinkle them on and stir.
  • Pour into the air fryer basket, shake, and cook for three minutes at 330 degrees Fahrenheit on the manual setting.
  • Go back to the air fryer and cook for a further two to four minutes, or until golden all over.
  • Before eating, take it out and allow it to cool completely.

AIR FRYER ROASTED MARSHMALLOWS

AIR FRYER ROASTED MARSHMALLOWS

Roasted Marshmallows in an Air Fryer – Have you ever used an air fryer to toast marshmallows? You’re losing out if not! Making them is enjoyable and simple, and the outcomes are outstanding. For a step-by-step tutorial on how to do it, continue reading.

An increasingly common household device is the Air Fryer. For cooking little or delicate foods, like roasted marshmallows, it is ideal. We’ll share our recipe for air fryer roasted marshmallows in this blog article, along with some helpful hints for making them flawless every time. Have fun!

Just in Time
Two minutes for preparation
Cooking Time: 5 minutes
Seven minutes in total

Components

  1. Four huge marshmallows

Guidelines

  • The secret is to line the aluminium foil-lined air fryer basket. Make sure there is absolutely no chance that your aluminium foil will come into contact with the element. If not, your air fryer will either break or catch fire.
  • Just lay the marshmallows on the foil in the air fryer and adjust the heat to 375 degrees Fahrenheit. Cook the marshmallows for three to five minutes, or until they turn golden brown.

The 4 Common Mistakes to Avoid When Drinking Lemon Water

The 4 Common Mistakes to Avoid When Drinking Lemon Water

A common option for people looking to refresh themselves during the day is lemon water. It is well-known for its possible health advantages, which include improving hydration, promoting better digestion, and offering a dose of vitamin C. Its simplicity belies a few common hazards, though, which can lessen its advantages or even create discomfort. Let’s examine four blunders to stay away from when introducing lemon water into your daily regimen.

1. Excessive Use of Lemon Juice

  • Lemons are a great source of antioxidants and vitamin C, but consuming excessive amounts of lemon juice might cause more harm than good. overly much lemon juice in your water might make it overly acidic, which can erode your teeth’s enamel or create upset stomach.
  • Advice: For each large glass of water, squeeze in the juice of around half a lemon. This ratio offers flavour and health advantages without the drawbacks of excessive acidity.

2. Taking a Sip of Lemon Water Too Soon

  • When using lemon water, timing is crucial. Many people think that drinking it first thing in the morning helps the body detoxify and aids with digestion. On the other hand, consuming lemon water when you’re empty-handed could raise your stomach’s acidity and cause irritation or heartburn.
  • Advice: If you’re sensitive to acidic foods, start with a lower dilution or try sipping lemon water after meals to buffer the acid.

3. Avoiding Using New Lemons

  • It’s common to reach for pre-squeezed lemon juice or concentrates, but these lack many of the natural enzymes and flavonoids present in fresh lemons and frequently contain preservatives.
  • Always use fresh lemons when squeezing them into your drink. They taste better, but they also include more of the healthy ingredients that make lemon water so popular.

4. Disregarding Dental Health

  • In time, the citric acid in lemon water can dissolve tooth enamel, increasing the susceptibility of your teeth to decay. While you don’t have to give it up completely, you should reduce the hazards.
  • To reduce touch with your teeth, try drinking lemon water with a straw. After drinking, rinse your mouth with plain water and wait a little before brushing your teeth to prevent abrasive brushing on fragile enamel.

In summary
When utilised properly, lemon water is a great supplement to your daily regimen. You can get all the rewards without having to deal with any of the downsides if you steer clear of these typical blunders. Cheers to many more drinks!

Harnessing the Power of Fig Leaves A Natural Remedy for Diabetes and More

Harnessing the Power of Fig Leaves A Natural Remedy for Diabetes and More

The common fig leaf is a useful tool that is sometimes disregarded in the search for natural health remedies. The leaves of the fig tree provide a variety of therapeutic qualities that are especially helpful for people with diabetes, even though the fig fruit is well known for its tasty flavour and nutritious advantages.

Fig Leaves: An Organic Diabetes Preventive
The fig tree’s leaves are full with substances that can help control blood sugar levels. They are therefore a useful natural treatment for diabetics. Numerous studies have confirmed that fig leaves are effective at lowering blood sugar levels, and when fig leaves are consistently included in a diabetic’s diet, there may be less need for insulin.

However, fig leaves have advantages beyond regulating blood sugar. Additionally, they have antioxidant qualities that strengthen immunity and guard against oxidative stress, which is connected to a number of chronic illnesses.

Making Fig Leaf Tea: A Straightforward Recipe
Making fig leaf tea is one of the easiest and most productive methods to use fig leaves. This can be appreciated for its health advantages alone, or it can be a great addition to a diabetes treatment regimen. Here’s how to get ready for it:

Components:

  1. Dried or fresh fig leaves

Instructions for Water:

  • If the fig leaves are still fresh, start by cutting them into smaller pieces. Should you be utilising dehydrated leaves, they might already be in an appropriate state for infusion.
  • For every cup of tea, measure out approximately one teaspoon of chopped fig leaves.
  • Place the fig leaves in a pot of boiling water. Give them a good fifteen minutes to simmer. This procedure aids in removing the advantageous substances from the leaves.
  • Once the tea has simmered, drain it to get rid of the leaf fragments.
  • Warm tea should be served. It is advised to consume one to two cups each day to help control blood sugar.
  • This tea is a delightful beverage to sip at any time of day because it not only lowers blood sugar levels but also has a calming impact on the body.

Fig Leaves’ Other Health Benefits

  • Apart from its ability to lower blood sugar, fig leaves offer numerous additional health advantages. They benefit the digestive system and urinary tract since they naturally laxify and diuretic. They can help lower blood levels of cholesterol and triglycerides, as well as relieve the symptoms of ulcers.
  • Furthermore, because it contains proteolytic enzymes, fig leaf sap—the milky liquid that is removed from the leaves—is well renowned for its capacity to eradicate warts. For this aim, it has been applied topically, offering a natural substitute for chemical therapies.

Security and Suggestions
Although fig leaves are typically safe to eat, it’s crucial that people with diabetes who are currently on medication or insulin therapy speak with their doctor before adding fig leaf tea to their regimen. This guarantees the balance and efficacy of their entire treatment strategy.

Fig leaves are more than just a component of the delicious fruit-bearing tree. They are a veritable powerhouse of health benefits, especially for diabetics. A more natural approach to health and wellness can be adopted by include fig leaf tea in your diet. Fig leaves present a viable and adaptable solution, whether your goal is to control your blood sugar levels or just learn more about the advantages of natural therapies.

The Unexpected Advantages of Putting Salt on Your Broom at Night

The Unexpected Advantages of Putting Salt on Your Broom at Night

a text’s opening. Is there a tradition of salted brooms before sweeping? This unconventional tip might sound like a fiction, but it has unforeseen benefits that can help you clean more effectively. Let’s investigate the effects of sprinkling a small amount of salt on your broom at night and how this can facilitate your daily cleaning duties.

Why do people coat their brooms in salt? Because of its texture and chemical makeup, salt is useful for a variety of household duties in addition to cooking. It has various benefits that when applied to a broom can enhance its cleaning capabilities and assist in maintaining a neat environment.

Benefits of Applying Salt to Your Broom

  • Enhanced Cleaning Capability: Salt acts as a mild scrubber, which facilitates the removal of dirt and grime when sweeping. This works well for cleaning uneven surfaces or areas where dirt tends to accumulate.
  • Benefit of Deodorizing: Odors are naturally eliminated by salt. You may assist eliminate unpleasant odors from your carpets and floors by using a broom that has been sprayed with salt.
  • There are qualities in salt that can kill microorganisms. Your home will become healthier if you sprinkle salt on your broom before sweeping. This helps prevent bacteria from growing throughout your house.
  • Unexpectedly, salt works as a pest repellent, keeping ants and other vermin at bay. These pests can be deterred from strolling on your freshly cleaned floors by using a broom sprayed with salt.

How to Clean Your Broom with Salt

Here’s a quick guide on using salt with your broom for optimal results:

  • Dust the bristles of your broom with a small amount of salt. You just need enough to gently cover them, not much at all.
  • To allow the salt to seep into the bristles, try leaving the broom overnight.
  • The next day, clean as normal, paying special attention to areas where odors and grime collect.

Concluding remarks Although it might seem insignificant, adding salt to your broom can make a big difference in how thoroughly you clean. In addition to keeping things tidy and hygienic, this easy-to-use and reasonably priced approach adds a startling benefit to your everyday chores. Tonight, give it a try, and prepare to be astonished by the results!