Air fryer Garlic Butter Roasted Mushrooms

Air fryer Garlic Butter Roasted Mushrooms

Ingredients:

  1. one pound of mushrooms (about 450 grammes) (cremini mushrooms or button mushrooms are good options).
  2. Olive oil, two tablespoons’ worth
  3. 2 cloves of garlic, chopped up
  4. 1 teaspoon of thyme when dried
  5. 1.5 milligrams of paprika
  6. To taste, season with salt and pepper
  7. Not required: To garnish, fresh parsley is used.

Details to follow:

  • Purify and prepare the mushrooms: In order to remove any dirt from the mushrooms, you can clean them with a damp cloth or a gentle brush.
  • To prepare the mushrooms, remove the stems and cut them into half or quarters, depending on the size of the mushrooms.
  • Infuse with: Olive oil, minced garlic, dried thyme, paprika, crushed black pepper, and salt should be mixed together in a basin.
  • Toss the mushrooms in the bowl until they are completely covered with the marinade. Add the mushrooms to the bowl. After allowing them to marinade for at least fifteen to twenty minutes, the flavors will begin to develop.
  • First, preheat the air fryer .For a few minutes, get the temperature of your air fryer up to 375 degrees Fahrenheit (190 degrees Celsius).
  • Place the mushrooms that have been marinated in the basket of the air fryer and spread them out in a single layer so that they cook evenly.
  • Cook the mushrooms for twelve to fifteen minutes, shaking the basket or tossing them halfway through the cooking process to ensure that they cook evenly.
  • You should check the mushrooms to see if they are done. They should be golden brown and crispy on the edges. The cooking time should be adjusted as necessary.
  • At this point, remove the mushrooms from the air fryer and place them in a plate that is designated for serving.
    Should you so want, garnish with some fresh parsley.

Air Fryer Chilli Chicken

Air Fryer Chilli Chicken

You can achieve really crispy chicken without deep frying by using this recipe for air fryer chilli chicken thighs! After giving your chicken thighs a dry rub, air fried them for around 16 minutes, rotating them midway. It really is that easy.

You and we both adore air-frying chicken thighs! One of our most well-liked recipes for air fryers is this one, and a tonne of you have cooked it time and time again, giving it 5-star ratings.

The air fryer is going to transform your life if you are used to cooking baked or grilled chicken thighs till they are delicious and crispy. I really do mean it when I say these are extremely crispy!

The best part is that you don’t need to use as much oil when cooking chicken thighs in an air fryer as you would when deep-frying them. Rather, you apply a small amount of drizzle and let the air fryer do the rest!

Just in Time
Ten minutes for preparation
20 minutes for cooking
30 minutes in total

ingredients  for Air Fryer Chili Chicken

  1. Bone-in chicken thighs, 2 pounds (we used 4)
    half a spoonful of powdered garlic
  2. Two tsp of paprika
  3. One tsp of dried thyme
  4. One-half teaspoon salt and two teaspoons brown sugar
  5. Two tsp olive oil
  6. One teaspoon of red pepper or chili flakes

instructions for Air Fryer Chili Chicken

  • Set the air fryer’s temperature to 400 degrees Fahrenheit
  • and apply non-stick cooking spray within the basket.
  • Use a paper towel to pat the chickens dry before preparing them.
  • A person is using a dishtowel to remove the skin from chicken breasts.
  • In a bowl, add the brown sugar, chilli flakes, dried thyme, paprika, garlic powder, and salt. Mix until well blended.
  • After that, cover the chicken thighs with the dry rub. Make sure the whole chicken thigh is coated with the dry rub.
    A white dish with seasoned chicken breasts on it.
  • After putting the chicken thighs in the air fryer, skin side down, coat them with olive oil. If your air fryer is small, you might need to do this in two batches.
  • Depending on the size of your thighs, cook the chicken for a further 6 to 10 minutes after flipping them after 8 minutes in the air fryer.
  • Take the chicken thighs out of the air fryer if the internal temperature reaches 160°F to 165°F and the skin is crispy. Cook the chicken thighs for a further two minutes if you want them to be crispier. Sit the chicken for three to five minutes, then serve.

Air fryer chicken rissoles

Air fryer chicken rissoles

Rissoles prepared in an air fryer have a crispy exterior and a soft, juicy interior, making them not only less fattening but also incredibly tasty. These chicken-y, cheesy, taste bombs with mostly concealed zucchini are going to quickly become a family favourite, especially during the hot months when it seems like too much work to turn on the stove, even for basic pan-frying.

To be honest, I was sceptical about air fryers. What was all the fuss about, considering how many devices come and go (I’ll sell my churros maker to the highest bidder)? I then began experimenting with it. They save half of the cooking periods, which makes them far more energy-efficient than using the oven, and I adore that they’re a secure method to get kids involved in meal preparation and reheating.

Components Air fryer chicken rissoles

  1. 500g Coles Chicken Mince with RSPCA Approval
  2. 25g, or half a cup, of panko crumbs
  3. 40g, or half a cup finely grated Parmesan cheese,
  4. three thinly sliced green shallots, t
  5. wo cloves of garlic,
  6. one egg, and a gentle whisk
  7. One zucchini, finely shredded
  8. Dressing with honey mustard
  9. Two tablespoons of olive oil
  10. One tablespoon of lemon juice
  11. Honey and Dijon mustard, one tablespoon each

INSTRUCTION FOR Air fryer chicken rissoles

  • Display the amount of each ingredient.
  • Step 1: In a large bowl, combine mince, breadcrumbs, parmesan, shallot, garlic, and egg. Add the zucchini to the bowl after squeezing out any extra juice. Once mixed, whisk in the seasoning.
  • Step 2: Form 10 balls out of 1/4 cupfuls of the mixture. Transfer to a lightly oiled tray, then carefully press into rounds that measure 7 cm. To cool, cover and refrigerate for half an hour.
  • Step 3: Mist the air fryer basket and rissoles with oil. Cook for 10 minutes at 180°C, or until cooked through and golden (see note).
  • Step 4: To make the dressing, thoroughly mix the oil, juice, mustard, and honey in a small basin.
  • Step 5: Drizzle the rissoles with the dressing before serving.

Air Fryer Fish & Chips

Air Fryer Fish & Chips

Take pleasure in fish that is crispy without the necessity for deep frying. Air fryer fish is ready in a matter of minutes and is really simple to prepare; it is the ideal accompaniment to some fries.

One of your favourite restaurant meals may be enjoyed in a more nutritious manner by using this recipe for fish and chips prepared in an air fryer. This crispy cod is coated with panko and fried in the air fryer, which eliminates the need for deep frying and results in fish that is precisely done. It is made in a matter of minutes. What a wonderful lunch for the family to enjoy on a weekday.

How About Now?
The preparation time is five minutes.
Ten minutes for cooking
A total of fifteen minutes

INGRIDIENTS FOR Air Fryer Fish & Chips

  1. One-half cup of all-purpose flour
  2. paprika for two tablespoons
  3. One-half teaspoon of garlic powder
  4. ½ teaspoon of salt
  5. and ¼ teaspoon of cracked black pepper
  6. 1 large egg that has been beaten
  7. Panko bread crumbs quantity: ½ cup
  8. 1 kilogramme of fish fillet, sliced into thin strips
  9. Spray tartar sauce with cooking oil preparing it for dishing
  10. For serving purposes, lemon wedges

INSTRUCTION FOR Air Fryer Fish & Chips

  • Flour, paprika, garlic powder, salt, and black pepper should be combined in a small basin and then mixed together. Put the egg that has been beaten into a different bowl, and then put the panko breadcrumbs into a third bowl.
  • A paper towel should be used to pat the fish dry. To ensure that the panko breadcrumbs adhere to the fish, first coat it with the flour mixture, then the egg, and then the panko breadcrumbs. Press down softly until the crumbs adhere. Oil should be sprayed on both sides.
  • About ten to twelve minutes, air fried at 400 degrees Fahrenheit, flipping halfway through, until the food is crispy and gently brown.
  • To determine whether the food is done to your liking, open the basket and use a fork to test whether it readily peels off. It is possible to bring the fish back for an additional one or two minutes if it is required.
  • Immediately serve with fries and tartar sauce, if preferred, and serve immediately.

Smooth Steps Ahead: Heal Cracked Heels with Toothpaste in Just 3 Days

Smooth Steps Ahead: Heal Cracked Heels with Toothpaste in Just 3 Days

In the beginning Are you prepared to transform hard, cracked heels into smooth, gorgeous feet in a short amount of time and with little effort? Whether you choose to believe it or not, a ubiquitous item found in bathrooms—your toothpaste—could very well be the key to your success. Allow me to introduce you to a straightforward home remedy that, with just a few applications, will completely change your heels.

Why Use Toothpaste on Heels That Have Cracks? In addition to its primary purpose of cleaning and exfoliating teeth, toothpaste also possesses elements that can be beneficial to your skin, particularly when applied to heels that are rough and cracked. The gentle abrasive properties assist in the removal of dead skin cells, while particular components have the ability to deeply moisturize and revitalize the skin.

This is a step-by-step guide on how to use toothpaste to repair your heels. Your feet will look their best if you utilise this odd yet efficient cure, which is described in the following way:

Day 1: Get Ready and Submit Your Application

  • Before you begin to clean your feet, begin by soaking them in warm water to soften the heels. It is possible to improve the softening effect by adding a small amount of soap or Epsom salt.
  • Apply toothpaste: For optimal results, select a toothpaste that is white and does not contain gel. Apply a generous amount to each heel, paying particular attention to the areas that are the most severe.
  • Cover and allow to sit: To ensure that the toothpaste remains in contact with your skin, you can either wrap your heels in plastic wrap or put on a pair of thick socks instead. In order to give the components time to work their magic, you should leave it on overnight.
  • Repeat the process on day two.
  • In order to remove the toothpaste from your feet, you should wash them with warm water first thing in the morning.
    Repeat the process of applying a new coating of toothpaste by following the same instructions as you did on the other day. When the therapy is complete, cover it once more.

Day 3: The Closing Round of Maintenance and Application

  • Iterate the application process: To guarantee the greatest possible outcomes, please continue to use toothpaste for one more night.
  • After washing off the toothpaste on the third day, apply a high-quality moisturiser or foot lotion to the skin in order to maintain its moisture level and prevent cracks from occurring in the future.

Final Thoughts

  • One bottle of toothpaste and a few nights of therapy are all that are required to make a considerable improvement in the state of cracked heels.
  • Using this straightforward and inexpensive home cure can produce results that are not only immediate but also long-lasting.
  • It is important to remember to moisturize your feet on a daily basis in order to keep them soft and smooth for a great deal of time after the toothpaste treatment has been completed.
  • If you give this straightforward method a shot, you will be able to step into comfort and confidence with your feet that have been revitalized.

Healthy Water with Lemon, Strawberry, Mint, and Cucumber

Healthy Water with Lemon, Strawberry, Mint, and Cucumber

Do you wish to revitalise your energies and experience a sense of revival? Not only is this water recipe with lemon, strawberries, mint, and cucumber delicious, but it is also beneficial for maintaining proper hydration and has a wide range of health advantages at its disposal. With the following instructions, you will be able to manufacture this flavoured water at home and reap the many benefits that it offers.

  • The Advantages of Drinking Water that Has Been Infused with Healthy Ingredients
  • Lemons are loaded with vitamin C, which helps strengthen your immune system, maintain healthy skin, and facilitate digestion. Lemons are also loaded with vitamin C.
  • Strawberries are a fruit that has a mildly sweet flavour and is loaded with antioxidants, vitamins, and minerals that are beneficial to maintaining a healthy heart and maintaining your blood sugar levels under control.
  • The leaves of the mint plant have a bright flavour and can help with digestion as well as alleviate headaches.
  • There is a high concentration of water in cucumbers, and they also include essential nutrients that can assist in reducing swelling and removing toxins from the body.

List of ingredients that are required to produce a dish.
This delicious detox water may be made with the following

ingredients:

  1. 1 quarter of a lemon, sliced very thinly.
  2. Create slices out of five to six strawberries.
  3. ten to twelve fresh stems of mint
  4. 1 small cucumber, in thin slices, chopped into little pieces.
  5. Cubes of ice (if you so desire)
  6. H2O
  7. Apparel
  8. In a large jar or pitcher
  9. For the purpose of combining.
  10. Both a knife and a cutting board

The directions

  • Bring the herbs and fruits to a ready state.
  • It is important to thoroughly clean all fruits and herbs in order to remove any pesticides and dirt.
  • Both the lemon and the cucumber should be sliced very thinly. A few portions of the strawberries should be cut.

Construct the Detox Water by:

  • In a large container, arrange the lemon slices, strawberry slices, cucumber slices, and mint leaves in a layered fashion.
  • Fill the jug to the top with ice water and continue to fill it. Utilise a spoon to gently combine the components in order to achieve a harmonious mixture of flavors.

Take it Easy and Allow Flavour to Develop:

  • If you want your water to be really cold, your pitcher should be filled with ice cubes.
  • For one to two hours, place the detox water in the refrigerator. Because of this, the flavors are able to combine and mingle with the water.

Helping out with:

  • After pouring the detox water into glasses, garnish each glass with a few pieces of fruit and a few mint leaves.
  • Take it to the next level by incorporating a slice of lemon or a tiny sprig of mint into the equation.
  • Suggestions for attaining the most favourable results
    Consume the water that has been infused within one to two days in order to get the most out of its freshness.
  • It is possible to add additional water to the pitcher on multiple occasions until the flavors begin to become less intense.

Remarks to conclude
In addition to being wonderful to drink, this water that contains lemon, strawberry, mint, and cucumber is also beneficial to your health. While you are savoring the exquisite flavors of these fresh ingredients, you can keep your body hydrated and expel toxins in a way that is simple and natural. Excellent for any day when you feel like you need a little energy boost!

Is Coconut Oil Healthy for You

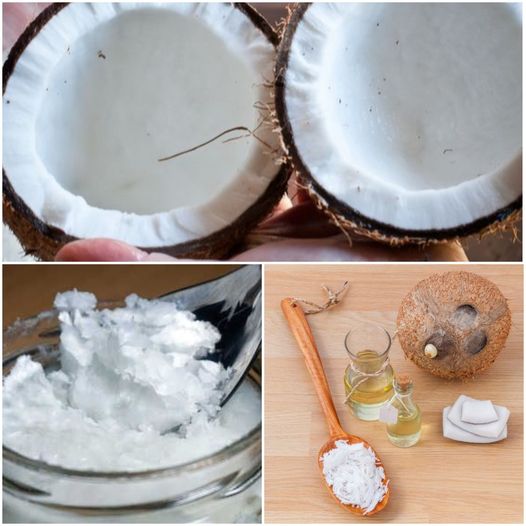
Is Coconut Oil Healthy for You?

In recent times, coconut oil has been a topic of discussion and research due to its reputation as a meal that is extremely beneficial to one’s health. People have begun taking it on a daily basis because of the unique combination of good fats that it contains and the potential health benefits that it may offer. Let’s investigate the reasons for the widespread use of coconut oil and determine whether or not it actually possesses all of the benefits that people claim it does.

Details Regarding the Nutritional Value of Coconut Oil
One of the most notable characteristics of coconut oil is that it is primarily composed of saturated fats, more specifically medium-chain triglycerides (MCTs). Multi-chain triglycerides (MCTs) are digested by the body in a manner that is distinct from that of other forms of saturated fats. They are transported from the digestive tract to the liver in a direct manner. You can use them as a source of quick energy there, or you can turn them into ketones, which are known to have beneficial impacts on the functioning of the brain.

Possible Advantages to Health

  • Improves the Condition of the Heart: However, despite the fact that it contains saturated fat, coconut oil has the ability to increase the levels of HDL cholesterol in your body. This may reduce the likelihood of getting heart problems in the future, according to the findings of several scholarly investigations.
  • When compared to other forms of fatty acids, the medium-chain triglycerides (MCTs) found in coconut oil have the ability to assist your body in burning more calories. The reason for this is that including coconut oil into a weight loss programmed is beneficial.
  • Coconut oil is well-known for its benefits when applied to the exterior of the body, and one of those benefits is that it improves the health of the skin and body hair. For those who suffer from eczema, this lotion is an excellent choice for the skin. When it comes to hair, it has the ability to keep it moisturised and protected, giving it a healthy and shiny appearance.

Properties that are antimicrobial include the ability of lauric acid, which is included in coconut oil, to eradicate dangerous microorganisms such as bacteria, viruses, and fungi. When this is applied to the skin, it has the potential to prevent infections.

Considerations to take into account
Despite the fact that it has a number of benefits, coconut oil is high in both calories and saturated fat. This demonstrates how crucial it is to maintain a moderate stance. When you decide to incorporate coconut oil into your diet, it is essential to do so with caution, ensuring that you also incorporate other healthy fats, such as olive oil and avocados.

  • How to Make Use of Coconut Oil in the Kitchen: Because it is a robust oil that is able to tolerate high temperatures without degrading, it is an excellent choice for both baking and frying the food.
  • To care for your skin, apply it directly to your skin and use it as a moisturizer.
  • It can be used as a natural conditioner or as a mask for dry hair, depending on your preference.

Remarks to conclude
In both your kitchen and your beauty routine, coconut oil is an excellent ingredient to keep on hand. It is most effective when used in moderation, much like any other helpful substance, since its unique fatty acids offer a variety of health benefits; nonetheless, it is most successful when used in moderation. Coconut oil has the potential to improve the quality of your life in a variety of ways, regardless of whether you use it in the kitchen or the bathroom.


Cautionary Tips Things to Avoid While Taking Apple Cider Vinegar

Cautionary Tips Things to Avoid While Taking Apple Cider Vinegar

There is a lot of praise for apple cider vinegar (ACV) because of the possible health benefits it offers, including helping people lose weight and boosting their heart health. On the other hand, just like with any other treatment, there are some precautions that you need to follow before introducing apple cider vinegar into your regimen. This is a helpful guide that will help you prevent any potential negative effects and guarantee that you get the most out of the benefits you receive.

  • 1..You should avoid drinking it straight since pure apple cider vinegar is extremely acidic and, if drank without being diluted, can cause damage to the enamel on your teeth or the lining of your oesophagus. At all times, it should be combined with water, often between one teaspoon and one tablespoon in a large glass of water.
  • **2. Refrain from Taking It Right Before Bed: Consuming apple cider vinegar right before going to bed can cause discomfort as well as acid reflux. Consuming apple cider vinegar at least half an hour before going to bed will allow your body to have some time to digest the substance.
  • **3. Do Not Ignore Allergic Reactions: Although allergic reactions to apple cider vinegar are uncommon, they are not impossible to have. After eating apple cider vinegar, you should be on the lookout for any unexpected symptoms, such as a rash, itching, or swelling. If you encounter any of these side effects, you should immediately stop using the product and speak with a healthcare provider.
  • 4..A direct application of apple cider vinegar to the skin might result in burns or irritation, particularly if the skin is sensitive. Therefore, it is important to avoid using it on skin that has not been protected. Before applying it to your skin, you should always dilute it with water, and you should also think about performing a patch test on a small area ahead of time.
  • 5. Avoid Consuming Excessive Amounts: Consuming excessive amounts of apple cider vinegar on a regular basis might result in abnormally low potassium levels as well as a loss of bone density. It is important to adhere to the prescribed dosages, which typically do not exceed two tablespoons per day when diluted in water.
  • **6. Do Not Combine It With Certain Medications: Apple cider vinegar has the potential to interact with a number of medications, including those used to treat diabetes and heart disease, as well as laxatives and treatments for these conditions. When beginning to use apple cider vinegar, it is best to discuss the matter with a healthcare provider if you are currently taking any prescription.
  • **7. Do Not Ignore the Importance of Maintaining a Balanced Diet: Although it may be tempting to consider apple cider vinegar as a panacea, it is not a replacement for maintaining a balanced diet overall. Take use of it as a supplement to a healthy lifestyle that incorporates a wide range of meals.

conclusion

If you adhere to these rules, you will be able to incorporate apple cider vinegar into your daily routine on a risk-free basis, allowing you to reap the potential health advantages of this substance without experiencing any adverse effects. Keep in mind that the key to getting the most out of this natural medicine is to use it in moderation and in the correct manner.

The Benefits of Raisin Water for Liver Cleansing

The Benefits of Raisin Water for Liver Cleansing

Do you have an interest in learning about natural strategies to promote the health of your liver? Raisin water is a straightforward and time-honored therapy that has the potential to provide your liver with the gentle boost it need. When it comes to the health of your liver, this tasty beverage is not only simple to prepare but also provides a multitude of various advantages.

Raisins, which are tasty small grapes that have been sun-dried, are loaded with different kinds of antioxidants and critical nutrients. When these nutrients are soaked in water, they become infused in the liquid, which results in the creation of a tonic that can assist in the cleansing and detoxification of your liver. Removing toxins from the body and enhancing liver function are also possible outcomes of this process.

Instructions on How to Make Raisin Oil:

  • Choosing the Right Raisins To begin, select raisins of a high grade, ideally organic ones when possible. Take care to ensure that they do not contain any oils or preservatives.
  • Raisins should be soaked by placing approximately 150 grams of raisins in a cup of boiling water and allowing them to soak for a full 24 hours.
  • Bring the Raisins to a boil: The following morning, drain the raisins and bring the water in which they have been soaking to a boil for 20 minutes.
  • Have a delightful drink: You should wait until the water has reached a temperature that is pleasant before you drink it.
  • I recommend drinking sultana water first thing in the morning on an empty stomach for the greatest possible outcomes. By engaging in this activity, you can stimulate your digestive system and increase the amount of nutrients that are absorbed into your body.

conclusion

Not only is drinking water with raisins helpful for the health of your liver, but it also helps you stay hydrated and can be a lovely way to start your day. In the event that you are looking for a natural method to improve the health of your liver or simply want to indulge in something that is both delicious and nourishing, sultana water is a wonderful option to consider. See how it can improve your entire health and well-being by giving it a shot and seeing how it works!

Air fryer Tinned potatoes

Air fryer Tinned potatoes

Air-frying potatoes from a can is a quick and easy way to make the outside crispy while keeping the inside fluffy. Here’s an easy way to make canned potatoes that have been air-fried:

Air-Fry Potatoes in a Can

  1. One 15-ounce can of whole or sliced potatoes, rinsed and patted dry.
  2. 1/2 to 1 tablespoon of cooking spray or olive oil
  3. Add salt and pepper to taste.
  4. Extra seasonings: Things like paprika, garlic powder, and herbs (like thyme or rosemary)

How to Do It:

1. Get the potatoes ready:

  • Drain and Dry: Use paper towels to dry the cooked potatoes after draining them. This step is necessary to get rid of extra water and make the food crispier.
  • Rub the dried potatoes with olive oil or cooking spray after putting them in a bowl. You can add salt, pepper, and any other spices or plants you like, like garlic powder, paprika, or herbs.

2. Fry the potatoes in the air:

  • Warm up the air fryer: For about 5 minutes, heat your air fryer up to 400°F (200°C).
  • Cook in Groups: If your air fryer basket isn’t very big, you might have to cook the potatoes in groups to make sure they cook evenly and get crispy.
  • If you want to air fry the potatoes, put them in the basket of the air fryer in a single layer. Cook at 400°F (200°C) for 15 to 20 minutes, shaking the basket every so often to make sure the food crisps up evenly.
  • Check to See if Done: As the potatoes are cooking down, check on them a few times. The outside should be golden brown and crunchy.
  • Remove and season: Once the potatoes are as crispy as you like them, take them out of the air fryer basket and serve. If you think it needs it, add more salt and pepper.
  • Have fun: You can serve the canned air fryer potatoes as a side dish with your favourite main food. They go well with fish, cooked meats, or a breakfast spread.

How to Do Well:

  • To dry completely: If you want the potatoes to be crispy, make sure they are completely dry before you air fry them.
  • Even Cooking: To make sure the potatoes cook evenly, shake the basket or flip them over halfway through cooking.
  • Variations: To make it taste better, try adding different toppings or spices, such as Parmesan cheese, Italian seasoning, or chilli flakes.

Why this recipe is unique:
Cans of potatoes that have been heated in an air fryer are a quick and easy way to get fried potatoes without having to deep fry them. They cook evenly and get nice and crispy in the air fryer, which is a healthier way to do it than standard frying. This way makes a tasty side dish or snack that you can change up by adding your favourite seasonings. You can use whole or sliced canned potatoes.

You can make a quick and easy side dish or snack by air-frying potatoes that have been canned. Today is a great day for this recipe because it’s easy to make and the potatoes are crispy.