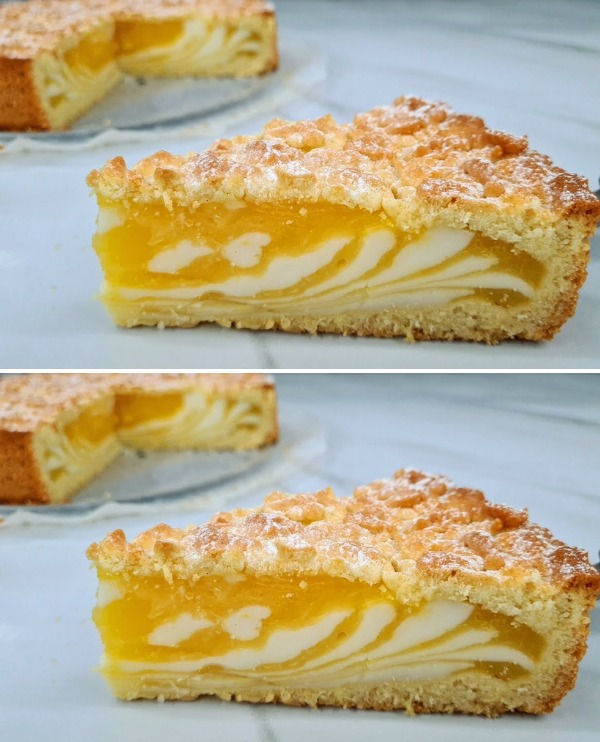
Get Ready to Be Amazed by this Irresistible Orange Cream Pie Better than Apple Pie
Regarding the Dough:**
**Components:**
- – Two eggs
- Five tablespoons (100g) of sugar
- – Eight grams of vanilla sugar
- Five teaspoons (50ml) of oil 🫒
- – Two and a half teaspoons (50g) butter
- – Eight grams of baking powder
- 320 grams of flour
Guidelines:
- 1. In a large mixing basin, thoroughly whisk together 2 eggs, 5 tablespoons sugar, and 8g of vanilla sugar.
- 2. To the egg mixture, add 2.5 teaspoons of melted butter and 5 tablespoons of oil. Blend well.
- 3. Add 320g of flour and 8g of baking powder and sift. Mix until a smooth dough is achieved.
- 4. To chill some of the dough, put it in the freezer for about 20 minutes.
- 5. Use butter to grease a pie form with a 24 cm diameter.
**Ingredients for the Orange Cream:**
- – 500 milliliters (about
- fifty milliliters)
- – Three tablespoons (60g) of sugar
- – 4 tablespoons (70g) of starch
**Guidelines:**
- 1. Place 500 milliliters of orange juice, 3 tablespoons sugar, and 4 teaspoons starch in a pot.
- 2. Over heat, stir constantly until the consistency of the mixture thickens.
- 3. Act swiftly to prevent the mixture from cooling down and becoming difficult to handle.
Regarding the Milk Cream:
Ingredients:
- – Half a liter, or 500 milliliters, of milk
- – Three tablespoons (60g) of sugar;
- four tablespoons (70g) of starch;
- and eight grams of vanilla sugar
Guidelines:
- 1. Transfer 500ml of milk, 3 tablespoons sugar, 4 tablespoons starch, and 8g vanilla sugar into a different pot.
- 2. Over heat, stir constantly until the consistency of the mixture thickens.
- 3. Once more, move swiftly to prevent the mixture from cooling. declining and growing challenging.
To Put the Pie Together:
- 1. Set the oven’s temperature to 180°C (350°F).
- 2. Roll out the cold dough and construct a crust by lining the pie shape with it that has been oiled.
- 3. Evenly distribute the orange cream across the pie shell as you pour it in.
- 4. Next, create layers by pouring the milk cream on top of the orange cream.
- 5. Bake for 25 to 30 minutes, or until the pie is golden brown, in an oven that has been prepared.
- 6. You may decorate the pie by dusting it with powdered sugar once it has cooled.
**Savor your sublime Orange Cream Pie—it’s superior to apple pie!**
Pro Tip: For a cool treat, serve chilled.
Call to Action: Make these delicious pies and share them with the world!