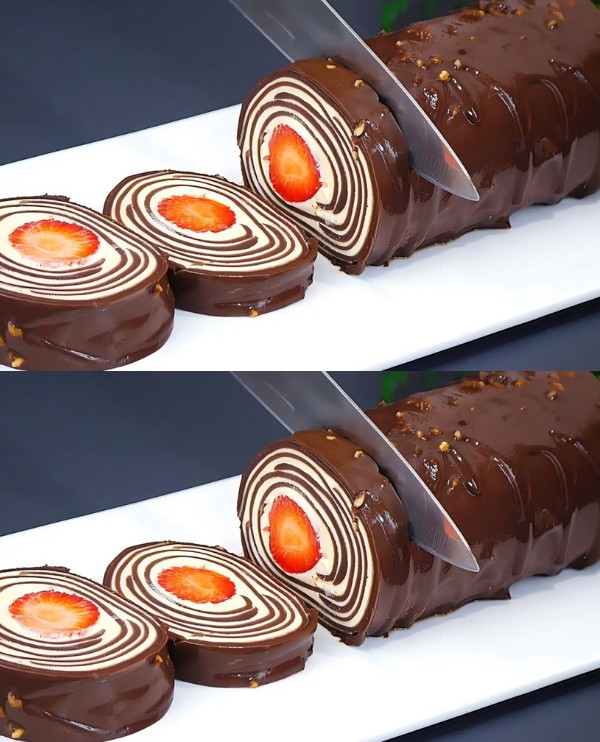
I Haven’t Eaten Sugar in a Year: A Sugar-Free Energy Dessert is a Real Treasure
Sugar-free eating does not have to be devoid of flavor or enjoyment. In addition to being delicious, this sugar-free energy treat delivers a significant nutritional boost. Let’s go into the specifics and discover how to make this healthful treat.
Ingredients
You’ll need the following to prepare this sugar-free energy dessert:
- About 130g of various dried fruits, including raisins, dried cranberries, dried apricots, and dried plums
- 20g of gelatin that dissolves quickly
- fifty grams of walnuts
- 50 grams of peanuts
- 50 grams of pumpkin seeds
- A 350-gram portion of cottage cheese
- Eighty grams of yogurt
Getting the Dried Fruits Ready
- The various dried fruits should first be soaked in water for 15 to 20 minutes. In this phase, preservatives are removed and the fruits are gently hydrated.
- After soaking, spread the fruits out to dry on a paper towel. Put another covering over them. Allow them to air dry with a towel.
- Cut the fruits into tiny pieces after they’re dried to make incorporating them into the dessert simpler.
- Melting the Gelatin
Dissolve 20g of fast-dissolving gelatin in 100g of water while the fruits are drying. Put this mixture away. - Warming Up the Nuts
Roast the pumpkin seeds, peanuts, and walnuts in a pan. To keep them from burning, occasionally stir and toss them. - After roasting, remove the nuts and let them cool .Putting Yogurt and Cottage Cheese Together
- Put 80g of yogurt and 350g of cottage cheese in a big bowl. Using a hand blender, vigorously mix them until a smooth consistency is achieved.
- Adding Gelatin
Melt the combination of gelatin that was previously put aside. - Remove and stir roughly 2 tablespoons of the cheese-yogurt mixture. into the gelatin that has melted.
- Re-pour this gelatin-cheese combination into the basin containing the leftover yogurt-cheese mixture. Use the hand blender to mix it one more. Everything will be held together by the gelatin.
- Blending Nuts, Seeds, and Fruits
In the dish with the cheese and gelatin mixture, add the roasted nuts, pumpkin seeds, and dried fruits. To ensure that all the ingredients are uniformly incorporated, carefully mix them with a ladle. - Forming the Blend
Scoop the mixture onto a piece of saran wrap with care.
Along the length of the wrap, form the mixture into a thick line. - Roll the saran wrap into a tube form by rolling it like you would a sushi.
- To make sure the mixture maintains its form, firmly twist the ends of the saran wrap.
- Cooling off within the refrigerator
To let the mixture solidify, refrigerate it for about two hours after it has been wrapped. - Opening and Cutting
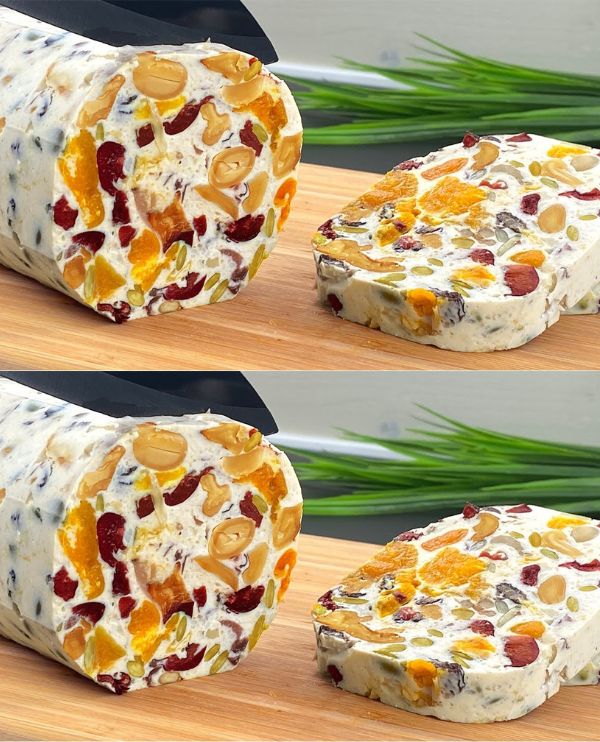
When the dessert is done, take it out of the fridge and open the saran wrap. Cut the dessert into serving sizes. Every slice contains the ideal combination of protein, fiber, natural carbohydrates, and healthy fats.
In summary
Enjoyment and flavor are not sacrificed when eating a sugar-free diet. This sugar-free energy cake demonstrates that you may maintain your sugar-free lifestyle and yet have a tasty reward. This dish, with its wonderful blend of nuts, seeds, and dried fruits, is a nutritional and flavorful treasure trove.