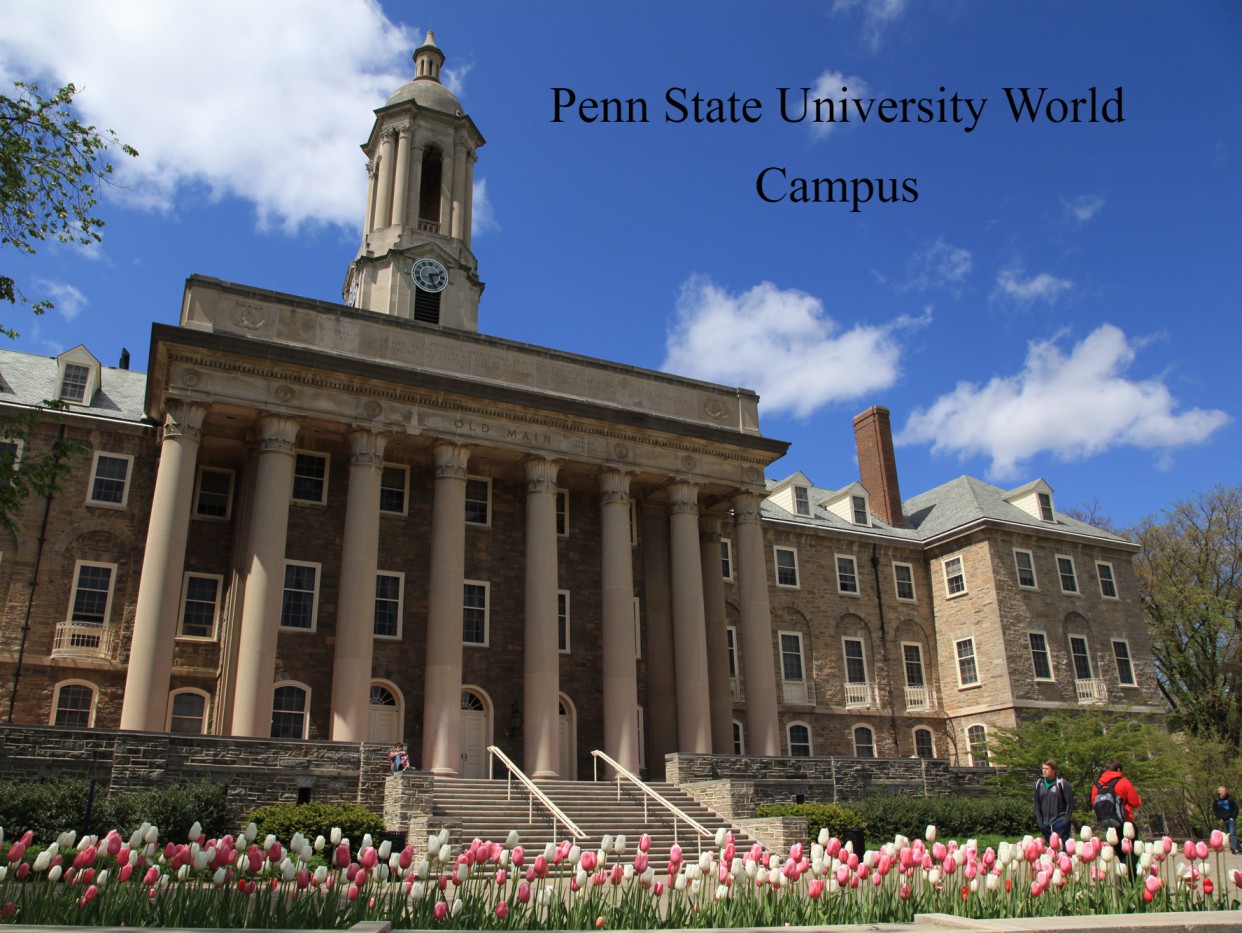
MELT-IN-YOUR-MOUTH CABBAGE FRITTERS, LOW CARB AND KETO FRIENDLY

MELT-IN-YOUR-MOUTH CABBAGE FRITTERS, LOW CARB AND KETO FRIENDLY

MELT-IN-YOUR-MOUTH CABBAGE FRITTERS, LOW CARB AND KETO FRIENDLY

This recipe for tasty cabbage fritters is perfect for a light lunch or dinner. Call them schnitzel, fritters, or pancakes made with cabbage. Everything is the same delectable thing! With cabbage fritters, you can transform regular cabbage into something quite remarkable.

PREP TIME:10 minutes
COOK TIME:10 minutes
TOTAL TIME:20 minutes
Ingredients:
  1. Two cups of finely shredded raw white cabbage
  2. one medium carrot cut finely
  3. two eggs
  4. Two tsp of sour cream
  5. Four tablespoons of all-purpose flour
  6. One-half teaspoon of baking powder
  7. One-half teaspoon of baking soda
  8. 1/2 tsp salt or to taste 1/2 tsp pepper or to taste
  9. Three tablespoons of avocado oil, or your favourite frying oil
  10. Two teaspoons of freshly chopped fresh dill (optional)
  11. One tablespoon of finely chopped green onion (optional)
  12. Two minced garlic cloves (optional)

Instructions:

  1. Give the cabbage a good rinse. Take off the uppermost leaves.
  2. Finely chop the cabbage. I chopped and shredded carrots and cabbage with ease using this food processor.
  3. Using your hands, crush in ½ teaspoon of salt.
  4. After 10 minutes, remove any remaining juice from the cabbage by pressing it out.
  5. Combine the cabbage with grated carrots.
  6. Stir in the eggs, sour cream, flour, baking powder, baking soda, and salt and pepper. Stir well.
  7. Add the herbs, garlic, and green onions, if preferred.
  8. Transfer the mixture into a frying pan that has been heated and coated with vegetable oil.
  9. Fry cabbage fritters over medium heat for two to three minutes on each side, or until golden brown.
  10. Using paper towels, pat the fritters to absorb extra oil (optional).
  11. Serve with sour cream or try them with this delicious homemade Chipotle sauce. Delicious! Enjoy your meal.

Notes:

I chopped and shredded carrots and cabbage with ease using this food processor. Despite being a low-carb dish, you can make it more keto-friendly by replacing the all-purpose flour. You can substitute any of your favourite keto flours, almond flour, coconut flour, or gluten-free flour.

AIR FRYER CABBAGE FRITTERS

Easy to prepare and delicious when served with sour cream or a homemade chipotle dipping sauce, air fryer cabbage fritters are a hit. Simple to bind and cook without creating a mess on parchment paper, I adore the way the crunchy cabbage gives them a caramelised, crispy exterior and a soft, crunchy interior

Ingredients:

  1. One medium carrot, finely chopped
  2. two cups raw cabbage, finely shredded
  3. one egg
  4. One tablespoon of sour cream, plus additional to serve
  5. Three tablespoons of all-purpose flour
  6. one-tsp salt, or according to taste
  7. One teaspoon of your preferred seasoning or ½ teaspoon pepper, to taste. I made use of Mrs. Dash Spice Blend.
  8. One tablespoon of vegetable oil of choice, or olive oil, to brush the fritters with

Directions:

  1. Set the air fryer to 375°F (190°C).
  2. Take off the cabbage’s upper leaves.
  3. Shred the cabbage finely. For simple chopping and shredding of cabbage and carrots, I use a Braun food processor.
  4. Shredded carrot and cabbage, baking soda, flour, sour cream, spices, and egg should all be combined in a big basin. Stir well.
  5. Add the herbs, garlic, and green onions, if preferred.
    Pick up the small amount of ingredients (about two teaspoons) and form it into a ball with your palms.
  6. Keep in mind to slightly moisten your hands if the mixture begins to become sticky.
  7. Place the balls in the air fryer basket or tray in a single layer.
  8. Press the balls with a spoon to form a pancake shape that is about ½ inch thick.
  9. Mist each fritter with a small amount of oil spray. An alternative is to use oil for brushing. Air fried till golden brown with caramelised edges, 3–4 minutes per side.
  10. Give them a few minutes to cool. Enjoy them warm or cold and dip them into a flavorful, garlicky Chipotle sauce or serve with a dollop of sour cream (approximately 1 teaspoon).

Notes:

  • To lay out the cabbage fritters, use parchment paper. They won’t stick and will be simple to flip. However, continue to brush the fritter with oil.
  • Almond flour or gluten-free flour can be used in its place.
  • You can season with anything you like.
  • If preferred, add a few fresh herbs. I especially enjoy using finely sliced green onion and fresh dill.
  • To create a fully loaded cabbage fritter, add cooked bacon pieces or crumbles, a dollop of sour cream, and green onions or chives on top.

GROUND BEEF CASSEROLE

GROUND BEEF CASSEROLE

This ground beef casserole is so simple and healthful that I prepare it whenever I’m not sure what to serve for dinner. It is low in calories, low in carbs, and ketogenic if that’s a problem for you. Most importantly, it tastes great!

I keep vacuum-packed ground beef in the refrigerator at all times. It’s really quite practical. I use it to make a lot of delicious ground beef recipes, like meat pie, Korean ground beef, and kale casserole.

How is casserole made with ground beef made?

How simple is this dish with ground beef? Ground beef is rapidly browned with a few spices, cream cheese and shredded cheddar are added, and the mixture is baked until the cheese melts.

This recipe tastes great with onion powder, and it’s much faster to avoid dealing with slicing onions, so I purposefully left it without any chopped onions.

Ingredients:

  • Pan spray with olive oil
  • Two pounds of extra-lean (93% lean) ground beef
  • A tsp fine sea salt and a ¼ tsp black pepper
  • two tsp powdered garlic
  • One tsp powdered onion
  • One-fourth tea
  • spoon of cayenne
  • Cubed 4 ounces of reduced fat cream cheese,
  • divided 2 tablespoons of minced parsley as garnish,
  • and 1 cup of shredded cheddar

INSTRUCTIONS

  • Set oven temperature to 400 degrees Fahrenheit. Grease a 2-quart casserole dish very lightly with olive oil and place it aside.
  • A big nonstick skillet should be heated over medium-high heat. Apply a little layer of olive oil on it.
  • To the skillet, add the ground meat. Cook for about 5 minutes, stirring occasionally and breaking up the meat into small pieces, or until it is no longer raw. If desired, remove the steak from the skillet (I personally don’t bother with this step).
  • Turn down the heat to medium. Season the beef with salt, pepper, onion powder, garlic powder, and cayenne. Gently stir in the cream cheese and stir until it melts completely.
  • After turning off the heat, stir in half of the shredded cheddar cheese with the meat mixture.
  • Pour the mixture into the 2-quart casserole dish that has been ready. Top with the remaining half cup of cheddar cheese.
  • For about ten minutes, or until the cheese is melted, bake the ground beef casserole. Add parsley as a garnish and serve.
  • Enjoy!

PISTACHIO PINEAPPLE CAKE

PISTACHIO PINEAPPLE CAKE

I simply adore simple dessert recipes that begin with cake mixes. Making this pistachio cake is so easy that nobody would ever suspect that it begins with a package of instant pudding and a cake mix.

Ingredients for Pistachio and Pineapple Cake:

  1. One package (15.25 ounces) Mixture of yellow cake
  2. One box, weighing 3.4 ounces Pistachio pudding mix in a flash
  3. half a cup of vegetable or canola oil
  4. Three big eggs
  5. One can (20 ounces) pineapple chunks (do not drain)
  6. For the Frosting of Pistachio Pudding:
  7. Three-quarter cup of nonfat milk
  8. Half a cup of heavy cream
  9. One box, weighing 3.4 ounces Pistachio pudding mix in a flash
  10. Eight ounces Thawed Cool Whip
  11. Pistachios, chopped (optional) as a topping

Guidelines

  • Set oven temperature to 350°F. Apply cooking spray to a 9 x 13 baking pan.
  • Mix the cake mix, instant pudding mix, canola oil, eggs, and crushed pineapple (with juice) in a large mixing basin or the bowl of a stand mixer. Using a handheld mixer, mix on medium-high speed for approximately two minutes, or until thoroughly mixed.
  • Evenly distribute the batter after pouring it into the baking dish that has been ready.
  • A toothpick put into the center of the cake should come out clean after 35 to 40 minutes of baking.
  • On a cooling rack, let the cake cool fully.
  • Hold off on frosting the cake with pistachios until it has cooled fully. Combine the heavy cream and half-and-half milk in a mixing dish. Whisk in the until thoroughly blended, about one to two minutes, using the instant pistachio pudding mix. Give it five-minute rest to thicken.
  • Add the thawed Cool Whip and stir until thoroughly combined. Use the pistachio pudding icing to cover the cake. Before serving, place cover or piece of tin foil over the pan and refrigerate for four to six hours or overnight.
  • NoteRefrigerating the cake before serving is not necessary, although it is advised for optimal flavor and texture.
  • For an even more pleasant treat, the icing gets thicker and the cake absorbs all the flavorful goodness!

New York Cheesecake

New York Cheesecake

The greatest cheesecake is this traditional New York cheesecake. It is really simple to create, and unlike most cheesecake recipes, it doesn’t require a water bath. It is dense, rich, and creamy. It really is among the greatest cheesecakes I’ve ever had! This is how you get perfection.

INGREDIENTS

Crust

  1. One and a half cups (150g) of finely ground vanilla wafer crumbs, digestive biscuits, or graham cracker crumbs (pulse in a food processor).
  2. Two teaspoons of sugar, granulated
  3. Four and a half tablespoons (65g) of melted unsalted butter

Stuffing

  1. Four cups (900g) of room-temperature full-fat cream cheese
  2. Scoop and ⅛ cup (225g) powdered sugar
  3. two tsp cornstarch
  4. Four sizable eggs and one yolk, room temperature
  5. ½ cup, or 120 milliliters thick cream
  6. A teaspoon and a half of pure vanilla extract
  7. grated zest from one lemon one small spoon

Guidelines

Cook the crust.

  • Heat the oven to 350°F, or 180°C. Grease the 9-inch springform pan from bottom to side.
  • Crumbs, 2T sugar, and melted butter should all be combined and moistened in a medium-sized basin. Evenly press mixture into bottom of prepared pan to create crumb layer. Roast for 8 to 9 minutes, or until well-browned. Let cool fully on a wire cooling rack. Meanwhile, get the filling ready.

Cheesecake Filling

  • Raise the oven’s setting to 425°F/220°C.
  • Beat the cream cheese on medium-low speed for one to two minutes, or until it is smooth and lump-free, using an electric mixer fitted with the paddle attachment or a handheld mixer. Beat in sugar until well combined. Using a rubber spatula, scrape down the sides and bottom of the bowl as needed. Stir in cornstarch until well combined. When the eggs are added, beat them in completely. Beat in the cream, vanilla essence, and zest from the lemon until smooth and well mixed. Evenly distribute batter over chilled crust after pouring
  • After 10 minutes of baking, reduce the oven temperature to 225°F/110°C and bake the cake for an additional 60 minutes, or until the sides are set but the center is still slightly jiggly. Some people have commented that this was not a long enough baking time. This is something I’ve baked a lot, and it works. You can add an extra 10 to 20 minutes to baking times if you’re not sure if your oven is correct or if you generally bake for longer than what recipes ask for (but try not to open the oven door too frequently). It’s okay if your cheesecake doesn’t get golden brown around the edges; simply follow the directions 🙂. After turning off the oven, partially or fully open the door to let cool air in, and let the cake for sixty minutes in the oven. This will keep the cake from cracking and keep its creamy texture. Once the cake has cooled to room temperature, move it to a wire rack. Place plastic wrap over the cake and place it in the fridge for a minimum of 12 hours or overnight.
  • Refrigerated cheesecake can last for up to five days.

Hearty Fire Roasted Tomato Soup

Hearty Fire Roasted Tomato Soup

It’s soup season again! I am loving everything warm and comforting this time of year. Nothing is better than preparing a large pot of soup at the beginning of the week and enjoying delectable leftovers for several days. Even though I’ve always loved comfort food favorites like minestrone, creamy potatoes, and chicken noodle soup, I took a chance with today’s meal, and boy, was it worth it. With its rich, creamy flavor, this hearty fire-roasted tomato soup is sure to become a new favorite.

INGREDIENTS FOR Hearty Fire Roasted Tomato Soup

  1. Two tsp olive oil
  2. One chopped yellow onion and three minced garlic cloves
  3. 1/2 cup finely chopped potatoes
  4. To taste, add salt and pepper.
  5. TWO TABLEspoONS tomato paste
  6. Two and a half tsp Italian seasoning
  7. A couple of tsp of red pepper flakes
  8. Two cans of fire-roasted tomatoes, 14 oz.
  9. Two 14-oz cans of drained white beans
  10. ¾ cup heavy cream and 32 ounces of vegetable broth
  11. Grated ½ cup of parmesan cheese

PROCEDURE For Hearty Fire Roasted Tomato Soup

  • Add the potato and onion to a large Dutch oven with the olive oil heated to a medium temperature. Add the garlic and simmer for an additional three to four minutes, or until the potatoes are cooked.
  • Red pepper flakes, tomato paste, and Italian seasoning should all be added. Cook for a further five minutes, stirring frequently.
  • Reduce the heat and add the beans, broth, and tomatoes with their juices. Allow to simmer for twenty minutes.
  • Add heavy cream and parmesan cheese, stirring until well blended.
  • Serve with crusty bread and garnish with more red pepper flakes.

Mango Float

Mango Float

Layers of graham crackers, sweetened whipped cream, and luscious mango make up this Filipino icebox delicacy. Everything should be chilled, including the cream, condensed milk, mixing bowl, glass dish, and mixer beaters. This will speed up the cream whipping process and ensure that everything fits together perfectly when assembled. Before serving, thaw the float or serve it slightly frozen. Enjoy with your preferred tea, coffee, wine, or cocktail for dessert!

INGREDIENTS

  1. Five ripe but firm mangoes
  2. Four cups (960 mL) of heavy cream or chilled canned all-purpose cream
  3. One can of condensed milk, kept cold all night
  4. two tsp of essence from vanilla
  5. ½ teaspoon kosher salt
  6. 21 crackers graham cracker, plus more, crushed, for topping

procedure

  • Remove the peel off the mangoes and trim the lobes as close to the pit as you can. Slice ¹⁄₁₆ of an inch (15 mm) thick on each side of the mango lobes, being careful to keep the slices whole, and place them on a tray or plate. Before assembling, place a lid on and keep chilled. Chop the remaining mango into cubes measuring ½ inch (1.24 cm). When ready to assemble, transfer to a bowl, cover, and chill.
  1. In a large, refrigerated bowl, add 2 cups of cream. Beat on medium-high speed for 3–5 minutes, or until firm peaks form, using an electric hand mixer. Add the remaining two cups of cream and beat for an additional three to five minutes, or until stiff peaks form.
  • After adding half of the condensed milk, beat it in completely. After adding the salt, vanilla, and remaining condensed milk, beat for 5-7 minutes, or until stiff peaks form. Finally, use a rubber spatula to whisk the mixture.
  • Press parchment paper into a refrigerated 7 x 11 (17 x 27 cm) glass dish, allowing overhang on all sides.
  • Graham crackers should be layered one layer deep on the bottom of the plate, broken to fill in spaces as needed. Evenly cover the graham crackers with 2-3 cups (480-720 ml) of the whipped cream mixture, ensuring that it reaches the corners and borders of the dish. Add ½ of the diced mango on top. To create a second layer, repeat. In the last layer, set up the Place the chopped mango over graham crackers and cover with 2-3 cups of whipped cream. Decoratively arrange the thinly sliced mango on top. Break up the Graham Crackers and scatter them about the float’s perimeter.
  • Refrigerate the mango float for four to six hours, or until the cream solidifies and the graham crackers become pliable and absorb some liquid. Cover the float with plastic wrap. Place the float in the freezer for a duration of eight hours or overnight.
  • Take the float out of the freezer and pull it out of the dish using the parchment paper. Thaw for five to ten minutes prior to slicing.
  • Accompany with your preferred dessert wine, drink, .tea, or coffee.


STUFFED CABBAGE ROLL RECIPE

STUFFED CABBAGE ROLL RECIPE

Growing up, I learnt how to prepare Polish cabbage rolls, or golabki, as my dad was the family chef. Uncle Ben’s converted rice is what we always used for the stuffing, although you can omit the mushrooms. Serve them with a dollop of sour cream on the side, or cooked in a little olive oil. – Jenny Jones

INGREDIENTS FOR STUFFED CABBAGE ROLL RECIPE

  1. Use two smaller heads of cabbage or one large head (about three pounds).
  2. One tablespoon of extra virgin olive oil
  3. one cup of finely chopped onion
  4. two minced garlic cloves
  5. One and a half cups of coarsely chopped, big mushrooms
  6. One pound of ground steak
  7. 3/4 cup of raw long-grain rice (white or brown)
  8. 1/4 cup of finely chopped parsley
  9. One cup of canned tomato puree or Pomi strained tomatoes
  10. One and a half tsp salt and pepper, to taste
  11. Meals, 3/4 cup (beef) cabbage water, or mix it with a few remaining tomatoes to make 3/4 cup.)

GUIDELINES FOR STUFFED CABBAGE ROLL

  • Heat up a big saucepan of water until it boils. Remove the cabbage’s center core and set it, core side down, in boiling water. Simmer for ten minutes with a lid on.
  • Simmer the cabbage for 3 to 5 minutes, or until the onion and garlic are browned. Heat the oil in the skillet over medium-high heat. Sauté the mushrooms for an additional two minutes. To cool, transfer mixture to a big bowl.
  • While leaving the water in the saucepan, remove the cabbage to a rimmed baking sheet. Using a tiny knife, carefully cut away from the core of the cabbage to remove the leaves. Save the top 16 intact leaves and trim the thick core spine for simpler rolling. Place all broken or tiny items aside.Leave aside the tiny cabbage leaves. (If the center is extremely hard, put it back in the boiling water for a short while to soften.)
  • Set oven temperature to 350°F.
  • Add the meat, raw rice, parsley, tomato, salt, and pepper to the cooled onion mixture. Mix thoroughly.
  • Fill each leaf to approximately 1/4 cup, roll, and set seam side down in a 13 by 9-inch pan. Drizzle with the remaining leaf mixture and serve the rolls. Bake the pan for 1 1/2 hours with the foil securely covering it. (In case it drops, place the pan on a cookie sheet.)
  • Take out of the oven, allow to cool for thirty minutes, or better yet, leave overnight in the refrigerator. (They freeze nicely.)

Embarking on a 7-Day Colon Cleanse for Weight Loss

Embarking on a 7-Day Colon Cleanse for Weight Loss

Are you considering a juice fast as a way to “cleanse” your body of toxins? There’s something you should know before you do that. Your body may fully detoxify itself without the need for you to drink a tonne of juice. It includes a sophisticated cleansing mechanism that operates continuously to make sure you’re clear of any impurities. Another possibility is that something is wrong with your detoxification system. This is particularly true if you’ve been consuming processed foods and haven’t been very mindful of what you eat. So, to ensure your body is toxin-free and all organs are working as they should, you can embark on a 7-day body cleansing.

components:

  1. One apple, either red or green.
  2. orange juice from one orange.
  3. ½ Leaf of aloe vera.
  4. Half a cucumber.
  5. A single pineapple slice.

Guidelines:

First Step

Cut the pineapple slice into small pieces, then thinly slice the apple and cucumber.

Step 2:

Extract the gel from one side of the Aloe Vera leaf after splitting it in half.

Step Three

In a blender, combine all ingredients, add orange juice and a glass of water, and blend until smooth.

Step Four

Pour the juice into a large glass and drink it twice a day, once in the afternoon and once in the morning when you’re not hungry.

Step Number Five

In order to aid in the cleansing process, make sure you consume eight glasses or more of water every day.

Step Six

Start this 7-day colon cleansing programme and witness the improvement in your general health and wellbeing that it delivers.

Enjoy your wonderful day!

Discover an easy method for crafting a scrumptious and diet-friendly avocado mayonnaise, transforming your meals into healthier alternatives compared to traditional options

Discover an easy method for crafting a scrumptious and diet-friendly avocado mayonnaise, transforming your meals into healthier alternatives compared to traditional options

Learn how to make a delicious, low-fat avocado mayonnaise that will make your dishes healthier than they would otherwise be. This simple condiment is a great option for people who want a well-rounded diet because it not only makes your food taste better but also has a lot of health benefits.

Which Avocado Mayonnaise Is Better?

Avocado is a great base for a reduced-calorie mayonnaise because of its velvety texture and healthy lipids. Avocados are a great food for weight management because they are full of healthy elements including fibre, vitamin E, and omega-3 fatty acids. They also promote satiety. Their high-nutrient profile not only promotes general health but also gives your dishes an indulgent creamy texture.

Ingredients:

  1. One half of a ripe avocado, room temperature
  2. One egg
  3. Two pieces (measured with your fingers) of sunflower oil
  4. two tsp lemon juice
  5. A small amount of black pepper
  6. Two fresh cilantro (coriander) sprigs, cut finely
  7. A small amount of salt

Directions:

  1. Steps in Preparation:
  2. In a food processor or blender, combine the avocado, egg, lemon juice, sunflower oil, cilantro, black pepper, and salt.
  3. Blend until a creamy, smooth consistency is achieved.
  4. Try the mayonnaise and add more salt or lemon juice to taste and adjust the seasoning.
  5. Once the texture and flavour are to your liking, pour the avocado mayonnaise into a bowl or airtight container.

Serving and Storage:

You may either eat the avocado mayonnaise right away or save it in the fridge for later use.
For healthier take on classic mayonnaise, try using it in your favourite recipes for spreads for sandwiches and burgers, dips, and salad dressings.

Benifts

  • Include this avocado mayonnaise in your diet to enjoy a tasty condiment and make a healthy lifestyle choice. Its nutrient-rich makeup promotes wellbeing, and its adaptability in the kitchen guarantees that your dishes are satisfying and scrumptious.
  • Try this delicious avocado mayonnaise recipe as you set out to adopt healthy eating habits. Savour enhancing your meals with a tasty and health-conscious touch!