AIR FRYER APPLE PIE TAQUITOS

AIR FRYER APPLE PIE TAQUITOS

AIR FRYER APPLE PIE TAQUITOS

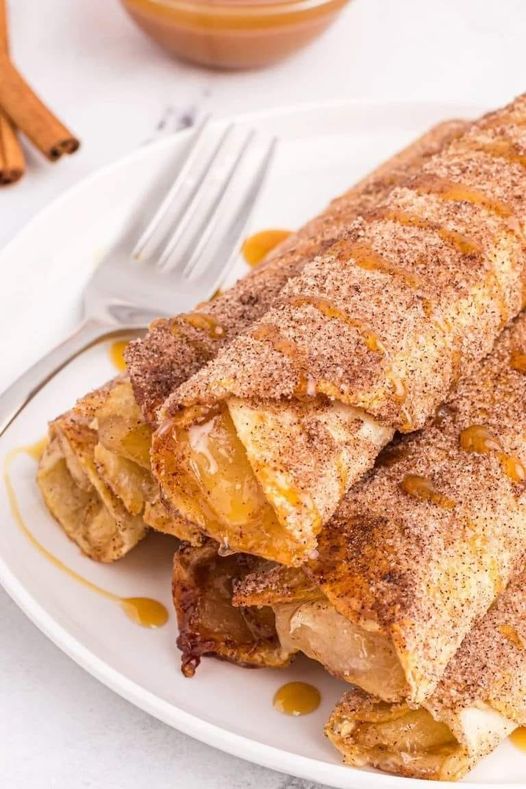
“Indulge in a delightful twist on a classic dessert with our Air Fryer Apple Pie Taquitos! These crispy, golden-brown delights are filled with tender cinnamon-spiced apples, all wrapped up in a warm, flaky tortilla shell. Perfectly crunchy on the outside and irresistibly gooey on the inside, they’re a heavenly treat for any occasion. Whether you’re craving a sweet snack, a dessert to impress guests, or just want to elevate your air fryer game, these apple pie taquitos are sure to hit the spot. So, fire up your air fryer and get ready to enjoy a taste of pure bliss!

INGREDIENTS
  1. 1 can apple pie filling 21 ounces
  2. 6 soft flour tortillas medium
  3. 4 tablespoon butter melted
  4. ½ cup sugar
  5. 1 tablespoon ground cinnamon

INSTRUCTIONS

  1. Lay tortillas flat, and then spoon about 2 tablespoons of filling across the center of the tortilla
  2. Roll tightly and then brush the rolled taquito with melted butter
  3. In a shallow, flat dish, stir together the sugar and cinnamon, then roll the buttered taquito in the mixture, coating the outside
  4. Place in the air fryer basket, seam side down, without stacking or overlapping.
  5. Air fry at 350 degrees F for 9-11 minutes, until the taquito is golden and crispy.
  6. Use tongs to flip them over, and air fry for an additional 3-4 minutes, or until they reach your desired crispness.

Tips:

  1. Choose the Right Apples: Opt for firm, tart apples like Granny Smith or Honeycrisp. They hold their shape well during cooking and provide a nice balance of sweetness and tartness.
  2. Thinly Slice the Apples: Thin slices ensure that the apples cook through evenly and become tender without being mushy.
  3. Seasoning is Key: Don’t skimp on the cinnamon and sugar mixture. It’s what gives the apple filling its classic flavor. You can also add a pinch of nutmeg or a dash of vanilla extract for extra depth.
  4. Prevent Soggy Tortillas: To avoid soggy taquitos, make sure the apple filling isn’t too watery. If it seems too liquidy, you can drain off excess liquid before filling the tortillas.
  5. Proper Tortilla Rolling Technique: Roll the tortillas tightly around the apple filling to prevent them from unraveling during cooking. Secure them with toothpicks if necessary.
  6. Don’t Overfill: While it might be tempting to stuff the taquitos to the brim, overfilling can cause the filling to spill out during cooking. Aim for a moderate amount of filling in each taquito.
  7. Brush with Butter: Before air frying, lightly brush the taquitos with melted butter or oil. This helps them achieve a beautiful golden-brown color and crisp texture.
  8. Arrange Evenly in the Air Fryer Basket: Make sure the taquitos are spaced evenly in the air fryer basket, with some room between each one. This allows the hot air to circulate evenly around them for consistent cooking.
  9. Monitor Closely: Air fryer cooking times can vary based on the model and size of the taquitos. Keep a close eye on them towards the end of the cooking time to prevent them from overcooking or burning.
  10. Serve with Toppings: Once done, serve your apple pie taquitos warm with a scoop of vanilla ice cream, a drizzle of caramel sauce, or a dusting of powdered sugar for an extra decadent touch. Enjoy!
Air Fryer Steak Bites

Air Fryer Steak Bites

Air Fryer Steak Bites

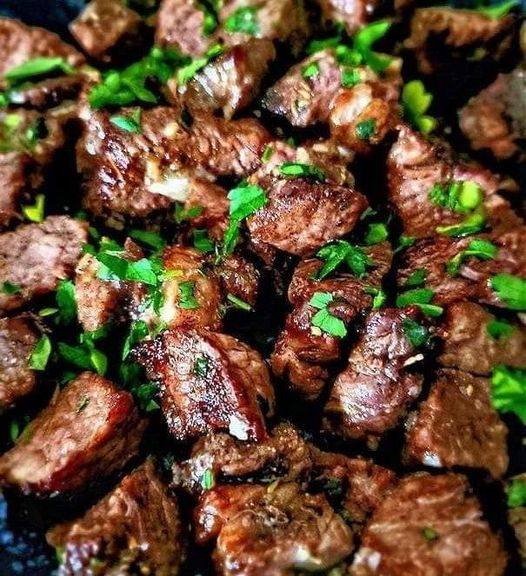
steak enthusiasts, to the realm of culinary delight! Today, we embark on a journey to savor the succulence of perfectly cooked steak bites, crafted with the magical touch of an air fryer. Brace yourselves for a tantalizing experience that will surely ignite your taste buds and leave you craving for more. Without further ado, let’s dive into the art of creating these savory, tender morsels of joy.

I love how they turn DELISH, juicy and tender.😋 Cooked mine 3 min per side to my liking of
Ingredients:
  1. 1 pound steak. I used Ribeye. Sirloin or NY strip will work great too.
  2. 1 Tablespoon olive oil (or avocado oil)
  3. 1/2 tsp salt or to taste
  4. 1/2 tsp pepper or to taste
  5. 1/4 tsp dry rosemary (optional)
  6. 1 TBS Worchestire sauce (optional)
  7. 1 Tablespoon fresh parsley, finely chopped
  8. BUTTER:
  9. 3 Tablespoons salted butter, melted
  10. 3 garlic cloves, minced.
  11. 1 Tablespoon fresh parsley, finely chopped
Directions:
  1.  Trim the visible fat off the steak and cut it into bite-size pieces. Approximately 1-inch cubes
  2. In a large bowl, add steak cubes, oil, salt, pepper, rosemary, Worchester sauce. Coat evenly. Let sit for 30 minutes.
  3. Preheat the air fryer to 400F/200C for a few minutes.
  4. Add steak cubes to the air fryer basket or tray
  5. Do not overcrowd them. Give them some space.
  6. Airfry mode 400F/200C 3 minutes.
  7. Open air fryer, flip each piece on the other side and fry for an additional 3 minutes or until the desired doneness. Usually, 6 minutes is good enough for medium doneness. The sides are nicely caramelized and crispy.
  8. . While the steak bites are cooking, heat butter in the microwave until melted. Add chopped garlic.
  9. Add cooked steak bites. Toss until well combined.
  10. Add parsley if desired and serve.


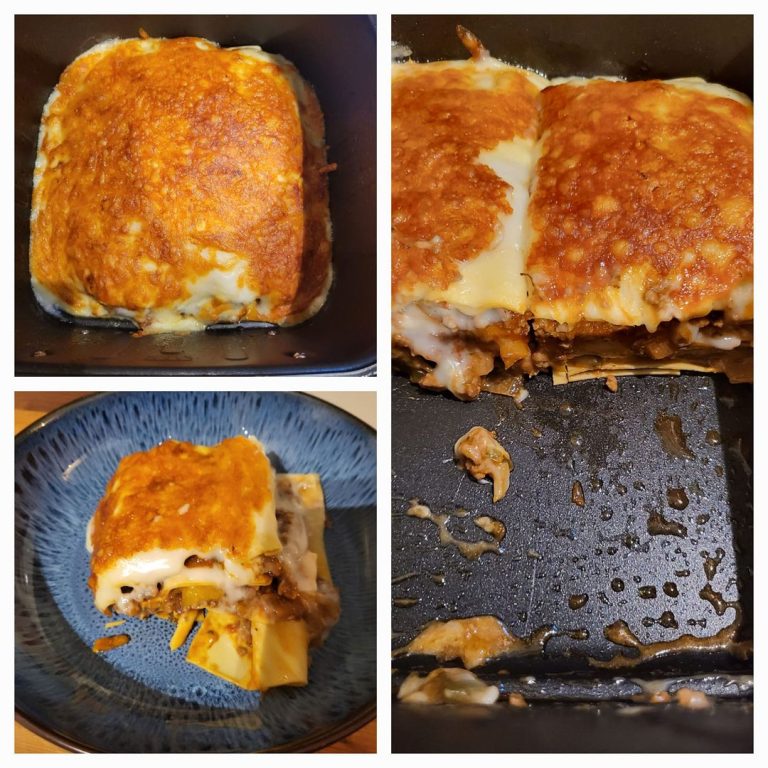
Air fried lasagne

Air fried lasagne

Air fried lasagne

Although cooking lasagna in an air fryer may seem unusual, it is totally doable and may provide wonderful results, particularly if you’re preparing for a small number of people or don’t want to heat up your kitchen by using the oven. This is a simple method to use an air fryer to make a little amount of lasagna.

Ingredients for Air Fryer Lasagna Recipe:

  1. Precooked or oven-ready lasagna noodles, four to six
  2. Half a cup of ricotta
  3. One egg
  4. Grated Parmesan cheese, half a cup
  5. One cup of finely shredded mozzarella cheese
  6. One cup of marinara sauce
  7. 1/2 pound of cooked and drained ground beef or Italian sausage
  8. To taste, add salt and pepper.
  9. One tsp of Italian spice
  10. For garnish, use fresh basil (optional).

Method:

1.Prepare the Filling:

Combine the ricotta cheese, egg, Parmesan cheese, Italian seasoning, salt, and pepper in a medium-sized bowl. Put aside.
2.Arrange the Lasagna Layers:

  • To begin, lightly coat the bottom of the baking dish with marinara sauce.
  • Spread lasagna noodles on top. To make them fit your dish, you might have to break them.
  • Cover the noodles with a layer of the ricotta mixture.
    Spread some cooked ground meat or sausage on top.
    Add some mozzarella cheese on top.
  • Repeat the layers until all ingredients are used, finishing with a layer of marinara and mozzarella cheese on top.

3.Cook in the Air Fryer:

  • Set the air fryer to 180°C/360°F.
  • To help the heat distribute more evenly and to keep the top from burning, cover the lasagna with aluminium foil.
  • After placing the meal into the air fryer, cook it for 15 to 20 minutes. Verify the lasagna’s doneness; if it’s not quite hot and bubbling, cook it for a further five minutes.

Last Steps:

  • Before serving, let the lasagna sit for a few minutes after it has cooked. The layers set during this resting time, which facilitates cutting.
  • If desired, garnish with fresh basil.

Advice for the Optimal Air Fryer Lasagna:

  • Avoid Overcrowding: To promote air circulation, make sure there is enough room surrounding the food in the air fryer.
  • Dish Size: Make sure your dish fits snugly within your air fryer without touching the top or edges.
    Water in the Marinara: To keep your thick marinara sauce from drying out during cooking, think about adding a small amount of water to it.


This air fryer lasagna recipe is ideal for smaller portions and can help you save time and energy. Savour your delectable and cosy dinner with less effort and clearing up!

Tater Tot Mini Cheeseburger Bites

Tater Tot Mini Cheeseburger Bites

Tater Tot small Cheeseburger Bites are a delightful and delectable appetiser that blend the crunchy joy of tater tots with the fun of small cheeseburgers. These appetisers are excellent for game days, get-togethers, or a fun family dinner that the whole family will enjoy. This is how you prepare them:

Ingredients for the recipe for Tater Tot Mini Cheeseburger Bites:

  1. Twenty-four Tater Tots, defrosted to room temperature
  2. Half a pound of ground beef
  3. To taste, add salt and pepper.
  4. Half a teaspoon of powdered onion
  5. half a teaspoon of powdered garlic
  6. Cut 12 cheddar cheese slices into quarters, so you have 48 little squares.
  7. Twenty-four little pickle slices
  8. Mustard with ketchup, to serve

Method:

1.Preheat Your Air fryer or oven

If you would rather start them in the oven, prepare your oven to 425°F (220°C); if you’re going directly to the air fryer, warm your air fryer to 400°F (200°C).
2.Get the Tater Tots ready:
Each tater tot should be gently flattened to create a little burger basis. You may achieve this by applying pressure to them using a tiny glass or the back of a spoon. If using an oven, place them in a little muffin tray; if using an air fryer, place them straight in the basket.

3.Cook the Beef:

The ground beef should be cooked in a pan over medium heat. While cooking, season with salt, pepper, onion powder, and garlic powder. As the meat cooks, take careful to split it up into little bits that are appropriate for the little nibbles.
4.Assemble the Bites:

Each flattened tater tot should have a little quantity of cooked ground beef spooned on top.

5.Bake or Air Fry:

Place a quarter piece of cheddar cheese on top of each.
Bake or Air fry: If you’re using an oven, put the mini muffin tray in and bake for about ten minutes, or until the tater tots are crispy and the cheese has melted.
Should you want to use an air fryer, put the tater tot bases into the basket and cook for approximately 6 to 8 minutes, or until the cheese is melted and bubbly.

6.Garnish and Serve:

Take the cheeseburger bits out of the air fryer or oven.
Add a little pickle slice on the top of each mouthful.
Accompany with mustard and ketchup for dipping.

Tips for Perfect Mini Bites:

Defrost Tater Tots: To ensure that you can easily flatten the tater tots without breaking them, make sure they are well thawed.
Cheese Selections: Try a variety of cheeses for distinct flavours, such mozzarella for a softer taste or pepper jack for a burst of heat.
Serving Tip: For an eye-catching and entertaining presentation, arrange the food on a tray and insert a toothpick into each mouthful.
Tater Tot Mini Cheeseburger Bites are a delightful bite-sized snack that combines traditional flavours and is guaranteed to be a success at any event. Have fun creating this savoury and entertaining dessert!

Air Fryer Bang Bang Chicken Skewers

Air Fryer Bang Bang Chicken Skewers

Air Fryer Bang Bang Chicken Skewers

Delicious and savoury Air Fryer Bang Bang Chicken Skewers are ideal for a light lunch or as an appetiser. This meal blends the spicy, creamy flavours of Bang Bang sauce with the ease of cooking in an air fryer. This is how you prepare them:

Ingredients for Air Fryer Bang Bang Chicken Skewers Recipe:

Regarding the Chicken:

  1. 1 pound of 1-inch-cube-sized chicken breast
  2. To taste, add salt and pepper.
  3. one tsp powdered garlic
  4. One tsp of paprika
  5. Water-soaked bamboo skewers, soaking for at least half an hour

For the Bang Bang Sauce:

  1. one-half cup mayonnaise
  2. Two tsp sweet chilli sauce
  3. One spoonful of honey
  4. One lime juice, or to taste, two tablespoons of Sriracha

Directions:

  1. Add paprika, garlic powder, salt, and pepper to the chicken cubes’ seasoning. Make careful to thoroughly mix so that the seasoning coats every item equally.
    After soaking the bamboo skewers, thread the seasoned chicken onto them. You may need to trim the skewers to fit in your air fryer, depending on its size.

Preheat the Air Fryer:

  • Set your air fryer to 380°F (193°C) before using. This aids in giving the chicken a great colour and uniform cooking.

Cook the Chicken:

  • Prepare the chicken by putting the skewers inside the air fryer basket. To guarantee uniform cooking, make sure they don’t overlap.
  • Cook the chicken for 10 to 12 minutes, rotating it halfway through, or until it’s cooked through and the edges are beginning to crisp up. A temperature of 165°F (74°C) should be reached inside.

Prepare the Bang Bang Sauce:

While the chicken is cooking, make the Bang Bang Sauce by combining mayonnaise, sweet chilli sauce, honey, sriracha, and lime juice in a bowl. Adapt the Sriracha quantity to your preferred level of heat.
The sauce should be creamy and smooth after whisking.

Serving: Take the skewers out of the air fryer when the chicken has finished cooking.
Serve the Bang Bang sauce on the side for dipping or drizzle it over the chicken skewers.
As an optional garnish, add some sesame seeds and thinly sliced green onions.

Tips for Perfection:

  • Soak the Bamboo Skewers: To keep the skewers from burning in the air fryer, soak them in water.
    room: To ensure that hot air circulates and cooks the chicken evenly, make sure there is room around each skewer in the air fryer.
  • Sauce Thickness: To give the sauce a tangier taste, you can dilute it somewhat with a little water or extra lime juice if it’s too thick.

Perfect for entertaining or a family supper, these Air Fryer Bang Bang Chicken Skewers deliver a great blend of convenience, speed, and taste. Savour the juicy crispness of air-fried chicken paired with the creamy, spicy blast of Bang Bang sauce!


Cheesy Hash Brown Cups in the Air Fryer

Cheesy Hash Brown Cups in the Air Fryer

Cheesy Hash Brown Cups in the Air Fryer

Hash Brown with cheese A tasty and simple way to enjoy a crispy, cheesy breakfast or side dish is to make air fryer cups. Without the necessity for deep frying, using an air fryer guarantees a flawless golden crust while also expediting the cooking process. This is how you prepare them:

Ingredients:

  1. Three cups of thawed frozen shredded hash browns
  2. One cup of shredded strong cheddar cheese
  3. 1/4 cup grated parmesan cheese
  4. Two tablespoons of flour (all-purpose)
  5. 1/4 cup melted unsalted butter
  6. half a teaspoon of powdered garlic
  7. Half a teaspoon of powdered onion
  8. To taste, add salt and pepper.
  9. Cooking spray
  10. Garnish optional: green onions or chopped chives

Directions:

1. Prepare the Hash Brown Mixture:

  • The frozen hash browns, sharp cheddar and parmesan cheeses, all-purpose flour, melted butter, onion and garlic powders, salt, and pepper should all be combined in a big bowl. Blend well until all the components are dispersed equally.

2. Set the Air Fryer to 400°F (200°C):

  • Set the air fryer to 400°F. To get a crispy outside, this is a critical temperature.

3. Prepare the Muffin tray or Cups:

  • Mist the silicone muffin cups or muffin tray with a small amount of cooking spray. This makes it easier to remove the hash brown cups and helps avoid sticking.

4. Fill the Muffin Tin or Cups:

  • With a small amount of pressure to compress the mixture, spoon the hash brown mixture into the muffin pan or cups. Create a small well in the middle of every cup to guarantee uniform cooking.

5. Cook:

  • Put the cups or muffin tray into the air fryer basket. Cook for 15 to 20 minutes, or until the edges of the hash brown cups are crispy and golden brown. The model of your air fryer may have an impact on the cooking time.

6. Cool and Serve:

  • Before taking out the hash brown cups, carefully take out the muffin pan or cups from the air fryer and allow them to cool for a few minutes. They become easy to remove and assist set throughout this resting period.
    Serve warm, garnishing with chopped green onions or chives if preferred.

Tips for Success:

  • Thawing Hash Browns: To avoid soggy cups, make sure the hash browns are completely thawed and drained of extra moisture.
  • Customisation: To add more flavour and texture, feel free to add chopped bell peppers, diced ham, or fried bacon pieces to the mixture.
  • Reheating: The air fryer works great for reheating these hash brown cups. Simply reheat them for a few minutes at 350°F/175°C to make them crispy and toasty once again.

A tasty and adaptable recipe that works well for breakfast, brunch, or as a side are Cheesy Hash Brown Cups. Make them in your air fryer and enjoy the simplicity and convenience of a tasty and filling treat.


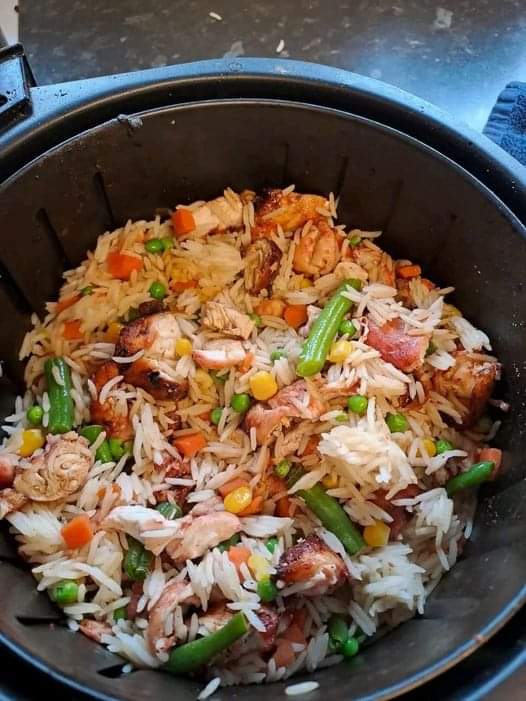
Air Fryer Fried Rice with Chicken and Veggies

Air Fryer Fried Rice with Chicken and Veggies

Air Fryer Fried Rice with Chicken and Veggies

Using an air fryer to make fried rice is a tasty and easy way to eat this traditional meal. This is how to make fried rice in an air fryer with chicken and vegetables:
Ingredients:

  1. Two cups of cooked rice, best served cold
  2. One tablespoon of sesame oil
  3. Two tsp soy sauce
  4. 1 tablespoon oyster sauce
  5. 1 tablespoon vegetable oil
  6. 2 boneless, skinless chicken breasts, diced
  7. 1 cup mixed vegetables (such as peas, carrots, and corn)
  8. 2 cloves garlic, minced
  9. 2 green onions, chopped
  10. 2 eggs, lightly beaten
  11. Salt and pepper to taste
  12. Sesame seeds and additional chopped green onions for garnish (optional)

Instructions:

  1. For three to five minutes, preheat your air fryer to 380°F (190°C).
  2. Get the ingredients ready:
    Combine the oyster sauce, soy sauce, and sesame oil in a small bowl. Put aside.
  3. In a large skillet, heat the vegetable oil over medium-high heat. Add the chopped chicken breasts and simmer for 5 to 7 minutes, or until browned and cooked through. After taking the chicken out of the skillet, set it aside.
  4. Add the chopped garlic and mixed veggies to the same skillet. Sauté the veggies for two to three minutes, or until they are crisp-tender. Take off the heat and place aside.
  5. Cooked rice, cooked chicken, cooked veggies, and chopped green onions should all be combined in a big mixing basin.
  6. Over the rice mixture, drizzle the soy sauce, oyster sauce, and sesame oil combination. Toss until completely
  7. Spoon the rice mixture into the basket of the air fryer. To guarantee uniform cooking, distribute it evenly.
  8. Fry the rice in the air fryer for 8 to 10 minutes at 380°F (190°C), stirring it halfway through, or until it’s cooked through and beginning to crisp up.
  9. To make room for the eggs, push the rice mixture to one side of the air fryer basket.
  10. Transfer the whisked eggs into the vacant area and let them simmer for two to three minutes, stirring now and again, until well cooked and scrambled.
  11. Incorporate the cooked eggs into the fried rice.
  12. Transfer the chicken and vegetable-infused air fryer fried rice to serving bowls or plates for dishing.
  13. If preferred, garnish with more chopped green onions and sesame seeds.
    Have fun!
  14. This savoury and filling dish of air fryer fried rice with chicken and vegetables is simple to tailor with your own ingredients. You may adjust the amount of veggies, protein, or seasonings to your personal taste.
  15. Savour your freshly produced fried rice immediately out of the air fryer.

This savoury and filling dish of air fryer fried rice with chicken and vegetables is simple to tailor with your own ingredients. You may adjust the amount of veggies, protein, or seasonings to your personal taste. Savour your freshly produced fried rice immediately out of the air fryer!

Egg Bites In Air Fryer

Egg Bites In Air Fryer

Egg Bites In Air Fryer Breakfast options like Air Fryer Egg Bites are tasty, easy to customise with your favourite toppings, and healthful. They always turn up delightfully tender and juicy when cooked in an air fryer. To produce your own batch of egg bites from an air fryer, follow these instructions.

Ingredients For Egg Bites In Air Fryer:

  1. Four big eggs
  2. 1/4 cup milk or cream is needed for a creamy mouthfeel.
  3. Cheese: 1/2 cup grated Monterey Jack, cheddar, or any cheese of your choosing
  4. 1/4 cup chopped cooked beef (optional)
  5. 1/4 cup of finely chopped spinach (optional)
  6. To taste, add salt and pepper.
  7. Cooking spray: to coat the moulds

Instructions For Egg Bites In Air Fryer:

  • Prepare the Ingredients: Cook the beef until it crisps up, if using, and then cut it into little pieces. If using spinach, be sure to cut it finely after washing.
  • Blend the Egg Concoction: Beat the eggs, milk or cream, salt, and pepper in a mixing bowl until thoroughly blended.
  • Add the spinach, fried beef and shredded cheese.
  • Get the moulds ready: To keep the silicone egg bite moulds or muffin cups from sticking, lightly mist them with cooking spray.
  • Fill the Moulds: Leaving space for the eggs to expand, evenly divide the egg mixture into each mould, filling it to about 3/4 of the way.
  • Cook in the Air Fryer: Set the air fryer’s temperature to 300°F, or 150°C.
  • Put the filled moulds inside the basket of the air fryer. For smaller air fryers, you might have to cook them in batches.
  • Cook for 8 to 12 minutes, until the tops of the egg bits are gently brown and set. Depending on the kind of your air fryer and the size of your moulds, the precise duration may change.
  • To serve, gently take the egg bits out of the moulds. If you’ve properly oiled the moulds, they ought to come out with ease.
  • While still heated, serve right away.

Advice for Getting It Just Right:

  1. Tailor Your Fillings: Don’t be afraid to try different components, such as sautéed veggies, different kinds of cheese, or even leftover cooked vegetables.
  2. Steer clear of overfilling: When egg bites are overcooked, they may spill out of the moulds due to excessive filling. They can swell wonderfully if there is enough room left.
  3. Check for Doneness: Fully set and hard to the touch, egg bits should pass muster. If in doubt, test with a toothpick; it should come out clean.

By circulating hot air over the egg bits, the air fryer cooks them fast and evenly. By retaining moisture, this technique produces soft, fluffy, and non-rubbery egg bits. Furthermore, silicone moulds are simple to remove and clean up after.

Visual Appeal: The interior of Air Fryer Egg Bites is soft and sensitive, while the exterior has a beautiful golden hue. Your breakfast will look as well as taste better if you serve it on a colourful dish or with a side of fresh fruit.

Savour your Air Fryer Egg Bites, a versatile and easy breakfast choice that will guarantee a good start to your day!


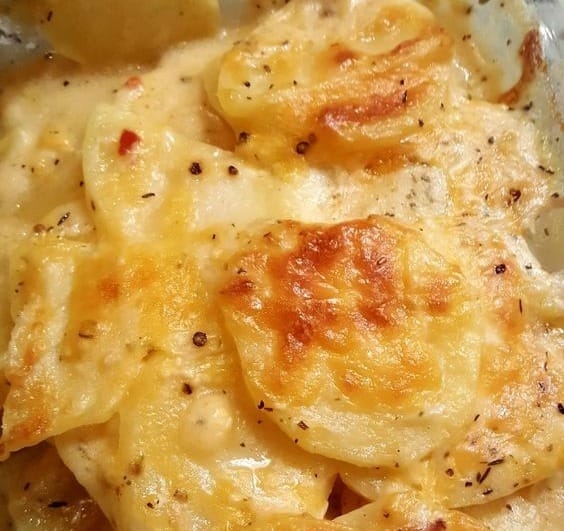
Best Scalloped Potatoes Air Fryer

Best Scalloped Potatoes Air Fryer

Best Scalloped Potatoes Air Fryer With the ease of an air fryer, creamy, delicate potatoes with a gorgeously crisp top layer may be made for a delicious take on a classic dish: air fryer scalloped potatoes. The tastiest scalloped potatoes can be made in your air fryer with this comprehensive recipe.

Ingredients For Best Scalloped Potatoes Air Fryer:

  • 1 1/2 pounds of thinly sliced potatoes (ideally Yukon Gold or another creamy kind).
  • One cup of heavy cream
  • Half a cup of milk
  • Two minced garlic cloves
  • One tsp salt
  • Half a teaspoon of finely powdered black pepper
  • Half a teaspoon of paprika
  • One cup of cheddar cheese, shredded
  • Grated Parmesan cheese, half a cup
  • Twice as much unsalted butter
  • For garnish, chop some fresh thyme or parsley.

Instructions For Best Scalloped Potatoes Air Fryer:

  1. Set your air fryer to 360°F (180°C) for preparation.
  2. Use nonstick cooking spray or butter to grease your casserole dish.
  3. Potato Layering: Arrange a layer of potato slices in the casserole dish that has been buttered, making sure that there are no spaces between them.
  4. Over this layer, scatter some of the minced garlic, salt, pepper, and paprika.
  5. Scatter some cheddar and Parmesan cheeses on top of the potatoes.
  6. Assembling the Plate: Continue piling the potato pieces and cheese until all of them are used; add a final layer of cheese on top.
  7. Cream and Milk Mixing: Beat the heavy cream and milk together in a basin. Evenly cover the stacked potatoes in the casserole dish with this mixture. Sprinkle little bits of butter on top.
  8. Cooking: If the type of your air fryer permits it, cover the casserole dish with aluminium foil or an appropriate air fryer lid. This will guarantee that the potatoes cook uniformly and help retain moisture.
  9. After putting the food in the air fryer, cook it for 40 to 45 minutes. Use a fork to pierce the potatoes to see whether they are tender.
  10. Browning the Top: Take off the lid and continue cooking for a further five to ten minutes, or until the top is bubbling and brown.
  11. Serving suggestion: After cooking, let the scalloped potatoes sit for a few minutes to allow the sauce to get thicker.
  12. Before serving, garnish with parsley or fresh thyme.

Advice for Perfection Best Scalloped Potatoes Air Fryer:

  • Even slicing the potatoes is essential to consistent cooking. For this purpose, a mandolin slicer might be quite useful.
  • You may flavour the cream mixture with a tiny pinch of nutmeg or onion powder.
  • To ensure uniform cooking, make sure your casserole dish fits the size of your air fryer.

In addition to expediting the cooking process, this air fryer version of scalloped potatoes gives the top layer a wonderful crispiness that oven-baked versions sometimes lack. It’s ideal served as a side dish at special occasions or as a cosy family supper. Savour your tasty and simple-to-make scalloped potatoes from the air fryer!

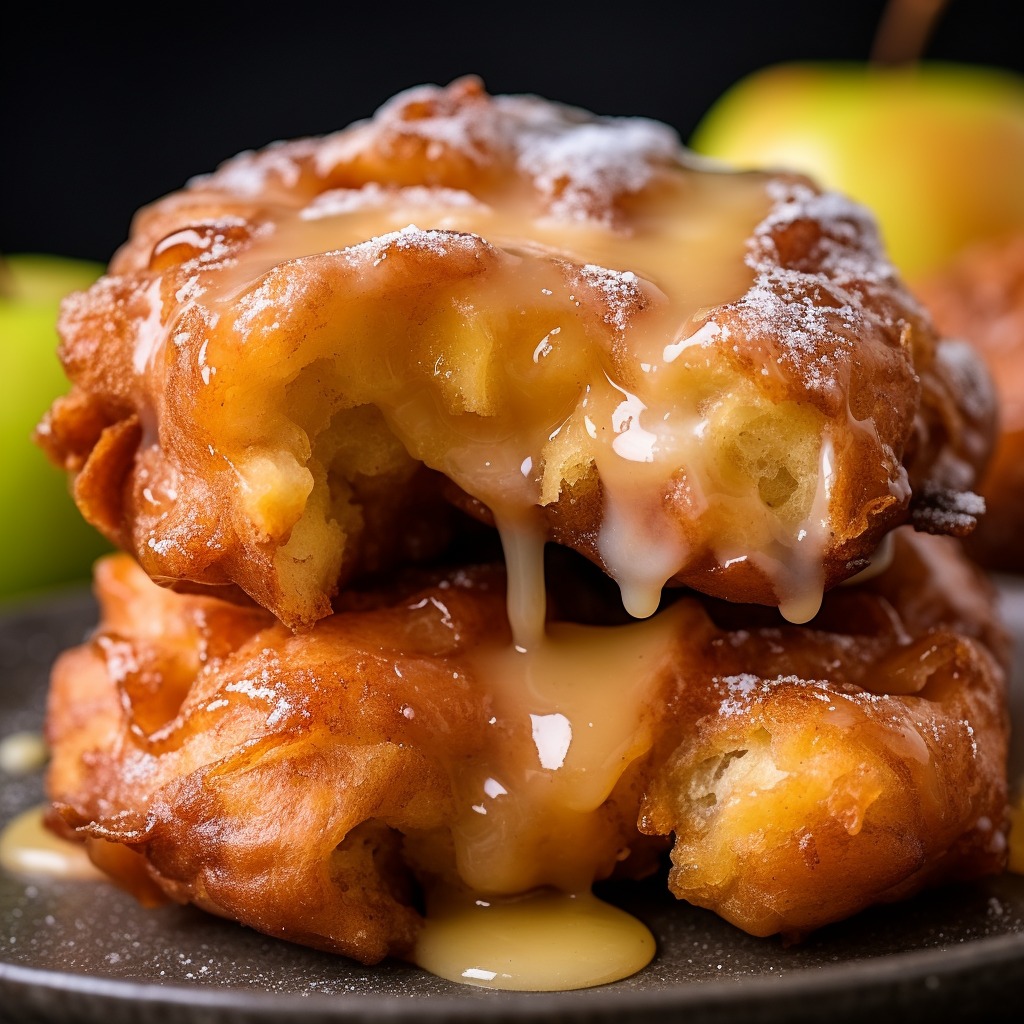
Air Freyr Big apple fritters

Air Freyr Big apple fritters

Air Freyr Big apple fritters, Don’t Lose This Recipe

Savour the mouthwatering deliciousness of fresh apples with a golden, crispy crust with Big Apple Fritters’ alluring charm. These fritters are a great option for a tasty snack or a filling dessert because of their ample size. Get ready to enjoy the warm, cinnamon-infused sweetness that these fritters offer to your mouth as you set out on your gastronomic excursion. This dish will quickly become a beloved favourite, so don’t miss it.

Ingredients:

For the Fritters:

  1. Two cups of all-purpose flour
  2. 1/2 cup of sugar, granulated
  3. One-third tsp baking powder
  4. Half a teaspoon of salt
  5. one tsp finely ground cinnamon
  6. Two big eggs
  7. one cup of whole milk
  8. One tsp vanilla essence
  9. 2 cups of peeled, cored, and coarsely chopped apples (such as Honeycrisp or Granny Smith)
    vegetable-based frying oil

For the Cinnamon Sugar Coating:

  1. 1 cup of sugar, granulated
  2. One tablespoon of cinnamon powder

Instructions:

  1. Preheat the Air Fryer: Preheat your air fryer to 350°F (175°C) for about 5 minutes.
  2. Prepare the Batter: In a large bowl, whisk together the flour, sugar, baking powder, cinnamon, and salt. In another bowl, whisk together the milk, egg, and vanilla extract. Pour the wet ingredients into the dry ingredients and stir until just combined. Fold in the diced apples gently.
  3. Shape the Fritters: Using an ice cream scoop or spoon, scoop out portions of the batter and shape them into round fritters, about 2 inches in diameter.
  4. Coat the Fritters: In a small bowl, mix together the sugar and cinnamon for the coating. Roll each fritter in the cinnamon-sugar mixture until evenly coated.
  5. Air Fry: Lightly grease the air fryer basket with cooking spray or oil. Place the coated fritters in the basket, leaving some space between each one to allow for even cooking. Depending on the size of your air fryer, you may need to cook them in batches.
  6. Cook: Air fry the fritters at 350°F (175°C) for 10-12 minutes, flipping them halfway through the cooking time, until they are golden brown and crispy on the outside.
  7. Serve: Once cooked, transfer the apple fritters to a wire rack to cool slightly before serving. Enjoy them warm, either plain or with a dusting of powdered sugar or a drizzle of caramel sauce.


These air fryer apple fritters are deliciously crispy on the outside and soft and tender on the inside, with bursts of sweet apple in every bite. They make a fantastic treat for breakfast, brunch, or dessert!