A Natural Skin Revitalizer: The Perfect Blend of Carrot, Bay Leaf, and Orange Zest

A Natural Skin Revitalizer: The Perfect Blend of Carrot, Bay Leaf, and Orange Zest

A Natural Skin Revitalizer: The Optimal Combination of Orange Zest, Bay Leaf, and Carrot
Though it may sound fantastical, often the most charming answers can be discovered in the most basic things that nature has to give. Just picture finding a fountain of youth in your kitchen. A DIY mixture of olive oil, carrot, bay leaf, and orange zest may be the skincare solution you’ve been looking for to brighten your complexion and minimize wrinkles. This tasty concoction is a tribute to the ageless beauty advantages of organic ingredients rather than merely a recipe.

The Potency of This Mixture

Each component in this mixture has a special advantage for the skin, but some are especially good at encouraging the creation of collagen, which is necessary to keep the skin supple and youthful-looking.

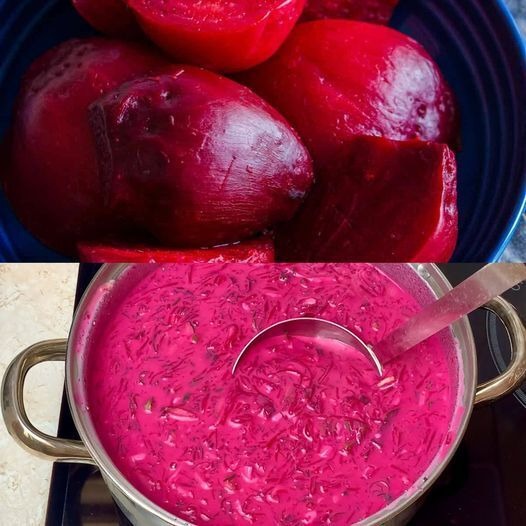
Beets: Rich in beta-carotene,

Carrots include vitamins A and C, which shield skin cells from free radical damage and increase the synthesis of collagen. This makes the skin appear younger by reducing wrinkles and fine lines.
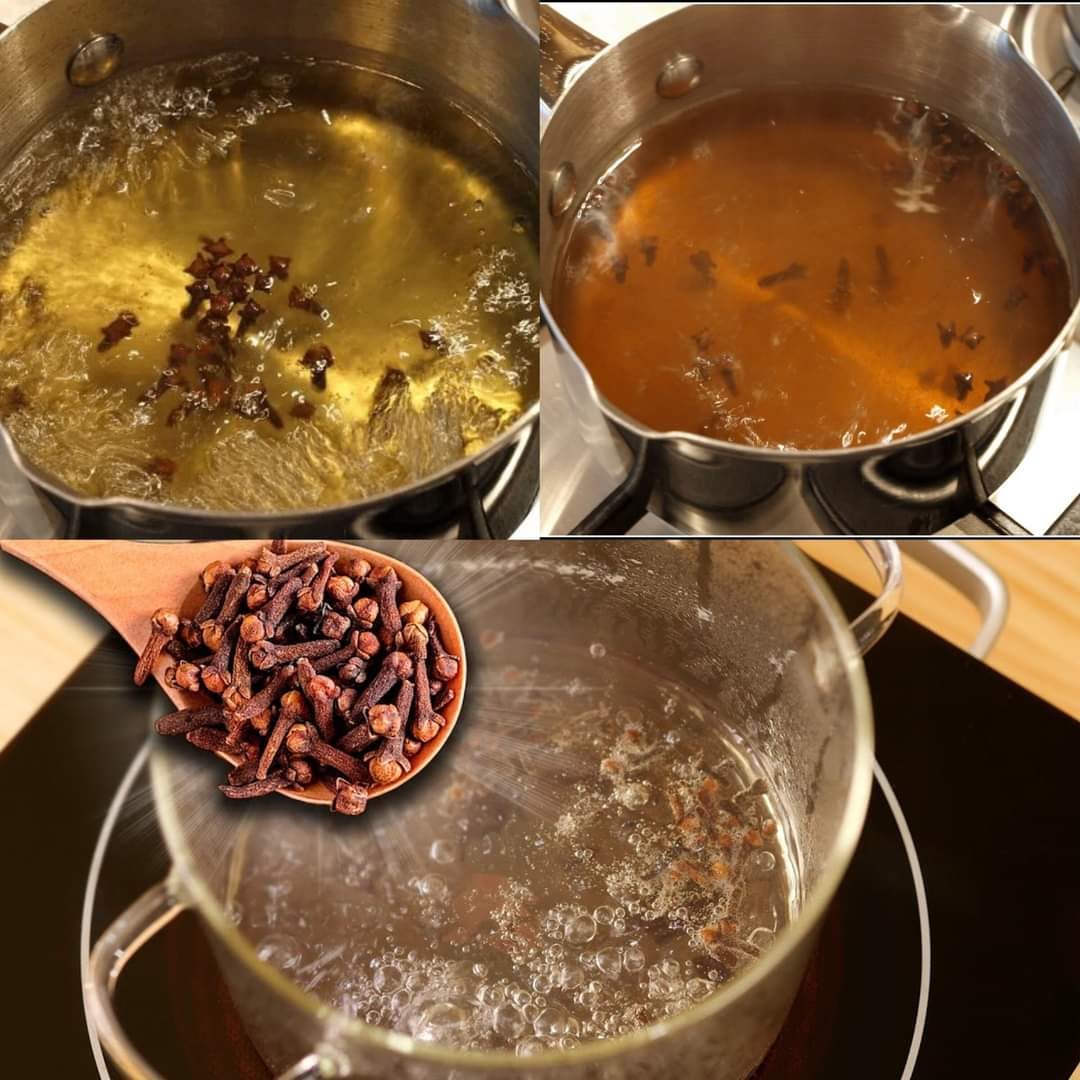
Bay Leaves: Bay leaves, which are well-known for their antioxidant and anti-inflammatory qualities, calm the skin and lessen redness, puffiness, and uneven pigmentation.
guidelines:

Each component in this mixture has a special advantage for the skin, but some are especially good at encouraging the creation of collagen, which is necessary to keep the skin supple and youthful-looking.

Carrots: Rich in beta-carotene, vitamin C, and vitamin A, carrots help produce more collagen and shield skin cells from free radical damage. This makes the skin appear younger by reducing wrinkles and fine lines.
Bay Leaves: Well-known for its antioxidant and anti-inflammatory qualities, bay leaves calm the skin and lessen redness, swollenness, and uneven skin tone.

Orange Zest: Packed with vitamin C, orange zest is a collagen-boosting superfood that brightens the skin, encourages skin healing, and combats aging signs.
Olive Oil Because of its high content of vital fatty acids and vitamins E and K, olive oil is a mainstay in Mediterranean beauty routines. It leaves the skin feeling supple and soft.

How to Make Your Own Skincare Products

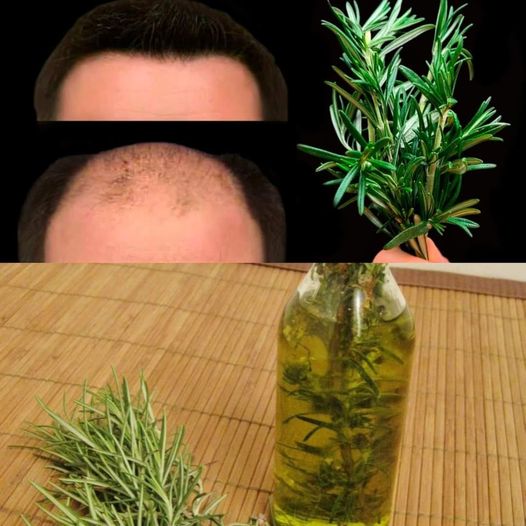
It’s easy to make this skin-renewing elixir. Simmer carrot, bay leaves, and orange zest in olive oil over low heat for many hours. After that, filter the oil and keep it somewhere cool and dark. Apply this golden liquid on your face’s wrinkles and fine lines before going to bed. The all-natural components feed your skin while you sleep.

skin, increasing the synthesis of collagen and bringing forth its inherent brightness.

Uncovering the Secrets of Nature’s Beauty

Including this natural elixir in your skincare routine is a great way to treat your skin, which deserves the utmost care. Embracing the calming force of nature is the first step towards adopting a more sustainable and health-conscious approach to beauty. One drop at a time, discover the mysteries hidden inside the wonders of the natural world. Start a lovely self-care journey today to maintain your skin’s radiance for years to come.

Slow Cooker Baked Potatoes

Slow Cooker Baked Potatoes

Hi there, friends that love to cook! Today, I’m excited to take you on a beautiful culinary trip centered around flavor and simplicity: preparing Slow Cooker Baked Potatoes. As a full-time stay-at-home mom, I’ve discovered this game-changing item that not only simplifies my life but also fills my house with the delicious smell of freshly baked potatoes. Now, put on your apron and join me as we explore the realm of culinary simplicity! There was a time, in my busy kitchen, when I was needing something warm and comfortable but fuss-free. My culinary buddy, the Slow Cooker Baked Potatoes, is now ready. The modest russet potatoes are the starting point of it all; they patiently await their transformation into golden, fluffy perfection. Following a brief cleaning and a cordial pat dry, they’re prepared to command attention.

“Olive Oil Ballet” to begin!
Here’s where the magic starts: a little coat of olive oil. It’s like giving your potatoes a spa day; the oil guarantees a crispy exterior that’s tempting in addition to adding a hint of elegance. Here’s a little secret: massage in some kosher salt and pepper after you’ve sprinkled them on. Yes, give those potatoes a little tender loving care, making sure to coat each and every nook and cranny with flavor.

Literally Wrapping Everything with Foil!
Have you ever wanted to know how to prepare a baked potato that is truly amazing rather than merely tasty? My pals, it’s all about the foil. Before making its dramatic entry into the leisurely

cook. It’s similar to lulling people into a warm sleep with the promise of a wonderful morning. Turn the cooker up to HIGH for a speedier meeting or LOW for patience.
Blended with kosher salt, pepper, and olive oil, baked potatoes are cooked slowly. They are excellent and melt-in-your-mouth soft and delicate! Use your crockpot to make baked potatoes that rival those found in restaurants! Savor them plain or topped with your preferred toppings.

COMPOSITION

  1. Eight russet potatoes
  2. Two tsp olive oil
  3. ½ teaspoon and
  4. 1 tablespoon of kosher salt

DIRECTIONS

  • Thoroughly wash the potatoes with cold water. Using a paper towel, pat dry the potatoes.
  • Using a fork, puncture the peel of the potatoes and place them on a sheet tray.
  • After applying a thin layer of olive oil, season the potatoes with salt and pepper. I enjoy rubbing To ensure it adheres, rub the salt and pepper into the skin.
  • Tear out pieces of foil, then wrap each potato in foil separately. In the slow cooker put them. Cook with a cover on for 7-8 hours on LOW or 4-5 hours on HIGH.
  • Slice through the foil or unwrap, then top with your preferred toppings.

If you see this in your yard, do not break it under any circumstances. It saves lives!

If you see this in your yard, do not break it under any circumstances. It saves lives!

Despite being disregarded as a common weed, purslane is an important discovery for gardeners and nutritionists. In addition to providing health advantages, its succulent leaves and stems improve your garden in a number of ways. Let’s examine the reasons why you ought to give purslane another look in your garden.

1. A Supercharged Nutrition
Purslane has a wealth of nutrients. One of the few plant sources of omega-3 fatty acids, which are generally present in fish, is this one. It also contains high levels of minerals like magnesium, calcium, potassium, and iron, as well as vitamins A, C, and E. Including purslane in your diet can improve your general health in a big way.

2. Low Maintenance and Drought-Tolerant
Purslane grows well in harsh environments where other plants might struggle. Because it can grow in poor soil and withstand drought, it’s a great option for low-maintenance gardening. Purslane adds beauty and health to your garden, and it requires very little care.

3. A Gastronomic Pleasure
Purslane is not only nutrient-dense but also gives your dishes a distinctive flavor. It tastes great added to salads, soups, and stews, with a hint of lemon and a pleasant crunch. Purslane’s edible leaves and stems can improve the nutritional content and freshness of your dishes.

4. Miracle Drugs
Purslane has been used in herbal therapy for millennia. Because of its antioxidant and anti-inflammatory qualities, it’s a

organic cure. Additionally, the omega-3 fatty acids in purslane support heart health and general wellbeing, making it a useful supplement to any diet.

5. Salutations to Helpful Insects
There’s a secret to the lovely purslane flowers: they draw beneficial insects to your garden. Purslane blooms attract a variety of pollinators, including bees and butterflies. You are fostering the development of a robust ecosystem that promotes plant growth and manages pests by allowing these beneficial animals into your garden.

6. Erosion Control and Soil Health
The remarkable root structure of purslane is essential for enhancing soil quality and reducing erosion. Purslane is a natural way to improve the stability and richness of your soil, which will ensure the long-term the prosperity of your flora.

7. A Living Debris
Purslane’s dense growth habit functions as a living mulch. It aids in retaining soil moisture and inhibits the growth of undesirable weeds by keeping the ground covered. Accept purslane as a natural means of keeping your garden bed healthy and reducing the amount of mulch you need to use.

8. Careless Management
Purslane grows quickly, yet it is not too difficult to handle. It’s easy to remove if it begins to intrude on other plants. Purslane is less invasive and requires less work to maintain in check than a lot of other weeds.

In summary, purslane is a useful and adaptable plant that merits a place in your landscape. Its health and nutritional advantages, together with its Because of its simple growing, it’s a great addition to your garden and diet. Therefore, consider gathering purslane for a tasty salad rather than tossing it out as a weed; both your garden and your health will appreciate it.

Boil the Cloves, Drink the Liquid, and You Will Be Grateful for This Advice

Boil the Cloves, Drink the Liquid, and You Will Be Grateful for This Advice

Searching for an easy-to-use, all-natural way to improve your health? You might find the solution you need by boiling cloves and then drinking the liquid. For millennia, people have employed this simple and efficient remedy to advance wellbeing. Here are several reasons to try it and some preparation tips.

ADVANTAGES OF CLOVES
Spices like cloves have been used medicinally for a very long time. They are rich in nutrients and provide a number of health advantages:

  • Anti-Inflammatory Properties: Eugenol, a naturally occurring anti-inflammatory substance found in cloves, can aid in lowering pain and inflammation in the body.
  • Rich in Antioxidants: These little spices are a treasure trove of antioxidants that help fend off free radicals and save your cells from harm.
  • Digestive Aid: Cloves increase the secretion of digestive enzymes, which can aid in better digestion. They are also proven to lessen bloating and gas.
  • Immune Booster: Cloves possess antibacterial and antiviral qualities that can fortify your immune system and maintain general health.

RECIPES FOR CLOVE TEA
Only a few simple components are needed to make clove tea. Here’s how to get ready for it:

Components:

  1. one cup of water
  2. Six complete cloves
  3. Not required: a little honey or a piece of lemon for flavor

Guidelines:

Boil the Water: In a small pot, first bring a cup of water to a boil.
When the water reaches a rolling boil, add the entire cloves. After lowering the heat, simmer the cloves in the water for roughly ten minutes.
After the liquid has simmered, strain it by taking the pot from the heat and remove the cloves before straining the liquid into a cup.
Enhance Flavor: To make your clove tea taste better, you can add a spoonful of honey or a slice of lemon.

USE GUIDE FOR CLOVE TEA

One cup of clove tea each day will yield the finest results. When taken first thing in the morning on an empty stomach, it is especially advantageous. By doing this, you can strengthen your digestive system and begin your day with an antioxidant boost.

ADDITIONAL HEALTH TIPS

In addition to brewing clove tea, take into account the following advice to improve your wellbeing:

  • Remain Hydrated: Throughout the day, sipping on lots of water can help your body work at its best.
  • Consume a Balanced Diet: Make sure to eat a range of fruits, vegetables, and nutritious grains and lean proteins to promote general wellness.
  • Exercise Frequently: Walking, yoga, or swimming are examples of mild physical activities that might help you keep your strength and mobility.

FINAL VERDICT

Including clove tea in your regular routine is an easy yet effective method to improve your health. Cloves’ natural qualities might boost your immune system, enhance digestion, and lessen inflammation. You’ll be happy you tried this simple cure because of all the advantages it offers. Cheers to a happier, healthier you!

Unlock Rapid Hair Growth with Rosemary and Olive Oil

Unlock Rapid Hair Growth with Rosemary and Olive Oil

First of all,

Are you trying to find a natural technique to get more hair and better hair health? Your kitchen pantry is the best place to start! When rosemary and olive oil are combined, they provide a potent combination that can nourish your scalp and encourage quicker hair development. This simple DIY solution is not only affordable but also a gentler option than store-bought hair care solutions. Here’s how to take advantage of these two amazing substances’ benefits.

The Potency of Olive Oil with Rosemary:

  • Rosemary: Well-known for its energizing aroma, rosemary is praised for promoting blood flow to the scalp. More nutrients and oxygen are delivered to hair follicles by this increased blood flow, which can promote growth and fortify hair roots.
  • Olive Oil: Packed with antioxidants, this rich oilas well as vitamins K and E, which give hair intense nourishment. It lessens the chance of scalp irritation, lessens dandruff, and moisturizes the scalp.
    Setting Up Your Hair Growth Therapy:

Components:

  1. Use dried rosemary or fresh rosemary sprigs with olive oil.
  • Infuse the Oil: Rinse the fresh rosemary sprigs to get rid of any dirt or debris before adding the oil. A couple of tablespoons would do for dried rosemary.
    Pour olive oil over the rosemary in a jar until the sprigs are completely submerged.
  • To let the rosemary infuse into the olive oil, seal the jar and place it in a bright position for two to three weeks. A speedier method is to slowly warm the oil and rosemary in a pot over low heat for two to three minutes. hours, after which strain and cool.
  • Application: Massage your scalp and hair immediately with the rosemary-infused olive oil once it’s ready.
    Spend a few minutes massaging the oil into your scalp to improve absorption and increase blood flow.
    For deeper conditioning, let the oil sit in your hair for at least 30 minutes, preferably overnight.
    To get rid of the oil, wash your hair with your usual shampoo.

Advantages and Advice:

The secret to great outcomes is consistency: apply this treatment at least once a week. Applying the product consistently is necessary to promote hair growth and provide noticeable effects.
Completely Organic: Unlike many hair growth solutions, this remedy is entirely natural and free of harsh chemicals, making it especially good for skin that is more sensitive.

In summary:

Olive oil and rosemary are not only for Cooking techniques can be your go-to tools for having thick, healthy hair. This all-natural remedy is simple to make and offers a calming, restorative ritual that improves your hair while also giving your routine a little respite. Try it out and see how your hair changes, becoming more vibrant and strong!

BANANA BREAD BROWNIES!!!

BANANA BREAD BROWNIES!!!

The lofty tiers of banana cake, the homey flavor of banana bread, the aged flavor, and the pleasing density and moisture of brownies are all present in banana bread cakes.

Easy and straightforward! This recipe is really popular with my entire family. I would be preparing this every day if it were for them! Try it out; you’ll love it! The following items are needed to make this recipe:

Ingredients:

  1. 1 cup sour cream, 1/2 cup sugar
  2. Half a cup softened butter
  3. two eggs
  4. 1-3/4 (3 or 4) mashed, ripe bananas
  5. A teaspoon of vanilla extract
  6. 2 c. flour, all purpose
  7. One teaspoon of baking soda
  8. 3/4 teaspoon salt
  9. 1/2 cup chopped walnuts (may be omitted)

Butter for Brown Butter Frosting:

  1. 1/2 cup
  2. 4. Powdered sugar
  3. 1.1/2 tsp. extract from vanilla
  4. Three tablespoons of milk

Guidelines

  • Preheat the oven to 375°F. Butter and dust a 15-by-10-inch jelly roll pan. To make the bars, combine the sugar, sour cream, butter, and eggs in a big basin and beat until well combined. Add vanilla extract and bananas and blend. Mix in the salt, baking soda, and flour for one minute. Add walnuts and stir.
  • Evenly distribute batter into pan. Bake until golden brown, 20 to 25 minutes.
  • In the meantime, melt butter in a big saucepan over medium heat until it starts to boil for icing. After allowing the butter to lightly brown, take it off the heat right away.
  • Stir in milk, vanilla essence, and powdered sugar. It should be thinner than frosting but thicker than a glaze after whisking everything together until smooth. Distribute the brown butter icing over the heated bars (when the bars are still warm, it will be simpler to distribute the icing).

Say Goodbye to Varicose Veins with Red Onions!

Say Goodbye to Varicose Veins with Red Onions!

Are you sick of putting up with ugly and unpleasant varicose veins? Red onions are a surprising natural treatment that you can find in your kitchen! These colorful veggies have anti-inflammatory and antioxidant qualities that can help minimize the visibility of varicose veins in addition to being delicious. With these top 5 red onion recipes, you may say goodbye to those bothersome veins and improve the health of your legs.

Why Do Red Onions Exist?
Quercetin is a unique flavonoid found in red onions that has potent anti-inflammatory and antioxidant qualities. Quercetin is a great natural treatment for varicose veins since it strengthens blood vessels, lowers swelling, and enhances circulation.

1. Ingredients for Red Onion and Apple Cider Vinegar Tonic:

  1. One medium-sized red onion
  2. One cup of Apple cider vinegar

Instructions for making apple cider vinegar

  • Chop the red onion finely and put it in a jar.
    Cover the onions with the apple cider vinegar, making sure they are well covered.
  • After you seal the jar, leave it for 12 to 24 hours.
  • After straining the mixture, put the liquid in a sanitized container.
  • Using a cotton ball, apply the tonic to your varicose veins twice a day.

2. Garlic and Red Onion Balm

Components:

  • One medium-sized red onion
  • two garlic cloves
  • One-third cup olive oil

Guidelines:

  • Dice the garlic and red onion finely.
    Add the chopped onion and garlic to a skillet of heated olive oil.
    The onion should be sautéed until transparent.
    Blend the contents into a homogeneous paste after letting it cool.
    Use the balm on
  • your varicose veins, let it sit for half an hour, and then give them a warm water rinse.

3. Ingredients for a Red Onion and Lemon Juice Compress:

  • One medium red onion and one lemon juice

Guidelines:

Add the lemon juice to the red onion that has been grated.
Dip a fresh cloth into the concoction.
Spend 20 to 30 minutes applying the cloth to your varicose veins.
To get the best effects, repeat this therapy every day.

4. Ingredients for the Red Onion and Honey Mask:

  1. One medium-sized red onion
  2. One tsp honey

Guidelines:

  • Red onion should be blended into a smooth puree.
    Stir in the honey until thoroughly blended.
    After applying the mask, let it sit on your varicose veins for 20 minutes.
  • After using warm water to rinse, pat dry.

5. Ingredients for Red Onion Salad:

  1. One medium red onion, cut thinly
  2. One cucumber, cut thinly
  3. One-third cup olive oil
  4. One lemon’s juice
  5. To taste, add salt and pepper.

Guidelines:

  • Slices of cucumber and red onion should be combined in a bowl.
  • Pour in some lemon juice and olive oil.
  • Add salt and pepper to taste, then toss to mix.
    To increase your consumption of the healthful components found in red onions, try this crisp salad every day.
  • An Organic Way to Have Healthier Legs
    You may improve the health of your legs overall and lessen the appearance of varicose veins by incorporating these red onion recipes into your regular routine. These
  • straightforward, all-natural treatments are simple to prepare and apply, providing a mild yet efficient method of treating varicose veins. So why not attempt them? Your legs will be grateful.

Beet Soup: A Refreshing and Nutritious Summer Dish

Beet Soup: A Refreshing and Nutritious Summer Dish

Beet soup is the ideal summertime recipe if you’re searching for something tasty and nutritious. This colorful soup is full of nutrients that are excellent for your health in addition to deliciousness. Beet soup is a culinary staple that you will love whether it is served hot or cold. Now let’s get started on making this delicious dish that you should prepare at least once a week.

Just Why Beet Soup?
Beets are an extremely nutritious food. They are high in minerals like magnesium and potassium and high in vitamins A, C, and K. Beets are a wise choice for preserving excellent health because they are also rich in dietary fiber and antioxidants. This recipe for beet soup is It’s tasty, light, and ideal for the hot summer months.

Ingredients You’ll need the following to prepare this delectable beet soup:

  • four medley beets, chopped and peeled
  • One large onion, finely sliced
  • two minced garlic cloves
  • Four cups of chicken or veggie stock
  • Two tsp olive oil
  • One tablespoon of apple cider vinegar or lemon juice
  • To taste, add salt and pepper.
  • Garnish with parsley or fresh dill (optional).
  • Greek yogurt or sour cream (optional) for serving

Guidelines

1. Get the beets ready.

Peel and chop the beets into small, uniform pieces first. They will cook more rapidly and evenly as a result of this.

2. Sauté the garlic and onions.

Heat the olive oil in a big pot over medium heat. Include the chopped onion in the mixture.

garlic, and cook for about five minutes, or until they are tender and aromatic.

3. Prepare the beets.

Stir the diced beetroots into the pot with the onions and garlic. Allow the beets to soften slightly by cooking them for an additional five minutes.

4. Include the broth

Make sure the beets are completely submerged before adding the vegetable or chicken broth. After bringing the mixture to a boil, lower the heat, and simmer it until the beets are soft, 20 to 25 minutes.

5. Puree the Soup

After the beets are cooked, purée the soup until it’s smooth using an immersion blender. Should you lack an immersion blender, you can cautiously move the soup into a conventional blender in divided portions and process it there. till silky.

6. Add Flavor and Present

Add the apple cider vinegar or lemon juice, and season with salt and pepper to taste. Spoon soup into dishes; sprinkle with parsley or fresh dill. If you want it extra creamy, add a dollop of Greek yogurt or sour cream.

Spicy beet soup
This soup made with beets is very adaptable. Serve it hot for a hearty dinner, or cool it down for a cool summertime meal. It tastes great with a simple green salad or toasted bread.

In summary
You’ll love making and enjoying this tasty and nourishing beet soup all summer long. Its rich flavor and vivid color make it a distinctive dish, and its health advantages guarantee that you’re giving your body what it needs. with each spoonful. Like many others, you’ll find yourself making this dish at least once a week after giving it a try. With a bowl of this delicious beet soup, relish your summer!

The vegetable renowned for its ability to regulate blood sugar levels proves to be a formidable ally against diabetes.

The vegetable renowned for its ability to regulate blood sugar levels proves to be a formidable ally against diabetes.

The vegetable that is well-known for controlling blood sugar levels turns out to be a powerful weapon against diabetes.

Because of its low glycemic index, healthy carbohydrates, moderate proteins, and soluble fibers, it is especially suggested for those who have diabetes.

Furthermore, according to the referenced source, beans are known as “sugar eaters” because of their high content of plant fibers, which prevent the absorption of sugar and lower insulin release.

Their place as a very nutritious dietary alternative is solidified by their nutrient-rich makeup.

Beans are a great source of calcium, magnesium, potassium, selenium, and vitamin B. Magnesium is an adaptable mineral that helps with blood pressure, bone health, immune system fortification, energy metabolism, and muscle and nerve system support.
Beans are used

as an abundant supply of calcium, magnesium, potassium, selenium, and vitamin B. Magnesium is an adaptable mineral that helps with blood pressure, bone health, immune system fortification, energy metabolism, and muscle and nerve system support.

Iron is also found, which is necessary for cell formation and oxygen delivery in the blood.

Beans come in a variety of sizes, shapes, and flavors, but they are all rich in fiber and minerals. Enjoyed fresh, dry, frozen, or canned, they always have a delicious taste. All year round, beans are available and can be cooked in a variety of ways for breakfast, lunch, or dinner.

Beans should only be consumed in amounts no more than three cups per week, as they are an essential nutritional component that can improve general health. The most recent dietary recommendations emphasize the weekly allowance of three cups of beans for maximum health benefits.

Cleanse Your Liver and Lungs with Grandma’s Recipe

Cleanse Your Liver and Lungs with Grandma’s Recipe

Are you trying to find a natural way to clear your lungs and liver? Try Grandmother’s tried-and-true recipe. This easy-to-make ginger beverage is not only delicious, but it also does a great job of cleaning your system. Let’s investigate how you might feel more refreshed and healthy with this amazing dish.

Why, Ginger? Strong and full of health benefits, ginger is a root vegetable. Its potent antioxidant and anti-inflammatory qualities aid in internal body cleansing. Ginger is a perfect detoxifying element since it facilitates better digestion, supports liver function, and helps remove mucus from the lungs.

The Components

Grandma’s recipe is easy to follow and calls for a few basic ingredients:

  1. One tiny, one to two inch piece of fresh ginger
  2. One lemon
  3. One tsp honey
  4. Four glasses of water

Detailed Instructions

  • To prepare the ginger, begin by giving it a good wash. Peeling is not required. To get the most out of the flavor and health benefits of ginger, slice it thinly.
  • Boil the Water: Fill a pot with 4 cups of water and bring it to a boil. After it boils, include the ginger slices.
  • Simmer: To impart the health benefits of the ginger to the water, lower the heat and let it simmer for ten to fifteen minutes.
  • Add the honey and lemon: Take the pot off the burner and allow it to cool a little. Add a tablespoon of honey and squeeze one lemon’s juice into the ginger water. While the honey offers sweetness and eases sore throats, the lemon amplifies the detoxifying impact and provides a vitamin C boost.
    Add the honey and lemon; remove
  • the saucepan from the heat and let it to cool a little. Add a tablespoon of honey and squeeze one lemon’s juice into the ginger water. While the honey offers sweetness and eases sore throats, the lemon amplifies the detoxifying impact and provides a vitamin C boost.
  • Pour the liquid into a mug after straining the mixture to get rid of the ginger bits. You can now sip your energizing ginger tea!

The Advantages

  • Regular consumption of this ginger tea can aid in liver and lung cleansing by:
  • Liver detoxification: Ginger stimulates the liver, assisting it in eliminating toxins and enhancing its performance.
  • Lung Clearing: Ginger’s anti-inflammatory qualities facilitate mucus removal from the lungs and help lessen congestion.
  • inhale.
  • Increasing Immunity: The immune system is fortified by the combination of ginger, lemon, and honey, which shields your body from disease.
    A Straightforward Way to Improve Your Health
  • A quick and simple strategy to help your liver and lungs is to include Grandma’s ginger tea in your daily routine. This herbal treatment has several health advantages and is calming to consume. Try it out and see for yourself how purifying ginger can be. Your health will appreciate it.