Why Do I Boil 1 kg of Carrots with Apples? You Can’t Buy This in Stores! Few People Make It This Way, and It’s a Shame.
If you’ve never tried boiling carrots with apples, you’re losing out on a tasty and nutritious treat that’s really simple to prepare at home. Carrots and apples may seem like a weird combination, but when cooked together, they provide a flavourful, naturally sweet meal that is high in vitamins, minerals, and antioxidants. It’s not something you can buy in shops, and after you try it, you’ll wonder why more people don’t do it!
Why Should You Boil Carrots with Apples?
Rich in nutrients:
Carrots are high in beta-carotene, vitamin A, and fibre, making them beneficial for eye health and digestion.
Apples give a delicious flavour and are high in vitamin C, fibre, and antioxidants, all of which benefit the immune system and general health.
Naturally Sweet:
The natural sweetness of apples complements the mild flavour of carrots, resulting in a meal that meets your sweet needs without adding sugar.
Easy to make:
This dish takes just a few basic ingredients and is ready in no time. It’s ideal as a side dish, snack, or dessert.
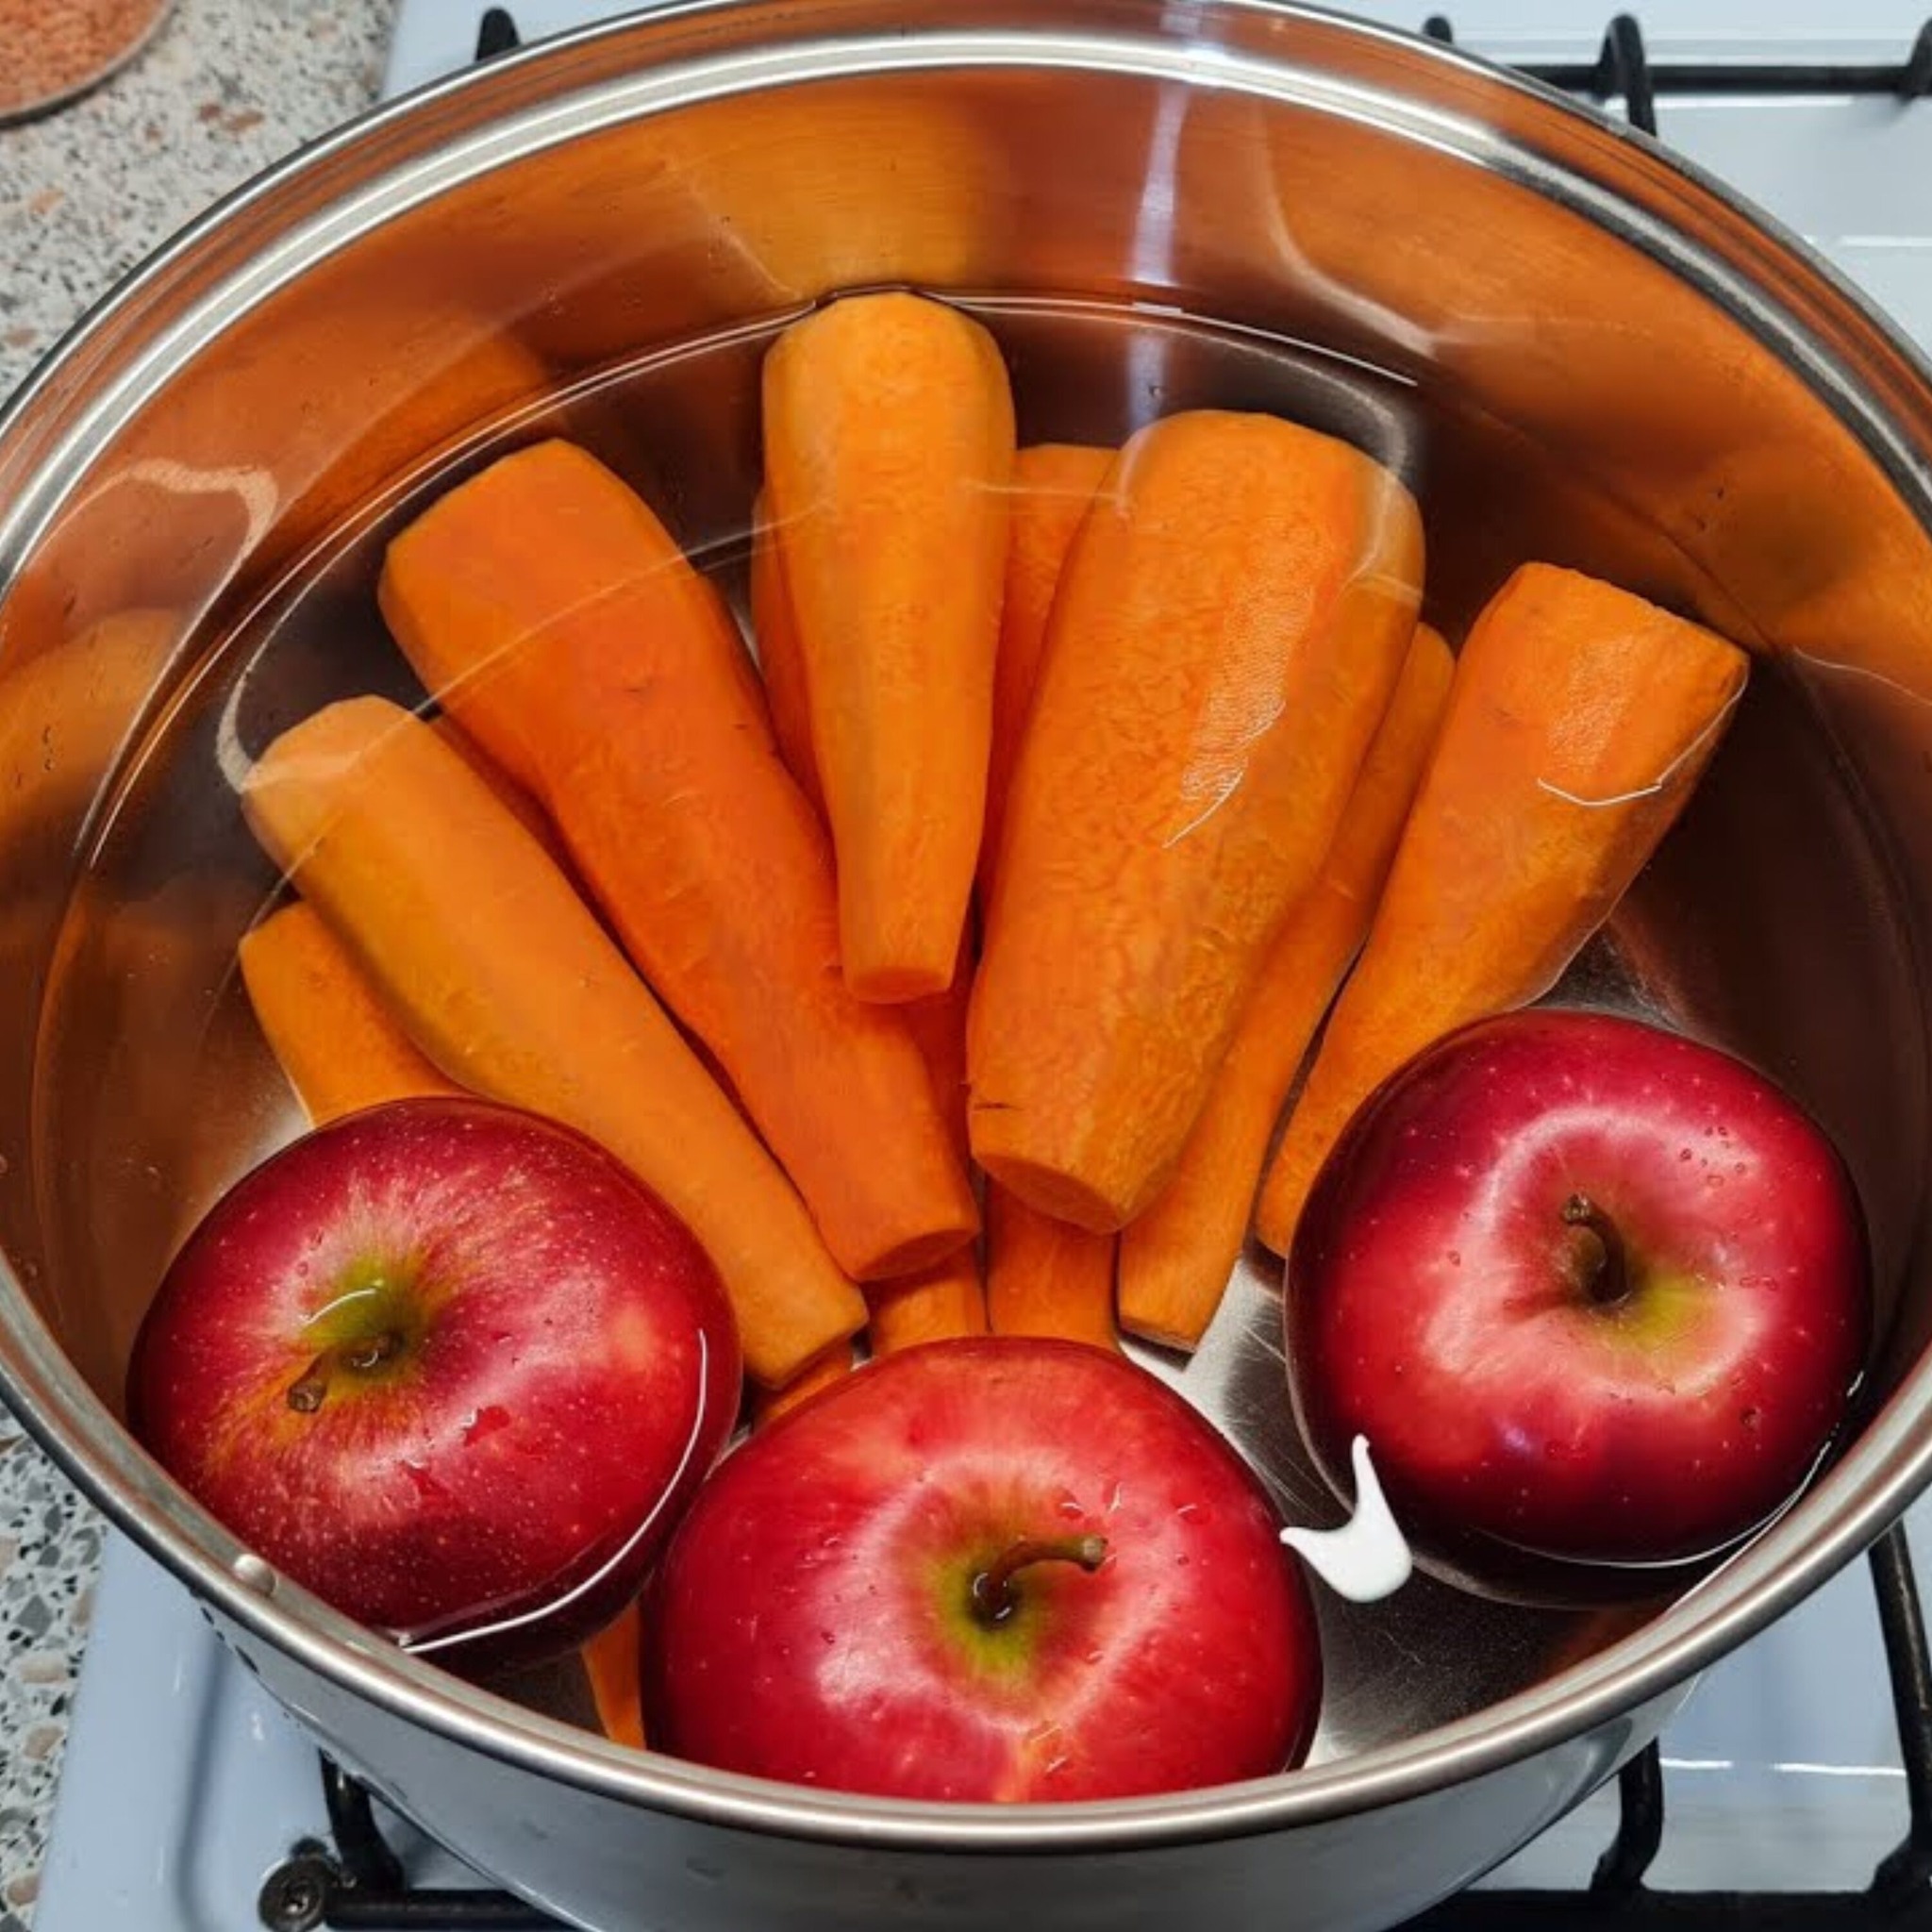
Ingredients: 1 kilogramme carrots, peeled and sliced.
3-4 apples, peeled, cored, and cut.
1-2 teaspoons of honey or maple syrup (optional for added sweetness)
A sprinkle of cinnamon (optional for flavouring)
Water (just enough to cover the carrots and apples in the saucepan)
Instructions:
Step 1: Prepare the ingredients.
Peel and chop carrots: Peel the carrots and cut into medium-sized pieces.
Peel, core, and slice apples into wedges.
Step 2: Boil the carrots and apples.
Boil Water: Heat water in a big saucepan until it boils. The water should be sufficient to cover the carrots and apples.
Add the Carrots: Cook the chopped carrots in the boiling water for 10-12 minutes, or until they soften.
Add the Apples: Once the carrots have softened, add the apple slices and simmer for another 5-7 minutes, or until both the carrots and apple are cooked.
Step 3: Add Flavouring (Optional).
Optional Sweeteners: If you like a sweeter meal, add 1-2 teaspoons honey or maple syrup at this point. Stir it in until well blended.
Optional Spices: Add a sprinkle of cinnamon to enhance the natural sweetness of the apples and carrots.
Step 4: Serve: For a softer, puree-like texture, mash the carrots and apples together. Alternatively, serve them whole, depending on personal choice.
Enjoy Warm or Cold: This dish is delicious both warm or chilled, making it a versatile treat.
Why Few People Make It—but Should:
Unique Flavour Combination: Not many people think to combine apples and carrots, but when you do, the result is a naturally sweet and nutritious dish that’s hard to resist.
Healthy and Satisfying: This dish is not only delicious but also packed with nutrients, making it a perfect option for those looking to eat healthily without compromising on taste.
No Additives or Preservatives: Unlike store-bought products, this homemade dish contains no artificial ingredients, preservatives, or added sugars, making it a healthier alternative.
Conclusion:
Boiling carrots with apples is a simple yet delicious way to create a nutrient-packed dish that’s perfect as a side or snack. It’s naturally sweet, healthy, and easy to make at home. Try this recipe today—you’ll see why it’s such a shame that so few people make it!