Veins and Poor Circulation with Cayenne Pepper

Veins and Poor Circulation with Cayenne Pepper

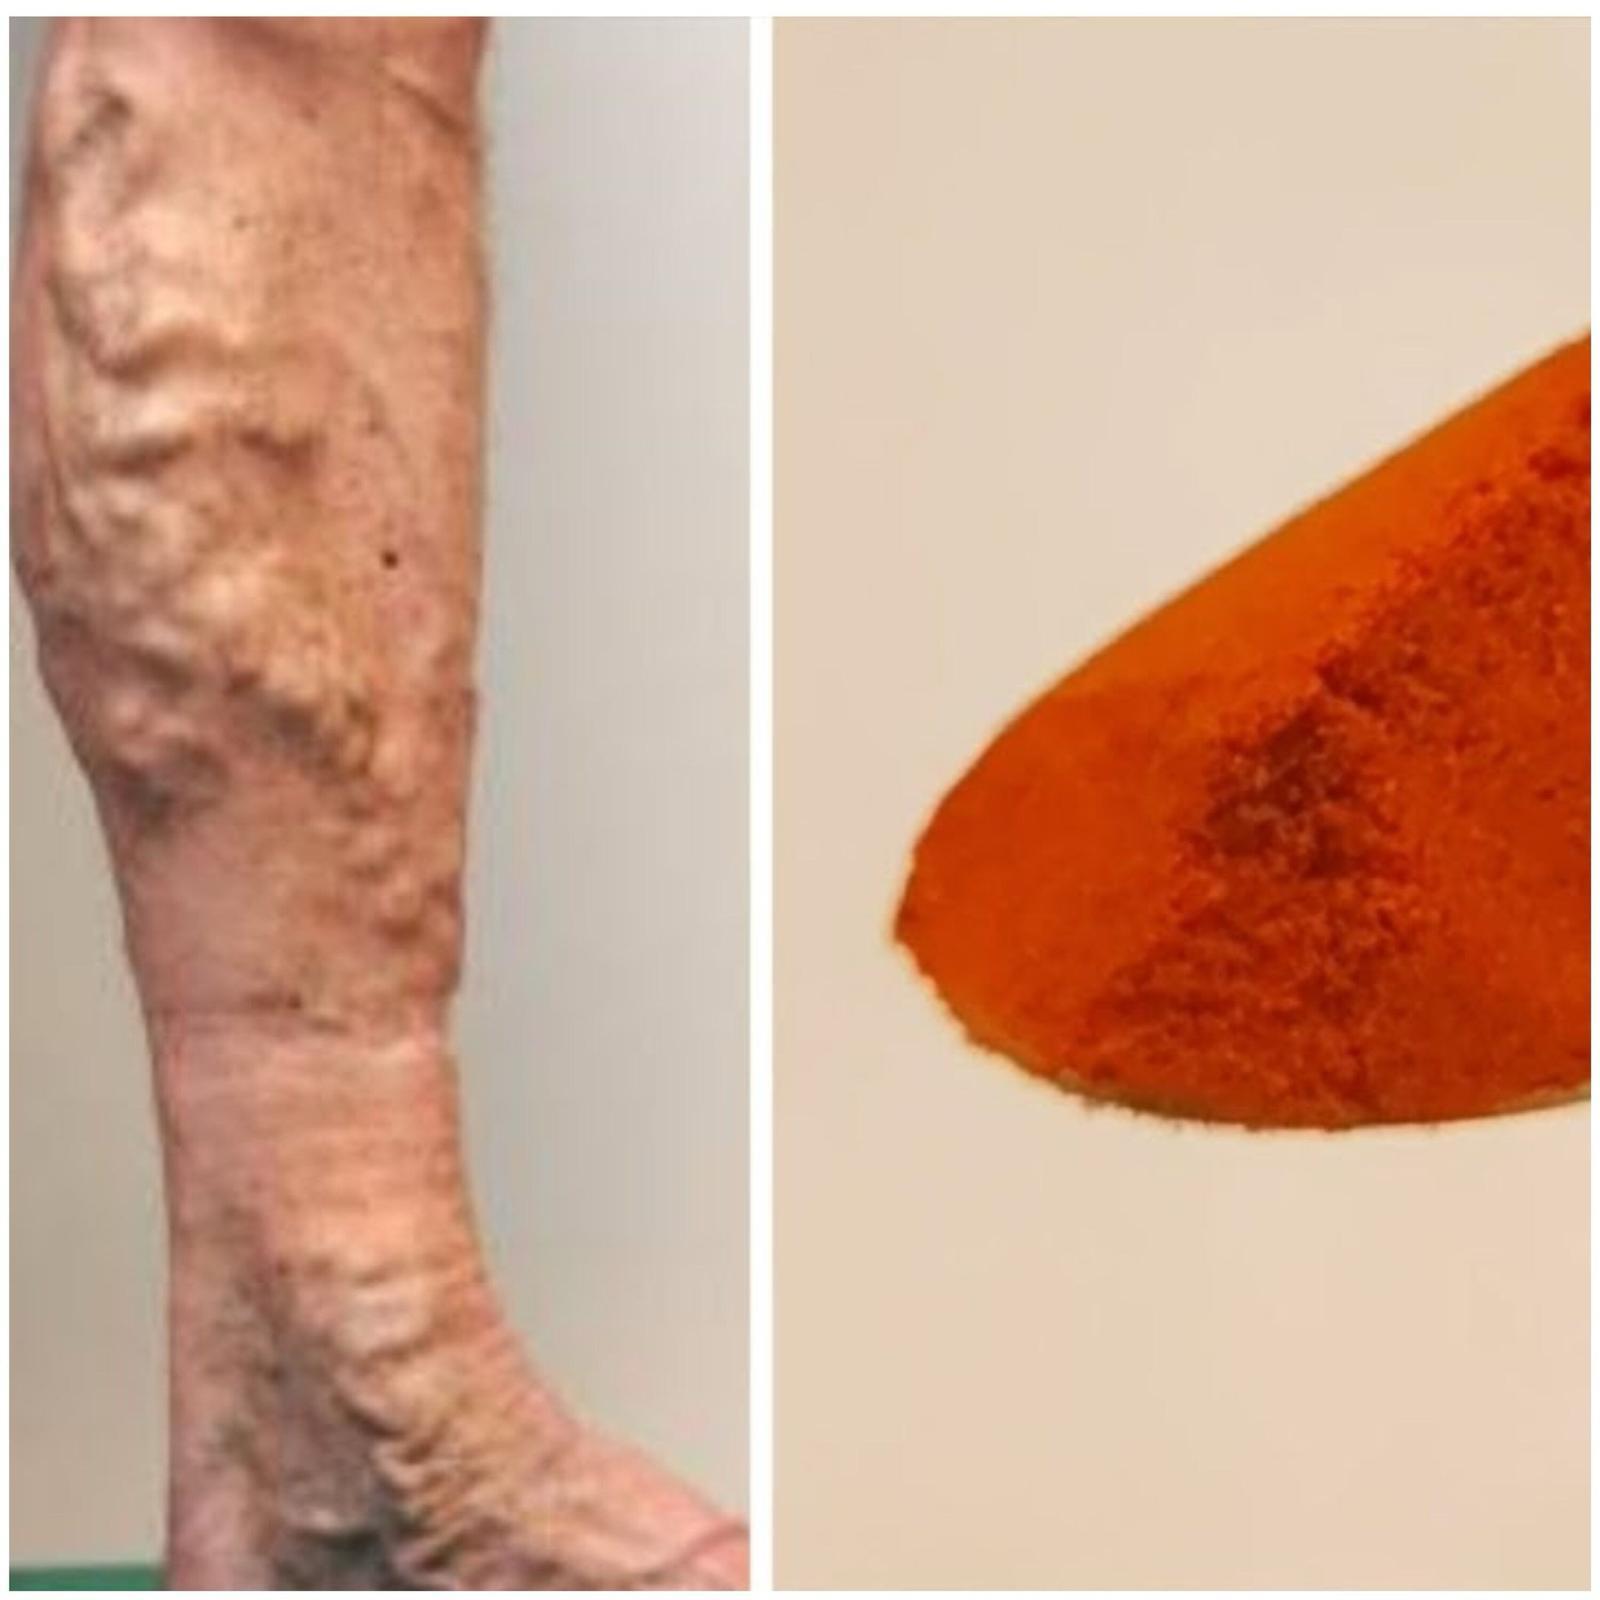
Wave Goodbye to Varicose Veins and Poor Circulation with Cayenne Pepper: The Natural Wonder

When it comes to natural remedies and herbal cures, cayenne pepper is a fierce contender that has been shown to significantly improve circulation and lessen varicose vein irritation. This bright red spice, a mainstay in kitchens everywhere, not only gives food a burst of flavour and complexity, but it also has strong health benefits that may help revitalise your heart.

The Power of Cayenne Pepper

Capsaicin, a substance found in cayenne pepper, is what gives it its distinct spiciness. More than just a flavour enhancer, capsaicin is a potent compound that has been demonstrated to strengthen veins and arteries, increase blood flow, and even lessen pain. Because of its medicinal qualities, cayenne pepper is a great natural treatment for people who want to get rid of varicose veins and impaired circulation.

Improving Circulation Naturally

Numerous discomforts, such as varicose veins, can arise from poor circulation. Varicose veins are ugly, bulging, and occasionally painful veins that mostly affect the legs. Cayenne pepper works to improve circulation, which lowers vein pressure and lessens pain and swelling.

How to Incorporate Cayenne Pepper into Your Routine

  1. Dietary Incorporation: Including cayenne pepper in your regular diet is one of the easiest methods to take advantage of its health advantages. Including a dash of cayenne pepper in your food can aid in promoting internal circulation. Cayenne pepper may be a delicious and health-promoting way to add some spice to your meals. Try it on your morning eggs, in soups and sauces, or in a hot cup of tea.
  2. Cayenne Pepper Supplements: Cayenne pepper supplements are available for people who would rather take a more direct approach or who might not like the spice in their food. These can deliver a potent dosage of capsaicin without the spiciness that comes with eating the pepper raw. Like with any supplement, it’s crucial to speak with a doctor before beginning to be sure it’s suitable for your needs.
  3. Topical Uses: Creams and ointments containing capsaicin are also accessible for topical use. When used topically, it may lessen discomfort and enhance blood circulation in the afflicted regions. This has the potential to be especially helpful in reducing varicose vein irritation.

A Note of Caution

Although cayenne pepper has many advantages, it should be used carefully, particularly for people with sensitive skin or digestive systems. Any possible discomfort can be reduced by progressively raising the dosage from minor starting points.

Conclusion

In the realm of health and wellness, cayenne pepper is a remarkable natural marvel that provides a straightforward yet efficient method of enhancing circulation and treating varicose vein problems. Through the use of topical applications, supplements, or food, you may incorporate this spicy spice into your everyday routine to reap its potent advantages and improve your vascular health. As always, to ensure a safe and fruitful journey towards wellness, seek medical advice before making any major changes to your health regimen.

Best Air Fryer Lamb Chops

lamb chops best air fryer

Best Air Fryer Lamb Chops The lamb loin chops in this dish are succulent and flavourful. These are easily prepared for a weeknight meal with just a little marinade. Alternatively, you might serve them on Easter or for any other festive event.

One of the proteins that a lot of people are afraid to cook is lamb. They worry that it may taste strange or gamey. In addition, lamb tends to be more expensive than other meats, so there’s a financial risk associated with making a mistake.

15 minutes for preparation

14 minutes for cooking

Advantages of Air-Fried Lamb Chops:

  • The lamb you cook in an air fryer will come out properly done. It’s faster and easier to use than an oven or grill.
  • Using the air fryer allows them to cook without being visible and without having to worry about how they are doing all the time, save from having to flip them over once.
  • It will be dinner in thirty minutes. These lamb loin chops are elegant enough for any holiday meal, yet they’re quick enough for a weeknight supper.

Recipe By Cleaneatingkitchen Carrie forrest

Ingredients For Best Air Fryer Lamb Chops:

  • Two tsp olive oil
  • Half a teaspoon of sea salt
  • Half a teaspoon of powdered garlic
  • 1/4 tsp freshly ground pepper (black)
  • Four lamb chops, defrosted.


Instructions Best Air Fryer Lamb Chops:

  • Mix the olive oil, salt, pepper, and garlic powder in a small bowl. Mix everything together.
  • After putting the lamb chops in a shallow dish, cover them with the marinade. Make sure they are covered on all sides with your hands. Another option is to marinade the lamb chops in a sizable ziptop bag.
  • Put the lamb chops inside the basket of the air fryer. For six minutes, set the temperature to 390°F.
  • Turn the lamb chops over with tongs and cook for a further 6 to 8 minutes. Your lamb chops might need to cook for a longer period of time if they are thicker than an inch.
  • Make sure the internal temperature of one of the lamb chops reaches at least 145°F by using a meat thermometer put into its centre.
  • Before serving, allow the lamb chops to rest for roughly five minutes.


Notes For the Recipe:

  1. Certain models of air fryers require preheating. To find out if you need to preheat your specific model before using it, please consult the owner’s manual.
  2. You could easily halve this recipe to make fewer servings.
  3. Feel free to keep the marinade in the refrigerator for up to 24 hours if you would like to marinate your lamb chops longer. Before cooking, let the lamb chops to come to room temperature.

Cough with Homemade Onion Syrup

Cough with Homemade Onion Syrup

Enhancing Immunity and Relieving Cough with Homemade Onion Syrup

Finding natural solutions to strengthen immunity and relieve coughs and sniffles becomes crucial when the cold and flu season arrives. Homemade onion syrup is one ancient remedy that has been passed down through the ages. This post will discuss the advantages of onion syrup, ways to increase its potency, and its many uses in fostering well-being.

Chop the onion, place it in a jar, add a spoonful of spice, and then cover it with honey: This homemade syrup can replace those from the pharmacy.

The Power of Onion Syrup

It has long been recognised that onion syrup strengthens the immune system. Brimming with vitamins and vital microelements such as iron and zinc, this homoeopathic treatment is an effective weapon against infections. What sets it apart is its bactericidal effect, which not only helps fight off illness but also alleviates troublesome coughs.

To make your onion syrup even more effective and enjoyable, consider replacing sugar with honey. Honey contains propolis, a powerful immune booster. Here’s how to upgrade your onion syrup:

Ingredients:

  1. 1 large onion
  2. Half a glass of honey
  3. Ground black pepper
  4. A few grains of whole black pepper

Approach:

  1. Cut the onion in half and finely dice it.
  2. Fill a jar halfway with the diced onion.
  3. Sprinkle half a teaspoon of ground black pepper over the onions.
  4. Add another layer of diced onion, followed by another half teaspoon of ground black pepper and a few grains of whole black pepper.
  5. Pour liquid honey over the onion layers until the jar is half full.
  6. Seal the container and let it sit for at least 10 hours in a cool, dark place.

This resting period allows the onion to release its juices, resulting in a ready-to-use syrup that is both effective and flavorful.

Alternative Onion and Bay Leaf Syrup

Another potent homemade syrup worth trying is the onion and bay leaf concoction. This syrup not only relieves coughs but also cleanses the lungs and airways.

Ingredients:

  1. 1/2 kg of onion
  2. 2 dl of water
  3. 3-4 bay leaves
  4. 250 g of honey

Directions:

  1. peel the onion, leaving the bottom skin intact, and cut it into quarters.
  2. Place the onion quarters in a pot and cover them with water.
  3. Add the bay leaves to neutralize the onion aroma and provide additional benefits.
  4. Simmer the mixture over low heat for about 1 hour, adding water if necessary.
  5. After simmering, strain the decoction through a thick sieve.
  6. Once the liquid has cooled, add 250 g of honey.
  7. Store the mixture in a glass jar with a lid in the refrigerator.

Consume 2 tablespoons of this natural syrup three times a day for three days or until it’s finished. Relief should be noticeable after the first day.

The Versatile Benefits of Onions

Onions not only play the starring role in these homemade syrups but also offer numerous other health benefits. Their antiviral and antibacterial properties can help thin mucus, making it easier to expel and alleviate respiratory discomfort.


Conclusion

As the cold and flu season approaches, turning to homemade onion syrup can be a wise choice. These natural remedies, enriched with honey and bay leaves, not only boost immunity and alleviate coughs but also have a delicious flavor. Embrace the wisdom of our grandmothers and enjoy a healthier and more comfortable winter season with these tried and tested elixirs. Here’s to a healthier you!

Mice and rats will avoid your house

Mice and rats will avoid your house

Mice and rats will avoid your house in droves if they detect this odor. A fantastic proposal.

Hi to all of you! Do you have unwanted mice guests and would rather use a gentler, more natural method to keep them away? You’re in the proper location! I’m excited to share with you today a practical and environmentally responsible way to keep mice out of your house. Not only should you trap, but you should also use the appropriate natural repellents. What’s the best thing, then? It’s simple, affordable, and kind.

Making the Ideal All-Natural Pest Deterrent

A combination of 9% vinegar, lemon peel, garlic, coffee grinds, cloves, and an aromatic mix makes up our repellant. Because of their powerful smells, mice often avoid ingesting these chemicals. This repellant can be made in the following ways:

What you need:

  1. Peeled lemon
  2. A clove of garlic
  3. Used coffee grounds
  4. Cloves
  5. 9 percent vinegar

Setting Up:

  1. Make a Combination: Crush the garlic cloves, add the lemon peel, coffee grounds, and cloves to a bowl.
  2. Whisk in the vinegar: Add 9% vinegar to the bowl. Both the repellant and the smells are improved by this.
  3. If you want the aromas to really pop, let the combination a few hours—or even a night—to infuse.
  4. Pour the liquid into a spray bottle so it can be applied easily.

How to Use:

  1. Doorways, windowsills, and other potential entry points for mice, including tiny cracks and holes, should be sprayed with this combination.
  2. To keep the combination effective, use it frequently, particularly after cleaning the area or after rain.

air fryer sausage hoagie sub

air fryer sausage hoagie sub

The homemade sausage hoagie sub from Italy is one of my favorite dishes from my early years. made with pepper jack cheese and air-fried Italian sausage covered in gravy. Everything presented to you in a sizable hoagie roll.

Expert Advice

  • Making the ideal hoagie sub requires a combination of tried-and-true methods and cutting-edge strategies, particularly when utilizing an air fryer. To guarantee that your hoagie subs are a hit every time, follow these expert tips:
  • Selecting Bread: Look for premium hoagie rolls that are substantial enough to contain your contents without becoming mushy. A decent hoagie roll should have a soft, airy inside and a slightly crispy outside.
  • Techniques for Layering: To keep the bread from becoming soggy from moist elements like tomatoes or sauces, start by applying a barrier layer of cheese or lettuce immediately on top of the bread. To ensure that the meats and cheeses on hot subs warm up evenly, place them near the bottom and use an air fryer to melt the cheese.
  • Combining a range of textures, such as soft meats and cheeses with juicy tomatoes and crispy greens, will make your meal more intriguing. Combine salty meats with sharp cheeses, sweet sauces, or sour dressings to counterbalance the flavors.
  • Meat & Cheese: For smoother melting and even distribution, use thinly cut meats and cheeses. If you want a hearty sub, layer them thickly. For added taste, think about toasting the meat in the air fryer just a little bit before assembling the sub.

Components

  1. One pound of mild or spicy Italian sausage
  2. Two cups of marinara sauce
  3. Four hamburger rolls
  4. Eight pieces Cheese with pepper Jack

Guidelines

  • First, put the sausages in the air fryer basket and cook them for 12 minutes at 360 degrees Fahrenheit.
  • After cutting the hoagie roll in half, spread two to three teaspoons of sauce over both the top and bottom of the sandwich. Cut the sausage into long segments and then into half. Sprinkle over the sauce.
  • Arrange the cheese pieces.Place the cheese on top, followed by the top portion of the bun.
  • After placing the sandwich inside the air fryer basket, let it cook for three to five minutes, or until the cheese is melted. (Selection for air fryer)
  • Arrange, present, and savor!


air fryer sausage, peppers, and onions

air fryer sausage, peppers, and onions

Impress your friends with this tasty and keto-friendly meal of sausage peppers and onions cooked in the air fryer! Simple ingredients and quick preparation

Serving Ideas

Though you are free to serve this dish with anything you wish, it is typically served with a large side of French fries! Serve over rice, or try one of these other well-liked sides instead:

  1. Potatoes Mashed
  2. Air-fried green salad onion rings
  3. Rolls with cheese stuffing inside

Onions and sausage peppers can also be layered with tomato sauce or your preferred dip inside a sandwich bread.

Methods for Preserving Leftovers

  • You may easily keep leftovers in the refrigerator for two to three days if you are cooking for yourself or if you prepare extra so you can enjoy them for lunch the following day.
  • To maintain maximum freshness, store in an airtight container.
  • To freeze: Place the extra piece in freezer-safe container if you wish to freeze it.
  • For two to three months, it can be stored in the freezer.
  • Refrigerate to thaw, then reheat in the microwave or air fryer.

Components

  1. 4-5 Italian sausages, mild or spicy
  2. two onions
  3. One or two green peppers
  4. One or two red peppers
  5. One or two yellow peppers
  6. Three tablespoons of optional extra virgin olive oil for rolling

Guidelines

  • Cut the onions and peppers into small pieces first.
  • Next, drizzle 1 tablespoon of olive oil into each batch (I cooked them in separate batches; use less olive oil if you cook them simultaneously).
  • The onions and peppers should be air-fried for 7 minutes at 390 degrees F. In three minutes, I combined them.
  • After that, add your sausage and air fry it at 390 degrees for 20 minutes.
  • Serve as is or top with onions and peppers and add sausage (I chopped mine up so they would fit well).
  • Arrange, present, and savor.

air fryer fried egg sandwich

air fryer fried egg sandwich

Are you trying to think of a simple breakfast recipe that will satisfy your palate? Take a look at this fried egg sandwich made in an air fryer! It’s a fantastic way to savor a traditional breakfast dish with a contemporary touch. You can quickly put a tasty dinner on the table because it is also easy to make. Have fun!

How do you make the finest fried egg sandwich in an air fryer?

For Right Now’s Meals:

  • To begin, toast your bagel in the air fryer for three minutes at 320 degrees Fahrenheit.
  • Cook the fried egg on the stove. Toss in some salt and pepper for flavoring.
  • After toasting, top the bagel with the egg, then top with a slice of cheddar cheese and a slice of deli ham.
  • The sandwich should be wrapped in aluminum foil and put in the air fryer for three minutes at 340 degrees Fahrenheit.
  • Arrange, present, and savor!

For Later Consumption:

  • Preparing these sandwiches in advance is highly recommended.
  • For the kids, I normally cook them and reheat them in in the morning.
  • To prepare them ahead of time: After preparing the sandwich as mentioned above, cover it with aluminum foil and store it in the fridge.
  • Next, preheat the air fryer, add the sandwich wrappers, and program the air fryer to cook for 4–7 minutes at 330 degrees Fahrenheit.
  • To Freeze: This would work in the air fryer, though I haven’t tried freezing breakfast sandwiches there. That would add another six or eight minutes to the duration. After the cheese has melted, remove.

Components

  1. Just one bagel
  2. One fried egg
  3. One piece of cheddar cheese
  4. One slice of deli ham, one tsp salt
  5. half a teaspoon of pepper, black

Guidelines

  • To begin, toast your bagel in the air fryer for three minutes at 320 degrees F.
  • Make your fried egg on the stove. Toss in some salt and pepper for flavoring.
  • After the bagel has toasted, place the egg on top.one slice of cheddar cheese and one slice of deli ham on top of the bagel.
  • The sandwich should be wrapped in aluminum foil and put in the air fryer for three minutes at 340 degrees Fahrenheit.
  • Arrange, present, and savor!

Best Air Fryer Parmesan Crusted Chicken Breast

Air Fryer Parmesan Crusted Chicken Breast

Prepare for a taste explosion with this air-fried chicken breast with a parmesan crust! This Parmesan Crusted Air Fryer Chicken Breast will up your supper game.

Components

  1. Two big chicken breasts, skinless and boneless
  2. Half a cup of grated Parmesan cheese
  3. Half a cup of Panko breadcrumbs
  4. One tsp of Italian spice
  5. half a teaspoon of powdered garlic
  6. One-half tsp Kosher salt
  7. half a teaspoon of pepper, black
  8. One huge egg that has been beaten

Guidelines

  • Warm up the air fryer. For around five minutes, preheat your air fryer to 375°F (190°C).
  • Get the coating ready: Grated Parmesan cheese, Panko breadcrumbs, garlic powder, Italian seasoning, a little salt, and a little pepper should all be combined in a shallow plate. To make the seasoned breadcrumb mixture, thoroughly mix.
  • Apply Coat to Chicken: Making sure each chicken breast is well submerged in the beaten egg completely covered. Let any extra egg drop off.
  • Breadcrumb Coating: Dredge the chicken breasts that have been egg-coated in the seasoned breadcrumb mixture. Make sure the breadcrumbs stick properly and create a lovely crust by pressing them onto the chicken.
  • Prepare the air fryer basket by lightly misting it with olive oil spray to keep it from sticking. To ensure consistent cooking, arrange the breaded chicken breasts in the basket in a single layer, leaving space between them.
  • To Air Fry: Mist a little extra olive oil over the tops of the chicken breasts. Cook for ten minutes at 375°F (190°C) in the preheated air fryer.
  • Flip and Cook: Use tongs to gently flip the chicken breasts after ten minutes. Cook the chicken for a further five to eight minutes, or until it reaches an baked at an internal temperature of 165°F (74°C), with a crispy, golden exterior.
  • Serve: Take out the Air Fryer’s Parmesan Crusted Chicken Breasts and let them a minute to rest. Slice and serve them hot after that.

air fryer honey-garlic chicken thighs

air fryer honey-garlic chicken thighs

Honey-Garlic Air Fryer Chicken Thighs — A fantastic appliance for preparing meals in a healthy approach is the air fryer. This recipe in particular creates the most exquisite flavor in your mouth by combining garlic and honey. It’s a very easy dish to prepare and goes well with rice or veggies for a weeknight meal.

You realize you need to quickly prepare dinner when you are in the living room or after a demanding workday. You want it to be tasty, but you don’t have time to cook anything elaborate. Fortunately, making these honey-garlic chicken thighs in an air fryer requires just a few simple ingredients and takes less than 30 minutes!

This is a tasty and nutritious recipe! Plus, it’s simple enough for kids to assist! This recipe is sure to become a family favorite—it’s ideal for hectic weeknights or weekend dinners.

Components

  1. Four thighs of chicken
  2. half a cup of soy sauce
  3. Half a cup of ketchup
  4. 1/4 cup honey,
  5. 4 teaspoons finely chopped garlic
  6. One tsp of basil
  7. One tsp of kosher salt
  8. half a teaspoon of pepper, black

Guidelines

  • After arranging the chicken, sprinkle it with salt and black pepper.
  • Next, add the soy sauce, ketchup, honey, minced garlic, basil, salt, and pepper to the chicken in a Ziploc bag. For optimal effects, position it in the for roughly one hour in the refrigerator.
  • The chicken thighs can be put on the air frying tray or in the air fryer basket.
  • Place the air fryer in the oven and cook for 10 minutes at 400 degrees Fahrenheit. Then, flip it over and cook for an additional 10 minutes.
  • Verify the temperature inside. You want an internal temperature of 165 degrees F before serving.
  • Arrange, present, and savor!


pecan crusted chicken in the air fryer

pecan crusted chicken in the air fryer

pecan crusted chicken in the air fryer With the addition of a few basic ingredients, this Pecan Crusted Chicken recipe transforms plain chicken breasts into a delicious meal that the whole family will enjoy. This is a simple pecan chicken dish that you will make again and again using a basic pecan combination.

For your next gathering, Pecan Crusted Chicken can be served as an appetiser or as part of the main course. In particular, I enjoy making a simple vinaigrette and topping a salad with it. This recipe for pecan-crusted chicken is sure to please your guests no matter how you serve it! The recipe is;

Basic Ingredients for the recipe.
Adaptable to various meals
Prepared in less than thirty minutes
Children-friendly

Ten minutes to prepare
Cook for Twelve minutes
Twenty-two minutes in total

4 servings are available.

Recipe By: Forktospoon


Ingredients for pecan crusted chicken in the air fryer:

  • One-pound chicken breast, sliced into tenderloins or breasts
  • Two eggs
  • Halves cup chopped pecans
  • One tsp powdered garlic
  • One tsp powdered onion
  • One tsp salt
  • Half a teaspoon of pepper, black


Instructions for pecan crusted chicken in the air fryer:

  1. Place the chicken on a chopping board.
  2. Combine the garlic powder, black pepper, and salt in a small bowl. Give your chicken a lot of seasoning.
  3. After beating, transfer the eggs to a shallow basin for dredging.
  4. Press the chopped pecans onto the chicken breast after dipping it into the beaten eggs. Press the pecans down firmly with your hands.
  5. Once the air fryer basket is filled with chicken, preheat the air fryer to 370 degrees F. Cook the chicken for 8 to 12 minutes, or until the internal temperature reaches 165 degrees F.


Tips for the Recipe:

I adore this dish since it’s so simple! I’ve made pecan crusted chicken breast a lot over the past few years, so here are some tips and tactics I’ve learned.

  • Crushing Pecans: Use a rolling pin or meat mallet to smash the nuts, or pulse them in a food processor or put them in a Ziploc bag. For a more consistent, delicate crust, crush them smaller or leave them rather lumpy.
  • Pat Chicken Dry: Before covering the chicken with the egg mixture, pat it dry with a paper towel. All elements will adhere to the surface more readily as a result.
  • Simple Cleanup: Cover the bottom of the air fryer basket with tin foil or spray it with cooking oil.
  • After the chicken has been dipped in the egg, put it in a freezer bag with the crushed pecans and shake well. One of the greatest methods to guarantee a uniform coating is this one.
  • Rest: Before slicing, let the pecan-crusted chicken from the air fryer sit for three to five minutes. That way, each bite will be just as juicy as the previous!
  • Employ a Thermometer with Instant Readout: If the interior temperature of poultry hits 165 degrees F, it is safe to consume. You may obtain fast and precise readings with an instant read thermometer.

Nourishment Facts of Recipe:
Serving: One Gram 218 kcal of calories 2 grams of carbohydrates 25g of protein 12g of fat One gram of saturated fat 3g of polyunsaturated fat 6g of monounsaturated fat Trans Fat: 0.01%73 mg of cholesterol 713 mg of sodium Potassium: 483 mg 1g of fibre 1g of sugar 42 IU of vitamin A Two milligrams of vitamin C Calcium: 16mg Iron: 1mg