Combat Blood Sugar Drops with This Culinary Gem

Combat Blood Sugar Drops with This Culinary Gem

COMPOSITION

  1. 400 grams of shredded cabbage: Packed full of fiber and important minerals, cabbage is a vegetable with a low calorie count. Because of its high fiber content, it helps the blood absorb glucose gradually, which is essential for regulating blood sugar levels.
  2. One large onion, chopped finely: Known for their strong taste, onions contain a variety of sulfur-containing chemicals that combine to improve insulin sensitivity. These substances help to maintain metabolic balance by regulating blood sugar levels by increasing cellular glucose consumption.
  3. Three minced garlic cloves: Although garlic is known for its unique flavor and scent, its cloves also include a powerful ally against blood sugar swings. Garlic contains a chemical called allicin, which is rich in potential applications. lowering blood sugar by the reduction of insulin resistance and enhancement of insulin sensitivity.
  4. Seven medium-sized mushrooms, cut thinly: Though low in carbohydrates, mushrooms are high in fiber and antioxidants, making them strong competitors in the fight to control blood sugar. Their fiber-rich content and antioxidant capabilities work together to control blood sugar levels and improve insulin sensitivity.
  5. One finely chopped bell pepper Bright bell peppers, a veritable gold mine of vitamin C, become essential partners in the fight against unstable blood sugar. Bell peppers are high in vitamin C, which has a beneficial effect on blood sugar management and improves insulin sensitivity. Furthermore, bell peppers’ natural fiber content inhibits the absorption of glucose, reinforcing their function in preserving metabolic balance.
  6. Three ripe, quartered tomatoes: Tomatoes, which are practically stores of the powerful antioxidant lycopene, become heroes when it comes to blood sugar regulation. Tomatoes are a rich source of lycopene, which has the ability to reduce blood sugar levels by reducing inflammation and improving insulin resistance. This provides a strong defense against blood sugar swings.

DIRECTIONS

  • First, heat a nonstick skillet over medium heat. fire, preparing the palate for a gastronomic symphony. Carefully add the shredded cabbage to the skillet and let it soak up the heat. Stir occasionally to gently cook the cabbage until it reaches a soft succulence, about 5 minutes.
  • Gently stir the chopped onion into the pan so that it becomes part of the blending mixture. Let the onion cook until it develops a translucent layer, which is a sign that it is becoming soft. This usually takes about 3 minutes.
  • Add some minced garlic to the skillet to give it an aromatic touch that will make the meal taste even better. Gently stir the garlic until it releases its aromatic essence; this should take about one to two minutes.
  • Present the Sliced mushrooms were added to the skillet so they could participate in the cooking show. Stir the mushrooms to release their moisture and turn golden, which will take around 5 to 7 minutes. This will provide a deep earthiness to the dish.
  • Add the chopped bell pepper to the skillet with a flourish to bring some color and freshness to the whole dish. The bell pepper will get somewhat softer after 3–4 minutes of sautéing, which will improve its texture and appearance.
  • Once the tomatoes are quartered and added to the skillet, the flavor profile will finally come together with bright acidity and juicy sweetness. After around five minutes of simmering and softening, gently squeeze the tomatoes to release their delicious juices. giving the food a mouthwatering taste explosion.
  • Apply a light touch of salt and pepper to the mélange to create a flavorful symphony that dances on the tongue.
  • Taste and adjust the seasoning to get a pleasing harmony of tastes that satisfies the palate.
  • When the veggies are soft and have come together in a harmonious blend of flavors, turn the skillet off the heat and serve. This marks the completion of this culinary masterpiece. Present the meal hot so that excited guests may enjoy every delicious bite of this culinary marvel.

The Secret Health Bomb: Sharp Green Pepper Infused Water

The Secret Health Bomb: Sharp Green Pepper Infused Water

Did you know that you can utilize a basic household object, like a bottle, to make a drink that would improve your health? You may produce an infused water that is high in taste and health benefits by using sharp green peppers. Here’s a quick recipe for this colorful mixture, which is well-known for its ability to energize and offer a number of health advantages.

1. CHOOSING YOUR TEAMS
For optimal results, use sharp, fresh green peppers. The abundance of vitamins A and C in these peppers is great for strengthening immunity and preserving skin health. Verify that the peppers are spotless and unblemished.

2. GETTING THE INFUSION READY
You’ll need a dry, clean bottle; glass is better because it doesn’t hold chemicals or smells.

from earlier applications. If you want a less spicy infusion, finely slice your green peppers and remove the seeds. If you want an additional kick, feel free to remove the seeds and membranes!

3. PUDDING INTO THE WATER
After adding the chopped peppers to the bottle, top it over with cool, fresh water. Slices of pepper can be slightly crushed or bruised before being added to the water for a stronger infusion. More of their oils and tastes are released into the infusion as a result.

4. PERMITTING IT TO STAY
After sealing the bottle, leave it either in the refrigerated overnight or at room temperature for approximately one hour. This enables the peppers’ tastes and nutrients to completely combine with the water.

5. Savoring your infusion of water after

The spicy green pepper water is ready to be savored after the infusion period. You can drink it all day long. Because capsaicin in peppers is known to increase metabolic rate, it is not only refreshing but also provides a metabolism boost.

FINAL VERDICT
A straightforward yet efficient method to infuse your water with flavor and get the health benefits of green peppers is to use sharp green peppers. This beverage is a great method to arouse your taste buds and might be your hidden health tool. Try it and discover what a difference a bottle and some peppers can make in your everyday routine!

Uncover the Stunning Advantages of Boiling Bananas: An Easy and Tasty Recipe

Uncover the Stunning Advantages of Boiling Bananas: An Easy and Tasty Recipe

Boiled bananas are a fast, healthful, and delightfully tasty treat that’s sure to please. Without using any additional sugar, this easy dish highlights the sweetness and richness of bananas. It’s the ideal meal to have as a satisfying dessert or a healthy snack that will quickly become a family favorite.

Why Are Bananas Boiled?

Boiling bananas is a great method to take advantage of their many health advantages and savor their natural tastes. Because of their high vitamin, mineral, and fiber content, bananas are a great addition to any diet. They get much softer and sweeter when boiled, making for a filling and cozy meal.

Components:

  1. Two fully ripe bananas
  2. two glasses of water
  3. A little amount of cinnamon (more flavoring optional)
  4. A little bit of extractive vanilla (optional)

Guidelines:

  • Get the bananas ready: Begin by removing the banana peels. Depending on your preference, you may either chop them into half or thirds or leave them whole.
    Bring the water to a boil in a medium-sized saucepan over medium heat.
  • Put the bananas in there: The bananas should be carefully added to the boiling water. The bananas should be soft and readily punctured with a fork after 10 to 15 minutes of simmering over low heat.
  • To enhance the flavor, while the bananas are boiling, you may add a dash of vanilla essence and a touch of cinnamon to the water. The bananas will have a toasty, fragrant taste from these additions.
  • Assist Warm: Use a slotted spoon to take the bananas out of the water once they are soft. Before serving, put them on a dish and allow them to cool somewhat. Savor them just the way they are, or add a little more cinnamon on top for taste.

Reasons to Love This Recipe

  • Simple and Quick: This dish is ideal for a last-minute dessert or snack because it just needs a short amount of prep and cooking time.
  • Nutritious: This meal is a healthy option since bananas are a great source of potassium, vitamin C, and dietary fiber.
  • Of course Sweet: The inherent sweetness of bananas is enhanced by boiling them, which obviates the need for additional sugar.
  • Boiling bananas are a versatile food that may be eaten on its alone or combined with yogurt, cereal, or nut butter for a more delicious treat.

In summary
A quick and delectable nutritious snack or dessert is boiled bananas. You can make a dish that is both soothing and accentuates the natural sweetness and nutritional value of bananas with very few ingredients and very little work. After trying this simple dish, boiling bananas could just become your new favorite snack!

Enjoy the Perfect Cauliflower: Crispy Outside, Soft Inside

Enjoy the Perfect Cauliflower: Crispy Outside, Soft Inside

You’re in for a treat if you’ve been looking for a non-frying method for making cauliflower that is succulent on the inside and flawlessly crispy on the exterior! With this technique, regular cauliflower becomes a meal so delicious that people will be clamoring for your recipe. Here’s how to get the perfect texture and flavor without requiring deep frying and with very little work.

THE Key to the Ideal Cauliflower
It is not necessary to cook your cauliflower in bad fats or with complex methods to get the ideal texture. Roasting is the secret to bringing out a delicious depth of flavor and that perfect crispy texture. Now let’s discuss how you can accomplish this in your own kitchen.

RECIPES FOR TENDER AND CRISPY CAULIFLOWER
The main emphasis of this dish is Bring out the most in your cauliflower with a few key ingredients that combine simplicity and taste.

Components:

  1. One large cauliflower head, divided into florets
  2. Two to three teaspoons of olive oil
  3. To taste, add salt and pepper.
  4. Herbs for a savory twist, such thyme or rosemary, garlic
  5. powder, or Parmesan cheese, are optional.

Guidelines:

Preheat the Oven: Set the oven’s temperature to 425°F (220°C). To get that crispy, golden texture, a hot oven is essential.
Get the cauliflower ready: Make sure all of the cauliflower florets are equally covered by tossing them in a big bowl of olive oil. Add salt and pepper for seasoning, and feel free to add other herbs or spices.
Organize onto a Spread Sheet: Place the cauliflower on a baking pan in a single layer. Produce To guarantee that they roast rather than steam, make sure the florets are not packed.
Cook to Glory: Bake the cauliflower for twenty to twenty-five minutes. To achieve consistent browning, stir or turn them halfway through. The florets should be tender on the inside and golden and crispy on the outside.
Present and Savor: Serve right away after adding some more flavor with freshly grated Parmesan cheese on top.

Why This Recipe Is Effective
Cauliflower combines well as a side dish with almost any main course since roasting it changes its texture and brings out its natural tastes. The oven’s high heat crisps the surface while softening the interior with butter, producing a visually appealing contrast that very soft feel.

Changes to keep things interesting

  • You may experiment with different toppings or seasonings to keep this dish interesting and fresh. To add a little zing, try adding a squeeze of lemon, some chilli flakes, or even a drop of balsamic glaze for some sweetness.
  • This is a tasty and healthier alternative to fried cauliflower, which makes it an ideal side dish that is both filling and healthy. Try this recipe; you might find that it quickly becomes a family favorite!

Heavenly Custard Cream Donuts (Vanilla & Chocolate) A Sweet Treat for All

Heavenly Custard Cream Donuts (Vanilla & Chocolate) – A Sweet Treat for All

What You Need (Makes 12 Donuts):

For the Cream Custard:

  1. – For Custard with Vanilla:
  2. – Three yolks from an egg
  3. – 250ml of milk –
  4. 16g of cake flour
  5. – 50g of cane sugar
  6. One-third of a vanilla bean

Regarding Chocolate Custard:

  1. – Three yolks from an egg
  2. 50g of delicious chocolate,
  3. 45g of granulated sugar,
  4. 16g of cake flour,
  5. and 250ml of milk

Regarding the doughnuts:

  1. 35 grams of bread flour,
  2. 150 grams of cake flour,
  3. 70 grams of granulated sugar,
  4. 6 grams of salt,
  5. 6 grams of instant dry yeast,
  6. 2 eggs and milk to create 285 grams,
  7. and 45 grams of unsalted butter

Regarding Coating:

  1. Sugar granules
  2. – Powdered cocoa

Directions: For the Custard Cream (chocolate and vanilla):

1. Make the chocolate and vanilla custards in different dishes.
2. Smoothly whisk three egg yolks in each basin.
3. For the vanilla custard, add cane sugar; for the chocolate custard, use granulated sugar. Blend well.
4. Fill each mixture with sifted cake flour. and mix until a smooth paste is formed.
5. Heat the milk for each of the two custards separately in a saucepan.
6. Split the vanilla bean and scrape the seeds into the vanilla custard. To the milk, add the pod and the seeds. Bring to a simmer.
7. Finely chop the sweet chocolate and mix it into the heated milk to make the chocolate custard. Stir the chocolate until it melts completely.
8. Take out the vanilla bean from the vanilla custard and whisk continuously as you progressively pour hot milk into each custard mixture.
9. Transfer each custard back to the saucepan and simmer, stirring constantly, over low heat until the custard thickens. Take them off the burner and allow them cool.

Regarding the doughnuts:

10. Mix together bread flour, cake flour, salt, sugar, and instant dry yeast in a mixing dish.
11. Combine the 285g of milk mixture and eggs with the dry ingredients. Stir to make a dough.
12. Knead the dough until it is smooth and elastic, about ten minutes.
13. Add the unsalted butter little by little and keep kneading until it’s completely combined.
14. Once the dough has doubled in size, cover it and allow it to rise for approximately one hour.
15. Using a glass or a donut cutter, roll out the dough to a thickness of about 1.5 cm and cut out circles.
16. Transfer the doughnuts to a parchment paper-lined baking sheet, cover, and allow to rise for an additional thirty minutes.
17. In a deep pan, heat the vegetable oil to 180 degrees Celsius, or 350 degrees Fahrenheit.
18. Gently cook the donuts for two to three minutes on each side, or until they are golden brown on all sides. blot with paper towels.

Regarding Coating:

19. For the vanilla custard donuts, coat them with granulated sugar while they are still warm, and for the chocolate custard ones, coat them with cocoa powder.

Stuff the Donuts:

20. After the donuts cool, fill them with the chocolate and vanilla custard creams using a piping bag.

Savor the sweet and delicious Custard Cream Donuts!

SOFT BUTTER CAKE

HOW TO MAKE SOFT BUTTER CAKE

INGREDIENTS SOFT BUTTER CAKE:

  • 1 3/4 cup (230 grams/ 8.1Oz) Cake Flour\
  • 1/2 teaspoon baking powder
  • 1 cup (250 grams/ 8.8Oz) butter
  • 1 cup (200 grams/ 7Oz) castor sugar
  • 5 eggs
  • 1 teaspoon vanilla extract
  • 1/4 cup (59ml) milk

INSTRUCTIONS FOR SOFT BUTTER CAKE:

  • This super soft moist butter cake is easy to prepare. The cake is very moist and soft. In a large bowl, sift 230 grams all-purpose flour, add 1/2 tea spoon baking powder. Sift the flour two to three times. This will bring a lot of air in the batter, set it aside.
  • In another bowl, add one cup of salted butter, if you are using unsalted butter add one and a quarter teaspoon of salt to the dry ingredients.
  • The butter should be at room temperature, beat the butter until it is very soft then add a cup of sugar and start beating the butter and sugar at low speed for about 2 minutes.
  • Scrape the sides and continue beating the mixture for 15 minutes. One of the key tips to their recipe is beating the butter and sugar very well until the mixture is pale.
  • Once you have beat the mixture really well, start adding 5 eggs one at a time and beat each egg until it is incorporated in the mixture before adding the next.
  • Add vanilla extract and beat for a minute, if you just love the butter flavor you can leave the vanilla extract out. Add the sifted dry ingredients to the butter mixture spoon by spoon. Keep beating while adding the dry ingredients slowly.
  • After you have added half of the dry ingredients, bring the milk and pour half of the milk into the batter, mix it through and continue adding the dry ingredients.
  • Mix until the batter is dense then add the remaining milk and beat the batter until light and fluffy with no lumps. For baking, you will need a 7 by 7 square pan greased and lined with parchment paper.
  • Pour the batter into the prepared cake tin, smoothen the top and bake the cake in a preheated oven at 320 degrees Fahrenheit (160C) for 55 to 65 minutes but start checking the cake after 50 minutes.
  • The cake should bake to golden brown and a toothpick inserted at the center comes out clean or with a few moist crumbs. Let it cool in the pan for about 10 minutes then invert on a wire rack, slice and serve.
  • Enjoy.

AIR FRYER EGGPLANT WITH GARLIC PARMESAN BUTTER

AIR FRYER EGGPLANT WITH GARLIC PARMESAN BUTTER

AIR FRYER EGGPLANT WITH GARLIC PARMESAN BUTTER A tasty and nutritious meal may be quickly and simply prepared with this air fryer aubergine recipe. I adore how it becomes a gorgeous golden colour with crispy skins and edges.

INGREDIENTS FOR AIR FRYER EGGPLANT WITH GARLIC PARMESAN BUTTER

  • One medium aubergine
  • Vegetable oil, two tablespoons
  • 1 TBS vegetable blend seasoning.
  • 4 ounces of room temperature butter
  • salt, and pepper to taste
  • One tablespoon of recently shredded Parmesan cheese
  • 1 tablespoon freshly chopped fresh parsley
  • Two garlic cloves, minced or coarsely chopped.

INSTRUCTIONS FOR AIR FRYER EGGPLANT WITH GARLIC PARMESAN BUTTER

  • Wash and pat dry the aubergine.
  • Chop into steaks that are one inch thick.
  • After drizzling the aubergine slices with olive oil, sprinkle them with the spice mixture.
  • Spread out the eggplant steaks on your baking sheet or air fryer basket so they don’t overlap after evenly coating them with a food silicone brush.
  • For 7 minutes, use the air fry mode at 400F (200C).
  • After that, turn each aubergine slice over and continue air-frying for a further five minutes, or until the skin is crisp and golden brown.
  • As soon as the aubergine is done in the air fryer, make the garlic-parmesan butter.
  • Combine the soft butter, parsley, and freshly grated parmesan cheese in a mixing basin.
  • Once the aubergine has been taken out of the air fryer and placed onto a platter, you may either brush each aubergine steak with your newly prepared garlic parmesan butter or sprinkle it with salt & pepper to taste.
  • Savour the aubergine that you air-fried!

NOTES: Air-fried Eggplant Recipe

  • A tasty and nutritious addition to any meal is roasted aubergine. This adaptable vegetable goes well with many different flavours and is simple to air fry, roast, or grill. Serve air fryer eggplant with whole grain bread, grilled chicken or fish, and a green salad for a full supper.
  • Try roasted eggplant slices on pizza or as a filler in a wrap with vegetables and hummus for a lighter alternative.


Intestines Liver and Kidneys are Clean

Intestines, Liver, and Kidneys are Clean! Only 3 Days! All the Dirt Flies Out with Pineapple

This remedy has a strong cleaning impact on the kidneys, liver, and intestines because of the pineapple. In as little as three days, you may support your body’s detoxification and feel renewed. Pineapple’s high nutrient content and natural enzymes make it a great fruit for detoxification. Join me as I walk you through creating this effective cleanse and reaping its benefits.
There’s Nothing Like the Allure of Muslim Women Among Brain berries.

  1. One pineapple that is still in its fresh state
  2. one cucumber
  3. One inch of freshly chopped ginger root
  4. one lemon
  5. 2 quarts of water
  6. Mint leaves, fresh (if desired)

Instructions

1. Get Everything Ready:
  • Pineapple: Peel and remove the core from the
  • pineapple. Next, cut it into pieces.
  • After giving the cucumber a thorough wash, slice it. If you would like, you can omit peeling it.
  • Peel the ginger root and cut it into thin slices.
  • Squeeze the lemon to release its juice.

2. Mix the Elements Together:

  • Slice the cucumber, juice the lemon, add the water, add the pineapple chunks, and blend until smooth. Include the ginger. Mix the ingredients with a whisk until the required consistency is achieved.
Step 3: Pour and Enjoy!
Straining the Liquid Through a Fine Mesh Strainer Will Remove the Pulp and Fibres. The drink will get smoother as a result.
Pour the drink into each glass as a garnish. Garnish with a few fresh mint leaves, if desired.
4. Enjoy yourself:

Serving this detox drink fresh will yield the most benefits. On an empty stomach, start with a glass first thing in the morning and have another one right before bed for three days in a row.
A tropical fruit rich in vitamins, minerals, and the digestive enzyme bromelain, pineapples are good for your health.

Pineapple supports the liver’s detoxification process by assisting in the breakdown and removal of toxins.
Digestive Health: Bromelain from pineapples reduces inflammatory bowel syndrome and improves digestion.
Preserving a Healthy Kidney Function: By boosting urine production and removing toxins, the high water content contributes to the preservation of a healthy kidney function.

Sea cucumber: Known for its capacity to hydrate, cucumber helps:

Unlock the Secret to Radiant Skin with Collagen and Beets Every Night ‎‎

Unlock the Secret to Radiant Skin with Collagen and Beets Every Night ‎‎

1:Smoothie with Beets and Berries: Blend cooked beets with a range of berries, a banana, a spoonful of collagen powder, and a little quantity of water or almond milk to make a delicious smoothie to enjoy before bed. It tastes great and gives your body a significant health boost at the same time.

3. A Wholesome Beet Salad with Collagen Dressing: Add a salad of beets, greens, and almonds to complete your nutritious supper. Mix collagen powder, vinegar, mustard, olive oil, and lemon juice to make the dressing.

Benefits of Developing a Nightly Routine for This

Beets and collagen can help to improve skin hydration, reduce inflammation, and support general skin health when added to your nighttime routine. Additionally, a quicker rate of muscle regeneration and a healthier metabolism and faster muscle repair and recovery may be achieved by combining the antioxidant qualities of beets with the protein boost of collagen before bed.

Cucumber-pineapple juice

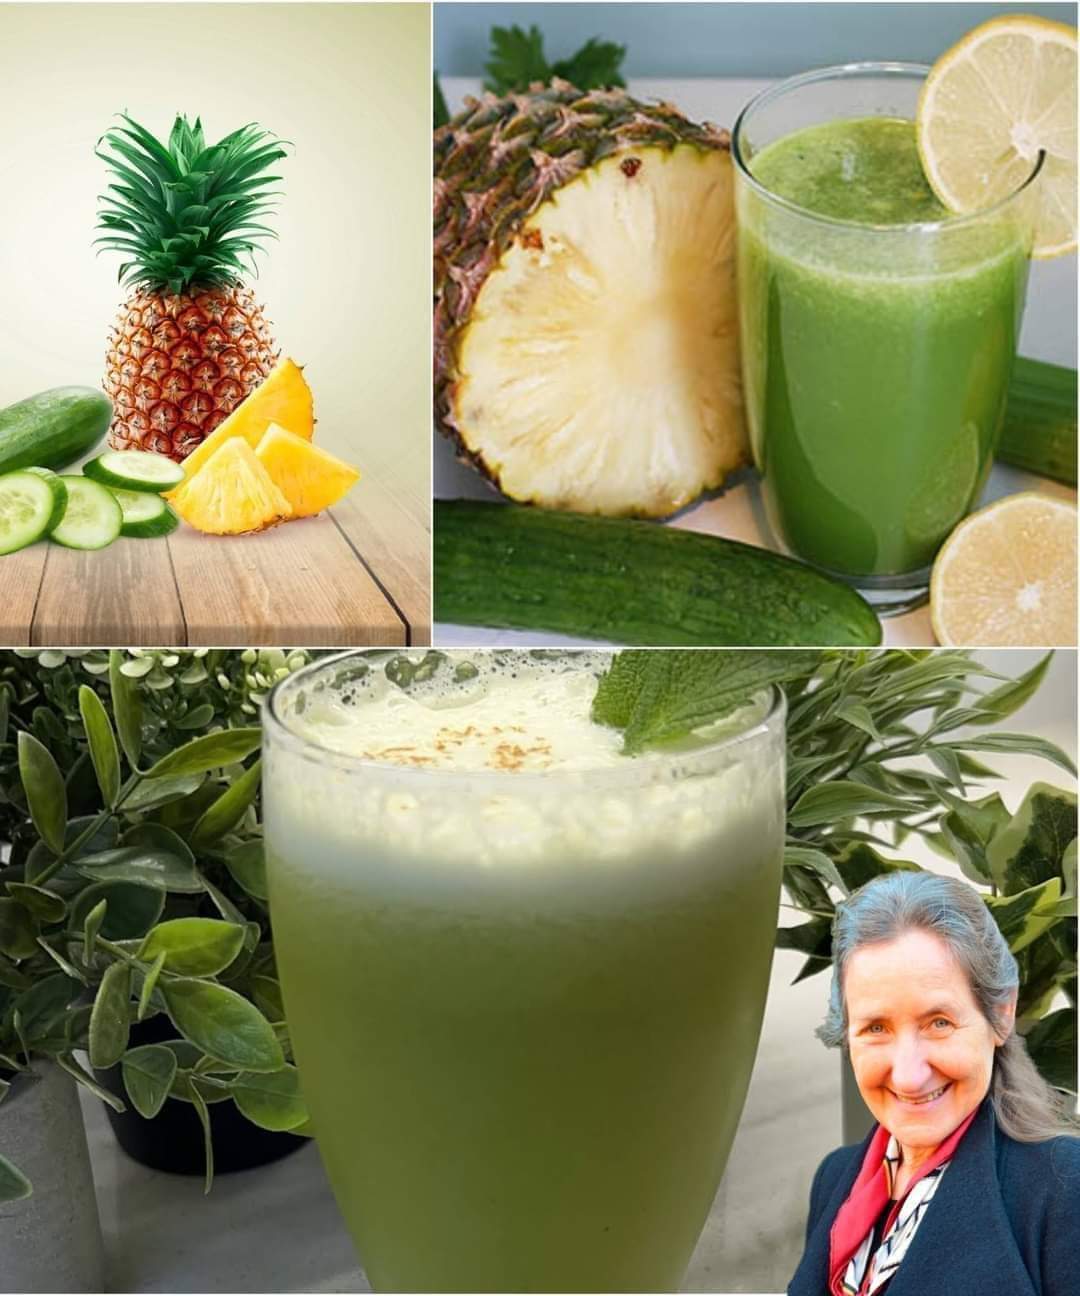
A refreshing drink! Cucumber-pineapple juice is a delicious and hydrating beverage, perfect for hot summer days or as a revitalizing pick-me-up any time of the year. The combination of cool cucumber and sweet pineapple is a match made in heaven!

Cucumber-pineapple juice offers numerous benefits, including:

1. *Hydration*: Both cucumber and pineapple are high in water content, making this juice an excellent choice for replenishing fluids and electrolytes.

2. *Antioxidant-rich*: Pineapple is a rich source of vitamin C and beta-carotene, while cucumber contains antioxidants like fisetin and lignans, which help protect cells from damage.

3. *Anti-inflammatory properties*: Cucumber contains anti-inflammatory compounds like fisetin, which may help reduce inflammation and improve overall health.

4. *Digestive health*: Cucumber contains fiber and water, making it a natural digestive aid, while pineapple contains an enzyme called bromelain, which helps break down protein and aid digestion.

5. *Antibacterial properties*: Pineapple’s bromelain has antibacterial properties, which may help boost the immune system and prevent infections.

6. *Skin and hair benefits*: The antioxidants and hydrating properties in this juice may help improve skin elasticity and hair health.

7. *Low calorie count*: This juice is relatively low in calories, making it a great choice for those watching their weight.

8. *Alkalizing effect*: Cucumber has an alkalizing effect on the body, which may help balance pH levels and reduce acidity.

Remember to consume this juice in moderation, as it may contain natural sugars. Enjoy the benefits of this refreshing and healthy drink!

Here’s a simple recipe to make cucumber-pineapple juice at home:

Ingredients:

  1. – 2 cups fresh pineapple chunks
  2. 1 large cucumber, peeled and chopped
  3. 1/2 cup fresh mint leaves (optional)
  4. 1 tablespoon honey (optional)
  5. Ice cubes (optional)


Instructions:


1. In a blender or juicer, combine pineapple, cucumber, and mint leaves (if using).

2. Blend or juice until smooth.

3. Strain the mixture to remove any pulp or fibers.

4. Add honey to taste (if desired) and stir well.

5. Chill the juice in the refrigerator for at least 30 minutes.

6. Serve over ice cubes (if desired) and enjoy!

You can also add a splash of lemon juice or a pinch of salt to enhance the flavor. Some people like to add a bit of ginger for an extra kick!


Hope you enjoy this refreshing drink!