Keep Chicken Intact for Twelve Months

Without the refrigerator! Keep Chicken Intinct for Twelve Months

instructions

1.The best way to prepare the chicken is to:

Washing and trimming the chicken should come first. Remove all feathers, internal organs, and excess weight. Commencing with excellent, fresh chicken will help to provide the best possible results.
2. Season the chicken with salt.

Coarsely salt the chicken well, making sure to coat the whole bird, even the cavity. Salt, a naturally occurring preservative, snatches moisture and inhibits the growth of microorganisms.

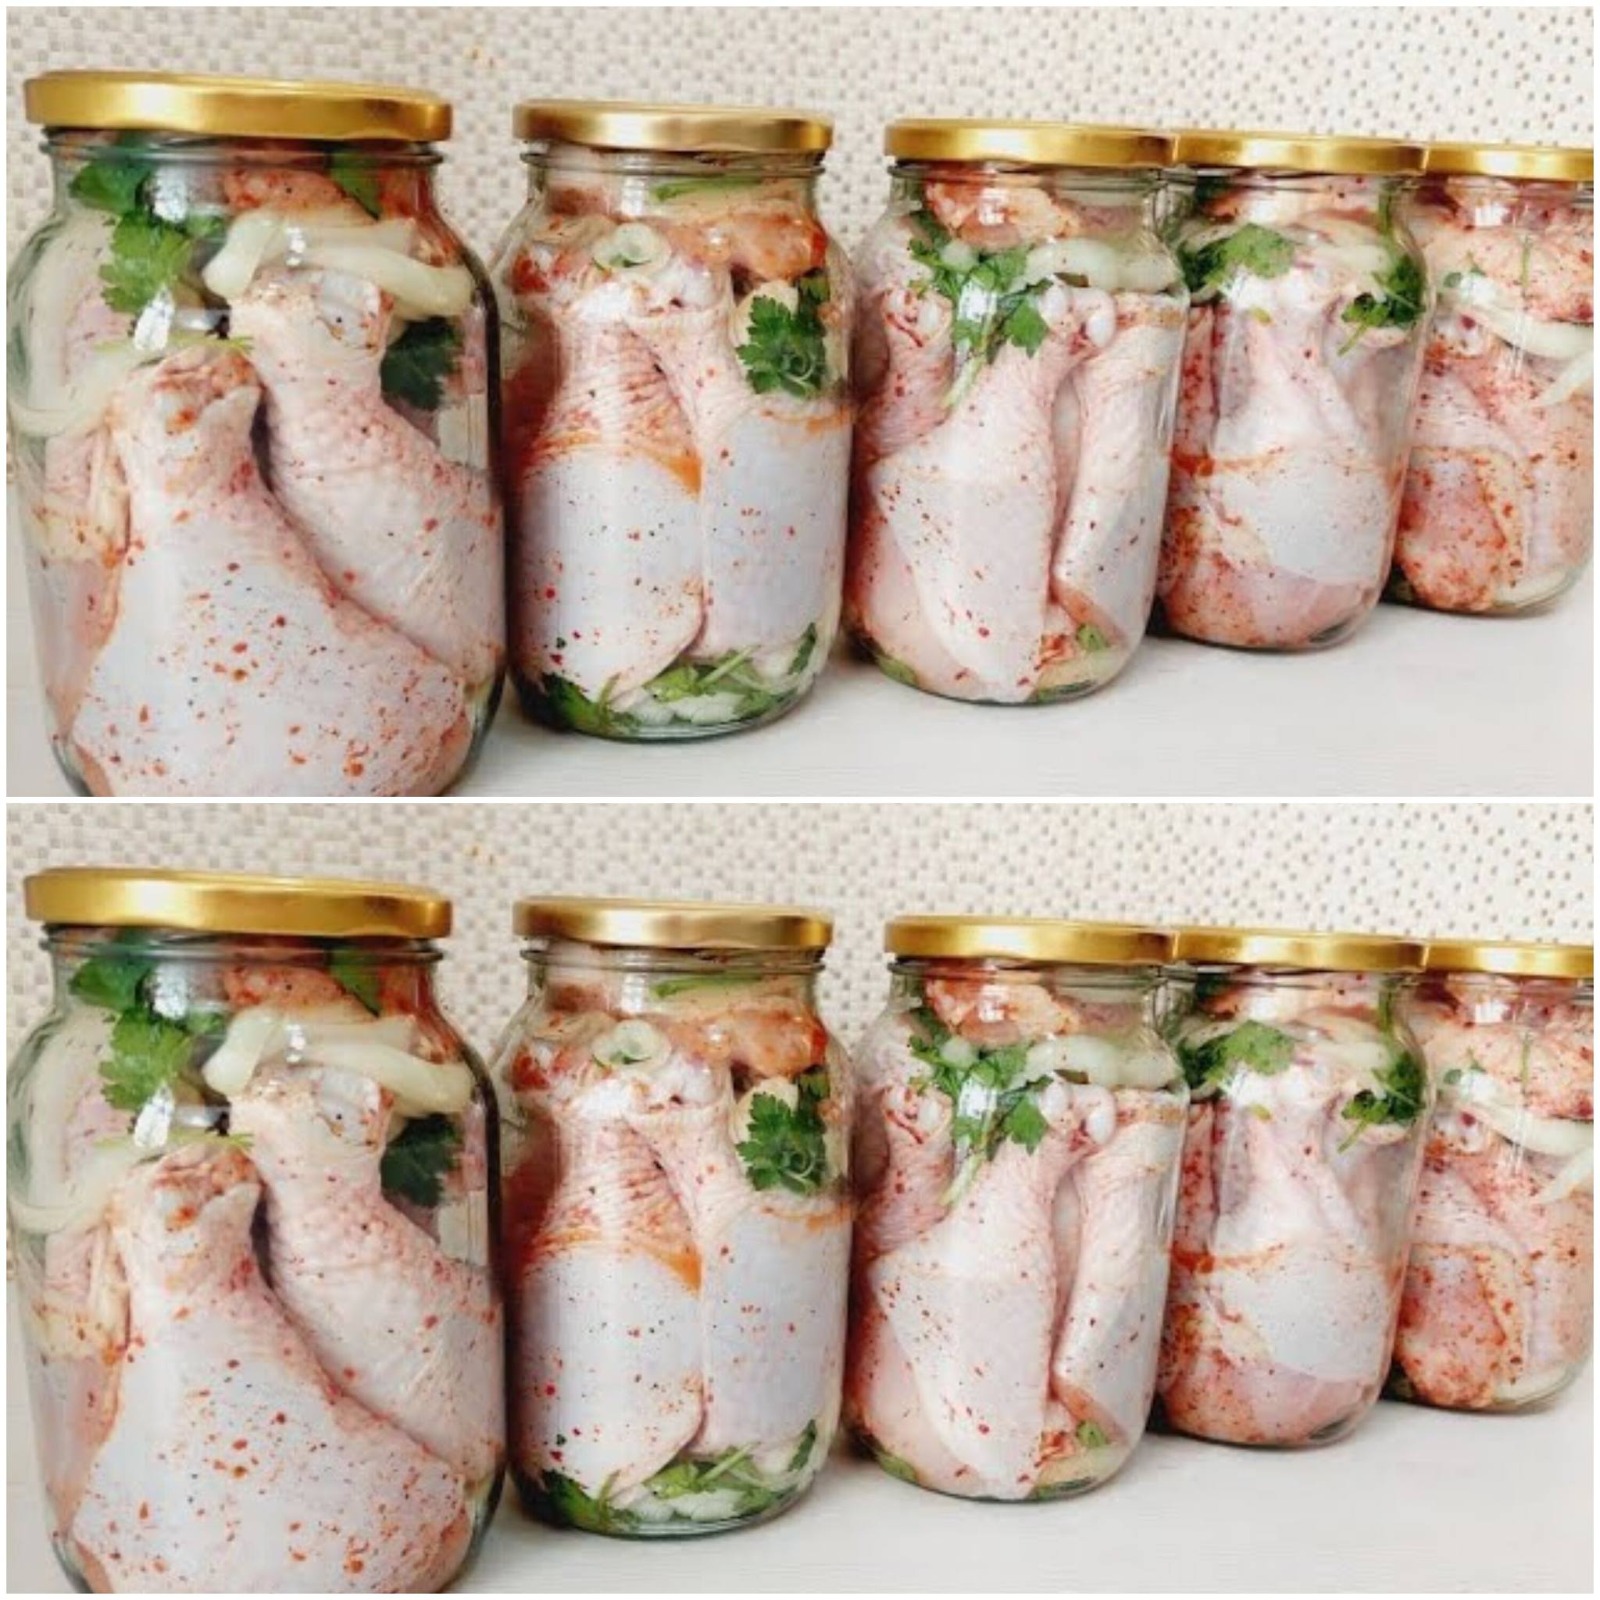
Start at the bottom of an airtight jar or container and layer with salt. Place the chicken on top of this layer and then sprinkle more salt over the entire thing. Verify that there are no exposed areas on the bird.

3. Let It heal:
After sealing the container, store it somewhere dry and cool. It works very nicely in a pantry or cellar. Give the chicken at least four to six weeks to cure. The chicken will be preserved since the salt will draw out its moisture.

4. Remove and give a rinse.

Rinse well: Following the curing period, remove the chicken from the salt. Rinse it well with cold water to get rid of all the salt. Use a clean towel to allow it to dry.

5. Long-Term Storage:

Cover the chicken with parchment paper or cheese cloth once it has been washed and dried. Return it to its sealed container. Keep it dry and cold. One may keep the chicken for up to twelve months nowadays.

Advice for optimal outcomes

  • Food will keep best if you use premium coarse salt. Iodized table salt should be avoided as it may include chemicals that affect the curing process.
  • Preserving helps food prevent spoiling by keeping the storage area consistently dry and cool.
  • Regularly check the chicken to make sure it’s not getting bad. If the chicken seems discoloured or has strange smells to it, discard it.
  • Before using the preserved chicken, submerge it in water for a few hours or overnight to rehydrate and remove excess salt.
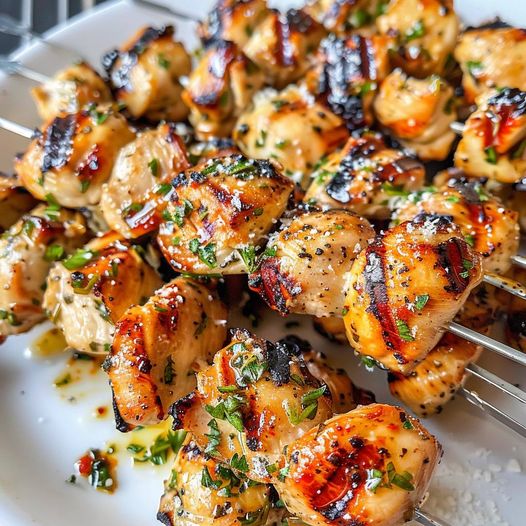
  • Cooking Methods: Salt-cured chicken is excellent for slow-cooking recipes including stews, braises, and soups. It can also be roasted or grilled after being rehydrated.

conclusion:

This traditional method of salt-curing keeps chicken safe and intact for up to a year, even without a refrigerator. This technique not only preserves the chicken but also gives it a rich, flavorful taste. Try this method and enjoy how convenient it is to have preserved chicken available all year long. Happy conservation!


Home Onion Recipe for Hair

Home Onion Recipe for Hair: Naturally Increase Strength and Growth

Look for a natural way to strengthen your hair and promote hair growth. Onions could hold the key to the answer! Onions, which are rich in sulphur and antioxidants, may help improve hair quality, growth, and lustre. Here’s how to whip up a simple, fast homemade onion hair mask.

What Makes ONions?
Sulphur is found in onions, which boosts the production of collagen and encourages the growth of healthy hair.

Antioxidants found in onions aid in the battle against free radicals, which reduces hair breakage and loss.

The antibacterial properties of onions help fight dandruff and scalp infections, which promote a healthy scalp environment.

Using onion juice on a regular basis can naturally give your hair a shine, which will improve its look and vibrancy.

components

  1. one huge onion
  2. 1 tablespoon honey
  3. 2 tablespoons coconut oil (optional for additional nutrition
  4. A few drops of essential oil—optional—to cover the onion scent

Direction:

  1. The onion juice ought to have been ready.
  2. Peel the onion first, and then chop it into little pieces.
  3. Place the onion pieces in a blender and process until a smooth purée is achieved. Blend or grate You may also grate the onion if you don’t have a blender.
  4. A cheesecloth or fine mesh screen can be used to extract the juice from the onion paste. Squeeze as much juice as possible into a serving dish.

Mix the components together.

  1. One teaspoon of honey should be added to the onion juice. The hair is moisturised and softened with honey.
  2. For extra nourishment, add two tablespoons of coconut oil. If necessary, add a few drops of your favourite essential oil to mask the smell of onions

Take care of your scalp and hair:

  1. Massage In: Gently massage your scalp with the onion juice combination using your fingertips. Please cover your whole scalp.
  2. Apply the mixture to your hair, being sure to focus on the tips and roots.

4. Permit It to Sit:

Soak Time: Let the mixture sit on your scalp and hair for thirty to one hour. This lets the nutrients reach and function as they should.

5. Shampoo and rinse.

Wash Out: Rinsing your hair thoroughly with warm water can assist you. To eliminate any lingering onion smell, use your regular shampoo. You might need to wash twice to make sure all of the mixture is gone.

Suggestions for the Best Outcomes

  • Use this onion hair treatment once or twice a week for best results.
  • Always do a patch test before applying a mixture to your entire scalp to ensure you won’t have any negative side effects.
  • In addition to a hair treatment, a well-balanced diet rich in vitamins and minerals may support overall hair health.

In summary
A homemade onion hair treatment is a simple, all-natural way to strengthen your hair strands, improve the condition of your scalp, and promote hair growth.Regular usage will help your hair to become thicker, glossier, and more robust. Try this simple recipe and appreciate the results—beautiful, healthy hair!


Spicy Parmesan-Garlic Chicken Skewers

Chicken Skewers with Garlic and Parmesan Spice – If something with a lot of flavour is what you’re craving. These Spicy Parmesan-Garlic Chicken Skewers are definitely worth trying. ideal for those who love grills. as well as taste chasers. The robust flavours of roasted garlic are combined in this meal. Cheese Parmesan. With a dose of hot buffalo sauce. Perfect for your upcoming outdoor cookout. or a family meal. These skewers will make you smile for sure.

What You Need To Make This Spicy Parmesan-Garlic Chicken Skewers Recipe?

Ingredients

  1. 4 lb boneless skinless chicken thighs
  2. 2 tbsp olive oil
  3. 2 tbsp BBQ seasoning

Spicy Garlic Parmesan Butter:

  1. 1 stick unsalted butter softened
  2. 1 tbsp chopped parsley
  3. 1 tbsp roasted garlic paste
  4. 1/4 c grated Parmesan Cheese
  5. 3 tbsp buffalo sauce
  6. 1 tsp kosher salt
  7. 1 tsp black pepper

Instructions:

  1. Cut the chicken thighs to prepare the chicken. cut into 1-inch chunks. After that, put them in a dish.
  2. Add a little olive oil to season. then season the chicken with BBQ sauce. Stir. until all of the chicken is covered equally.
  3. Thread the spiced chicken pieces onto the skewer. Finally, wooden skewers.
  4. Prepare the butter mixture in a another bowl. Add the buffalo sauce, parsley, garlic paste, Parmesan cheese, melted butter, salt, and pepper to a mixture.
  5. Grill: Turn the grill’s heat up to medium-high. Cook the skewers on a grill. Occasionally turning. till the chicken begins to cook through.
  6. When the chicken’s internal temperature reaches 135°F, apply butter. Apply the hot garlic Parmesan butter first. Keep grilling. Add butter as well. until the chicken reaches an internal temperature of 165°F.
  7. Last Brush: Take the kebabs off of the grill. And give it another brush. Using the combination of butter. prior to serving.
  8. Savour your tasty food. as well as tasty chicken skewers!

Notes:

  • To savour these chicken skewers with spicy parmesan-garlic. as a substitute for gluten. There are a few easy changes you should make. First, make sure the spice for your barbecue is labelled as gluten-free. as certain seasoning mixes. may include unidentified gluten. either as fillers or additions. if you’re not sure. It’s simple to create your own blend. using simple spices such as onion, garlic, and paprika powder, with a small dash of cayenne for added spiciness. Naturally devoid of gluten.
  • Check your buffalo sauce as well. With additional toppings. for any component that contains gluten. Many sauces don’t contain gluten. But reading labels is usually a good idea. or get in touch with producers. if you’re not sure.
  • using these few modifications. You can serve these delicious skewers with confidence. being aware of their safety. and entertaining for everybody. Whatever the dietary constraints. Savour the strong flavours. Without the gluten!


Deliciously Simple Apple Pie Recipe in Just 5 Minutes

Deliciously Simple Apple Pie Recipe in Just 5 Minutes

Savor the wonderful tastes of a traditional apple pie with this simple recipe that will have your taste buds tingling in only five minutes! This dish is great for last-minute get-togethers or hectic workdays because it is just the right amount of simple and flavorful. Quick preparation and few ingredients can have you enjoying warm, cozy apple pie in no time.

Ingredients:

  1. four apples
  2. , crisp and fresh
  3. two eggs
  4. One-third cup of powdered sugar
  5. one-third cup of milk
  6. One and a half cups plain flour
  7. Two tsp baking powder
  8. To grease the baking sheet, use butter.
  9. taste-tested vanilla extract

Method by Method Guidelines:

Get the apples ready:

  • To start, give the apples a good wash under running water to get rid of any residue or debris.
  • Core the avocado gently with a sharp knife.
  • apples, and then cut them into even pieces.
  • Preheat the Oven: To guarantee that your oven reaches the ideal temperature for baking, preheat it to 180 degrees Celsius (350 degrees Fahrenheit).
    Get the baking sheet ready:
  • To avoid the pie sticking, line a baking pan with parchment paper.
  • To give the crust a deep, buttery taste, generously butter the parchment paper.
    Organize the Apples:
  • Arrange the sliced apples in a single layer on the prepared baking sheet to ensure equal baking. Spread the apples evenly.
  • To make the dough, crack the eggs into a large mixing basin and whisk in the caster sugar until the mixture becomes light and fluffy.
  • Whisk the milk into the egg mixture continually as you gradually add it.
  • Sort the unrefined flour. Add the baking powder into the bowl, and mix them in gradually until a smooth, homogenous dough forms.
  • Pour the Batter: Taking care to cover all of the apples in a uniform layer, carefully pour the prepared batter over them on the baking sheet.
  • Bake until done:
    After preheating the oven, place the baking sheet inside and bake the apple pie for 25 to 30 minutes, or until the apples are soft and the crust is golden brown.
  • Present and Savor:
    After baking, take the apple pie out of the oven and let it cool a little bit before slicing.
  • Before serving, sprinkle icing sugar on top of the pie for an additional hint of sweetness.
  • Warm up and serve with a dollop of whipped cream or a scoop of vanilla ice cream for a really rich dessert encounter.

In conclusion

, this delicious apple pie recipe will satisfy your needs for handmade sweetness and only takes five minutes to prepare. This easy yet tasty dish is likely to become a family favorite, whether it is served as a lovely treat or as a soothing dessert. Savor every delicious mouthful while indulging in the comforting scent of freshly baked apples and buttery crust. Prepare to make enduring memories at the dinner table with this simple recipe for apple pie!

This Is Cauliflower Why Didn’t I Know This Recipe Before Better Than Meat No Frying

This Is Cauliflower Why Didn’t I Know This Recipe Before Better Than Meat No Frying

The vegetable cauliflower, which is sometimes disregarded, is about to take center stage in your kitchen. You can make a tasty and nutritious meal with just a few basic items and simple instructions. Let’s explore the recipe and discover cauliflower’s power!

Ingredients:

  1. 1.5 kilogram (about 3.5 pounds) of cauliflower
  2. 1.5 liters (6.5 cups) of water
  3. One teaspoon of salt
  4. Two tablespoons of milk
  5. 3 eggs, 3 tablespoons oil
  6. Three tablespoons of flour
  7. 100 g (3.5 oz) of mushrooms
  8. Four green peppers
  9. Two red peppers, one carrot, one onion, two tomatoes,
  10. one teaspoon of salt
  11. One teaspoon of mint
  12. One teaspoon of red pepper
  13. One teaspoon of pepper
  14. Four tablespoons of oil
  15. 150 g (5.5 oz) cheese

Detailed Instructions

  • Setting Up the Cauliflower Foundation
  • Chop the cauliflower into small pieces.
  • Simmer till tender in water with milk and salt.
    Blend the eggs and cauliflower until a smooth purée is achieved.
  • Simmering the Veggies
    Chop the tomatoes, onions, peppers, and mushrooms.
    Add the onions, carrots, and mushrooms and sauté until soft.
  • Cook until flavors combine after adding the tomatoes and spices.
  • Combining and Cooking
    Spread the cauliflower puree onto an oiled baking tray.
    Add grated cheese and sautéed veggies on top.
    Bake till bubbling and golden.
  • Benefits of Broccoli
    There is more to cauliflower than meets the eye. Nutrients including folate, vitamin K, and C are abundant in it. It’s also high in fiber and low in calories, which makes it a fantastic option for maintaining digestive health and controlling weight.
  • Value Nutritionally
    This dish of cauliflower yields a hearty portion when eaten alone. amount of antioxidants, minerals, and vitamins. This filling supper feeds your body from the inside out.

Changes
Try experimenting with different flavors, garnishes, and mix-ins to add some creativity to your cauliflower dish. The options are unlimited, ranging from creamy cauliflower gratin to spicy buffalo cauliflower.

Advice and Techniques

  • To prevent the cauliflower from becoming mushy, don’t overcook it.
  • Add the cheeses and veggies of your choice to personalize the meal.
  • For a full dinner, serve with crusty bread or a side of fresh salad.

Serving Ideas
This inventive use of cauliflower goes well with a cool white wine and a fresh green salad. It is sure to please even the pickiest palates, whether you are hosting a dinner party or just spending a relaxing evening at home.

In summary
Bid adieu to dullness Say hello to a world of taste and possibilities with cauliflower. You won’t be able to look at cauliflower the same way once you try this dish. So gather your ingredients, heat up your oven, and get ready to go on an absolutely delicious culinary journey!

No Flour No-Bake Carrot Cake Recipe A Healthy Delight

No Flour No-Bake Carrot Cake Recipe A Healthy Delight

Do you want to enjoy a delicious dessert without having to deal with the trouble of baking? There’s nowhere else to look! We’ll provide the techniques for making a delicious no-bake carrot cake that doesn’t use flour, eggs, sugar, or butter in this post. You can make a delicious, healthful, and fulfilling dessert with only a few basic materials and simple instructions.

Ingredients combine the subsequent components:

  1. 2.5 cups of carrots, grated
  2. One cup of coconut flakes
  3. one cup of dates
  4. One cup of walnuts
  5. 300 grams of plain yogurt
  6. Three tsp of coconut flour
  7. Ginger, Cinnamon, and Nutmeg
    clovers
  8. Steps in Preparing Sweetener
  9. Blending the Carrot Concoction

Let’s begin by making the carrot combination to get our culinary journey underway:

  • Grate the Carrots: Start by shredding two and a half cups of fresh carrots, then move them to a big bowl.
  • Include the Sweets: Add chopped walnuts, dates, coconut flakes, and a teaspoon of each of crushed cloves, cinnamon, and ginger to the shredded carrots. Add a tiny dash of nutmeg for an added taste boost.
  • Blend Well: Blend the ingredients with a mixer until fully blended, creating a colorful and aromatic carrot combination.
  • Making the Layer of Creamy Yogurt

Let’s now beat up the layer of creamy yogurt:

Get the yogurt ready:

  • Transfer three hundred grams of plain yogurt into a another bowl.
  • Include the Extras: Add three tablespoons of coconut flour and a little amount of sweetener, according to taste, to give the yogurt a nice sweetness without using any additional sugar.
  • Mix Away: Using a spoon or whisk, fully mix the components, resulting in a creamy, smooth yogurt concoction.

Putting the Cake Together

  • Here’s the exciting part: putting our carrot cake without baking together.
  • Starting with a piece of the carrot mixture, spread it out onto a platter in a compact, circular layer.
  • Put the Cream in: A portion of the smooth yogurt mixture should be spooned onto the carrot layer, covering the surface evenly.
  • Again: Once all of the ingredients have been utilized, keep stacking in alternate directions between the creamy yogurt and the carrot combination. Place one last layer of the creamy yogurt on top to finish.

Accessorizing

To put the final touches on our creation: Add a delicious crunch and nutty taste to the cake’s top layer by scattering chopped walnuts over it.

Optional: For an additional

for a burst of flavor and color, try adding a sprinkling of cinnamon or drizzling some honey on top.
Serving Ideas
It’s time to treat yourself now that your masterpiece of no-bake carrot cake is finished! Here are some ideas for serving that may improve your culinary experience:

  • On a hot day, serve chilled for a cool treat.
  • Serve with hot tea or coffee for a comforting midday munchie.
  • For an additional decadent touch, top with a dollop of Greek yogurt or whipped cream.

Advantages for Health

This carrot cake that doesn’t require baking is not only extremely tasty but also quite nutritious:

  • High in Fiber: Rich in fiber, carrots support gut health and assist with digestion.
  • Rich in Nutrients: Walnuts are an excellent source of protein, healthy fats, and antioxidants, while dates offer a dose of vitamins and minerals as well as natural sweetness.
  • Probiotic Boost: The probiotics in the plain yogurt help to maintain a healthy immune system and gut microbiota.

In summary
Creating a delicious dessert doesn’t have to be difficult or harmful, to sum up. This easy and healthy no-bake carrot cake recipe will allow you to indulge in dessert without feeling guilty. Why then wait? Get your ingredients ready and go on a gourmet journey that will satisfy your palate and provide you with nutrition.

White Chicken Chili

White Chicken Chili
Ingredients

  1. 4 Anaheim peppers or poblano peppers
  2. 1 ½ tablespoons olive oil
  3. 1 medium sweet onion chopped
  4. 2 cloves garlic minced
  5. 1 ½ teaspoons ground cumin
  6. 1 teaspoon chili powder
  7. ½ teaspoon marjoram or oregano
  8. ⅛ teaspoon ground cayenne pepper
  9. 3 cups low sodium chicken broth
  10. 2 15.8 ounce cans great northern beans drained and rinsed
  11. 1 15.25 ounce can whole kernel corn drained
  12. 2 cups cooked cubed or shredded chicken breasts or chicken thighs
  13. ½ cup sour cream
  14. ¼ cup chopped fresh cilantro
  15. Kosher salt and fresh ground black pepper
  16. Monterey Jack Cheese or Pepper Jack Cheese

optional
Instructions

  1. Preheat oven to 400 degrees. Cover a baking sheet with aluminum foil.
  2. Place the Anaheim or poblano peppers on the baking sheet with space between them. Roast for 8-10 minutes. Using tongs carefully flip them and roast for another 8-10 minutes. Place them on a cutting board and invert a large bowl over the top to steam them. Steam for 30 minutes. Cut the stems off, peel the peppers, and the discard the skins. Dice the peppers and set them aside for a few minutes.
  3. Heat the olive oil in a Dutch oven or heavy pot over medium heat. Add the onion and cook until soft. Reduce the heat to low and add the minced garlic, ground cumin, chili powder, marjoram, and cayenne pepper. Cook for 1 minute stirring constantly.
  4. Add the chicken broth, beans, corn, cooked chicken and diced peppers. Simmer for 10 minutes. Remove 2-3 cups of the chili and using an immersion blender or stand blender puree the chili. Add the pureed chili back to the pot andheat for 2-3 more minutes.
  5. Turn the heat off and stir in the sour cream and chopped cilantro. Reserve some of the cilantro for a garnish for each bowl. Season with kosher salt and fresh ground black pepper to taste. Ladle the chili into bowls and top with shredded Monterey Jack Cheese and chopped cilantro.

Irresistible Citrus Delights in 1 Minute

Irresistible Citrus Delights in 1 Minute!

Pancakes with lemon filling:

Components:

  1. 3 eggs 🥚
  2. One tsp vanilla sugar,
  3. 120g sugar,
  4. a dash of salt, and sunflower oil 🌻
  5. 200g flour,
  6. 10g baking powder,
  7. and 120ml milk 🥛
  8. One tsp lemon juice and a lemon peel 🍋

Guidelines:

  • Whisk three eggs and a dash of salt in a bowl.
  • Mix thoroughly after adding 120g of sugar and 1 tsp of vanilla sugar.
  • Add 120 milliliters of milk and 120 milliliters of sunflower oil, and stir again.
  • 200g of flour and 10g of baking powder should be added gradually while mixing the mixture until it is smooth.
  • To intensify the flavor of lemon, add 1 tsp of lemon juice and some lemon peel.
  • Make little pancakes out of the batter on a hot pan. Cook until both sides are golden brown

Orange Cream:

Composition:

  1. Two teaspoons of powdered sugar
  2. in 300ml of whipped cream 🥛
  3. powdered sugar (for dusting)
  4. 200ml orange juice sugar

Guidelines:

  • Whip 300ml of heavy cream in a bowl till it gets thick.
    Mix in 2 tablespoons powdered sugar until thoroughly blended.
  • 200 milliliters of orange juice should be added and carefully folded into the whipped cream.
  • Top the orange cream with a powdered sugar coating and serve.
  • Savor these easy and delicious citrus sweets!

Cheesy Garlic Bread Recipe (No Kneading Required)

Cheesy Garlic Bread Recipe (No Kneading Required)

Ingredients:

* Cheese Bread Ingredients:

  1. Milk 160ml /4g
  2. (1 tbsp) 30g (3 tbsp) of instant dry yeast
  3. 200g (1 1/2 cups) of sugar
  4. All-purpose flour or bread flour (strong flour)  4g (1 tsp)
  5. 25g (2 1/2 tbsp) of salt
  6. 160g of unsalted mozzarella cheese 
  7. (Optional) milk

Regarding the Garlic Sauce:

  1. 20g (2 tablespoons) unsalted butter 
  2. 7g (1/2 tablespoon) Garlic minced 
  3. 15g (1 1/2 tbsp) Add sugar to taste
  4. 40g of mozzarella cheese
  5. , 1/2 tbsp dried parsley
  6. and 1/4 tsp salt

Guidelines:

Regarding the Cheese Bread:

  • After mildly warming 160ml of milk, stir in 30g (3 tbsp) of sugar and 4g (1 tbsp) of quick dry yeast. Until it foams, let it sit for a few minutes.
  • 200g of bread flour, often known as all-purpose flour, and 4g (1 teaspoons) of salt.
  • After mixing in the yeast mixture, stir in 25g (2 1/2 tbsp) of unsalted butter. Mix until there is no trace of flour.
  • After the dough has doubled in size, cover the bowl and let it ferment in a warm location for approximately an hour.
  • After dividing the dough into sixteen pieces, let it ten minutes to rest.
  • Each dough portion should be flattened, then the dough should be sealed around a 10g cube of mozzarella cheese.
    The filled dough pieces can be arranged in any desired size or form.
  • Give them another half hour or more in a warm location to rise. If you would like, you may use milk to brush the tops.
  • Set the oven temperature to 180°C (356°F).
  • Bake the dough with cheese inside at 180°C (356°F) 
  • They should turn golden brown after 12 minutes.

Regarding the Garlic Sauce:

  • Melt 20g (2 tbsp) unsalted butter in a saucepan.
  • Add 7g (1/2 tbsp) finely chopped garlic and fry for a little while, until fragrant.
  • Add 1/2 tbsp dry parsley, 1/4 tsp salt, and 15g (1 1/2 tbsp) sugar (adjust to taste).
  • Take the sauce off of the burner and pour it over the cheese bread that has been cooked.
  • Top with 40g of mozzarella cheese.
  • Bake for a further ten minutes at 180°C (356°F) or until the cheese is melted and bubbling.
  • Savor your garlic bread with cheese.

Unveiling the Magic of Hungarian Chicken Delight

Unveiling the Magic of Hungarian Chicken Delight

Envision being taken to the energetic streets of Budapest, where the fragrance of food seasoned with paprika permeates the atmosphere. I’d like to take you on a culinary adventure with me today as we explore the realm of Hungarian food. A Hungarian cook gave me a delicious dish that is the foundation of our journey. It is a masterful fusion of love, flavor, and tradition.

Overview of Ingredients

  1. Six legs of chicken
  2. One onion
  3. three garlic cloves
  4. Just one tomato
  5. Tomato puree, one cup
  6. one cup of water
  7. four to five tablespoons sour cream
  8. Butter with Parsley
  9. A pair of teaspoons of paprika
  10. Two teaspoons of wheat flour
  11. Add pepper and salt.
  12. Olive oil

Getting Ready for the Chicken Seasoning:

  • Coat the chicken legs with a mixture of ground black pepper and salt. Be bold and let the tastes mix!
  • skillet-frying: In a skillet with hot olive oil and butter, gently cook the seasoned chicken legs until they are golden brown on both sides.

Creating the Tasty Sauce

  • Sautéing the Aromatics: In the same pan, add the minced garlic and heat it until aromatic after sautéing the chopped onion till it becomes golden.
  • Adding Tomatoes: Add chopped tomatoes to the mixture and then paprika for a traditional Hungarian touch.
  • Making the Sauce: Add the tomato puree to the mixture, dust it with wheat flour, and season it to taste. Simmer it so the flavors may combine to create a mellow, beautiful symphony.

Enhancing the Rice

  • Rice Cooking: After giving the rice a quick rinse, cook it in salted water until it achieves the perfect al dente consistency. Make it more comfortable with For maximum fluff, use a fork.
  • Assembly: Serving with Love and Flavor Serve the chicken legs over al dente rice, drizzle with enough of the rich tomato sauce, and sprinkle with the parsley that has just been cut.
  • Savoring the Moment: Chew each bite thoroughly and pause to notice the tastes dancing on your tongue.

Why Would You Eat Hungarian Food?
Hungarian food is known for its robust meals and strong spices, and it is a mouthwatering blend of Eastern and Western flavors. Hungarian cuisine is a veritable feast for the senses, ranging from flavorful goulash to exquisite desserts, reflecting a rich tapestry of history and culture.

Investigating Hungarian Substances
Ingredients that give dishes depth and richness, such as paprika, sour cream, and substantial meats, are essential to Hungarian cooking. These components are not just everyday foods but also cultural icons that embodies the essence of Hungarian cuisine.

The Skill of Harmonizing Tastes
The secret to Hungarian cooking is finding the ideal harmony of salty, spicy, and sweet flavors. Every component, from the softness of sour cream to the warmth of paprika, contributes significantly to the harmonized taste profile that pleases the palette.

The Recipe for a Rich Tomato Sauce
A silky tomato sauce is achieved by adding sour cream, which gives the meal an opulent richness. It makes a rich and soothing sauce when combined with the richness of paprika and the tart sweetness of tomatoes.

Getting the Hang of Al Dente Rice
Perfect rice cooking is a kind of art, and in Hungarian cooking, getting the perfect al dente texture is crucial. You can guarantee a delicious textural contrast that accentuates the flavors of the main meal by cooking the rice just long enough to be soft but still firm to the taste.

Cooking with Enthusiasm
Hungarian cuisine is rooted on a love of food and a respect for tradition. Every dish is meticulously prepared to ensure that every bite is a celebration of flavor and history.