Healthiest Avocado Ice Cream Recipe

Healthiest Avocado Ice Cream Recipe! I Couldn’t Believe It Was So Delicious! Ready in 5 Minutes!

Rich, smooth, and loaded with health benefits, avocado ice cream is a creamy, healthy substitute for classic ice cream. Its texture is irresistible. This is a fast and simple dish that can be put together in about 5 minutes, utilising basic ingredients that have a powerful nutritional impact. Here’s how to make this tasty delicacy.

Ingredients:

  1. 2 ripe avocados
  2. 1/4 cup of coconut milk (or almond milk for a lighter option)
  3. Juice of 1 lime (adds freshness and tang)
  4. 2 tablespoons of honey or agave syrup (optional, for sweetness)
  5. A pinch of salt (to enhance flavors)

Method:

Get the avocados ready:

Halve the avocados, remove the pit, and transfer the flesh to a food processor or blender.

Include Ingredients:

Add the coconut milk to get a somewhat sweet taste and creaminess. The mixture is further smoothed down by the coconut milk.

Add the juice from one lime. In addition to adding a zesty kick, this keeps the avocado’s vivid green colour intact.

Add honey or agave syrup to your ice cream according to your preference for sweetness. You may change the sweetness in this stage to suit your tastes.

Although it may seem little, adding a sprinkle of salt may greatly improve the ice cream’s flavour overall.

Blend until smooth:

All ingredients should be blended on high until creamy and smooth. It may be necessary to pause and scrape down the edges a few times to make sure everything is well mixed in.

Either serve right away or freeze:

After combining, serve the ice cream right away for a soft-serve texture.

Transfer the mixture to an airtight container and freeze it for about two hours if you desire a firmer consistency. To ensure it freezes evenly, stir every thirty minutes.

Serve and Savour:

For an added touch of sophistication, garnish with some chopped nuts, lime zest, or even mint leaves.

Enjoy a tasty and healthy dessert that is guilt-free by serving it in your preferred bowls or cones.

Advice: Variations: Add chocolate powder for a chocolate version or a handful of berries for a fruity touch to personalise your avocado ice cream.

For optimal creaminess and flavour, make sure your avocados are completely ripe.

Storage: Place any leftovers in the freezer in an airtight container. To make it softer, let it rest at room temperature for a few minutes before serving once again.

Not only is this avocado ice cream delicious, but it’s also a great treat that you can enjoy guilt-free since it’s full of fibre, healthy fats, and vitamins. Ideal for those who are health-conscious or just want a tasty and easy treat!

Cheesecake Fluff

Here’s a simple recipe for Cheesecake Fluff that requires only three ingredients:

introduction for Cheesecake Fluff:

Cheesecake Fluff: A Light-as-Air, Creamy, and Indulgent Dessert Masterpiece

Imagine a dessert that combines the richness of cheesecake with the airy texture of a cloud. Welcome to the world of Cheesecake Fluff, a game-changing treat that will revolutionize your dessert game!

A Heavenly Combination:

– Creamy Cheesecake Filling: A classic blend of cream cheese, sugar, and vanilla, whipped to perfection
– Light-as-Air Whipped Cream: Folded into the cheesecake mixture, creating a mousse-like texture
– Crunchy Graham Cracker Crust: A delicate, buttery crust adds a satisfying crunch

Why You’ll Love Cheesecake Fluff:

– Easy to Make: Simple ingredients and quick preparation
– Customizable: Mix-ins like fruit, nuts, or chocolate chips add endless possibilities
– Impressive Presentation: A show-stopping dessert perfect for gatherings or special occasions
– Guilty Pleasure Without the Guilt: Lighter than traditional cheesecake, but just as indulgent

Get Ready to Indulge:

Cheesecake Fluff is a true dessert innovation, offering a unique and addictive taste experience that will leave you wanting more. With each spoonful, you’ll be treated to a creamy, dreamy, and indulgent treat that’s sure to become your new favorite dessert!

Ingredients:
  1. 1 cup Greek yogurt (plain, non-fat or low-fat)
  2. 1/2 cup sugar-free cheesecake pudding mix (instant)
  3. 1/2 cup unsweetened almond milk (or any low-carb milk)
Instructions:
Mix the Ingredients:
In a large mixing bowl, combine the Greek yogurt and sugar-free cheesecake pudding mix.
Gradually add the almond milk while stirring until the mixture is smooth and well combined.
Chill:
Refrigerate the mixture for at least 30 minutes to allow it to thicken and flavors to meld.
Serve:
Serve chilled. You can enjoy it plain or top with fresh berries or a sprinkle of cinnamon for extra flavor.
This Cheesecake Fluff is a light and creamy dessert that fits well into a bariatric-friendly diet, offering a sweet treat with minimal ingredients.

Ground Beef Stuffed Potatoes

This dish is perfect if you’re searching for a tasty and different way to eat ground beef and potatoes. Savoury beef and soft potatoes are combined with oozy melted cheese to create a delicious dish known as ground beef stuffed potatoes. This meal is ideal for a special occasion or family supper because it is visually beautiful and quite fulfilling.

components:

  1. Four big potatoes
  2. One pound of ground beef
  3. One onion, chopped finely
  4. two minced cloves of garlic
  5. One tsp salt
  6. half a teaspoon of pepper, black
  7. One tsp of smoky paprika
  8. One tsp of dehydrated oregano
  9. Tomato sauce, half a cup
  10. Half a cup of beef stock
  11. One cup of finely shredded mozzarella cheese
  12. Two tsp olive oil
  13. Chopped fresh parsley (for garnish)

Guidelines:

Step 1: Get the potatoes ready

  • Before boiling the potatoes, give them a good wash. After adding them to a big saucepan of boiling water, cook for 20 to 25 minutes, or until they are soft but still firm. The potato should be soft enough to easily insert a fork into without falling apart.
  • After the potatoes are cooked, take them out of the water and let them to cool down a little. Then, hollow them out. Scoop out the inside of each potato by cutting it in half lengthwise, leaving a thick, strong shell about 1/4 inch thick. Save the potato that was scooped out for mashed potatoes or another purpose.

Cook the ground beef in step two.

  • Sauté the Garlic and Onions: Heat the olive oil in a big skillet over medium heat. Add the chopped onion and garlic, and sauté for about 5 minutes, or until the onion is transparent and fragrant.
  • Brown the Beef: When the ground beef browns, add it to the skillet and break it up with a spoon. Add dried oregano, smoked paprika, black pepper, and salt for seasoning. Cook for 8 to 10 minutes, or until the beef is browned and cooked through.
  • Add Tomato Sauce and stock: Add the beef stock and tomato sauce, stirring to mix. Simmer the mixture for ten minutes or so, so that the flavours can combine and the sauce may get thicker.

Step 3: Put the Stuffed Potatoes Together

  • Turn on the Oven: Set the oven’s temperature to 375°F, or 190°C.
  • Put the hollowed-out potato halves in a baking dish and fill them. To make sure the ground beef mixture fills the potato half completely, spoon it into each half and press down a little.
  • Add Cheese: Coat each loaded potato generously with shredded mozzarella cheese.

Step 4: Cook and Present

  • Bake: For 15 to 20 minutes, or until the cheese is bubbling and melted and the potatoes are thoroughly cooked, place the baking dish in the preheated oven.
  • Garnish and Serve: Take the stuffed potatoes out of the oven and sprinkle some freshly chopped parsley on top. Enjoy while hot!

Advice for Making Ideal Stuffed Potatoes:

  • Selecting the Correct Potatoes: Yukon Gold or russet potatoes are ideal for this dish since they maintain their shape when baked hollowed out.
  • Don’t Overcook the Potatoes: The potatoes must stay firm enough to support the filling, so take care not to overcook them during the first boiling.
  • Personalise Your Filling: You may add extra flavour and nutrients to the ground beef combination by adding your preferred herbs and spices, or you can add veggies like bell peppers or mushrooms.

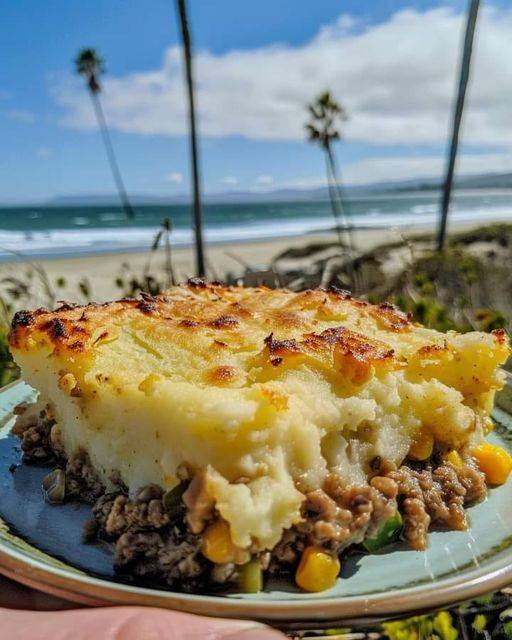
Air Fryer Shepherd’s Pie

A delicious and classic dish with a twist! Here’s a detailed intro for Air Fryer Shepherd’s Pie:

Air Fryer Shepherd’s Pie: A Revolutionary Twist on a Comfort Food Classic

Shepherd’s Pie, a traditional English dish, has been a staple of comfort food for centuries. The classic recipe consists of a layer of ground meat and vegetables topped with a crispy mashed potato crust, baked to perfection in the oven. However, with the advent of air fryer technology, this beloved dish has been transformed into a quicker, healthier, and equally satisfying meal.

Introducing Air Fryer Shepherd’s Pie

By utilizing the air fryer’s rapid air circulation and precise temperature control, we can achieve a golden-brown, crispy potato topping and a tender, flavorful filling in a fraction of the time. This innovative approach reduces the calorie count and oil content, making it an attractive option for health-conscious foodies.

Key Benefits:

– Faster Cooking Time: Ready in under 30 minutes
– Less Oil: Healthier alternative to traditional deep-frying
– Easy Cleanup: Fewer dishes and less mess
– Customizable: Experiment with various ground meats and vegetable combinations

Get ready to indulge in a guilt-free, mouthwatering Air Fryer Shepherd’s Pie that will become a new favorite in your household!

Ingredients:
  1. 1 lb ground beef
  2. 1 onion, chopped
  3. 2 cloves garlic, minced
  4. 1 cup frozen peas and carrots
  5. 1 cup beef broth
  6. 1 tablespoon tomato paste
  7. 1 tablespoon Worcestershire sauce
  8. 1 teaspoon dried thyme
  9. Salt and pepper, to taste
  10. 4 cups mashed potatoes (prepared from scratch or store-bought)
  11. 1 cup shredded cheddar cheese (optional)

Instructions:

  1. Cook the Beef Filling:
  2. Preheat your air fryer to 375°F (190°C)
  3. In a large skillet on the stove, cook the ground beef over medium heat until browned. Drain any excess fat.
  4. Add the chopped onion and minced garlic to the skillet. Cook until the onion is soft and translucent.
  5. Stir in the frozen peas and carrots, beef broth, tomato paste, Worcestershire sauce, dried thyme, salt, and pepper. Simmer for 5-7 minutes, until the mixture thickens
  6. Assemble the Shepherd’s Pie:
  7. Transfer the beef mixture to a heatproof baking dish that fits inside your air fryer basket.
  8. Spread the mashed potatoes evenly over the top of the beef mixture.
  9. If using, sprinkle shredded cheddar cheese over the mashed potatoes.
  10. Cook in the Air Fryer:
  11. Place the assembled dish into the preheated air fryer.
  12. Air fry at 375°F (190°C) for 15-20 minutes, or until the top is golden brown and the filling is bubbling. If your air fryer has a smaller capacity, you may need to cook it in batches or reduce the recipe size.
Serve:
Once cooked, carefully remove the dish from the air fryer.
Let it cool for a few minutes before serving.
Prep Time: 15 minutes
Cooking Time: 20-25 minutes
Total Time: 35-40 minutes
Servings: 4-6 servings

Carrot Cake Roll Recipe

Carrot Cake Roll Recipe

Welcome to a culinary adventure where traditional flavors meet innovative cooking techniques! Today, we’re diving into the world of desserts with a twist, presenting to you a mouthwatering creation.you can make this cake in oven and air fryer.

For the Carrot Cake:

  1. 3/4 cup all-purpose flour
  2. 1/2 tsp baking powder
  3. 1/2 tsp baking soda
  4. 1/2 tsp salt
  5. 1/2 tsp ground cinnamon
  6. 1/2 tsp ground ginger
  7. 1/4 tsp ground nutmeg
  8. 1/8 tsp ground cloves
  9. 3 large eggs
  10. 3/4 cup granulated sugar
  11. 2 Tbsp oil (canola or vegetable)
  12. 1 tsp vanilla extract
  13. 2 cups shredded carrots

For the Best Cream Cheese Frosting:

  1. 8 oz cream cheese, cold
  2. 8 Tbsp (1/2 cup or 1 stick) butter, room temperature
  3. 1 cup powdered sugar
  4. 1 tsp vanilla extract

Directions:

  1. Turn the oven on to 375°F, or 190°C. Press parchment paper into a jelly roll pan (10 x 15 inches), leaving it hanging over the sides for simple removal.
  2. Mix the flour, baking soda, baking powder, salt, nutmeg, cloves, cinnamon, and ginger in a medium-sized bowl.
  3. Whisk the eggs, oil, vanilla extract, and granulated sugar together well in a big basin that is separate from the other one.
  4. Mixing only until combined, gradually add the dry ingredients to the wet ones. Add the shredded carrots and fold.
  5. Evenly distribute the batter after pouring it into the pan. Cook for ten to thirteen minutes, or until the cake bounces back when you touch it.

Roll and Cool:

  1. Using the edges of the parchment paper, carefully remove the cake from the pan as soon as it is taken out of the oven. Set it down on a level surface.
  2. While the cake is still warm, wrap it up in the parchment paper, starting from the short end. Give it ten minutes or so to cool fully.

Prepare the Frosting:

  1. Beat the room temperature butter and chilled cream cheese together in a medium-sized bowl until smooth.
  2. Add the vanilla essence and powdered sugar gradually while beating until thoroughly mixed and creamy.

Put the Cake Roll Together:

  1. The cake should be carefully unrolled without breaking.
    Over the cake, evenly distribute the cream cheese icing.
  2. Without using the parchment paper, reroll the cake.
  3. To set, wrap it securely in plastic wrap and place it in the fridge for at least an hour or the freezer for around half an hour.

Serve:

  1. When the cake is ready to be served, cut it neatly using a hot knife that has been rinsed under hot water and dried.
  2. Before serving, let the slices defrost a little.

Air fryer Method:

  1. Preheat your air fryer to 325°F (160°C).
  2. Air fry the cake: Place the pan in the preheated air fryer and cook for about 12-15 minutes, or until the cake is set and springs back when lightly touched.

Tips and Variations

  • Add-ins: For extra crunch, stir in 1/2 cup finely chopped pecans or walnuts into the batter.
  • Spices: To create a distinctive flavour twist, add a touch of cardamom or adjust the spice amounts to your taste.
  • icing: Incorporate a teaspoon of lemon zest into the cream cheese mixture for a tangier icing.
  • Presentation: For a traditional appearance, dust the cake roll with powdered sugar before serving.

How to Store Refrigeration:

You may keep the constructed cake roll in the refrigerator for up to five days by placing it in an airtight container.
Freezing: Tightly wrap the cake roll with plastic wrap and then aluminium foil for extended storage. For up to three months, freeze. Before serving, let it thaw overnight in the refrigerator.

Blood sugar drops immediately

Blood sugar drops immediately! This liver recipe is a real treasure!

This liver recipe is a real treasure! Blood sugar drops immediately!

Ingredients:

  1. 500g chicken liver
  2. 70ml milk
  3. 3 eggs
  4. 1 onion
  5. Vegetable oil
  6. 3 cloves of garlic
  7. 1 carrot
  8. Spring onions
  9. Parsley
  10. 6 tablespoons oatmeal
  11. Salt, black pepper, paprika
  12. 30g cheese
  13. 250g yogurt
  14. Dill
  15. 1/2 lemon

METHOD:

  1. After washing 500g of chicken liver, soak it for 20 minutes in 70ml of milk.
    Chop one carrot, one onion, and three garlic cloves.
  2. In a skillet with heated vegetable oil, sauté the chopped veggies until they are soft.
  3. After discarding the milk, add the soaked chicken liver and boil it through.
    To taste, add paprika, black pepper, and salt for seasoning.
  4. Stir in chopped parsley and spring onions.
  5. After a few minutes, stir in six tablespoons of muesli and continue cooking.
  6. Pour the beaten three eggs over the liver mixture.
  7. After adding some shredded cheese, place a lid over top.
  8. Cook until the eggs are set, about 20 minutes.
  9. Combine 250g of yoghurt, 1/2 lemon juice, and chopped dill in a small bowl.
  10. Serve the chicken liver with a side of yoghurt sauce.
  11. Savour your food!
  12. Please remember to like, comment, and share this recipe with your friends if you like it. Good appetite!

Chicken Bubble Biscuit Bake Casserole

Chicken Bubble Biscuit Bake Casserole

A comforting and delicious casserole! Here’s a detailed introduction to Chicken Bubble Biscuit Bake Casserole:

Introduction:

Chicken Bubble Biscuit Bake Casserole is a mouthwatering, easy-to-make dish that combines tender chicken, flaky biscuits, and a rich, creamy sauce. This satisfying casserole is perfect for a weeknight dinner, a weekend meal, or even a special occasion. The biscuits “bubble” up during baking, creating a golden-brown, crispy top layer that complements the juicy chicken and savory sauce.

Key Ingredients:

– Boneless, skinless chicken breasts or thighs
– Canned biscuits (homestyle or buttermilk)
– Cream of chicken soup
– Shredded cheddar cheese
– Milk or heavy cream
– Salt, pepper, and herbs (optional)

Tips and Variations:

1. Use fresh or frozen chicken: Thaw frozen chicken before using.
2. Don’t overmix the sauce: Combine soup, milk, and shredded cheese just until smooth.
3. Add some spice: Mix in diced jalapeños or red pepper flakes for a spicy kick.
4. Try different cheeses: Experiment with mozzarella, Monterey Jack, or Parmesan.
5. Add some veggies: Mix in steamed broccoli, carrots, or peas for added nutritio

Ingredients:

  1. 3 cups cooked chopped chicken, or canned chicken
  2. 2 cans cream of chicken soup 1 1/2 cups sour cream
  3. 1 cup grated cheese
  4. 2 Tablespoons Ranch dressing mix
  5. 1/4 cup cooked, chopped bacon
  6. 1 (12 oz) can refrigerator Grands Jr Biscuits
  7. 1 additional cup grated cheese for top of casserole

Method:

  1. Turn the oven on to 350°. Apply a thin layer of cooking spray to a 9 x 13-inch pan. Put aside.
  2. Add the bacon, ranch dressing mix, 1 cup shredded cheese, chicken, soup, and sour cream. **Each biscuit should have four bits. Add chicken mixture and toss.
  3. Transfer chicken mixture to pan that has been ready.
  4. Add the last cup of grated cheese on top.Bake for 25 to 35 minutes, or until biscuits are golden brown and bubbling.

Vegetable Stuffed Flatbreads

Vegetable Stuffed Flatbreads

Ingredients;


  1. All-Purpose Flour: 2 cups (250g)
  2. Warm Water: 3/4 cup (180ml)
  3. Instant Yeast: 1 teaspoon
  4. Sugar: 1 tablespoon
  5. Salt: 1/2 teaspoon
  6. Olive Oil or Melted Butter: 2 tablespoons
  7. Mixed Vegetables: 1/2 cup, finely diced (such as bell peppers, carrots, green onions)
  8. Optional Additions: Grated cheese or chopped herbs (like parsley or cilantro) for enhanced flavor

METHOD:

Preparation Steps

1. Dough Preparation

  • In a large mixing basin, combine warm water, sugar, and instant yeast. Once the mixture is well combined, let it rest for about five minutes, or until it starts to foam.
  • To the yeast mixture, add the all-purpose flour, salt, and olive oil (or melted butter). Mix until a dough starts to come together.
    On a surface dusted with flour, knead the dough for five to seven minutes, or until it is smooth and elastic.
  • Gently mix the finely chopped veggies into the dough, being sure to distribute them evenly, along with any optional cheese or herbs.

2. Rising Dough:

  • Place the dough in a basin that has been gently oiled, cover it with plastic wrap or a wet towel, and let it rest in a warm place until it has doubled in size, approximately 1 hour.

3. Forming the Biscuits:

  • Punch down the dough to remove any trapped air once it has risen. The dough should be divided into 8–10 equal pieces, depending on your desired size.
  • Each part should be formed into a ball. Next, flatten each ball into a disc that is approximately 1/4 inch thick using a rolling pin or your hands.

4., Preparing the Flatbreads

  • Grease a non-stick skillet or griddle with butter or oil and preheat it over medium heat.
  • Cook each flatbread for two to three minutes on each side, or until it puffs up and becomes golden brown. In order to guarantee consistent cooking without scorching, adjust the heat as needed.

5. Ideas for Serving

Warm vegetable-stuffed flatbreads should be served. They go well with soups and salads, as well as on its own or with a dipping sauce.
These adaptable flatbreads are a lovely complement to any snack, appetiser, or meal since they are so simple to customise with your favourite veggies, herbs, or cheese. Please get in touch if you have any queries or if you need additional recipes!

Legendary Lentils with Leeks

Legendary Lentils with Leeks: A Meatless Dish That Will Surprise You!

Leeks and lentils are a culinary marriage made in heaven. This recipe matches any meat-based dinner in terms of flavour, nutrition, and heartiness. This dish will wow you whether you’re searching for a filling vegetarian alternative or you just want to try something different. This meal is very tasty and comforting, thanks to the marriage of sweet, savoury leeks and earthy lentils. You must give it a try!

Ingredients:

  1. 1 cup of dried lentils (green or brown)
  2. 2 large leeks, cleaned and sliced (white and light green parts)
  3. 2 cloves of garlic, minced
  4. 1 carrot, diced
  5. 1 celery stalk, diced
  6. 1 bay leaf
  7. 4 cups of vegetable broth or water
  8. 2 tablespoons of olive oil
  9. 1 teaspoon of dried thyme (or 1 tablespoon of fresh thyme)
  10. 1 teaspoon of smoked paprika (optional, for a smoky flavor)
  11. Salt and pepper to taste
  12. Fresh parsley, chopped (for garnish)

Method:

Get the lentils ready.

  • Clean and Arrange: After giving the lentils a good rinse with cold water, remove any dirt or broken lentils. After draining, put away.
  • Cook the Lentils: Bring water or vegetable broth to a boil in a large saucepan. Add a bit of salt, the lentils, and the bay leaf. After lowering the heat, simmer the lentils, covered, for 20 to 25 minutes, or until they are soft but not mushy. Eliminate the bay leaf and drain any remaining liquid.

2. Get the veggies and leeks ready.

  • Leeks should be properly cleaned since debris might get lodged between their layers. Cut the leeks lengthwise, then thinly slice them. After giving them a good rinse in cold water, drain thoroughly.
  • Sauté the Vegetables: Heat the olive oil in a big pan over medium heat. When aromatic, add the garlic and sauté for approximately one minute. When the veggies are cooked, add the leeks, carrot, and celery and simmer, stirring regularly, for approximately 5 to 7 minutes.

3. Mix and Heat:

  • Combine the veggies and Lentils: Put the sautéed veggies and cooked lentils in a pan. Add the thyme, more salt and pepper to taste, and smoked paprika, if using.
  • Simmer Together: Turn down the heat to low and let the ingredients gently simmer for five to ten minutes, giving the lentils time to absorb the spice and the flavours to combine.

4. Serve and Enjoy Garnish: Take the pan off of the burner and sprinkle some fresh parsley over the lentils and leeks.

Serve: You may eat this recipe by itself, over quinoa or rice, or with crusty bread on the side.

Why Meat Is Not Always Better Than Lentils with Leeks:

  • Nutrient-Dense: A great meat substitute, lentils are rich in protein, fibre, and vital elements like iron and folate.
  • Bound to Please: The earthy and comforting taste of lentils paired with the sweetness of leeks results in a flavour profile that is both rich and delicious.
  • Budget-Friendly: Since leeks and lentils are cheap ingredients, this recipe is a great choice for meal prep or serving a large group.
  • Versatile: You may easily modify this recipe. You may add more veggies, like as spinach or mushrooms, or season it with other herbs and spices.

Advice for Optimal Outcomes:
Don’t Cook the Lentils Too Much: As the lentils simmer, pay attention to make sure they don’t become too soft. They should maintain their form while yet being delicate.

Utilise Fresh Ingredients: The flavour and texture of the dish will significantly improve with the use of fresh leeks and high-quality lentils.

Tailor to Taste: To make this recipe uniquely yours, feel free to add your own herbs or spices and adjust the flavour.

In summary
The classic pairing of lentils and leeks provides all the comforts of a filling dinner without the addition of meat. This recipe is really simple to prepare, full of minerals, and flavour. This dish is a must-try whether you’re a vegetarian or simply want to try something different. Try it out and see why lentils with leeks are really superior than beef!

3 Ingredient Avocado Bread

  1. 3 Ingredient A  Pre-heat the Oven:

vocado Bread (Low-Carb/Keto)


Ingredients:

  1. 1 avocado
  2. 1 egg
  3. 1 cup shredded mozzarella cheese (or cheese of choice)

Method:

 Pre-heat the Oven:

Set the oven temperature to 350°F (175°C).
Use parchment paper to line a baking sheet or gently oil a loaf pan.
Get the Avocado Mixture Ready:

Mash the avocado until it’s smooth in a bowl.
Crack the egg into the bowl and thoroughly combine it with the avocado mash.
Mix the ingredients together:

Add the shredded mozzarella cheese, or any other preferred cheese, and stir until well blended.
Prepare the Bread:

If using a baking sheet, pour the ingredients onto it and smooth it out into a flat, uniform layer that is approximately ½ inch thick. Pour the mixture into the loaf pan, if using one, and level the top.
Bake for 15 to 20 minutes, or until the tops of the bread are golden brown and firm, in a preheated oven.
Chill and Cut:

Before slicing, let the bread cool somewhat. Cooling will cause it to solidify.
Serve:

Savour the avocado toast alone or topped with your preferred toppings.
This simple low-carb bread is a fantastic substitute for regular bread and goes well with a low-carb or ketogenic diet.