Refreshing Nettle and Lemon Syrup

Refreshing Nettle and Lemon Syrup: A No-Cook, Preservative-Free Delight


Nestled in the centre of natural living and traditional medicine is a wealth of recipes that not only taste great but also have many health advantages. Of these, the cooling nettle and lemon syrup is one of the best. This tasty mixture is proof of how easy and effective it is to combine the bounty of nature without resorting to artificial preservatives or cooking. Let’s learn how to produce this nutritious syrup, which is ideal for adding a bit of nature’s finest to your everyday routine.

The Wonders of Nettle and Lemon

Nettle is a nutrient-dense plant that is sometimes disregarded as just an annoying weed. It contains iron, calcium, and the vitamins A, C, and K. Conversely, lemon is well-known for strengthening the immune system and having a high vitamin C concentration. When combined, they produce a syrup that is not only cooling but also health-promoting, helping with digestion, detoxification, and skin health.


Ingredients:

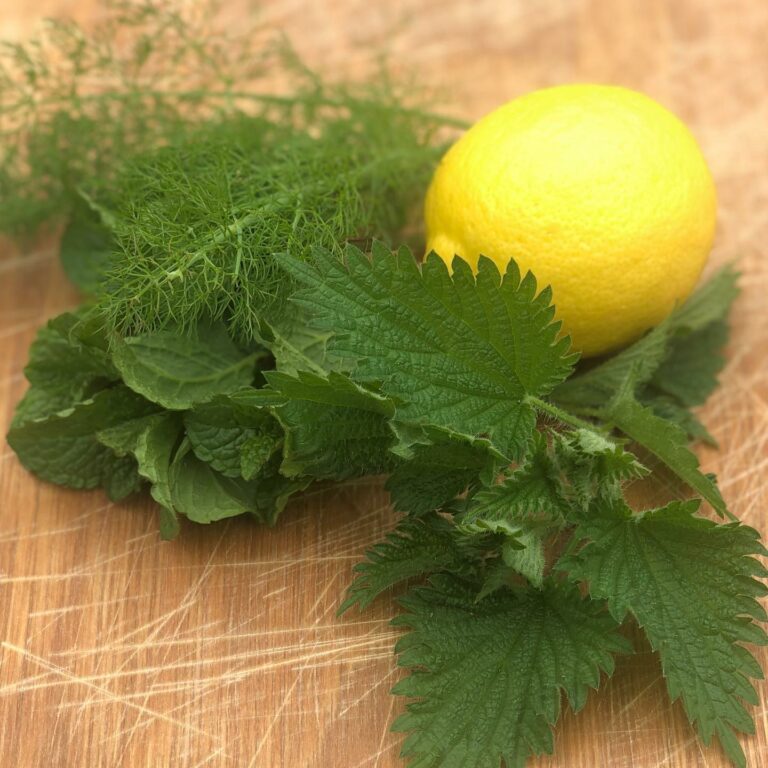
  1. New nettle leaves (about a cup)
  2. two or three big lemons
  3. To taste, honey or other natural sweeteners
  4. filtered water
  5. A big jar made of glass

How to Prepare: A No-Cook Approach

  1. Collect & Prep Nettle Leaves: Gather fresh nettle leaves first. Gloves can help prevent stings. To get rid of any dirt or insects, give the leaves a good rinse.
  2. Cut the lemons into thin slices after giving them a wash. Zest one lemon before slicing it if you want a stronger lemon flavour.
  3. Layering in the Jar: Arrange lemon slices and nettle leaves in a big glass jar in alternating layers. To taste, distribute your preferred sweetener between the layers.
  4. Water Adding: After the nettle, lemon, and sweetener have been put into your jar, cover the contents completely with filtered water.
  5. Allow to Infuse: Tightly seal the jar and set it in a dark, cold spot to allow the infusion to occur. Allow it to steep for at least a day, or up to three days if you want a more intense flavour.
  6. Strain and Serve: To eliminate all solids, strain the mixture through a fine mesh strainer after the infusion period. It’s time to savour your nettle and lemon syrup! It can be used as a cool topping for sweets, diluted with water, or added to teas.


Savouring Your Syrup

This nutrient-dense, naturally preservative-free nettle and lemon syrup is a great way to enjoy the tastes and health benefits of the natural world. The process of getting ready for it serves as a subtle reminder of the benefits of living simply and the importance of embracing nature’s goodness. Savour this cool syrup as a tribute to a healthy lifestyle and the ageless wisdom of natural cures.

Discover the Magic of a Miraculous Tea

Discover the Magic of a Miraculous Tea

Within the field of natural therapies, there is a little-known gem that has received a lot of praise for its amazing capacity to reduce swelling rapidly. This is no regular tea—rather, it’s a wonder tea that leverages the knowledge of herbal history and the force of nature to gently but effectively address those irritating episodes of swelling that can result from a variety of causes. Let’s investigate the reassuring properties of this unique mixture and see how you can use it to improve your quality of life.


The Power of Nature in Every Sip

This miracle tea creates a potent mixture that not only calms the affected areas but also promotes the body’s natural ability to reduce swelling. It does this by combining certain herbs that are known for their diuretic and anti-inflammatory qualities. Its potency is attributed to a carefully chosen combination of herbs:


  • Dandelion: Known for its diuretic properties, dandelion aids in the body’s removal of extra fluid, which lowers swelling.
  • Parsley: In addition to its culinary use, parsley is a strong diuretic that helps the body eliminate extra water.
  • Green Tea: Rich in antioxidants, green tea supports general well-being and has a slight diuretic effect that helps reduce swelling.
  • Ginger: Well-known for its ability to reduce edoema and relieve inflammation, ginger also offers a warming impact.


Brewing the Magic

Making this amazing tea is as easy as it is calming. After carefully bringing a balanced blend of these herbs to a boil, steep it for around ten minutes. Carefully drain the mixture, then bask in the tea’s cosy, warm embrace, savouring every drink as it performs its therapeutic magic on your body.

A Journey Towards Wellness, One Sip at a Time


Including this amazing tea in your daily regimen not only provides a proactive way to control edoema but also encourages you to take a moment of peace – a priceless break devoted to taking care of your body and spirit. This tea is a monument to the amazing healing power of nature, whether you’re seeking a natural remedy for your body’s discomfort or are dealing with the aftermath of an exciting day out.


Accept the calming road towards alleviation and learn about the remarkable powers of this miracle herb. Not only will you see a decrease in swelling as you immerse yourself in the soothing ritual of preparing and enjoying this tea, but you’ll also discover a tranquil route to general wellbeing and balance in your life.

Italian Supplì Recipe (Risotto Rice Croquettes)

Italian Supplì Recipe (Risotto Rice Croquettes)

The incredible sensations of creamy risotto, cheesy filling, and a satisfyingly crunchy shell come together in Italian supplì.

FRY IN THE AIR

  • Set your air fryer’s temperature for few minutes at 390°F.
  • To keep the air fryer basket from sticking, lightly spray it with cooking spray.
  • Make sure the breaded suppli in the air fryer basket are not in contact with one another by placing them in single layer.
  • Turn them over halfway through the cooking period and continue cooking for another 10 to 12 minutes, or until they are golden brown.
  • Using tongs, carefully take the crispy suppli out of the air fryer.
  • Savor cheese, crispy suppli without using lot of oil.

INGREDIENTS

  1. Two cups of cooked classic risotto with tomato, meat, or any other combination;
  2. four ounces of small-cube mozzarella cheese.
  3. Two beaten eggs
  4. and ½ cup all-purpose flour
  5. 1/4 cup vegetable oil for frying,
  6. either Panko or Italian breadcrumbs

DIRECTIONS

  • After risotto is done, allow it to rest for ten minutes or so at room temperature. When shaping suppli, let it cool completely if you’re producing a new one.
  • Line a baking sheet or pan with parchment paper.
  • Add breadcrumbs, flour, and beaten eggs to three different shallow plates.
  • Using two tablespoons, take a tiny portion of risotto and gently press it flat. place one or two mozzarella cubes in the middle.
  • Make sure the mozzarella is well encased in the risotto by covering it. If more rice is required to cover the cheese, you can add it. Suci should be shaped like an oval or a ball.
  • Shake off any extra flour after rolling the suppli in the flour. Then, submerge it in beaten eggs. Finally, carefully roll it in breadcrumbs until completely covered. Arrange breaded supli on a tray that has been ready. Proceed with the remaining rice in the same manner.
  • Refrigerate the breaded suppli for a minimum of 20 minutes.While frying, cooling aids in improved shape retention. Heat the vegetable oil in deep fryer or saucepan to about 350°F. *For baking or air-frying instructions, read the comments below.
  • Three to four cooled suppli should be added to the hot oil at time, being careful not to crowd the pan. They should be fried for three to four minutes, or until golden brown.
  • Supli should be taken out of the hot oil using slotten spoon and put on plate covered with paper towels to absorb any leftover oil.
  • Serve them with some marinara sauce for dipping while they’re still hot and fresh.

Observations

  • To cook food with an air fryer, warm it for a few minutes.
  • Apply a little cooking spray on the basket.
  • Place the breaded suppli into the basket of the air fryer.
  • After giving them another oil spray, air fry them for 10 to 12 minutes at 390°F, or until golden brown.


A Simple Bedtime Ritual for Colon Health

A Simple Bedtime Ritual for Colon Health

Taking good care of our digestive systems—especially the colon—is essential to achieving wellness. In addition to promoting general wellbeing, a healthy colon also helps us prevent discomfort and guarantees effective nutrient absorption. Nature offers us some incredible nutrients that can be used to support colon health in a gentle yet effective approach. Let’s look at a quick and all-natural recipe that contains flaxseed, pumpkin seeds, cloves, and olive oil. It’s a nutritional powerhouse and a natural cleanser that can do wonders for the health of your colon.


Why This Concoction Produces Wonders

  • Flaxseed Flaxseeds are high in fibre and help to cleanse the colon and encourage regular bowel motions. Additionally, they have omega-3 fatty acids, which lessen inflammation.
  • Pumpkin Seeds: Rich in magnesium, pumpkin seeds support the smooth movement of muscles required for digestion.
  • Cloves: Well-known for its antibacterial qualities, cloves help to maintain a healthy gut environment by getting rid of dangerous germs in the digestive system.
  • Olive Oil: Serving as the body’s natural lubricant, olive oil promotes the body’s internal cleansing functions and facilitates easier bowel motions.


Recipe Ingredients:

  1. 50g  of pumpkin seeds
  2. 50g  of flaxseed
  3. Ten grammes of cloves
  4. 150 millilitres of olive oil

Guidelines:

  1. Grind the cloves and seeds: Grind the cloves, pumpkin seeds, and flaxseed finely in a grinder. This increases their bioavailability and facilitates the mixture’s consumption.
  2. Combine with olive oil: To make sure the ingredients are well combined, combine the ground mixture with the olive oil and stir thoroughly.
  3. Eat Right Before Bed: Before going to bed, take one spoonful of this mixture. To ensure that the mixture lasts through the night, it is advisable to avoid eating anything after taking it.


The Advantages of Having a Daily Ritual
Without the use of harsh chemicals or procedures, you can maintain digestive health and gently cleanse your colon by implementing this easy nightly habit. It is evidence of the effectiveness of natural compounds in fostering wellbeing and well health.

As with any new addition to your health regimen, keep in mind that it’s crucial to pay attention to your body and modify as necessary. Before beginning any new health practice, it is advisable to speak with a healthcare provider if you have any specific health conditions or concerns.

Cheers to discovering all-natural, compassionate ways to support your health. This easy-to-make, all-natural concoction might be the nightly routine you’ve been looking for to maintain a clean colon and enhance your general health.

Garlic Your Hearts Natural Guardian Against Blood Clots

Garlic Your Hearts Natural Guardian Against Blood Clots

Garlic is a major player in the symphony of natural medicines that support heart health and wellbeing. Humble in appearance but rich in flavor and perfume, this cooking classic may hold key secrets to preventing heart attacks and blood clots. Let’s explore how the natural components found in garlic serve as a guardian for your heart.

The Power of Garlic in Heart Health

Garlic has been a cornerstone in culinary traditions and medicinal practices around the globe, not just for its distinctive taste but also for its health benefits. Among its many virtues, garlic’s role in heart health is particularly noteworthy. It’s like having a personal health assistant, focused on keeping your heart running smoothly.C


Cracking the Code of Garlic

Why is garlic such a health benefit? The secret is in its abundance of sulfur-containing substances, such allicin, which surface when garlic is diced or crushed. These substances are the main contributors to garlic’s health benefits, particularly in terms of heart health.

A Natural Approach to Preventing Blood Clots

A Natural Method for Preventing Blood Clots: Garlic reduces the risk of heart attacks by preventing blood clots in multiple ways. First of all, it functions as a naturally occurring anticoagulant, which means it can aid in preventing blood clot formation. This is essential to preserving your arteries’ smooth, unhindered blood flow and warding off the risk of a heart attack.

promoting the health of blood vessels


Garlic also helps your blood vessels stay healthy by lowering blood pressure and raising cholesterol. It promotes artery flexibility, averting the hardening that may result in cardiac problems. Consider garlic to be a kind of maintenance staff, keeping your circulatory system’s roadways clear and in good working order.


Garlic: Adding It to Your Diet


Garlic is a wonderful and heart-healthy addition to any diet. Garlic adds taste to sauces, dressings, and foods, while also providing health advantages. Garlic supplements are an option for individuals looking for a more direct approach, but it’s best to speak with a healthcare professional before beginning any new supplement program.

A Kind Reminder


Garlic is a natural ally in the fight for heart health, not merely a gourmet element. You’re taking a quick but powerful step to protect your heart and avoid blood clots by adding garlic to your regular routine. Cheers to savoring life’s zest and the zest of garlic!

Homemade Air Fryer Vegetable Egg Roll Recipe

Homemade Air Fryer Vegetable Egg Roll Recipe

Using an air fryer to prepare this delectable homemade vegetable egg roll recipe makes it healthier. encased in egg roll wrappers and packed with nutritious broccoli slaw, mushrooms, water chestnuts, and Asian seasonings. This recipe for egg rolls will have you falling head over heels.

Components

Filling for egg rolls:

  1. One tablespoon of olive oil
  2. One 12-oz bag Slaw with Broccoli
  3. 8 chopped white mushrooms
  4. and 1 tablespoon minced garlic
  5. 1 tablespoon freshly minced fresh ginger
  6. One eight-oz can of chopped water chestnuts
  7. 1/4 cup soy sauce or coconut aminos
  8. One teaspoon of sesame oil
  9. 1/2–1 tsp. chile flakes, adjusted for desired level of heat

Assembly of Egg Rolls Things:

  1. Eight wonton wrappers, full size
  2. 1/4 cup water is needed to seal the edges.

Guidelines

  • Instructions for Filling: Heat up a big skillet with olive oil. Add the broccoli slaw and heat for a few minutes, or until it wilts. Add the chopped water chestnuts, ginger, garlic, and mushrooms.
  • Add the soy sauce, aminos, sesame oil, and chili flakes once all the veggies have softened and wilted. As needed, taste and add more salt and pepper. Turn off the heat and place aside.
  • Option: This combination should include very little liquid. If the mixture is overly liquid, thin it out and remove excess moisture by adding a slurry of 1 tablespoon cornstarch and 1 tablespoon water to the vegetable mixture.
  • Putting the Egg Rolls Together:
  • Set the air fryer’s temperature to 400°F. Lay the egg roll wrapper in the interim. so that, like in a diamond, the points (corners) are on the top and bottom. Wet all of the egg roll wrapper’s edges with water using your finger.
  • Now, evenly distribute a spoonful of filling in a horizontal line down the center of the wrapper. The filling should then be pushed firmly into the egg roll wrapper by folding the bottom corner over it.
  • Next, place one side over the other, one at a time, making sure to wet each edge with water to ensure that it seals shut. To ensure that they stay closed, fully roll up and wet the edges that are exposed. After completing the other egg roll, apply frying spray to both sides.
  • After the Air Fryer has heated up, place the egg rolls inside. Cook for After 4 minutes at 400 degrees, flip them over and open the air fryer. Cook for an additional four minutes. Remove the air fryer basket with care, then cut it in two. Serve right away with soy sauce or coconut aminos. Have fun!

Air Fryer Frittata

Air Fryer Frittata

This quick and simple vegetable frittata prepared in an air fryer makes the tastiest, most satisfying morning dish. The ideal recipe for ninja air fryer eggs!

The ingredients are as follows:

  1. 6 eggs;
  2. 1/3 cup of shredded cheddar or Mexican cheese;
  3. 1/4 cup of optionally chopped cilantro;
  4. 1/4 cup of sliced black olives;
  5. 1/4 cup of halved cherry tomatoes;
  6. 2 tablespoons of pickled sliced jalapenos;
  7. 2 tablespoons of diced red onion;
  8. and salt and pepper for seasoning.

Guidelines

  • Crack the eggs straight into the parchment paper-lined air fryer basket. Top with shredded cheese, sprinkle with salt and pepper, then add all the toppings.
  • For 15 minutes, air fried at 350 degrees Fahrenheit (180 degrees Celsius).
  • Savor right away, best served with salsa and sour cream!

Remarks

  • After around 12 minutes, check on your frittata. Each air fryer is unique; my ninja foodi takes 15 minutes to cook the frittata.
  • Eggs can be whisked in a bowl before being added to the air fryer basket, or they can be kept more intact like I do in this recipe.
  • Use whichever combination of cheeses and vegetables you choose

Keeping leftovers:

  • This is best served warm, but it’s also delicious cold straight out of the refrigerator. Store leftovers in the refrigerator for three to four days, tightly wrapped.
  • Frittatas can also be frozen for up to two months if they are wrapped tightly. If you choose this course, I suggest slicing into individual servings and freezing those so that single dishes can be quickly thawed. You can microwave it gently or reheat it in an oven at 275 F (135 C) for about 15 minutes.
  • Any remaining frittata can also be reheated in the air fryer for a short while at 350 F (180C).

AIR FRYER OMELETTE THICK AND FLUFFY

AIR FRYER OMELETTE (THICK AND FLUFFY)


This air fryer omelette is the easiest thing ever to make. Never allow your hectic mornings cause you to miss the most significant meal of the day. Made with fresh eggs, bacon bits, and vegetables (for added nutrition), this omelette has four eggs.

Ingredients:

  1. Four eggs
  2. Two tablespoons of water or milk
  3. Five cherry tomatoes
  4. A small bell pepper and some fresh parsley
  5. One tablespoon of bacon bits
  6. Two pinches each of salt and black pepper
  7. ⅛ tablespoons of dried herbs, such as basil


DIRECTIONS:

  1. Chop the bell pepper and tomatoes into small pieces. Finely chop the parsley.
  2. Add the eggs, milk, basil, salt, and pepper to a mixing bowl. Mixing until well blended.
  3. Stir in the chopped veggies, bacon bits, and parsley.
  4. Line a cake pan or glass container that is appropriate for the oven with parchment paper to fit your air fryer. Put the egg mixture in a pan.
  5. Get the air fryer ready. Put the container or a cake pan into the air fryer basket with caution. Bake for fifteen minutes at 350°F. Check the eggs. Cook the omelette for a further two minutes, or until it is cooked through, if it is still raw.


Notes:

  • The cooking time required for different air fryers may vary. After 15 minutes, check the eggs and continue cooking if necessary.
  • Stir just until mixed; if you stir too much, your eggs will get dense.
  • Water can be substituted for the milk.
  • Wait a few minutes before taking the pan out of the air fryer because it will be extremely hot. Put on oven mitts.


STORING

Transfer any leftovers to airtight container or wrap them in foil and place in a Ziploc bag. Store in the fridge for about 3 days.

TOP TIP

All air fryers are different, check if eggs are cooked after 12 minutes to prevent overcooking. If they are still raw, add 2 minutes at a time until desired doneness.


NUTRITION

Calories: 173 k cal Carbohydrates: 3.8 g Protein: 15.1 g Fat: 10.7 g Sodium: 385.3 mg Fiber: 0.8 g

The Unlikely Duo: Foil and Toothpaste Wonders

The Unlikely Duo: Foil and Toothpaste Wonders

Creativity has no boundaries when it comes to do-it-yourself projects and home hacks. Today, we’re going to explore toothpaste with aluminum foil, an odd but very useful combo. You did really read correctly. Even while one is a must in our kitchens and the other is part of our regular grooming regimen, when combined, they can perform some surprising magic in your house. Let’s look at how this duo can replace your go-to products for easy fixes and household miracles.

An Illuminating Metamorphosis

The first tip on the list is a cleaning technique that can restore the shine to your cutlery. Silver can tarnish and fade with time, losing its shine. This is where our talented team really shines. By causing an abrasive element and aluminum to react, Silver objects can have tarnish removed gently with toothpaste. Apply a thin coating of toothpaste onto the silver, gently massage it with a foil piece, then rinse it with warm water to ensure the tarnish vanishes. It resembles magic!

Headlight Revival

Restoring automobile headlights is an additional intriguing application for foil and toothpaste. Headlight haze from oxidation can reduce vision and give the impression that your car is older than it actually is. Your car will look better and be safer if you apply toothpaste to the headlights and gently rub them with a piece of foil to remove the fog. Who knew it could be so simple to keep the shine on your car?

Remover of Scratch

Have you ever seen little scratches on the screens of other devices, such as your phone?pondered how to get rid of them without going broke? Foil and toothpaste save the day once more. Toothpaste’s moderate abrasive qualities might help reduce the visibility of tiny scratches. After lightly rubbing the screen with foil after applying a tiny amount of toothpaste, clean the screen. It is ideal for little scratches but will not remove deep ones.

Finding Joy in Do-It-Yourself Projects

The use of foil and toothpaste together is only one instance of the amazing ways that commonplace objects may be recycled. It not only offers a cost-effective solution to typical issues, but it also injects some enjoyment into standard maintenance chores. Keep this in mind the next time you encounter tarnished silver, cloudy headlights, or a scratched screen.unlikely duo and the wonders they can perform. Cheers to doing it yourself!

Wave Goodbye to Toenail Fungus with a Natural Apple Cider Vinegar Remedy

Wave Goodbye to Toenail Fungus with a Natural Apple Cider Vinegar Remedy

Swell A Natural Apple Cider Vinegar Remedy to Bid a Fond Farewell to Toenail Fungus

Apple cider vinegar (ACV) stands out as a versatile hero in the search for soothing and healing home remedies, especially when it comes to treating the bothersome issue of toenail fungus. This disorder, which is characterized by thicker, yellowed, and occasionally painful nails, can affect comfort in addition to appearance. But before you think about harsh chemicals or pricey treatments, let’s look at a straightforward, all-natural approach that makes use of water and ACV.

Apple cider vinegar: Why Use It?

  • The acidic nature of apple cider vinegar makes it difficult for fungi to grow, which is why it is praised for its antifungal qualities. ACV is well-known for its antibacterial and anti-inflammatory properties in addition to its antifungal abilities. posing a triple danger to the field of alternative remedies. It provides a calming route to recovery that is particularly valued by those of us looking for more holistic health treatments. It is mild but effective.

Creating a Homemade Natural Treatment for Toenail Fungus

This cure is as simple to make as they come. You’ll need water and apple cider vinegar in equal amounts. The aim is to combine the cleansing simplicity of water with the therapeutic benefits of apple cider vinegar to create a soak that your toes may enjoy.

This Is How You Do It:

Blend the Fix: To make a foot bath, fill a large enough basin with equal parts apple cider vinegar and warm water.

Soak Away: Dip your feet into the concoction and allow them to soak for approximately Twenty to thirty minutes. Now is a perfect time to unwind, read, or listen to your preferred podcast or music.

Dry Completely: After soaking, make sure your feet are completely dry, especially in the spaces between your toes. It’s important to keep feet dry since fungus loves moisture.

Repeat: You should do this bath every day for optimal benefits. Using natural medicines consistently is essential.

It Pays to Be Patient

  • Recall that this and other natural remedies take time and persistence. Even though you might not notice effects right away, many people have reported that their toenails’ appearance and health have significantly improved with ongoing use

A Concluding Remark

  • Although apple cider vinegar is an excellent natural remedy for toenail fungus, instances that are severe or persistent should be assessed by a medical practitioner. The key to this cure is to embrace nature’s healing abilities and find joy in the process of becoming healthy.