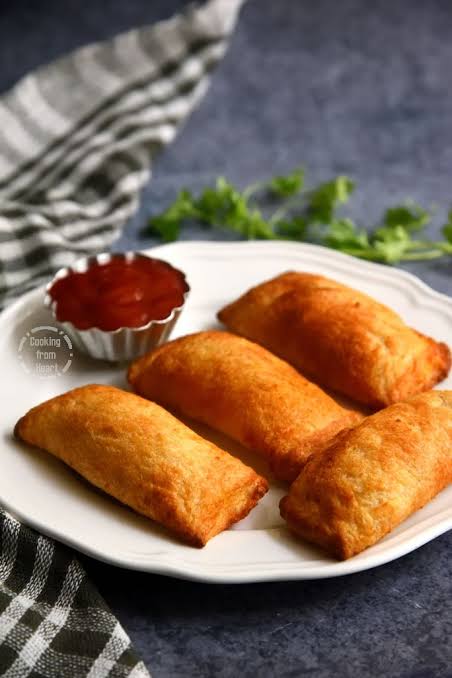
tyson boneless chicken wing in air fryer recipe
The Tyson Boneless Chicken Wing Air Fryer dish is an extremely straightforward and user-friendly dish. Tyson boneless chicken wings are baked in an air fryer after being marinated in a unique spice mixture. The outcome is a tasty, juicy chicken wing that works well for any occasion. The family is going to love this recipe for air-fried boneless chicken wings.
The Greatest Air Fryer Boneless Wings: Some Advice
- These days, air fryers are extremely popular. And for good cause, too! They can cook your favorite items in a fraction of the time and are a healthier option than deep frying. But if this is your first time using an air fryer, you may be unsure of where to begin.
- The following advice can help you make the best boneless wings in an air fryer:
- Commence with frozen wings: Although it may seem paradoxical, doing so will actually aid in the wings cooking more evenly.
- It’s crucial to season your wings for both flavor and texture.
- My favorite combination is just salt, pepper, and garlic powder.
- However, you may actually utilize any set of of your preferred seasonings. Just make sure that before frying, they are evenly coated.
- Cook over a high heat: The temperature range of the majority of air fryers is 200–400 degrees Fahrenheit. You should cook at the higher end of that range (around 400 degrees) for boneless wings. This will keep them juicy on the inside and help them crisp up nicely on the outside.
- Don’t fill the basket too full: This is very important! The wings won’t be as crispy if you pack the basket too full; instead, they will simmer rather than fry. Thus, while they’re cooking, make sure to give them lots of space to breathe.
- Accompany with your preferred dipping sauce: It’s time to enjoy now! Present your preferred dipping sauce alongside your boneless wings.
INGREDIENTS
- One Package of Frozen Tyson Chicken Wings (Boneless)
Air Fryer
How to Cook Air Fryer Boneless Tyson Wings
- I’m frequently asked how to cook Tyson boneless wings in an air fryer. The air fryer is a terrific way to prepare food because people are always looking for new ways to do it. Tyson Boneless Wings are relatively easy to prepare in an air fryer.
- Preheat your air fryer to 400 degrees Fahrenheit as a first step.
- The Tyson Boneless Wings must next be taken and put inside the air fryer. Cook them until they are thoroughly done, about ten minutes.
- You may then take them out of the air fryer and savor them!