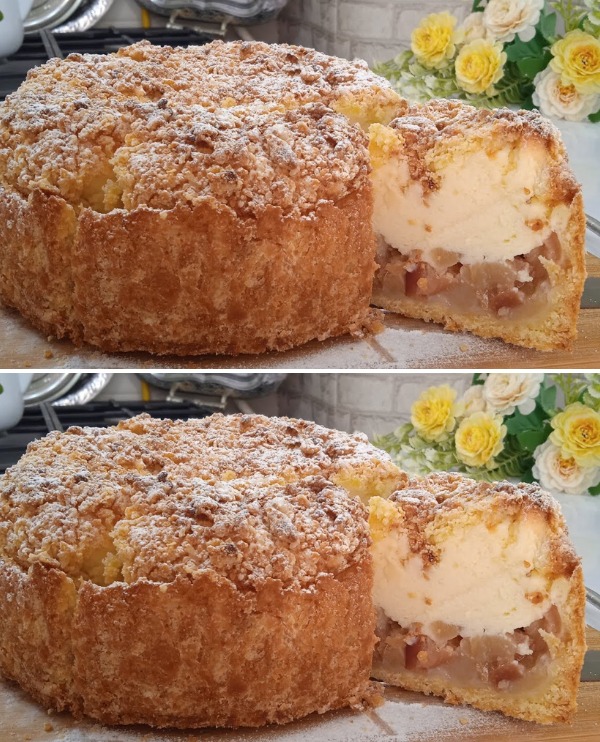
Apple Pie with Soufflé Cream – A Melting Delight Simple and Incredibly Tasty
Ingredients
Pie Crust Ingredients:
- 260 grams of flour,
- 100 grams of butter,
- a dash of salt,
- and two egg yolks
- – 40 grams of sugar
For the Cream Soufflé:
- – Two egg whites
- 150 grams of sugar,
- 400 grams of sour cream
- , and 35 grams of starch
Regarding the Apple Filling:
- 550 grams of apples and 40 grams of sugar
Guidelines
For the Pie Crust:
- 1. Combine flour, sugar, egg yolks, softened butter, and a small amount of salt in a mixing dish.
- 2. Work the ingredients into a dough that is smooth.
- 3. Evenly press the dough onto the bottom and sides of a pie plate that has been oiled.
- 4. Use a fork to prick the bottom.
- 5. Lightly toast the crust in a preheated oven (oven temperatures and baking times vary).
For the Cream Soufflé:
- 6. In an Beat the egg whites in a clean, dry basin until soft peaks form.
- 7. Add sugar gradually while whipping until stiff peaks form.
- 8. Blend sour cream and starch in a another basin until smooth.
- 9. Until fully blended, gently fold the beaten egg whites into the sour cream mixture. Put aside.
Regarding the Apple Filling:
- 10. Cut the apples thinly after peeling them.
- 11. Dust them with powdered sugar and stir to coat.
Pie Assembly:
- 12. Evenly cover the prebaked pie shell with the apple mixture.
- 13. Evenly cover the apples with the soufflé cream by pouring it over them.
- 14. Bake in your oven (baking temperature and time vary depending on your oven) until the pie is set and the top is gently brown.
- Slice, cool, and savor your delicious Soufflé Cream with Apple Pie!
Call to Action: Savor this delectable dish and share your delectable experiences!