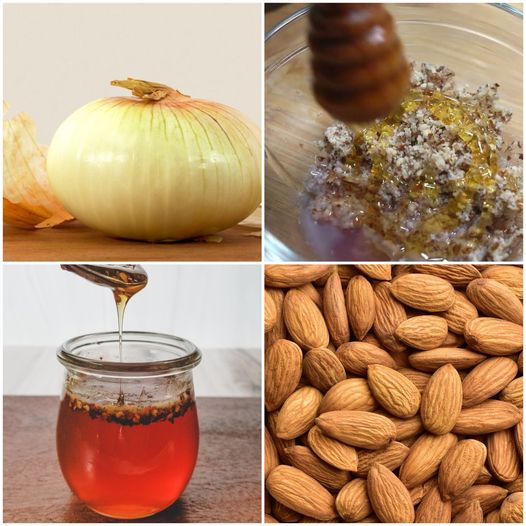
Onion, Almond, and Honey: A Simple Recipe for Delicious and Nutritious Treats,
Ingredients:
- One big onion and one cup of almonds
- Two tsp honey
- Olive oil
- To taste, add salt and pepper.
DIRECTIONS:
Get the onion ready:
- Peel the onion and cut it into thin rings to start. The thinness is essential for bringing out the inherent sweetness of the onions since it enables a faster and more equal caramelization.
- Toast the Almonds: Put the almonds in a dry pan over medium heat while you prepare the onions. Shake the pan occasionally while toasting them for about 5 minutes to make sure they brown evenly and don’t burn. After toasting, coarsely cut the almonds into tiny bits.
- To caramelize the onion, place a tablespoon of olive oil in a frying pan and heat it over medium heat. Include the onion rings, then scatter with Add a little salt and pepper, and cook, tossing constantly, until the edges start to crisp up and they take on a beautiful golden brown color. Ten to fifteen minutes should be plenty for this.
Mix and Present:
After the onions have become caramel, turn down the heat to low and pour honey over them. To thoroughly coat each onion ring with honey, stir. Cook for a further two minutes, or until the onions are well covered and the honey is warm.
Take off the heat and thoroughly whisk in the roasted almonds, ensuring that all the flavors are blended.
Have fun:
Serve warm, as an inventive side dish to go with a range of main entrees, or as a topping for grilled chicken or salad.
VERDICT: This onion, , almond, and honey dish gives excellent nutritional advantages in addition to a delicious blend of salty and sweet flavors. Honey provides a hint of natural sweetness without using refined sugars, while onions and almonds contribute vital minerals and a plethora of health advantages. This dish is easy to make, tasty, and full of nutrients. It’s a great way to add some flare to your cuisine without making a big deal out of it. Try it out and you could find yourself saying “Thank you” to yourself.