The Ultimate Natural Powerhouse

The Ultimate Natural Powerhouse

The Ultimate Natural Powerhouse: Boost Your Immune System and Fight Bacteria and Fungi!

Are you sick of fighting off colds and coughs all the time? There’s nowhere else to look! We have found a potent natural mixture that kills bacteria and fungi 150 times more efficiently than garlic and lemon. It will not only help you get rid of colds and flu, but it will also strengthen your immune system!

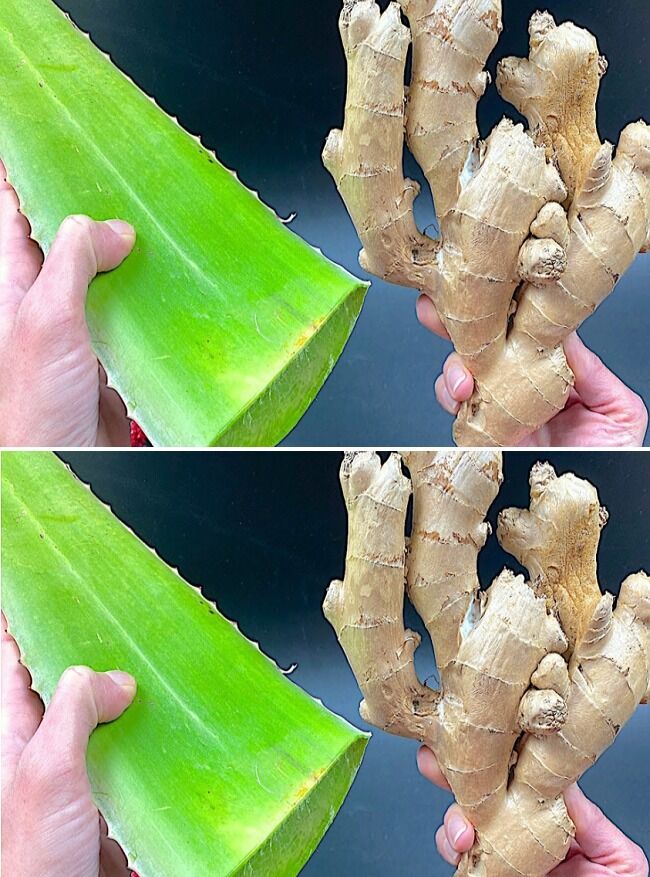
Aloe: Nature’s Healing Wonder

Aloe has a well-deserved reputation for healing; it truly lives up to the hype! Aloe is incredibly effective in disinfecting and eliminating bacterial infections in the body. However, please remember to be cautious of any potential allergies or contraindications. It’s always a good idea to consult a healthcare professional before trying something new.
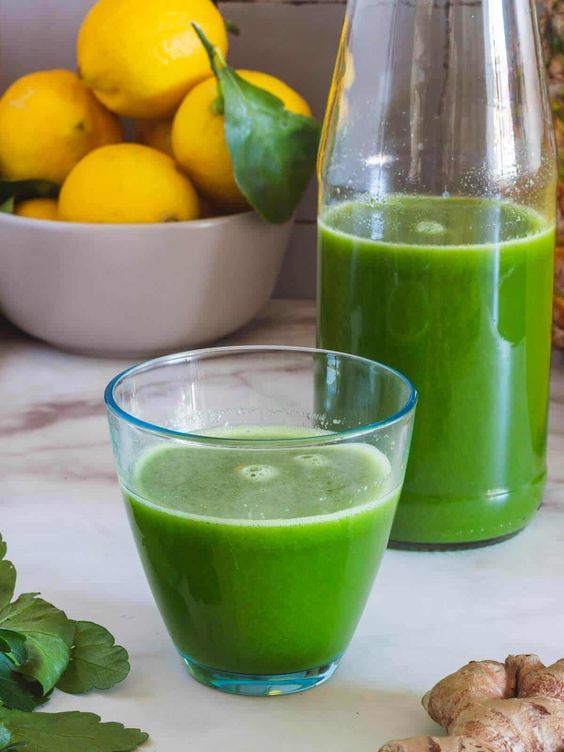
The Power of Lemon

In addition to being sweet, lemons are remarkably effective in warding off common colds. Lemons, which are high in potassium and iron, can cut bad cholesterol, control blood pressure, and strengthen the heart.

Aloe for Beautiful Skin

Did you know that aloe vera works wonders for skin health as well? You can revitalise your skin and aid in the reconstruction of collagen fibres, which are essential for keeping your skin appearing young and healthy, by routinely eating 200 grammes of aloe juice.

Ginger: A Digestive Superstar

If you get stomach problems frequently, ginger may become your new best buddy. Even a teaspoon of ginger added to your diet can improve digestion, increase appetite, and encourage the formation of gastric juice. Bid farewell to those uncomfortable digestive issues!

Honey: Nature’s Sweet Healer

Not only is honey a tasty sweetener, but it also has several health benefits. Two tablespoons of honey is all you need to make magic! Not only does honey have exceptional wound and burn healing properties, but it also has a positive impact on both your circulatory and digestive systems.

How to Use

Are you ready to try this natural powerhouse? It’s simple! Just mix these amazing components together and take one teaspoon of the diluted concoction in 100 millilitres of water. To keep the mixture powerful and fresh, you can store it in the refrigerator for four to five days.

With this amazing natural blend, you can boost your immune system and take control of your health right now. You’ll be astounded by the outcomes and your body will thank you!

air fryer boston brown bread

air fryer boston brown bread

Boston Brown Bread Air Fryer — I adore baking bread. There’s something so delightful about kneading and watching dough rise. That’s why when I learned how to make Boston Brown Bread in an air fryer, I got so excited! This recipe makes homemade bread fast and simply, and it doesn’t even require an oven or a stand mixer! If you adore baking as much as I do, keep reading to find out how simple it is to make this delectable delicacy.

Ingredients:

  1. One egg, one cup buttermilk, or one cup milk combined with one tablespoon of vinegar
  2. one-fourth cup molasses
  3. One tablespoon oil
  4. 1/4 cup sugar or equivalent sweetener
  5. 1.5 cups whole wheat flour
  6. 1/2 cup cornmeal
  7. 2 teaspoons baking powder
  8. 1 teaspoon ground allspice
  9. 1/2 cup chopped walnuts1/4 cup raisins

Guidelines:

  1. Mix the whole wheat flour, cornmeal, baking soda, and salt in a big bowl.
  2. Pour in the molasses and buttermilk gradually and stir until dough forms. Add the raisins and fold gently.
  3. Place the dough on a surface dusted with flour and knead it for a few minutes.
  4. Line the bottom of the air fryer basket with parchment paper and grease the sides. Using a sharp knife, score the top of the dough after placing it in the air fryer basket over the parchment paper.
  5. A toothpick inserted into the centre should come out clean after 25 minutes of cooking at 350˚F, the air fryer’s recommended setting.
  6. Air fryer bread should be removed. Let it cool for a minimum of fifteen minutes before to slicing it into pieces.
  7. Arrange, present, and savour!


How to Make store:

Each and every baker is aware of how important it is to score bread before baking. The dough may rise too quickly and collapse during the bake cycle if the score lines are not there to allow heat and gases to escape from the dough.

Additionally, scoring contributes to a beautiful finish on your bread loaf! There are two ways to assign points:

Cut the bread with a sharp knife (or paring knife)
cutting lines in the bread with a pair of scissors.
In order to score the bread, make a 1/4-inch line in it, which is typically shaped like an X.

air fryer ranch goldfish snack mix

air fryer ranch goldfish snack mix

air fryer ranch goldfish snack mix

This is one of the greatest snack mixes for kids—perfect for the beach, camping, or after-school snack! Air Fryer Ranch Goldfish Snack Mix.

  1. Two cups of Goldfish crackers
  2. One cup of pretzel twists and Goldfish pretzels
  3. One cup of optionally toasted almonds
  4. Melted three teaspoons of butter
  5. Two tsp ranch spice blend, taste and adjust
  6. One tsp of Worcestershire sauce
  7. One-half teaspoon of powdered garlic

Guidelines:

  1. Melted butter, ranch seasoning mix, Worcestershire sauce, and garlic powder should all be thoroughly mixed together in a big basin.
  2. To the bowl containing the ranch mixture, add the Goldfish crackers, pretzel twists, and almonds. Toss gently until the spice is equally distributed across all of the pieces.
  3. The amount of time needed to cook the snack mix in batches will depend on how big your air fryer is. Fill the air fryer basket with a single layer of mix, making sure there is room for air to circulate.
  4. For approximately 4-6 minutes, air fry the snack mix at 250 degrees Fahrenheit (120 degrees Celsius), shaking the basket halfway through to guarantee even frying. The mixture ought to be toasty and heated.
  5. Before serving, let the snack mix cool for a few minutes. This will aid in the flavours solidifying and the mix reaching its ideal crunch.


TIPS:

Achieving that right crunch and flavour balance are key components of the ideal Air Fryer Ranch Goldfish Snack Mix. To guarantee that your snack mix tastes great every time, follow these expert tips:

  • Even Coating: Ensure that the melted butter, Worcestershire sauce, and ranch seasoning are combined in an even layer. This guarantees that each component of your snack mix receives an equal amount of the coating’s rich flavour.
  • Shake Gently: Halfway through cooking, give the air fry basket a gentle shake. This aids in redistributing the pieces so that there are no soft or overly toasted areas and that everything cooks evenly.
  • Keep an Eye on the Cooking Time: Since the power of air fryers varies, make sure to check your snack mix earlier than the recipe directs. The idea is to lightly roast the ingredients without scorching them.
  • Let It Cool: Before serving, let the snack mix cool somewhat. The flavours and texture of the mixture are further solidified and made crisper by cooling.
  • Storage Is Key: If you cannot resist eating your snack mix all in one go, store it in an airtight container. This preserves its savoury flavours and keeps it crisp and fresh for up to a week.
  • As they say, “variety is the spice of life.” Feel free to try with other items. Nuts, cereal bits, or little pretzel chunks can give texture and flavour new depths.
  • Season to Taste: Feel free to reduce the amount of ranch seasoning if you want stronger flavours. If the recommended amount isn’t strong enough for your snack mix, add extra after tasting it.
  • Choose Your Nuts: Nuts can have their flavour enhanced and crunch added if they are roasted before being added to the mixture. Just make sure that before combining them with the other ingredients, they have cooled fully.
  • Use Parchment Liners: You may want to use perforated parchment liners in the air fryer basket to make cleanup simpler. They don’t impede airflow and stop sticking.
    Keep an eye on Freshness: If you’re using items from previously opened packages, such pretzels or almonds, make sure they’re still fresh and haven’t gone stale because this will change the flavour of your snack mix as a whole.

You can become an expert at creating this Air Fryer Ranch Goldfish Snack Mix with these professional tips, transforming a basic snack into a gourmet delight suitable for any setting.

Discover the Top 5 Benefits of Drinking Cucumber Juice

Discover the Top 5 Benefits of Drinking Cucumber Juice

Discover the Top 5 Benefits of Drinking Cucumber Juice

Although cucumber juice may appear unassuming, its simplicity should not be underestimated. Cucumber juice, which is high in minerals and water, has several health advantages that can make you feel your best.

Here are the top five benefits of incorporating cucumber juice into your daily routine, which range from maintaining healthy skin to boosting hydration.

1. Hydration Boost

For general health, it’s important to stay hydrated, and cucumber juice is a great way to both relieve your thirst and replace your body’s fluid reserves. Cucumbers are composed of over 95% water, making cucumber juice a hydrating beverage that can help keep you feeling refreshed and energized throughout the day.

2. Rich in Nutrients

Cucumbers contain a lot of water, but they’re also a great source of important vitamins and minerals. Vitamin K, vitamin C, potassium, and magnesium are abundant in cucumber juice and are all essential for good health maintenance. You may make sure you’re getting a variety of nutrients to support your body’s functioning by include cucumber juice in your diet.

3. Supports Digestive Health

Enzymes found in cucumber juice facilitate digestion and support intestinal health. Frequent consumption of cucumber juice might alleviate digestive problems such as bloating, gas, and constipation. The high water and fiber content in cucumbers also help keep your digestive system.

4. Promotes Healthy Skin


Because it is moisturising and nourishing, cucumber juice is a beauty elixir for your skin. Cucumbers’ high silica concentration promotes collagen synthesis and increases skin suppleness, which lessens the visibility of wrinkles and fine lines. Cucumber juice has the added benefit of reducing skin irritation and inflammation, giving your complexion a clear, bright, and youthful appearance.

5. Weight Management Aid

Cucumber juice might be a beneficial addition to your diet if you’re trying to lose weight or keep it off. Cucumber juice helps you feel full and satisfied without consuming extra calories because it is low in calories and high in water and fibre. Consuming cucumber juice as a meal substitute or low-calorie snack might support your weight loss objectives while offering vital  nutrients to fuel your body.

Conclusion

Cucumber juice is a straightforward yet effective complement to any healthy lifestyle because of its nutrient-rich composition, moisturising qualities, and long list of health advantages. Cucumber juice can help you look and feel your best, whether your goals are to support bright skin, improve digestion, or improve your general health. So raise a glass to your health and energy while sipping on some cool cucumber juice!

Air Fryer Salmon Teriyaki Lettuce Cups

Air Fryer Salmon Teriyaki Lettuce Cups

Salmon Teriyaki Air Fryer Lettuce Cups: Are you looking for a tasty and simple dinner recipe? Perfect lettuce cups for salmon teriyaki!

The results are delicious since the air fryer does all the work for you. This recipe is also gluten-free and healthful. Don’t pass up this delicious dinner!

Expert Advice on Salmon Wraps

  • Simple Lunch: You can always prepare double the salmon and utilize the leftovers for this recipe for a quick and easy meal.
  • Canned Salmon: This dish works well with canned salmon.
  • Don’t Cook the Salmon Too Much: Overcooking the salmon is one of the most frequent errors made when air-frying. The salmon flake easily when it reaches an internal temperature of 125 degrees Fahrenheit.

Components

  1. One and a half pounds of fish
  2. One butter lettuce head
  3. One cup cooked white rice
  4. one-fourth cup of sesame seeds
  5. Twice as much Sriracha sauce
  6. Soy sauce (1/2 cup) for Teriyaki sauce
  7. one-fourth cup Mirin
  8. two tsp honey
  9. Four tsp of brown sugar
  10. two tsp finely chopped garlic
  11. one tsp finely powdered ginger
  12. One tablespoon of cornflour
  13. One tablespoon of water
  14. Serve with Sriracha sauce and sesame seeds.

Guidelines

  • After lining your air fryer with parchment paper, add your salmon and season with black pepper and salt. Preheat the air fryer to 400 degrees F. Cook for 8 to 10 minutes, or until the food is easily flaked.
  • Place the flaked salmon in a medium-sized bowl and put it aside. Combine one tablespoon of water and cornstarch in a to create the cornstarch slurry, use small bowl. Put aside. Prepare the sauce with teriyaki: Combine all the ingredients for the teriyaki sauce (except from the slurry) in small pot and whisk until well blended.
  • Once it reaches boil, reduce the heat to simmer
  •  Add the cornstarch slurry and cook, whisking, for one to two minutes, or until thickened.
  • When thick enough, it should cover the back of spoon.
  • Give it few minutes to cool. After the salmon has cooked, pour the teriyaki sauce over it and swirl to mix.
  • Place one or two teaspoons of teriyaki salmon on top of the rice layer on top of the lettuce leaves.
  • Add sesame seeds on top. Assist. Arrange, present, and savor!

air fryer duck

air fryer duck

There’s a new bird in town, so get over, chicken. The crispy, juicy, and delectable duck cooked in an air fryer. This recipe is ideal for a special occasion or a weeknight supper. So, why do you hesitate? Try this recipe right now!

This Air Fryer Duck puts the ideal holiday feast or special occasion dinner right at your fingertips. You will be able to savor each and every bite because of its delicious flavors!

This recipe did not let me down—I was ecstatic to try it in the air fryer. The plump duck was superbly roasted and cooked to perfection, with a wonderful flavor!

Our favorite recipes are made much better when air-fried instead of being served roasted. It tastes nothing like game, unlike those, and results in more soft meat with crispy skin that is great on its own or with potatoes!

By fork to spoon

Components

  1. 3–4 pound defrosted duck
  2. One tsp salt
  3. half a teaspoon of pepper, black
  4. Two tsp olive oil
  5. one tsp finely chopped garlic
  6. two tsp lemon juice

Guidelines

  • To begin, prepare your duck by combining the olive oil, minced garlic, salt, black pepper, and lemon juice in a small bowl. Blend thoroughly and apply on the duck.
  • Place the duck into the air fryer, adjust the temperature to 300 degrees Fahrenheit, and cook for 40 to 50 minutes, or until the duck reaches an internal temperature of 170 degrees Fahrenheit.
  • Before serving, let it sit for five to ten minutes.
  • Arrange, present, and savor!
  • Remarks The cooking time will vary depending on whether you use fresh or frozen duck. I’ve discovered that using thawed duck will result in superior air fryer roasted duck after making this dish few times. When removing frozen duck from the air fryer, ensure sure your meat thermometer reads 170 degrees Fahrenheit.

Air Fryer Sweet and Sour Chicken

Air Fryer Sweet and Sour Chicken

Chinese food is incomplete without the sweet-and-sour sauce found in air-fried chicken. Pineapple, sugar, vinegar, ketchup, soy sauce, and other ingredients are usually used to make it. You might want to try this recipe for Air Fryer Sweet and Sour Chicken instead, even though it can be cooked in the oven or on the stovetop to save time and energy. What’s the hidden component? Continue reading

Different Recipes

Air-Fryer You can alter the flavor of this adaptable dish, sweet and sour chicken, to suit your preferences. Consider trying these recipe variations:

  • Pineapple Sweet & Sour Chicken: For a tropical touch, incorporate canned or fresh pineapple chunks into the sauce. The pineapple’s tartness and sweetness go well with the sauce.
  • Spicy Sweet and Sour Chicken: Add some Sriracha sauce or crushed red pepper flakes to the sauce for a little kick of heat. To suit your taste, adjust the amount of spice.
  • Honey Garlic Sweet and Sour Chicken: To achieve a more sweet and garlicky taste profile, add additional minced garlic and honey to the sauce.
  • Onion with Bell Pepper Add some crunch and color to your Sweet and Sour Chicken by adding diced white onion and bell peppers to the air fryer basket along with the chicken.
  • Ginger Sweet and Sour Chicken: To give the sauce a zesty and aromatic boost, add freshly grated ginger. It tastes great with the tart and sweet components.
  • Vegetarian Sweet and Sour Tofu: To make a vegetarian version of this meal, replace the chicken with tofu cubes. Before smothering the tofu in sauce, press and air fried it until it becomes crispy.
  • Gluten-Free Sweet and Sour Chicken: To make this dish gluten-free without sacrificing its delicious flavors, use gluten-free cornstarch and soy sauce (or a substitute).

Components

  1. Chicken with sesame ingredients:
  2. Two pounds of boneless chicken breast and two big eggs
  3. One cup cornstarch,
  4. one teaspoon salt,and one teaspoon sesame oil
  5. half a teaspoon of pepper, black
  6. One tspn of five spice

sour and sweet sauce components:

  1. 3/4 cup of sugar, granulated
  2. Half a cup of vinegar made from apple cider
  3. One-fourth cup ketchup
  4. Two tsp soy sauce
  5. One tablespoon of sesame oil
  6. One-third cup brown sugar
  7. two tsp finely chopped garlic
  8. two tsp water
  9. One tablespoon of cornflour

Guidelines

Chickenwith Sweet and Sour Flavor Guidelines:

  • Cut the chicken into 1-inch pieces first.
  • After the chicken has been chopped to perfection, proceed to prepare the dipping stations.
  • Combine the cornstarch, five-spice, salt, and pepper in bowl. Blend thoroughly.
  • Beat the egg in separate bowl and mix in the sesame oil.
  • Stir until thoroughly combined. Apply layer of olive oil spray to the basket.
  • Chicken is dipped in the cornstarch mixture.
  • Afterward, return to the cornstarch mixture after adding to the egg mixture. Put them in the air fryer basket as you batter them.
  • Apply liberal amount of olive oil spray.
  • For five minutes, set the temperature to 370 degrees. Five minutes later, turn them over and give them generous spraying of olive oil to ensure the batter crisps up. Five more minutes of air fry time. Over the chicken, drizzle the sauce.
  • Instructions for the Sauce: Combine all the ingredients, excluding the cornstarch and water, in a small saucepan. Simmer for four to five minutes while whisking. To prevent the sauce from burning or sticking, simply keep stirring it.
  • After then, take it off the heat.
  • Combine the cornstarch and water in a small bowl, whisk into the sauce, and simmer for an additional five minutes to thicken.

Beet and Orange Salad: A Flavor Explosion for Your Taste Buds

Beet and Orange Salad: A Flavor Explosion for Your Taste Buds

Even the most basic components can produce a visually gorgeous and exceptionally delicious feast when it comes to culinary delights. Imagine the bright, zesty flavor of oranges combining with the rich, earthy flavor of beets. Although it may sound strange, this special blend has several health advantages in addition to a taste explosion. You can make a tasty and nourishing dinner that will make you desire more with just one orange and one beet.

The Magic of Beets and Oranges

Beets have a delightfully earthy and sweet flavor that satisfies the senses. They are also a rich source of fiber, antioxidants, and minerals. On the other hand, oranges are a fantastic source of vitamin C and are brimming with juicy sweetness. When mixed together, these components produce a flavorful symphony that is invigorating and gratifying.

Beet and Orange Salad is going to be your new favorite recipe!

Components:

  1. one medium beet, shredded and peeling
  2. One big orange, peeled and divided into sections
  3. A handful of fresh greens (mixed greens, spinach, and arugula are particularly good options)

Regarding the dressing:

  1. Two tsp olive oil
  2. One-third cup of balsamic vinegar
  3. One teaspoon of maple syrup or honey
  4. To taste, add salt and pepper.
  5. Garnish with roasted walnuts or a sprinkling of feta cheese, if desired.

Guidelines:

  • Prepare the ingredients: Peel and grate the beetroot first. The orange should next be gently peeled and sliced into segments, being sure to remove as much of the white pith as you can.
  • Put the salad together: Grated beet, orange segments, and a few fresh greens should all be combined in a big bowl. The beautiful colors and additional nutritional boost will add to the salad’s allure.
  • Get the dressing ready: Mix the olive oil, balsamic vinegar, honey (or maple syrup), salt, and pepper in a small bowl that is separate from the rest until thoroughly blended.
  • Put on and throw off: After lightly tossing everything to coat everything equally, drizzle the salad items with the dressing.
  • Serve with garnish: Add some feta cheese or roasted walnuts to the top right before serving for an additional A fusion of taste and texture.

A Dish to Savor

More than just a dish, this beet and orange salad is a feast of flavors and textures that meld together in the most wonderful way. It demonstrates that a little creativity in the kitchen can create magic even with basic, fresh ingredients. This salad will look stunning whether it’s served as a light lunch, a cool side dish, or the focal point of your dinner table. Let’s experiment with new flavors that uplift our emotions and improve the quality of our food!

Transform Your Cleaning Routine with Detergent and Salt

Transform Your Cleaning Routine with Detergent and Salt Sometimes the simplest pairings of commonplace objects can yield the finest results when it comes to keeping our houses tidy. Detergent and salt are one such combo that can surprise you.

Despite their initial strange appearance, this formidable pair offers a number of incredible cleaning advantages that will make your tasks much easier. Let’s examine this combination’s potential benefits in more detail.

1. Bid Farewell to Ugly Stains

Dealing with stains on our clothing that won’t go away is a common frustration. Fortunately, using salt and detergent together can be a great way to get rid of them. When it comes to stubborn stains like blood, grass, and red wine, salt strengthens the cleaning properties of detergent, making it an ideal choice. Just use the with regular washing. You’ll be astounded by the outcome!

2. Get Rid of Grease on Cookware

Although cleaning grease-filled cookware can be extremely difficult, you can remove even the most stubborn oil by using soap and salt. Salt’s abrasiveness amplifies the detergent’s ability to combat grease, guaranteeing a deep clean without causing any damage to your pots and pans. Therefore, this potent combination will take care of any grease buildup, be it oven grease or stovetop filth.

3. Start Over with Your Cutting Boards

Cutting boards can pick up flavors and stains from different dishes over time. Scrubbing them down with a detergent and salt solution will help get rid of stains and mask offensive odors. This works particularly well for eliminating overpowering smells like seafood, onions, and garlic. Bid farewell to residual odors and welcome to a clean, new cutting surface!

4. Bring Back the Beauty of Your Carpets and Rugs

Your carpets and rugs may sustain damage from spills, pet stains, and muddy footprints. Fortunately, a mixture of salt and detergent can work wonders. Just apply the mixture to the afflicted region, give it a good scrub, then use a vacuum or towel to remove any leftover residue. Your carpets and rugs will appear like new in no time!

5. Rejuvenate the curtains and upholstery

Curtains and upholstery may turn drab and lifeless over time. Additionally, light stains may make them appear less attractive. But worry not—they can be revived with a solution of salt and detergent. This potent mixture can eliminate light stains and brighten the fabric. Just don’t forget to first do a patch test to ensure the fabric is colorfast.

6. Bid Farewell to Grimy Bathrooms

Bathrooms can be a haven for mold, mildew, and soap scum. But you can remove these unwelcome visitors by using salt and detergent. After applying the mixture to the grout and tiles, allowing it to sit for a little while, Use a brush to scrape. In no time, your bathroom will be immaculately clean and fragrant!

In conclusion, cleaning using a combination of detergent and salt is revolutionary. It is not only more affordable, but it also uses fewer harsh chemicals, which makes it a more environmentally friendly option. Thus, the next time you have a difficult cleaning assignment, grab these common household objects to improve the efficiency and environmental friendliness of your cleaning regimen!

Lemon Pepper Air Fryer Chicken Tenders

Lemon Pepper Air Fryer Chicken Tenders

Lemon Pepper Air Fryer Chicken Tenders With a crunchy coating and a creamy citrusy sauce on top, the zesty chicken with lemon flavour makes for a delectable appetiser known as lemon pepper chicken tenders. With a few basic supplies, it can be assembled in less than forty minutes. Make it using my simple air fryer recipe.

With just a few basic ingredients, you can make these delicious appetisers in less than 30 minutes: lemon pepper chicken tenders.

Recipe By: Neha whiskaffair

Prepared in ten minutes

Cooking Time: 30 minutes

Time Spent: forty minutes

Servings: six individuals


Ingredients for Lemon Pepper Air Fryer Chicken Tenders:

Regarding The Tenders;

  1. One tablespoon of lemon pepper seasoning
  2. Two pounds (1 kg) of chicken tenders
  3. One cup panko bread crumbs (or ordinary bread crumbs)
  4. ½ cup all-purpose flour
  5. Two big eggs (beaten)
  6. Cooking oil or oil spray (as needed)

Needed for the sauce;

  1. Two tablespoons salted butter
  2. Two teaspoons all-purpose flour
  3. One cup of chicken broth, or chicken stock
  4. Two tablespoons of freshly squeezed lemon juice
  5. One teaspoon of Italian or cajun seasoning
  6. Half teaspoon of ground paprika
  7. Half teaspoon of red pepper flakes

As a garnish, add three tablespoons of freshly chopped parsley.

Instructions for Lemon Pepper Air Fryer Chicken Tenders:

Chicken Coat;

  • After rinsing, thoroughly drain the chicken tenders.
  • Paper towels are used to pat them dry.
  • Combine the chicken tenders with the lemon pepper seasoning in a mixing dish and well mix.
  • Advice: At this point, add ¼ teaspoon of baking soda to make the tenders extremely juicy and tender.
    Put up three small bowls at a breading station. Place the eggs, breadcrumbs, and all-purpose flour into separate bowls.
  • Select a tender and coat it with flour. Next, thoroughly coat it with the egg mixture, allowing any excess to fall off. Apply a thick layer of panko.
  • Do this again.
  • Apply the same coating to each chicken tender, then place them on a platter.

Air-Fry the Chicken;

  • Put the cooked chicken tenders in the air fryer’s basket in a single layer.
  • Note: If they don’t fit in one go, fry them in batches.
    Use a lot of oil while brushing or spraying.
  • Bake at 360°F (180°C) for ten minutes.
  • After ten minutes, flip, and continue air fry until golden brown.
  • To keep the tenders warm, move them to a serving plate and cover with aluminium foil.

Prepare the sauce;

  • Prepare the sauce while the chicken tenders are frying.
    Melt the butter in a pan over medium heat.
  • Stir the all-purpose flour into the pan and heat, stirring constantly, for one minute, or until the flour turns light brown.
  • Turn off the heating system.
  • Add lemon juice and chicken stock and whisk.
  • Turn the heat down to medium and swirl constantly for a minute or until the sauce thickens.
  • Cook for a further minute after adding the red pepper flakes, paprika, and cajun seasoning.
  • If the sauce seems thick, add extra stock. It ought to have a pourable texture.
  • Inspect for salt and pepper, adding additional as necessary.
  • Serve the chicken tenders immediately after pouring the sauce over them.

Note for the recipe: You can simply double or quadruple this recipe to suit your needs. Ensure that the chicken is air-fried in batches.

Storage Advice;
  1. These chicken tenders with lemon pepper can be refrigerated for two to three days when kept in an airtight container.
  2. Place back into an air fryer and reheat for a couple more minutes. After adding sauce, serve.


Nutrition Facts; 

333 kcal; 20g carbs; 38g protein; 10g fat; 4g saturated fat; 1g polyunsaturated fat; 3g monounsaturated fat; 0.2g trans fat; 163 mg cholesterol; 360 mg sodium; 689 mg potassium; 1g fibre; 2g sugar; 544 IU vitamin A; 4 mg vitamin C; 45 mg calcium; 2 mg iron