Italian Supplì Recipe (Risotto Rice Croquettes)

Italian Supplì Recipe (Risotto Rice Croquettes)

The incredible sensations of creamy risotto, cheesy filling, and a satisfyingly crunchy shell come together in Italian supplì.

FRY IN THE AIR

  • Set your air fryer’s temperature for few minutes at 390°F.
  • To keep the air fryer basket from sticking, lightly spray it with cooking spray.
  • Make sure the breaded suppli in the air fryer basket are not in contact with one another by placing them in single layer.
  • Turn them over halfway through the cooking period and continue cooking for another 10 to 12 minutes, or until they are golden brown.
  • Using tongs, carefully take the crispy suppli out of the air fryer.
  • Savor cheese, crispy suppli without using lot of oil.

INGREDIENTS

  1. Two cups of cooked classic risotto with tomato, meat, or any other combination;
  2. four ounces of small-cube mozzarella cheese.
  3. Two beaten eggs
  4. and ½ cup all-purpose flour
  5. 1/4 cup vegetable oil for frying,
  6. either Panko or Italian breadcrumbs

DIRECTIONS

  • After risotto is done, allow it to rest for ten minutes or so at room temperature. When shaping suppli, let it cool completely if you’re producing a new one.
  • Line a baking sheet or pan with parchment paper.
  • Add breadcrumbs, flour, and beaten eggs to three different shallow plates.
  • Using two tablespoons, take a tiny portion of risotto and gently press it flat. place one or two mozzarella cubes in the middle.
  • Make sure the mozzarella is well encased in the risotto by covering it. If more rice is required to cover the cheese, you can add it. Suci should be shaped like an oval or a ball.
  • Shake off any extra flour after rolling the suppli in the flour. Then, submerge it in beaten eggs. Finally, carefully roll it in breadcrumbs until completely covered. Arrange breaded supli on a tray that has been ready. Proceed with the remaining rice in the same manner.
  • Refrigerate the breaded suppli for a minimum of 20 minutes.While frying, cooling aids in improved shape retention. Heat the vegetable oil in deep fryer or saucepan to about 350°F. *For baking or air-frying instructions, read the comments below.
  • Three to four cooled suppli should be added to the hot oil at time, being careful not to crowd the pan. They should be fried for three to four minutes, or until golden brown.
  • Supli should be taken out of the hot oil using slotten spoon and put on plate covered with paper towels to absorb any leftover oil.
  • Serve them with some marinara sauce for dipping while they’re still hot and fresh.

Observations

  • To cook food with an air fryer, warm it for a few minutes.
  • Apply a little cooking spray on the basket.
  • Place the breaded suppli into the basket of the air fryer.
  • After giving them another oil spray, air fry them for 10 to 12 minutes at 390°F, or until golden brown.


 

Homemade Air Fryer Vegetable Egg Roll Recipe

Homemade Air Fryer Vegetable Egg Roll Recipe

Using an air fryer to prepare this delectable homemade vegetable egg roll recipe makes it healthier. encased in egg roll wrappers and packed with nutritious broccoli slaw, mushrooms, water chestnuts, and Asian seasonings. This recipe for egg rolls will have you falling head over heels.

Components

Filling for egg rolls:

  1. One tablespoon of olive oil
  2. One 12-oz bag Slaw with Broccoli
  3. 8 chopped white mushrooms
  4. and 1 tablespoon minced garlic
  5. 1 tablespoon freshly minced fresh ginger
  6. One eight-oz can of chopped water chestnuts
  7. 1/4 cup soy sauce or coconut aminos
  8. One teaspoon of sesame oil
  9. 1/2–1 tsp. chile flakes, adjusted for desired level of heat

Assembly of Egg Rolls Things:

  1. Eight wonton wrappers, full size
  2. 1/4 cup water is needed to seal the edges.

Guidelines

  • Instructions for Filling: Heat up a big skillet with olive oil. Add the broccoli slaw and heat for a few minutes, or until it wilts. Add the chopped water chestnuts, ginger, garlic, and mushrooms.
  • Add the soy sauce, aminos, sesame oil, and chili flakes once all the veggies have softened and wilted. As needed, taste and add more salt and pepper. Turn off the heat and place aside.
  • Option: This combination should include very little liquid. If the mixture is overly liquid, thin it out and remove excess moisture by adding a slurry of 1 tablespoon cornstarch and 1 tablespoon water to the vegetable mixture.
  • Putting the Egg Rolls Together:
  • Set the air fryer’s temperature to 400°F. Lay the egg roll wrapper in the interim. so that, like in a diamond, the points (corners) are on the top and bottom. Wet all of the egg roll wrapper’s edges with water using your finger.
  • Now, evenly distribute a spoonful of filling in a horizontal line down the center of the wrapper. The filling should then be pushed firmly into the egg roll wrapper by folding the bottom corner over it.
  • Next, place one side over the other, one at a time, making sure to wet each edge with water to ensure that it seals shut. To ensure that they stay closed, fully roll up and wet the edges that are exposed. After completing the other egg roll, apply frying spray to both sides.
  • After the Air Fryer has heated up, place the egg rolls inside. Cook for After 4 minutes at 400 degrees, flip them over and open the air fryer. Cook for an additional four minutes. Remove the air fryer basket with care, then cut it in two. Serve right away with soy sauce or coconut aminos. Have fun!

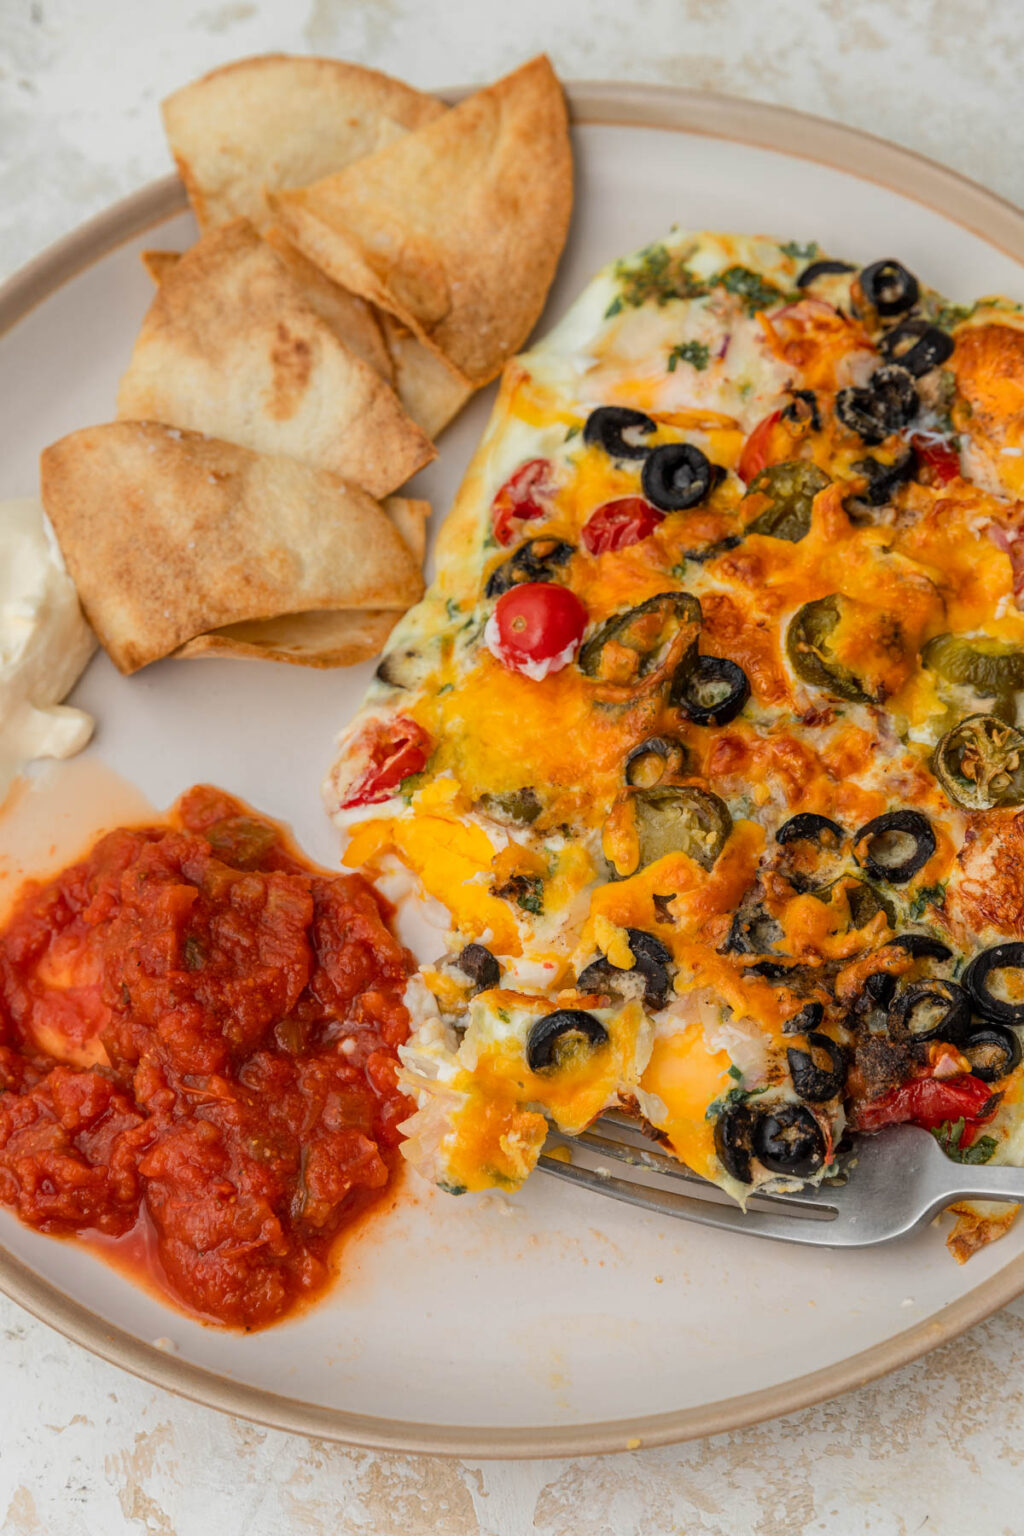
Air Fryer Frittata

Air Fryer Frittata

This quick and simple vegetable frittata prepared in an air fryer makes the tastiest, most satisfying morning dish. The ideal recipe for ninja air fryer eggs!

The ingredients are as follows:

  1. 6 eggs;
  2. 1/3 cup of shredded cheddar or Mexican cheese;
  3. 1/4 cup of optionally chopped cilantro;
  4. 1/4 cup of sliced black olives;
  5. 1/4 cup of halved cherry tomatoes;
  6. 2 tablespoons of pickled sliced jalapenos;
  7. 2 tablespoons of diced red onion;
  8. and salt and pepper for seasoning.

Guidelines

  • Crack the eggs straight into the parchment paper-lined air fryer basket. Top with shredded cheese, sprinkle with salt and pepper, then add all the toppings.
  • For 15 minutes, air fried at 350 degrees Fahrenheit (180 degrees Celsius).
  • Savor right away, best served with salsa and sour cream!

Remarks

  • After around 12 minutes, check on your frittata. Each air fryer is unique; my ninja foodi takes 15 minutes to cook the frittata.
  • Eggs can be whisked in a bowl before being added to the air fryer basket, or they can be kept more intact like I do in this recipe.
  • Use whichever combination of cheeses and vegetables you choose

Keeping leftovers:

  • This is best served warm, but it’s also delicious cold straight out of the refrigerator. Store leftovers in the refrigerator for three to four days, tightly wrapped.
  • Frittatas can also be frozen for up to two months if they are wrapped tightly. If you choose this course, I suggest slicing into individual servings and freezing those so that single dishes can be quickly thawed. You can microwave it gently or reheat it in an oven at 275 F (135 C) for about 15 minutes.
  • Any remaining frittata can also be reheated in the air fryer for a short while at 350 F (180C).

AIR FRYER OMELETTE THICK AND FLUFFY

AIR FRYER OMELETTE (THICK AND FLUFFY)


This air fryer omelette is the easiest thing ever to make. Never allow your hectic mornings cause you to miss the most significant meal of the day. Made with fresh eggs, bacon bits, and vegetables (for added nutrition), this omelette has four eggs.

Ingredients:

  1. Four eggs
  2. Two tablespoons of water or milk
  3. Five cherry tomatoes
  4. A small bell pepper and some fresh parsley
  5. One tablespoon of bacon bits
  6. Two pinches each of salt and black pepper
  7. ⅛ tablespoons of dried herbs, such as basil


DIRECTIONS:

  1. Chop the bell pepper and tomatoes into small pieces. Finely chop the parsley.
  2. Add the eggs, milk, basil, salt, and pepper to a mixing bowl. Mixing until well blended.
  3. Stir in the chopped veggies, bacon bits, and parsley.
  4. Line a cake pan or glass container that is appropriate for the oven with parchment paper to fit your air fryer. Put the egg mixture in a pan.
  5. Get the air fryer ready. Put the container or a cake pan into the air fryer basket with caution. Bake for fifteen minutes at 350°F. Check the eggs. Cook the omelette for a further two minutes, or until it is cooked through, if it is still raw.


Notes:

  • The cooking time required for different air fryers may vary. After 15 minutes, check the eggs and continue cooking if necessary.
  • Stir just until mixed; if you stir too much, your eggs will get dense.
  • Water can be substituted for the milk.
  • Wait a few minutes before taking the pan out of the air fryer because it will be extremely hot. Put on oven mitts.


STORING

Transfer any leftovers to airtight container or wrap them in foil and place in a Ziploc bag. Store in the fridge for about 3 days.

TOP TIP

All air fryers are different, check if eggs are cooked after 12 minutes to prevent overcooking. If they are still raw, add 2 minutes at a time until desired doneness.


NUTRITION

Calories: 173 k cal Carbohydrates: 3.8 g Protein: 15.1 g Fat: 10.7 g Sodium: 385.3 mg Fiber: 0.8 g

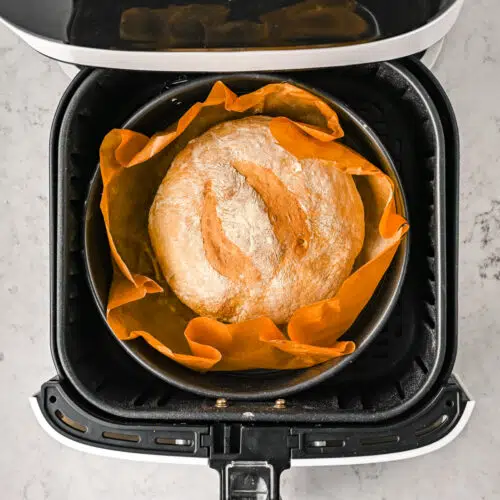
Air Fryer Bread

Air Fryer Bread

You can make this simple Air Fryer Bread in a few minutes in the kitchen with just six basic ingredients. It’s fluffy, airy, and the ideal side dish for everything you make that tastes so good.

By:my air fryer kitchen

HELPFUL NOTES:

  • Place the dough onto a surface that has been lightly floured to shape the roll. Carefully bring the dough’s edges towards the center to form a round loaf. Place the bread in the pan with its smooth side facing up.
  • Line the outside of the bread pan with ice cubes to give the bread’s outside a lovely crispy feel. The outside will get a wonderful crispy, chewy crust thanks to the steam.

INGREDIENTS

  1. 1/2 cup Whole-Wheat Flour 
  2. 1/4 teaspoon instant yeast
  3. One teaspoon salt
  4. 1/4 teaspoon of granulated sugar
  5. Warm Water, 3/4 cup
  6. One teaspoon of olive oil

DIRECTIONS

  1. Mix together the flour, sugar, yeast, and salt.
  2. After that, carefully whisk in the oil and warm water until completely incorporated.
  3. It will be really sticky dough. After let the dough an hour to rise, place it on surface that has been lightly floured.
  4. Place the dough onto surface that has been lightly floured to shape the roll.
  5. Carefully bring the dough’s edges towards the center to form round loaf.
  6. Place the bread in the pan with its smooth side facing up.
  7. On top of the dough, cut two or three slices. Put the dough in place. on a piece of parchment paper that slides easily into an 8- or 6-inch-diameter circular pan.
  8. After putting the dough and parchment paper into the pan, let it rise for about an hour in a warm location.
  9. For ten minutes, preheat the air fryer at 400°.
  10. Put the bread dough pan inside the air fryer. Place a few ice cubes within the air fryer basket but outside the circular pan.
  11. Reinstall the air fryer basket and bake at 400° for 20 to 25 minutes, or until golden brown. Fry the bread for a further five minutes after flipping it over.
  12. Take out and serve.

AIR FRYER CORNBREAD – EASY HOMEMADE

AIR FRYER CORNBREAD – EASY HOMEMADE

You probably didn’t realize cornbread could be air-fried! Well, everything is possible if you’re dedicated, equipped with an air fryer basket, and have a taste for sweet or savory cornbread.

Quick and simple to prepare, this air fryer cornbread is moist and wonderful as a side dish.

Recipe by :my air fryer kitchen

How to Keep Air Fryer Cornbread Fresh:

  • Although my family rarely has any leftovers, you can keep Air Fryer Cornbread fresh for up to a week!
  • IN THE Fridge: Remaining cornbread can be kept for up to a week in the refrigerator in an airtight container.
  • IN THE FREEZER: Cornbread can be frozen for up to three months if it is wrapped tightly in foil or plastic wrap before being put in a freezer bag or other freezer-safe container.

Important Advice for Baking Cornbread:

  •  Don’t overmix the batter to avoid tough cornbread; instead,scrape down the sides and bottom of the basin as you mix to ensure everything is combined.
  • Because of its effortless release, adore using Baker’s Joy nonstick cooking spray.
  • To guarantee fluffy and evenly cooked cornbread, make sure the cooking dish you use still permits airflow around the dish.
  • Add some jalapeño cheddar butter to this cornbread made in the air fryer to make it even more delectable.

INGREDIENTS

  1. One cup of cornmeal
  2. one cup of flour
  3. one-third cup sugar
  4. One teaspoon salt,
  5. two teaspoons if you like your cornbread saltier
  6. Dollop of baking powder
  7. One egg
  8. one cup of corn on the cob
  9. one-third cup of vegetable oil

DIRECTIONS

  • Mix the dry ingredients together in a big bowl.
  • Mix the wet ingredients in the bowl until they are well blended.
  • Pour the batter into an 8-inch round cake pan that has been sprayed with cooking spray. After leveling the top with a spatula, cover with foil.
  • After your pan has fully set, place it in the air fryer and cook it at 360°F for 25 to 30 minutes. The cornbread is done when a toothpick inserted into it comes out clean.
  • Before slicing, remove from the air fryer and allow it to cool somewhat in the pan.
  • Warm up and serve with jam, butter, or honey.

NOTES:

  • To ensure that everything is combined, scrape down the sides and bottom of the bowl as you mix.
  • Because of its effortless release, I adore using Baker’s Joy nonstick cooking spray.
  • Add some more flavor to this cornbread by spreading some jalapeño cheddar butter on top.

AIR FRYER CHILI CHEESE TOTS

AIR FRYER CHILI CHEESE TOTS

This recipe for Air Fryer Chili Cheese Tots combines rich chili, oozy melted cheese, and perfectly crispy tater tots for a simple yet filling meal.

Instructions for Storage and Reheating:

 These air fryer-friendly chili cheese tater tots reheat quickly and store nicely.

IN THE Fridge: 

Keep leftovers fresh for up to four days by sealing them in container. NOT SO GREAT FOR FREEZINGThis recipe isn’t worth freezing.

Instructions for reheating:

Remaining food can be reheated by placing it on parchment paper sheet and heating it to 350°F.

INGREDIENTS

  1. 16-ounce tater tots
  2. cooking oil, salt, and pepper according to taste
  3. one cup of chili
  4. Half a cup of shredded cheese

DIRECTIONS

  • Spread out an even layer of frozen tater tots in the air fryer basket to start. Though they cannot overlap, the tots can touch.
  • Season them to taste with salt and pepper after lightly misting them with cooking oil.
  • For five minutes, air fried the tater tots at 400°F.
  • Toss the tots to ensure equal, crispy grilling by opening the basket and shaking them. Once the tots are golden and crisp, air fry them for an additional five to seven minutes.
  • After taking them out of the basket, place the tater tots aside.
  • After that, give the basket a thorough cleaning and line it with paper air fryer liners, silicon baskets, or parchment paper.
  • Re-place the tater tots in the lined basket and add shredded cheese and warm chili on top.
  • The cheese should be melted and bubbling after 5 minutes of air fry time at 350°F.

NOTES:

  • For this dish, I use frozen potato tots from Ore Ida.
  • Use up leftover chili with this tasty recipe. To ensure that everything cooks evenly, warm it up before pouring it over the tater tots.
  • Make sure the parchment paper stays away from the upper heating components if you use it.


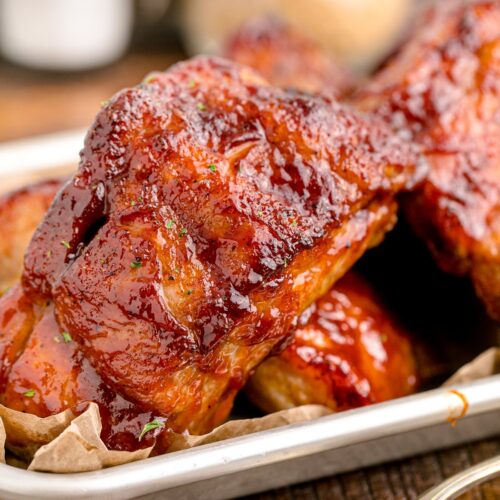
Air Fryer Ribs

Air Fryer Ribs

A tasty and easy dessert that’s perfect for any time of year are air-fried ribs. Tender, meaty baby back ribs paired with flavorful seasonings create an unforgettable feast.

Don’t wait for the weekend to enjoy these succulent air fryer ribs—they’ll quickly become a family favorite due to their speed and ease of preparation!

INGREDIENTS

  1. Two tablespoons of paprika
  2. Four tablespoons of brown sugar
  3. One teaspoon salt
  4. 1 teaspoon each of pepper and garlic powder
  5. One teaspoon of onion powder
  6. Two cups of barbecue sauce
  7. Two pounds of baby back ribs of

DIRECTIONS

  • After combining the dry rub ingredients in a bowl (paprika, brown sugar, salt, pepper, garlic powder, and onion powder), massage the mixture all over the ribs’ surface and transfer them to your air fryer.
  • Fry for ten minutes at 350 degrees Fahrenheit, then turn and continue to fry for an additional ten minutes.
  • After that, coat the ribs with your preferred barbecue sauce, air fry them for five minutes, open the basket, coat them again, and cook for an additional five minutes.
  • Use the air fryer for an extra five minutes if you’d like the barbecue sauce to have a little more sear.

Store Leftover Ribs.

  • Ribs that are left over can be refrigerated in an airtight container. The ribs will keep for three to four days.
  • Make sure that before storing your ribs in the refrigerator, they have cooled to room temperature.

Reheat Ribs In The Air Fryer.

  • Ribs reheat wonderfully in the air fryer! All you have to do is put the leftover ribs in the air fryer basket.
  • Cook them in the air fryer for 5 to 18 minutes at 350 degrees Fahrenheit, turning them halfway through, or until they are thoroughly heated.
  • If you want the ribs to be really saucy, you may add spray them with some sauce before reheating.

AIR FRYER EGG WHITE BITES

AIR FRYER EGG WHITE BITES


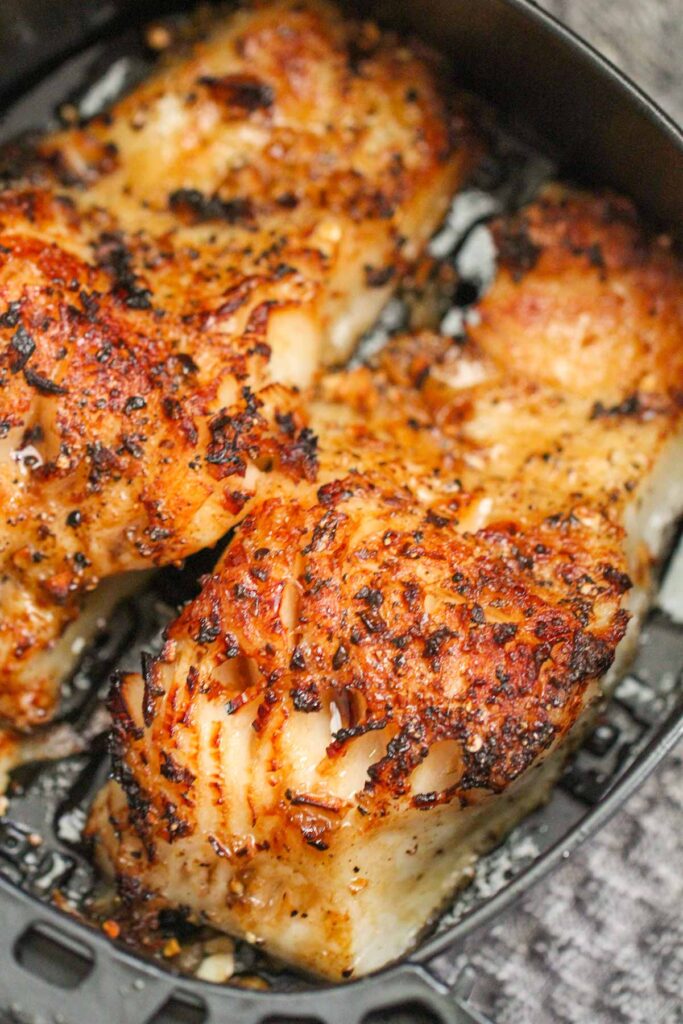
AIR FRYER HONEY CHILEAN SEA BASS

AIR FRYER HONEY CHILEAN SEA BASS


Your relatives and acquaintances will be amazed by this restaurant-caliber air fryer honey Chilean sea bass. In addition to being delicious, it cooks a lot faster than it would in a conventional oven. Easily the simplest dinner to prepare on a weeknight.


Ingredients:

  1. Two fillets of 1 pound of Chilean sea bass
  2. 1/4 cup honey
  3. 1 tablespoon soy sauce
  4. One clove of finely minced garlic
  5. one tsp red crushed pepper, or to taste
  6. salt and pepper to taste cooking oil

DIRECTIONS

  1. As soon as the air fryer reaches 375 degrees Fahrenheit
  2. apply cooking spray inside the basket.
  3. On all sides, liberally season the fish with kosher salt and black pepper. Put it in the air fryer basket skin-side down, and cook for ten minutes.
  4. Mix the soy sauce, honey, crushed red pepper, and fresh garlic while the fish is cooking.
  5. Turn the heat up to 400 degrees F. Brush the fish with the honey-garlic glaze, then fry it for 2 minutes, or until it’s cooked through and the top is crispy and golden brown.


NOTES

  • Let the Chilean sea bass sit at room temperature for at least 20 minutes before cooking it. Otherwise, if the fish is too cold, it will cook unevenly.
  • Make sure you cook the fish for 10 minutes before glazing it, honey burns quickly and if cooked for 12 minutes, it will burn!
  • Serve with fresh lemon.


CAN I BAKE IT IN THE OVEN INSTEAD?

Yes, to make it in a traditional oven, preheat the oven to 375 degrees F. Bake for 16 minutes and then top it off with the glaze and cook for an additional 2 minutes or until it fully cooks through.


NUTRITION

Calories: 500kcal | Carbohydrates: 36g | Protein: 27g | Fat: 28g | Saturated Fat: 6g | Polyunsaturated Fat: 1g | Monounsaturated Fat: 1g | Cholesterol: 100mg | Sodium: 632mg | Potassium: 67mg | Fiber: 1g | Sugar: 35g | Vitamin A: 750IU | Vitamin C: 1mg | Calcium: 10mg | Iron: 1mg