Delectable Delight: Cheesecake Crescent Rolls Casserole to Satisfy Your Sweet Tooth

Delectable Delight: Cheesecake Crescent Rolls Casserole to Satisfy Your Sweet Tooth

Delectable Delight: Cheesecake Crescent Rolls Casserole to Satisfy Your Sweet Tooth! 🧀🥐🍰

Enter a world of creamy bliss with this Casserole of Cheesecake Crescent Rolls. This delectable dish creates a heavenly dessert that is both easy to make and appealing to the taste buds by combining the flaky goodness of crescent rolls with the lusciousness of cheesecake. This delicious casserole will up your dessert game and be a hit at any party.

Components:

  1. Two 8-ounce cans of chilled crescent rolls
  2. 16 ounces of softened cream cheese
  3. 1 cup of sugar, granulated
  4. One tsp vanilla extract
  5. 1/4 cup melted unsalted butter
  6. Sugar and cinnamon for dusting

Instructions:

  1. Oven Prep: Set the oven’s temperature to 350°F, or 175°C. Grease a 9 x 13-inch baking dish so that your casserole can be removed with ease.
  2. Get the Crescent Rolls ready: Press one can of crescent rolls into the bottom of the baking dish that has been oiled. To make a sturdy base, make sure the seams are pinched together.
  3. To make the cheesecake filling, beat together the softened cream cheese, sugar, and vanilla extract in a mixing bowl until the mixture is smooth and creamy. This is what makes up the rich cheesecake filling.
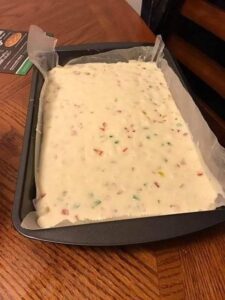
  4. Spread Cheesecake Filling: Evenly and fully cover the layer of crescent rolls in the baking dish, spread the cheesecake filling over it.
  5. Add Second Layer of Crescent Rolls: Spread the cheesecake filling evenly over the second can of crescent rolls that you have unrolled. To make the top layer cohesive, pinch the seams together one more.
  6. Drizzle with Melted Butter: Over the crescent roll top layer, drizzle the melted butter. This gives the casserole a rich, buttery flavour.
  7. Dust with Sugar and Cinnamon: Lightly dust the entire casserole with sugar and cinnamon. This not only provides a delicious flavour, but when baked, it produces a golden, caramelised exterior.
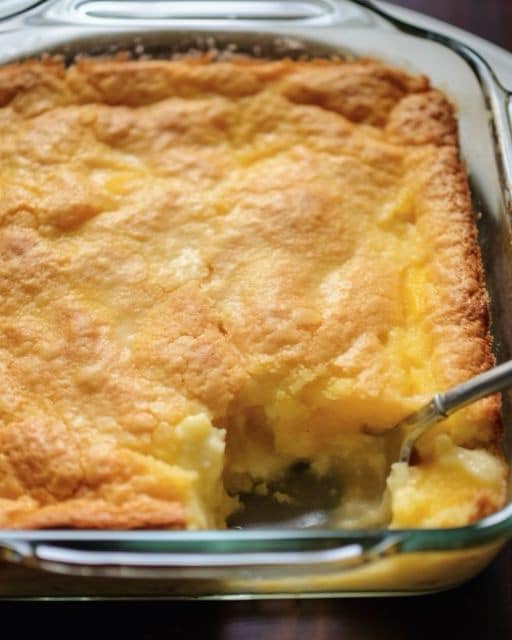
  8. Bake to Perfection: Bake for 25 to 30 minutes in a preheated oven, or until the cheesecake filling is set and the crescent rolls are golden brown.
  9. Chill and Cool: Give the Cheesecake Crescent Rolls Casserole about fifteen minutes to cool in the baking dish. After that, put it in the fridge to cool for at least two hours, which will improve the flavour and make cutting simpler.
  10. Cut and Serve: Cut into squares or rectangles after refrigerated. For a cool treat, serve chilled.

With its layers of buttery crescent rolls and velvety creamy cheesecake, the Cheesecake Crescent Rolls Casserole is sure to please your palate. Served as a sweet breakfast dish or as a show-stopping dessert, this casserole is sure to please any crowd. This recipe combines elegance and simplicity to create a delicious treat that will elevate your dessert repertoire.

Blood Orange Loaf Cake

A great recipe that really highlights blood oranges is this Blood Orange Loaf Cake. The lovely citrus flavour appears in the cake, syrup, zest, and topping. This exquisite cake is sure to wow!

Cake Ingredients:

  1. ½ cup cake flour
  2. ½ cup flour for all purposes
  3. One tsp baking powder
  4. One-half teaspoon of baking soda
  5. Half a teaspoon of salt
  6. 1 cup plus 2 tablespoons of powdered sugar
  7. Four substantial eggs, room temperature
  8. Grated blood orange zest, 2 TBSP
  9. Freshly squeezed blood orange juice, two tablespoons
  10. Two sticks (1 cup) of melted, unsalted butter
  11. ¼ cup of Greek yoghurt, plain
  12. One tsp vanilla essence

Syrup:

  1. 3 TBSP granulated sugar
  2. 3 TBSP freshly squeezed blood orange juice
  3. Candied orange slices
  4. 1 blood orange, preferably organic
  5. ½ cup granulated sugar
  6. ½ cup water

Glaze:

  1. 1 cup confectioners’ sugar
  2. 2-3 TBSP freshly squeezed blood orange juice

Guidelines:

  1. Prepare the cake: Start the oven at 350 degrees Fahrenheit. Grease a normal 9″ x 5″ loaf pan generously, then set it aside. Mix the flours, baking soda, baking powder, and salt in a big bowl. Put aside.
  2. Mix the sugar, eggs, orange zest, and orange juice in a large basin or the bowl of a stand mixer fitted with the paddle attachment. Mix on medium speed for two to three minutes, or until thoroughly combined. Melt the butter and add it while the mixer is on low. The dry ingredients should then be added gradually until just mixed. Once combined, add the vanilla and Greek yoghurt. Don’t overmix; instead, add the remaining dry ingredients until everything just comes together.
  3. After transferring the batter to the loaf pan that you have prepared, bake it for 20 minutes in a preheated oven. After rotating the pan, reduce the oven’s temperature to 325 degrees Fahrenheit and continue baking for a further 30 to 35 minutes, or until a toothpick inserted in the centre comes out clean.
  4. Take the pan out of the oven and let it cool for at least ten to fifteen minutes (I can tell you from experience that if you skip this step, your loaf won’t hold together and you’ll end up with a huge mess!). After that, take the cake out of the pan and let it cool fully on a wire rack.
  5. To prepare the syrup, place the sugar and orange juice in a glass measuring cup or bowl that is safe to microwave for 45 seconds, or until the sugar is completely dissolved. When you’re ready to assemble, set the syrup aside.
  6. To prepare the candied orange slices, wash your blood orange well and let it air dry. Cut the orange in half width-wise, cutting through the fruit’s “equator” with a paring knife. Slice the orange extremely thinly with a serrated knife. Ensure that all seeds are removed.
  7. Heat the water and sugar in a medium saucepan over medium-high heat until the mixture bubbles. Make sure the orange slices do not overlap by adding them in a single layer. After reducing the heat to medium low, simmer the oranges for ten minutes. After 10 more minutes of simmering, flip them (tongs come in handy here).
  8. After removing the orange slices, arrange them on a wire rack that is placed on waxed or parchment paper.
  9. Prepare the glaze: Blend the juice and powdered sugar until the mixture is thick enough to pour or spread, without being too thin. If necessary, add extra juice or powdered sugar.
  10. Put the cake together: After the cake has completely cooled, use a toothpick to poke holes all over the top. Over the cake’s top, pour the syrup. Using a spatula, evenly distribute the glaze over the cake. Place the candied orange slices on top after that. Let the glaze set up before cutting and serving.
  11. Cake can keep for approximately four to five days at room temperature if stored in an airtight container.

Recipe By: Mandy recipe box


Mango Float

Mango Float

Layers of graham crackers, sweetened whipped cream, and luscious mango make up this Filipino icebox delicacy. Everything should be chilled, including the cream, condensed milk, mixing bowl, glass dish, and mixer beaters. This will speed up the cream whipping process and ensure that everything fits together perfectly when assembled. Before serving, thaw the float or serve it slightly frozen. Enjoy with your preferred tea, coffee, wine, or cocktail for dessert!

INGREDIENTS

  1. Five ripe but firm mangoes
  2. Four cups (960 mL) of heavy cream or chilled canned all-purpose cream
  3. One can of condensed milk, kept cold all night
  4. two tsp of essence from vanilla
  5. ½ teaspoon kosher salt
  6. 21 crackers graham cracker, plus more, crushed, for topping

procedure

  • Remove the peel off the mangoes and trim the lobes as close to the pit as you can. Slice ¹⁄₁₆ of an inch (15 mm) thick on each side of the mango lobes, being careful to keep the slices whole, and place them on a tray or plate. Before assembling, place a lid on and keep chilled. Chop the remaining mango into cubes measuring ½ inch (1.24 cm). When ready to assemble, transfer to a bowl, cover, and chill.
  1. In a large, refrigerated bowl, add 2 cups of cream. Beat on medium-high speed for 3–5 minutes, or until firm peaks form, using an electric hand mixer. Add the remaining two cups of cream and beat for an additional three to five minutes, or until stiff peaks form.
  • After adding half of the condensed milk, beat it in completely. After adding the salt, vanilla, and remaining condensed milk, beat for 5-7 minutes, or until stiff peaks form. Finally, use a rubber spatula to whisk the mixture.
  • Press parchment paper into a refrigerated 7 x 11 (17 x 27 cm) glass dish, allowing overhang on all sides.
  • Graham crackers should be layered one layer deep on the bottom of the plate, broken to fill in spaces as needed. Evenly cover the graham crackers with 2-3 cups (480-720 ml) of the whipped cream mixture, ensuring that it reaches the corners and borders of the dish. Add ½ of the diced mango on top. To create a second layer, repeat. In the last layer, set up the Place the chopped mango over graham crackers and cover with 2-3 cups of whipped cream. Decoratively arrange the thinly sliced mango on top. Break up the Graham Crackers and scatter them about the float’s perimeter.
  • Refrigerate the mango float for four to six hours, or until the cream solidifies and the graham crackers become pliable and absorb some liquid. Cover the float with plastic wrap. Place the float in the freezer for a duration of eight hours or overnight.
  • Take the float out of the freezer and pull it out of the dish using the parchment paper. Thaw for five to ten minutes prior to slicing.
  • Accompany with your preferred dessert wine, drink, .tea, or coffee.


4 INGREDIENTS LEMON CREAM CHEESE DUMP CAKE

4 INGREDIENTS LEMON CREAM CHEESE DUMP CAKE

4 INGREDIENTS LEMON CREAM CHEESE DUMP CAKE

Four Components Cheese Dump Cake with Lemon Cream – Picture yourself savouring a slice of this amazing cake on a steamy summer afternoon. The moment you take a mouthful, the air is filled with vibrant yellow hues and a seductive lemon aroma.

A sunny citrus orchard appears in your mouth as soon as the luscious cake crumbles and melts. The creaminess of the cream cheese wonderfully balances the zesty, refreshing taste of lemon.

This straightforward but enthralling recipe is proof of the happiness that comes from making simple treats that are cosy and enjoyable.

Components:
  1. One (16-ounce) can of lemon pie filling
  2. One package (15 oz) of yellow cake
  3. 4 ounces of cubed cream cheese
  4. 1/2 cup (1 stick) of thinly sliced unsalted butter

How to Prepare Four Ingredients Cheese Dump Cake with Lemon Cream

  1. Preheat oven to 350º F and lightly grease a square baking dish with butter or non-stick spray.
  2. Pour lemon pie filling into the bottom of greased baking dish, making sure to spread it into the corners.
  3. Sprinkle half of the cake mix on top, then evenly distribute the cubed cream cheese and the remaining cake mix.
    Attempt to cover as much of the cake’s surface as you can with a single layer of thinly sliced butter pats placed on top of the cake mix.
  4. A toothpick inserted in the centre should come out clean after 35 to 40 minutes of baking the baking dish in the oven.
  5. Before serving, remove from oven and allow it cool for 15 to 20 minutes.


FOUR INGREDIENT NOUGAT BARS

FOUR INGREDIENT NOUGAT BARS

Nougat Bars with Four Ingredients – Every holiday dessert table featured this treat, as I remember seeing it growing up. This dessert was designated only for adults.

Growing up, I never really understood that. I understand why they kept it to themselves, even though I don’t see why it was an adult-only delicacy until I started preparing it myself as I got older.

These tasty and simple-to-make nougat bars only require four ingredients. These bars are ideal for a quick snack or dessert, and people of all ages will love them! Everyone will be begging for more when they taste the exquisite blend of crunchy cereal, creamy melting chocolate, and sweet and chewy nougat.

Components

  1. Two tiny marshmallow bundles
  2. TWO TBS melted butter
  3. Two boxes of white chocolate chips
  4. One-quarter cup of red and green gumdrops

How to Make Nougat Bars with Four Ingredients
step 1:

  1. Chop the gumdrops in half.
  2. Make sure there is enough parchment paper hanging over the sides of the baking dish before layering it with it.
  3. On the stove, bring a pot of water to a boil.

Step 2:

  1. The second step is to cover the first pot with water with a heat-resistant dish or another pan.
  2. Add the butter, white chocolate chips, and small marshmallows to the top dish.
  3. Melt the materials in the pan using a double boiler or similar method.
  4. Stir until all of the material melts.

Step three:

  1. Carefully fold in the gumdrops.
  2. Pour onto the parchment paper-lined baking dish.
  3. Rest the nougat overnight to allow it to set.
  4. Using the parchment paper, carefully remove the baking dish and cut it into bars.
    Have fun!

THE BEST BANANA PUDDING Recipe

THE BEST BANANA PUDDING RECIPE

THE BEST BANANA PUDDING RECIPE Made with custard, cream cheese, sweetened condensed milk, fresh bananas and Nilla wafers, this recipe for the best banana custard can be prepared without cooking!

A traditional Southern dish that has been enjoyed for generations is banana custard. Layers of vanilla custard, sliced bananas and Nilla wafers are combined to create this rich and delectable dessert, which is finished with whipped cream. Whether it’s served during a summer BBQ or a family get-together, it makes the ideal dessert. Take a spoon, then, and let’s go!

How does this pudding vary from a cooked banana pudding?

I’ve already posted a recipe for cooked southern banana custard on the website. The bananas’ propensity to brown quickly is the sole drawback to baked custard. You want to bring nice, non-brown bananas if you are bringing this to a potluck or picnic. Because the no-cook version travels well and serves up effortlessly, it’s perfect for potlucks and picnics where bananas keep fresher for longer.

Setup Time: twenty-five minutes
Twenty-five minutes in total
12 servings

Recipe By: Brandie Skibinski

INGREDIENTS FOR THE BEST BANANA PUDDING RECIPE:
  • 8 ounces of room temperature cream cheese
  • 14 ounces of condensed milk with added sweetness
  • 5 ounces of instant vanilla custard mix (bigger box)
  • Three cups of milk (2% or more)
  • Two tsp vanilla essence; an eight-ounce tub of
  • Thawed COOL WHIP whipped topping (separate use)
  • An 11-oz package of Nilla wafers (split use)
  • 5–7 bananas, cut into slices and peeled for separate usage.
INSTRUCTIONS FOR THE BEST BANANA PUDDING RECIPE:
  • Cream cheese should be beaten with an electric mixer on medium speed in a large bowl until it is creamy and fluffy.
  • Pour in the milk, vanilla custard mix, sweetened condensed milk and vanilla essence. Stir until thoroughly blended.
  • Incorporate half of the whipped topping lastly.
  • To layer: line the bottom of a big bowl, trifle dish or 9 x 13-inch baking dish with one-third of the Nilla wafers.
  • Arrange the banana slices in a single layer.
  • After that, cover all of the bananas with a third of the custard mixture.
  • Add two more layers after that.
  • Place the leftover whipped topping over top.
  • To allow the mixture to thicken and the wafers to soften, cover with plastic wrap and chill in the refrigerator for at least one to two hours before serving.

Remarks:

  • Please be mindful of the custard you are purchasing. It cannot be “cook and serve,” but rather INSTANT. On store shelves, they are next to each other. Cook and Serve WON’T SUCCEED.
  • Additionally, confirm that the can of condensed milk you are collecting is sweetened and not evaporated milk. This dish won’t firm up and won’t have as much sweetness.
  • You can use vanilla custard flavour instead of banana cream custard flavour. As an alternative, vanilla extract can be replaced with banana extract.
  • Ensuring that the cream cheese is room temperature is crucial. If not, lumps will form and you won’t be able to get it extremely smooth.
  • Given that bananas naturally come in a variety of sizes, I would estimate 5-7 bananas, depending on the size of the bananas you buy. Although you should follow your own preferences, I like my banana custard to have a lot of fresh banana in it.

What is the shelf life of banana custard?

  • If kept in an airtight container, banana custard can be kept in the refrigerator for up to three days. After preparing it, make sure to chill it right away. Note: The bananas will start to turn brown once you start eating the banana custard, so keep that in mind. Freezing is not something I advise.

Nutritional values: 458 kcal, 72 g of carbohydrates, 10 g of protein, 14 g of fat, 408 mg of sodium, 1 g of fibre, and 54 g of sugar.


10 Minute Pudding

10 Minute Pudding

10 Minute Pudding Recipe Finding a dish that blends speed and flavour is a genuine culinary discovery in a world where time is often limited. For dessert enthusiasts who want to sate their sweet tooth in the shortest amount of time, the 10-Minute Pudding seems like a real gem. Prepare to set out on an adventure where excitement and pragmatism collide.

Ingredients For 10 Minute Pudding Recipe:

  1. One condensed milk can
  2. Two milk cans (as a measure, use the condensed milk can)
  3. Three eggs
  4. One tsp vanilla extract
  5. One cup of sugar (to make the syrup)

Instructions For 10 Minute Pudding Recipe:

  • Making the syrup: Melt one cup of sugar in a custard mould until it turns golden caramel. Hold back.
  • Making Pudding: Condensed milk, milk, eggs, and vanilla essence should all be added to the blender. Until you have a homogenous mixture, beat for around five minutes.
  • Assembly: Fill the caramelised mould with the mixture.
  • Speedy Cooking: cook in the microwave on high for 8 to 10 minutes. The custard should have a somewhat creamy centre with firm edges.
  • Cooling: Give it at least two hours to cool before putting it in the refrigerator.
Relevance to Recipe:

Ten Minutes Pudding is more than just a quick dessert; it’s a call to pragmatism without sacrificing the pleasure of indulging in something delectably sweet. A choice that is well suited to the hectic pace of daily existence.

Advice for Recipe:

For a zesty twist, try adding some lemon zest to the mixture.
For a fragrant touch, lightly sprinkle some cinnamon over top before serving.

In summary:

One example of how to make sweet moments without spending hours in the kitchen is the 10-Minute Pudding. Talk about your experiences making this simple dish and see how taste and usefulness may go hand in hand. Post a comment to encourage others to savour the pleasure of life as it is happening!


Irresistible Chocolate Mani

Irresistible Chocolate Mani 😋

Ingredients:

  1. a quarter cup all-purpose flour
  2. 1 cup of sugar, granulated
  3. ½ cup chocolate powder, unsweetened
  4. One tsp baking powder
  5. One-half teaspoon of baking soda
  6. Half a teaspoon of salt
  7. One cup of buttermilk
  8. Half a cup of vegetable oil
  9. Two big eggs
  10. two tsp of essence from vanilla
  11. One cup of dark or semi-sweet chocolate chips
  12. Chocolate bits or chopped nuts are optional but add added texture.

Guidelines

  • Set the oven temperature to 350°F (175°C). Grease a muffin tray gently or line it with paper liners.
  • Mix the flour, sugar, baking soda, cocoa powder, baking powder, and salt together in a big bowl.
  • Beat the eggs, vegetable oil, buttermilk, and vanilla extract together until smooth in a separate basin.
  • Gently incorporate the dry ingredients into the wet ones until they are just blended. Take care not to overmix; some lumps are acceptable.
  • Add the chocolate chips and, if desired, the nuts or chocolate pieces and stir.
  • Evenly distribute the batter into each muffin cup, filling each to about ¾ of the way.
  • Bake for about 18 to 20 minutes in a preheated oven, or until a toothpick inserted into the center of a muffin comes out clean. with a few moist crumbs.
  • Remove the muffins from the oven and let them cool in the tin for a few minutes before transferring them to a wire rack to cool completely.
  • Enjoy your irresistibly delicious chocolate muffins!

Note: This recipe yields about 12 standard-sized muffins. Cooking times may vary, so keep an eye on the muffins as they bake

Creamy Vanilla Happiness Recipe

Creamy happiness

Creamy Vanilla Happiness Recipe A Tasty Adventure into Dessert Paradise Recipe

Savour the silky smoothness of our happy dessert with creamy vanilla! Your taste buds will be dancing after tasting this delicious confection, which is the ideal balance of smooth textures and rich flavours. This dish is going to become a staple in your repertoire, regardless of whether you’re a dessert connoisseur or just trying to sate your sweet taste.

Ingredients for Creamy Vanilla Happiness Recipe

  1. Two cups of heavy cream
  2. One cup of whole milk
  3. Two tsp vanilla essence or one vanilla bean
  4. 1/2 cup of sugar, granulated
  5. Four huge yolks from eggs

Instructions for Creamy Vanilla Happiness Recipe

  • Put the whole milk and heavy cream in a saucepan. Split the vanilla bean apart and scrape the seeds into the mixture if you’re using one. The mixture should be heated to a simmer over medium heat. Take off the heat.
    Beat the egg yolks and sugar together thoroughly in a another basin.
  • Pour the heated cream mixture into the egg yolk mixture gradually while continuing to whisk to prevent curdling.
  • Transfer the blended mixture back to the pot and stir constantly over low heat until it thickens to the point where a spoon can easily slide through it. Keep it from boiling.
  • Take off the heat source and pass the custard through a fine-mesh sieve to eliminate any remaining particles.
  • At this stage, mix the vanilla essence into the custard if using it.
  • The custard should be allowed to come down to room temperature before being chilled for four or more hours or overnight.
  • As directed by the manufacturer, churn the custard in an ice cream maker after it has cooled.
  • When the ice cream has thickened, transfer it to a container with a lid and freeze it for a further two to four hours.

Advice and Hints for the Recipe:

  • Before serving, add with chocolate shavings or crushed vanilla wafers for a special touch.
  • Try varying the extracts you use, such as hazelnut or almond, to create interesting flavour combinations.
  • For an extra treat, swirl in some caramel sauce or fruit compote.

Direction for the Recipe:

Serve your creamy vanilla bliss in repurposed ice cream bowls and top with fresh mint leaves straight from your garden to give it a uniquely personal touch. The presentation has the power to improve the whole eating experience.

In summary:

Take a trip through delicious flavours with our custard, which is creamy vanilla happiness. This dish, with its smooth texture and pure vanilla fragrance, is a celebration of life’s sweet moments. Give every bite of happiness to you and your loved ones.

Keto Blueberry Ice Cream

Keto Blueberry Ice Cream

Your taste buds will think you cheated when you try this delectable frozen keto delight, which is made with keto blueberries ice cream.

This low-carb blueberry ice cream’s richness and smoothness will make keto a breeze—especially in the sweltering summer months.

This is an eggless keto ice cream that is loaded with healthful blueberries.

This homemade keto blueberry ice cream is simple to make because no egg yolks are needed. Another reason to make when the temperature rises is that there is no need to turn on the burner.

INGREDIENTS

  1. one-fourth cup lemon juice
  2. 3/4 cup of sugar replacement, granulated
  3. 2. Half a cup of thick cream for whipping
  4. one cup of water
  5. One-eighth teaspoon of salt
  6. One pint (16 ounces) of frozen or fresh blueberries, divided

GUIDELINES

  • In a small bowl, mix the sugar substitute and lemon juice together. Keep in mind that the sweetener won’t dissolve entirely. After that, transfer this mixture to the blender. Then, fill the blender with the heavy cream, water, and salt. Blend for about 30 seconds.
  • After adding half of the blueberries to the blender, pulse for a further 20 to 30 seconds, or until the mixture is well combined.
  • Subsequently, include the leftover blueberries into the ice cream blend.
  • If you’re using an ice cream maker, fill it with the blueberry mixture and process it in line with the directions provided by the manufacturer. My machine processed it in twenty to twenty-five minutes.
  • Any leftovers should be kept in an airtight jar with a tight lid. The ice cream must melt on the kitchen surface before it can be scooped again.

Instructions for No-Churn Ice Cream

  • When the ice cream is ready, transfer the mixture into one or more metal pans, depending on availability. After that, freeze the ice cream for around one hour.
  • Take the ice cream out of the freezer and give it a spoonful of stir-power after an hour. After that, put it back in the freezer. This phase will be repeated twice more, giving you three hours in total. Now you may scoop and savor the no-churn ice cream.
  • You’ll need to let the ice cream melt on the kitchen counter until it’s scoopable again if you have any leftovers.

Notes

  •  This recipe’s proportions are for a 2-quart ice cream maker. You may easily double the recipe if your ice cream maker is larger.
  • A serving is about two and a third cups.