Say Goodbye to Flies and Mosquitoes with This Homemade Trap

Say Goodbye to Flies and Mosquitoes with This Homemade Trap

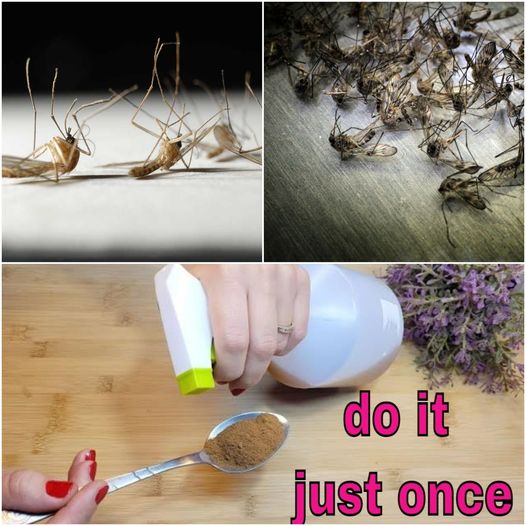
Say Goodbye to Flies and Mosquitoes with This Homemade Trap In addition to being bothersome, flies and mosquitoes may carry diseases that could endanger your family’s health. It’s essential to keep these pests at bay to maintain a cosy and healthful house. Fortunately, there’s a quick and easy do-it-yourself fix that can assist you in achieving exactly that. You’ll be able to capture these unwanted visitors in a matter of seconds with this simple fly trap, which you probably already have in your pantry. We’ll concentrate on one especially powerful component today: ground cinnamon.

The Power of Cinnamon as a Repellent

In addition to being a culinary spice, cinnamon works wonders as a natural insect repellant. Its potent scent works as an efficient deterrent because, although appealing to humans, it has the opposite impact on these pests. Instead of using harsh pesticides to keep flies and mosquitoes out of your home, try adding cinnamon to a DIY trap.

How to Construct a DIY Fly Trap:

It only takes a few simple components and minimal effort to make this trap. What you’ll need is as follows:

  1. One tablespoon of cinnamon powder
  2. Water
  3. Sweetener
  4. Use dish soap

Get the solution ready:

  1. In a bowl, combine sugar and water to make a syrupy mixture that will draw mosquitoes and flies. You can play around with the precise proportions, but the water should have enough sweetness to successfully entice the pests.
  2. One tablespoon of ground cinnamon should be added and stirred in. By acting as a repellant, the cinnamon confuses the pests and increases the effectiveness of the trap.
  3. Add Dish Soap: The mixture needs to contain a small amount of dish soap. As a result, the liquid’s surface tension is broken, guaranteeing that any flies or mosquitoes drawn to the solution will be caught.Set the Trap: Position the bowl in any areas where you’ve seen a concentration of mosquitoes or flies. The pleasant aroma will attract pests, but the cinnamon will repel them and the soapy solution will capture them.
  4. Set the Trap: Position the bowl in any areas where you’ve seen a concentration of mosquitoes or flies. The pleasant aroma will attract pests, but the cinnamon will repel them and the soapy solution will capture them.

Why This Trap Works

There are two ways that this improvised trap functions: attraction and repulsion. The cinnamon repels the flies and mosquitoes, drawing them in and making it harder for them to leave after they are pulled in by the sweet water. Then, the dish soap makes sure they can’t just land and take off.

The Benefits of Natural Repellents

One safe and environmentally responsible strategy to keep pests out of your house is to use natural repellents like cinnamon. Natural repellents are perfect for family homes because they are safe to use around children and pets, unlike chemical repellents. They’re also frequently easier to make with things you already have and more affordable.

You may enjoy a fly and mosquito-free house with this easy and efficient homemade trap, keeping everyone comfortable and healthy. Try it out and observe the difference in safe and natural pest control.

Air Fryer Teriyaki Chicken Wings Recipe

Air Fryer Teriyaki Chicken Wings Recipe

This recipe for Air Fryer Teriyaki Chicken Wings is perfect for you if you enjoy the savory and sweet flavor of teriyaki! When cooking a nutritious dinner, flavor and taste don’t have to be compromised.

How to Keep Things

tasty and adaptable dish, cooked wings can be eaten as snack, an appetizer, or even main course. Wings can be prepared in variety of ways, but appropriate storage is essential to maintaining their flavor and freshness. The following advice can help you store cooked wings:

Storage:

  •  After cooking, transfer the wings to an airtight container and keep them chilled in the fridge.
  • Cooked wings can be kept fresh for up to four days if stored in an airtight container.
  • FreezingPut your cooked wings in the freezer.
  • After cooking the wings, transfer them to baking sheet covered with parchment paper, and freeze for approximately two hours, or until completely frozen.
  • After the wings are frozen, place them in resealable bag.

Components

  1. One pound of fresh or frozen chicken wings
  2. One tablespoon each of cornstarch and kosher salt
  3. half a teaspoon of pepper, black
  4. Sauce Teriayki Ingredienst
  5. One cup of teriyaki sauce from the store
  6. One tablespoon cold water and one tablespoon cornstarch

Guidelines

  • You must put store-bought teriyaki sauce in a small skillet if using it. Before adding to the teriyaki sauce in your small saucepan, make your cornstarch mixture in a small bowl. Add the cornstarch and water, and stir thoroughly. Stir continuously while simmering over low to medium heat for a few minutes to avoid the preventing the sauce from scorching.
  • Wipe out any extra moisture from the chicken wings with a paper towel. Combine the cornstarch, black pepper, and kosher salt in a big basin. Toss to coat the chicken wings.
  • Coat the chicken wings in cooking spray, put them in the air fryer basket in a single layer, and use the air fryer setting to cook for 18 to 24 minutes at 400 degrees Fahrenheit. Check the internal temperature of the chicken wings with a meat thermometer; remove the wings with a pair of tongs after the temperature hits 165 degrees.
  • After putting the chicken wings in a medium-sized bowl and reserving half of the teriyaki sauce, return to the air fryer and cook for an additional four to five minutes at 400 degrees Fahrenheit.
  • Accompany with sliced green onions or white sesame seeds.

Air Fryer Teriyaki Chicken Bites

Air Fryer Teriyaki Chicken Bites

Air Fryer Teriyaki Chicken Bites are the ideal choice if you’re searching for a quick, delectable dish that tastes great and is likely to please a lot of people at your next dinner party or potluck.

Components

  1. One-pound chicken breast, deboned and skinless
  2. 1/4 cup of flour for all purposes
  3. Two big eggs
  4. Two cups of breadcrumbs, or panko

Sauce Teriyaki:

  1. 1 cup of sauce teriyaki
  2. two tsp of soy sauce
  3. Two tsp honey (or brown sugar)
  4. half a teaspoon of powdered garlic
  5. Half a teaspoon of powdered ginger

Guidelines

  • Your chicken should be cut into 1- to 2-inch pieces and then dried with paper towels. The chopped chicken breast should be put in a bowl.
  • Place the flour in one bowl, the eggs (beaten with a fork) in another, and the bread crumbs in the last bowl. Dipped your chicken in bread crumbs, egg wash, and flour.
  • While the chicken is coating, put it in an air fryer basket that has been coated with cooking spray or use a reusable silicone liner. Apply frying spray all over the chicken and use the air fryer setting for 5 to 8 minutes at 370 degrees F. (Before removing your chicken, the internal temperature must reach 165 degrees Fahrenheit.)
  • In a bowl, mix together the teriyaki sauce, soy sauce, honey or brown sugar, ginger powder, and garlic powder. To make sure all of the tastes are well blended, stir thoroughly.Just before serving, combine with the cooked chicken.
  • Sesame seeds and finely chopped green onions make a tasty and eye-catching garnish for the Air Fryer Teriyaki Chicken Bites. Serve the hot chicken bits as a dinner, snack, or even as an appetizer. They go well with fresh salads, stir-fried veggies, or steaming rice.

Air Fryer Copycat Kneaders French Toast

Air Fryer Copycat Kneaders French Toast

Kneaders French Toast Recipe: An Air Fryer Copycat Recipe — If you enjoy the delicious French toast at Kneaders Bakery & Café, you’ll adore this air fryer substitute dish.

Components

  1. The French Toast Kneader:
  2. One French bread loaf
  3. Six big eggs
  4. three cups of milk
  5. One-third cup brown sugar
  6. One tsp of kosher salt
  7. One tablespoon of essence from vanilla
  8. two tsp butter

Made at Home Melt caramel Sweetener:

  1. One cup of brown sugar
  2. One cup of thickened cream for whipping
  3. one cup of corn syrup

Guidelines

  • Cut your bread into 2-inch slices first. In a large dish, mix together the eggs, milk, brown sugar, kosher salt, and vanilla essence.
  • After dipping the bread into the egg mixture, coat it and transfer it to an air fryer basket coated with parchment paper or oiled.
  • To keep it from sticking, either coat the bottom of the air fryer basket with parchment paper or grease it with cooking spray. Without overlapping, arrange the dipped bread pieces in the air fryer basket in a single layer. Your air fryer’s capacity may need you to cook the French toast in batches.
  • Adjust the air fryer’s cooking temperature to 330 degrees Fahrenheit and program it to cook for 8 to 12 minutes, or until crispy and golden brown. To guarantee that the slices brown evenly on both sides, turn them over halfway through the cooking process.
  • As the French toast cooks, add In small saucepan, combine corn syrup, heavy whipping cream, and brown sugar; stir thoroughly. After removing and allowing it to cool for short while, simmer over medium heat and stir until smooth. Drizzle the French toast with the caramel syrup and serve it with freshly cut fruit.

Extending the Freshness of Fruits with Jars

Extending the Freshness of Fruits with Jars

Extending the Freshness of Fruits with Jars

The feeling of biting into a juicy, delicious piece of fruit is beyond words. But how can you prolong their freshness? Their alluring flavours and textures could be eliminated by refrigerators. If you leave them out, they may get spoiled. Thankfully, there’s a simple solution: jars!


Benefits of Using Jars

Jars have uses beyond appearances. They establish the perfect atmosphere to keep your fruits fresh for longer. They keep out moisture and other elements that lead to spoiling thanks to their airtight closures. Recalling those delicious delicacies is less likely when you get a clear glimpse of what’s inside.

Simple Steps to Store Fruits in Jars

To fully utilise jars for preserving fruit, adhere to these simple guidelines:

1. Select the Ideal Jars: Go for glass jars that have tight-fitting lids. Make sure they are dry and clean before using.

2. Get Your Fruits Ready: Give your fruits a good wash and pat dry. A vinegar rinse (one part vinegar to three parts water) will get rid of mould spores and germs from berries and other similar foods.

3. Slice as Needed: Cut larger fruits, such as pears or apples, into slices. To keep from browning, squeeze in some lemon juice.

4.Pack Wisely: Don’t overpack the jars; instead, gently lay the fruits inside. To keep an airtight seal, leave a small amount of gap at the top.

5. Seal and Store: Make sure the jars are tightly closed and place them in the refrigerator. Berries, grapes, cherries, and sliced fruits are all excellent candidates for this procedure.

Savor the Freshness for Longer

When you keep your fruits in jars, you’ll be happy to discover that they remain tasty and fresh for a delightfully long time. Throw away spoilt fruit no more! This technique guarantees that you always have a nutritious snack close at hand in addition to helping to prevent waste. Enjoy the delight of freshness and bid adieu to the letdown of discarded fruits!

Air Fryer Copycat Crumbl Iced Oatmeal Cookies

Air Fryer Copycat Crumbl Iced Oatmeal Cookies

Copycat Crumbl Iced Oatmeal Cookies for Air Fryer — These delicious air fryer-inspired Crumbl iced oatmeal cookies are the perfect treat if you’re searching for something sweet and easy to make at home.

These cookies are not only a fantastic, low-effort method to sate your cravings—the air fryer guarantees that they bake to perfection in a fraction of the time it takes to make them the traditional manner.

Components

  1. Half a cup of room temperature butter
  2. 1/4 cup of sugar, granulated
  3. one-third cup of brown sugar
  4. One tablespoon of essence from vanilla
  5. One big egg, at room temperature
  6. 1½ cups dried quick oats plus additional for topping
  7. One cup of flour for all purposes
  8. 1/4 tsp cinnamon (plus additional for garnish)
  9. One-fourth teaspoon of nutmeg
  10. One-half tsp baking soda
  11. One-fourth teaspoon of kosher salt

Crumbl Icing Components:

  1. 3/4 cup of sugar, powdered
  2. two tsp milk
  3. One-fourth teaspoon of vanilla essence

Guidelines

  • Using a paddle attachment on a large stand mixer, beat the butter, brown sugar, and granulated sugar until smooth. Add the cracked egg to the bowl along with the vanilla extract and to incorporate.
  • In a separate bowl, whisk together the dry quick oats, nutmeg, cinnamon, and all-purpose flour. Using the stand mixer, add the dry ingredients and mix until thoroughly blended.
  • Place six to eight cookie dough balls in the air fryer basket lined with parchment paper, then flatten the tops of the dough with your palms.
  • Advice: Since these cookies must be baked in batches, chill the dough in the fridge in between batches. In an air fryer, cold cookie dough cooks more evenly than room temperature dough.
  • Choose a cooking temperature of 320 degrees Fahrenheit and a cooking duration of 4-6 minutes for your air fryer. After that, give the cookies at least five minutes to cool in the air fryer basket before moving them to A cooling shelf.
  • Prepare the icing while the cookies are cooling. In a small bowl, blend together the powdered sugar, milk, and vanilla with a spoon or whisk.
  • Let the extra icing fall back into the basin as you dip the tops of the cookies into it. Next, add some quick oats and a tiny amount of cinnamon to the cookies. Before serving, give the cookies at least five minutes to solidify and set.

Incredible pour hot milk with the dates

Incredible pour hot milk with the dates

Incredible pour hot milk with the dates A veritable gold mine of nutrients, dates have a rich, caramel-like flavour and inherent sweetness. They are an excellent source of vitamins, minerals, and fibre. When combined with milk, which is high in protein and calcium, you have a well-rounded, wholesome, and incredibly gratifying dessert. What’s the best thing, then? It calls for few ingredients and little work.

Recipe By: Greentricks


Ingredients For Incredible pour hot milk with the dates:

  • One cup of milk (vegan or dairy-based, according on personal preference)
  • Four to six dates, cut and pitted for ease of eating
  • A dash of cardamom or cinnamon is optional but adds flavour and warmth.


Instructions For Incredible pour hot milk with the dates:


  • Warm the Milk: Transfer the milk into a little saucepan and warm it over low heat. To maintain the calming effects and avoid scorching, you want it heated but not boiling.
  • Prepare the Dates: Take your pitted and chopped dates and put them in the bottom of the serving cup while the milk warms. Sprinkle any spices you choose to use, such as cardamom or cinnamon, over the dates at this time.
  • Pour and Marvel: Carefully pour the heated milk over the spices and dates in your cup. Allow the dates to soften and release their sweetness into the milk by giving it a little stir to mix.
  • Watch for the Magic: Give the mixture a minute or two to settle. This little period of time lets the flavours mingle and the dates soften even more, resulting in a pleasant mix.
  • Enjoy: Give your drink a last, gentle stir when the flavours have had a chance to fully integrate. Then just take a drink, taste, and revel in the warm, comforting qualities of your mixture of dates and milk’s natural sweetness.

This recipe for hot milk and dates is more than just a simple treat—it’s a peaceful moment condensed into a cup. It’s ideal for relieving a sore throat, unwinding after a demanding day, or even serving as a soft wake-up call on a lazy morning. Because the dates are naturally sweet, you don’t need to add any sugar, making this a healthy option for people watching their sugar intake.

The next time you’re craving something warm, sugary, and remarkably easy, keep in mind the wonderful combination of hot milk and dates. It serves as evidence that sometimes the most effective recipes are the simplest ones. Have fun!

Getting Rid of Sun Spots with Cinnamon and Potato

Organic Shine potato ans cini

Organic Shine Getting Rid of Sun Spots with Cinnamon and Potato Sun spots can be a bit annoying—tiny reminders of our fondness for the great outdoors and maybe our tendency to forget to reapply sunscreen. However, have you ever considered that your kitchen’s modest limitations could hold the key to fading these symbols of sunshine? You did really hear correctly! A little potato and cinnamon will do the trick. Let’s explore this easy-to-use yet highly efficient natural cure that can brighten your skin and minimise the appearance of sun spots.

The Potency of Cinnamon and Potatoes
Potatoes are used for more than just frying, mashing, and baking. Additionally, they contain a lot of catecholase, an enzyme that can brighten skin and minimise the appearance of sun spots. Conversely, cinnamon is well-known for having antibacterial and anti-inflammatory qualities, which makes it a great addition to skin care products.

Recipe By: Greentricks


Ingredients For Getting Rid of Sun Spots with Cinnamon and Potato:


  1. One little potato
  2. A small amount of cinnamon


Instructions For Getting Rid of Sun Spots with Cinnamon and Potato:


  • Grate the Potato: To start, finely grate the potato. The finer the better, as you want to extract as much juice as possible.
  • Mix in Cinnamon: Give the grated potato a small teaspoon of cinnamon. Keep in mind that you don’t need much cinnamon because a little goes a long way.
  • Apply the Mixture: Apply the mixture to the sun-spot-prone regions gently. Do a patch test beforehand if you have sensitive skin to be sure there won’t be any irritation.
  • Let It rest: Give the mixture twenty minutes or so to rest on your skin. It’s the ideal time to unwind and take in some peace and quiet.
  • Rinse Off: Use lukewarm water to rinse off the mixture, then pat yourself dry.


Accepting Natural Remedies
This cure using potatoes and cinnamon is proof of the elegance of using natural remedies. It’s mild, simple to make, and a tribute to the abundance of nature. You might just see a brighter and more even skin tone with consistent use, even though it’s not an instant miracle.

A Cautionary Note
Results may vary with any natural therapy, so it’s always a good idea to pay attention to your skin. If irritation develops, stop using the product and seek medical advice if required. This technique is a great way to adopt natural beauty care, providing a straightforward but efficient way to have skin that is clearer and free of spots.

Rejuvenate Your Liver Health DIY Cocktail

Rejuvenate Your Liver Health DIY Cocktail

Rejuvenate Your Liver Health DIY Cocktail Overview Drinking freshly produced juice is a tasty and simple way to support liver health. This healthy combination of carrot, lemon, and tomatoes is a good option if you’re searching for a natural way to assist your liver, particularly in controlling diseases like fatty liver. If you include this easy meal into your healthy lifestyle, it tastes fantastic and might even improve the health of your liver.

Juicing’s Beneficial Effects on Liver Health Every component of this juice is essential for maintaining the liver:
Carrot: Packed in fibre and beta-carotene, carrots are great for fat metabolism and liver health.
Lemon: Rich in antioxidants and vitamin C, this citrus fruit supports the liver’s detoxifying function and facilitates fat digestion.
Tomatoes: Packed with antioxidants like lycopene, tomatoes can help prevent and lessen liver damage as well as inflammation.

Recipe By: Greentricks


Ingredients For Rejuvenate Your Liver Health DIY Cocktail:


  1. One carrot
  2. One lemon
  3. Two ripe tomatoes
  4. Water in 360 ml (1 1/2 cups)


Instructions For Rejuvenate Your Liver Health DIY Cocktail:


  • Under running water, give every vegetable and fruit a thorough wash.
  • If desired, remove the tomato seeds and peel the carrot.
  • To get the juice, squeeze the lemon.
  • In a blender, combine the carrot, tomatoes, and lemon juice.
  • To help combine the ingredients smoothly, add 360ml of water.
  • Blend the mixture until it’s smooth.


Serving Ideas Rejuvenate Your Liver Health DIY Cocktail:

  • If you want a smoother texture, filter the juice; if you want to keep more fibre in there, leave it unstrained.
  • To guarantee you obtain the most nutrients possible, drink the juice straight from the source.
  • Drink one glass of this juice every day to assist the health of your liver.

Including the Drink in Your Everyday Activities Consume this drink in moderation along with a range of foods high in fibre, antioxidants, and healthy fats for optimal benefits. Keeping hydrated and engaging in regular exercise are also essential for preserving ideal liver health.


In summary This easy-to-make juice blend of tomatoes, carrots, and lemons is a delicious way to nourish your liver. Savour the flavours and nutritional advantages while committing to a healthier way of living. Cheers to the health of your liver! Toast to a revitalising, do-it-yourself route to improved health.

Use Baking Soda Cream to Transform Your Skin

Baking Soda Cream

Use Baking Soda Cream to Transform Your Skin Do blackheads, wrinkles, and skin blemishes make you feel self-conscious? Rest assured, we have an easy fix for you! You may get a fresh and young complexion and realise your skin’s full potential with a simple baking soda cream recipe.

In addition to being a dependable household necessity, baking soda is an absolute beauty for skincare. Due to its pH-balancing and exfoliating qualities, it is a great component for treating a variety of skin issues. Now let’s get started and get into the recipe!
Recipe By: Greentricks


Ingredients For Baking Soda Cream:


  1. Two teaspoons baking soda
  2. Extra Virgin Coconut Oil, 1 Tbsp.
  3. One teaspoon of honey
  4. A few drops of essential oil (for extra benefits, try lavender or tea tree oil)


Instructions For Baking Soda Cream:


  • Change things up: Put two tablespoons of baking soda, one tablespoon of extra virgin coconut oil, and one teaspoon of honey in a clean basin. Until the mixture is uniformly smooth, thoroughly stir.
  • Add a hint of luxury: A few drops of your preferred essential oil will provide a luxurious and fragrant experience. Tea tree oil and lavender oil are excellent choices because they provide further skin benefits. It only takes a few drops to work!
  • Stir it properly: Combine all the ingredients and stir until thoroughly combined. It should be easy to work with and have a creamy texture.
  • Time of application: Focus on the regions of your face that have wrinkles, spots, and blackheads when you gently apply the baking soda cream. For two to three minutes, use circular motions to massage the cream into your skin. Give it five more minutes to sit on your skin.
  • Rinse it off: Use warm water to properly rinse your face after the cream has worked its job. Using a gentle towel, pat dry your skin and notice how fresh it looks!
  • Apply your preferred moisturising lotion or face oil on your skin to seal in the benefits. This step will guarantee that your skin remains supple and silky while also offering extra nourishment.
  • Repetition and enjoyment: Use this baking soda cream two to three times a week for optimal benefits. You’ll become aware of the noticeable changes in the texture and look of your skin over time.

    After discovering the baking soda cream’s secret recipe, it’s time to go out on a quest to get gorgeous, youthful-looking skin. Try it out and see the transformation for yourself!