Say Goodbye to White Hair Forever

Say Goodbye to White Hair Forever

Say Goodbye to White Hair Forever!

For both men and women, having white hair can be a major aesthetic concern. It frequently has an impact on our self-esteem, which has an impact on other facets of our existence. Many people experiment with different remedies to address this problem, however the majority of cosmetics contain chemicals and only offer short-term fixes.


Regrettably, this issue is affecting an increasing number of persons in their 30s. Although there are many variables that contribute to white hair, it’s advisable to choose natural remedies that won’t be harmful to our health. I discovered an old recipe that can darken grey hair while doing internet research.


This is how to apply it:

  1. Peel five to six large to medium-sized potatoes.
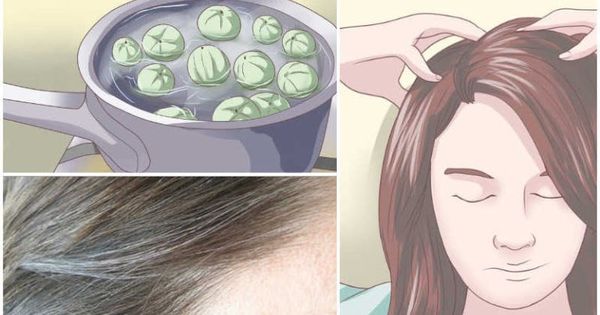
    Put the potato rinds and two cups of water in a pan.
  2. After bringing the water to a boil on high, lower the heat and simmer it for 15 to 20 minutes.
  3. After the mixture has cooled, pour it into a big basin.
  4. After straining the water to get rid of the potato rinds, store it in a glass bottle with a tight closure. You can boost the aroma by adding a few drops of lavender or rosemary oil, if you’d like.
  5. As usual, give your hair a wash and condition. Give the conditioner a minute or two on your hair before washing it off. Since grey hair is typically drier, it’s important to properly hydrate it.
  6. It’s crucial to avoid keeping the water from the potato rinds in the refrigerator. When you’re almost out, make more preparations.
  7. For a few weeks or months, provide this medication once a day or two to three times per week. Recall that wonderful outcomes take time to manifest, so exercise patience!
  8. An alternative to chemical-laden products that might not offer a long-term answer is this natural therapy. You may perhaps restore your confidence and naturally darken your grey hair by adhering to these easy measures. Try it out and accept the beauty that is naturally yours!

The Magical Touch of Aluminum Foil

The Magical Touch of Aluminum Foil

The Magical Touch of Aluminum Foil: Reviving Your TV Remote Control


Is that not the case? Just as you’re getting comfy and settled in to watch your favourite TV show, the remote control decides it’s time for a break. Let me tell you a little technique that might just work to revive your remote using something you probably already have in your kitchen: aluminium foil. Don’t bother searching for batteries or a new remote.


The Issue with Remote Controls

Occasionally, the connecting points inside the remote control are the problem rather than the batteries. These points may deteriorate or lose their ability to conduct the power required to deliver messages to your TV over time. That’s where aluminium foil, our culinary hero, comes into action.

Why Use Foil Made of Aluminium?

Not only is aluminium foil an excellent electrical conductor, but it also works surprisingly well to improve the connections inside your remote control. Plus, if you already have foil in your kitchen, it’s a simple remedy that costs nothing additional and takes little effort.


How-To Guide: Fix Your Remote Step-by-Step

  1. Get your remote open: With caution, take off your remote control’s rear cover. You may need a little screwdriver if it includes screws.
  2. Examine the batteries. To gain access to the battery compartment, remove the batteries.
  3. Apply Aluminium Foil: Using a tiny piece of cut aluminium foil, cover the remote’s battery connection terminals. Improved surface area creation is what you want the battery to attach to.
  4. Check to make sure the aluminium foil is firmly in place and making good contact before reassembling and testing the system. Next, put the back cover back on.
  5. Savour Your Resurrected Remote: Try it by pointing your remote control at the television. You may be astounded at how it’s back to its responsive self.


Why This Is a Game-Changing Trick

This easy tip is a great way to prolong the life of your remote control and spare yourself a trip to the store, which makes it a great way to spend leisurely evenings. It’s evidence that sometimes the simplest answers are hidden in our kitchen drawers or right at our fingertips.

Thus, keep in mind the aluminium foil method the next time your remote starts acting strange. It’s a fast, simple, and efficient method to resume your leisure and pleasure without missing a beat.

Air Fryer Chicken Leg Quarters

Air Fryer Chicken Leg Quarters

The crispy exterior of Air Fryer Chicken Leg Quarters sizzles to perfection and the luscious meat is wonderfully seasoned. For a very simple weekday supper, try serving chicken leg quarters with any of your favorite veggie side dishes. They provide a hearty protein alternative.

Changes

  • Adjust the spices to your personal preference. I use a delicious chicken seasoning, but you can also use Italian seasoning or just blend your own favorite spices, like salt, pepper, and garlic powder.
  • Add some Teriyaki, BBQ, or chicken marinade. Remove the chicken quarters during the last 4–5 minutes of cooking before adding a sauce or marinate. Next, use a basting brush to coat the food with sauce, then go back and finish. preparing. There will be ample time for the sauce to get somewhat browned on top.
  • If you want extremely crispy skin, add one more minute.

How to Keep Chicken Leg Quarters After Air Fryer

  • For four to five days, keep any leftover chicken in the refrigerator in an airtight container.
  • Reheating Chicken Quarters: A Guide
  • First, warm your Air Fryer to 360°F for around two minutes to achieve excellent, juicy chicken. After that, return your chicken to the basket. Make sure you don’t overcrowd your quarters and that the chicken has enough room. Use the Air Fryer to reheat them for a duration of 6-8 minutes, or until you find the right level of warmth.

Components

  1. Four quartered chicken legs, cleaned and patted
  2. one-third cup olive oil
  3. One cup of Kick’ n Chicken Seasoning, or your preferred brand,
  4. 1/2 tsp salt
  5. One and a half teaspoons Pepper Cooking Spray (non-stick)

Guidelines

  • After rinsing, gently dry the chicken leg quarters with a paper towel.
  • Fill a big Ziploc bag with all of the spices. To ensure the spices are thoroughly mixed, close the bag and shake.
  • Using a pastry brush, lightly coat each chicken leg quarter on both sides with olive oil.
  • One chicken leg quarter at a time, place it into the spice bag. Once the chicken is thoroughly covered in all of the spices, close the bag and shake. Repeat this process with every chicken piece.
  • After 1-2 hours, preheat the air fryer to 390 degrees F. Place uncooked chicken leg pieces in the Air Fryer basket in a single layer; cooking time will vary based on the kind of air fryer you use. Apply a mist of cooking spray.
  • For 8–10 minutes, air fry.
  • After 8 to 10 minutes, flip the chicken and continue to air fried it. Make sure the internal temperature reaches 165 degrees by using a meat thermometer.
  • Because it will be extremely hot, take the chicken out of the air fryer and allow it to rest for five minutes before serving.

Air Fryer Huli Huli Chicken

Air Fryer Huli Huli Chicken

A delicious and sweet dish called Air Fryer Huli Huli Chicken may instantly transport you to a stunning paradise. This recipe for pineapple puree, brown sugar, soy sauce, ketchup, and spices originated in Hawaii and combine to create a delicious and flavorful chicken dish.

What Food Is Suitable For Huli Huli Chicken?

  • Are you unsure about what to serve this dish for Hawaiian Huli Huli chicken with? Serve your preferred sides, or try these delicious suggestions:
  • Serve the chicken over a bed of coconut rice and side orders of fresh pineapple to cut through the sauce, along with vegetables like broccoli.
  • Drizzle the remaining half of the sauce over the noodles while serving this succulent chicken that has been cut. when producing two batches.
  • Savor this chicken with additional sauce and on white rice.

Components

  1. Three pounds of skinless, boneless chicken thighs.
  2. One cup of brown sugar
  3. Soy Sauce, 3/4 cup
  4. one-third cup Ketchup
  5. Half a cup of pure pineapple
  6. Three tablespoons of ground ginger
  7. three tsp finely chopped garlic
  8. One tablespoon of chili powder

Guidelines

  • Combine soy sauce, ketchup, ginger, garlic, and chili flakes with pineapple puree.
  • Transfer chicken to a glass baking dish and pour Huli Huli sauce over it. Place a plastic wrap over it and refrigerate the marinate for at least three hours.
  • Arrange the marinated chicken thighs in a single layer within the air fryer basket.
  • Bake the chicken thighs for 18 minutes at 380°F, turning them over after 9 minutes. Make use of an instantaneous read thermometer to Make sure your chicken reaches an internal temperature of 165°F. Adapt the cooking time as necessary.

How Air Fried Huli Huli Chicken Is Stored

  • Any leftover chicken can be refrigerated in an airtight container. Remaining food should be consumed within three to five days.
  • Leftovers can also be frozen. You may freeze your cooked Huli Huli chicken for up to three months by placing it in a freezer-safe bag or container.

How to Warm Up Leftover Food

  • Once again, reheat your Air Fryer Huli Huli Chicken at 380°F for 8 minutes, making sure to check for doneness halfway through. Keep an eye on your chicken because some large thighs could take longer or shorter.

Cranberry Chicken

Cranberry Chicken

In less than 30 minutes, you can have this delicious Cranberry Chicken on the table, coated in a savory and sweet glaze.

Advice Tips for Recipes

StorageRemaining food can be kept in the refrigerator for up to three or four days if sealed tightly. They can also be frozen for roughly three months. Wonderful Flavor: You can let the chicken marinade in the glaze for 30 to 60 minutes in the refrigerator if you’d like it to absorb bit more of the flavor. The taste of your chicken will be exploding!

INGREDIENTS

  1. Eight ounces Salad Catalina Clothes
  2. One packet of dried onion soup mix
  3. Whole fruit cranberry sauce in a 15-ounce can
  4. Three pounds of skin-and bone-free chicken thighs

DIRECTIONS

  • In a large bowl, combine 1 cup Catalina dressing, 1 packet dry onion soup mix, and 1 can cranberry sauce. Keep one cup of the mixture aside for later use.
  • Coat the chicken thighs evenly by adding them to the basin with the sauce.
  • Without overcrowding, arrange the chicken thighs in a uniform layer within the air fryer basket. If you don’t want to clean your air fryer basket afterwards, you can use a silicone or parchment liner.
  • Cook for 10 minutes at 400 degrees, then turn each thigh over. Cook for a further 10 minutes, or until the internal temperature reaches 165 degrees, after basting each one with more sauce.
  • As those are cooking, you may reheat the sauce that was set aside and serve it alongside the thighs as an additional sauce by heating it in the microwave or on the stove.

Why You Will Adore This Recipe

  • Full with Flavor This chicken recipe’s components are really potent!
  • So Easy: All you need for this dish is 30 minutes of your day and 4 easy, inexpensive ingredients. Is there a greater level of ease than that?
  • Air Fryer: These little devices are lifesavers and do amazing things for poultry.
  • Option: You can still make this delicious chicken recipe in the oven if you don’t have an air fryer!
  • Go Side Dish Crazy: A variety of side dishes pair well with cranberry chicken. Serve it with any type of starch, such as spaghetti, potatoes, or white or brown rice. This goes well with an abundance of vegetables or even sliced up on a

Air Fryer Chicken Thighs

Air Fryer Chicken Thighs

Instead of deep-frying, try making air-fried chicken! In the air fryer, marinated chicken thighs are battered and cooked till crispy.

How should keep leftover chicken thighs from my air fryer?

Store them in the refrigerator for up to three days in an airtight container. This chicken can also be frozen for up to month. Before serving, thaw and reheat in the air fryer for few minutes to crisp them up once more

INGREDIENTS

  1. one cup of whole milk
  2. divided 1 1/2 tsp salt
  3. One teaspoon of lemon juice roughly half a lemon
  4. Skin and bone 4 chicken thighs
  5. and coat with 1/2 cup all-purpose flour.
  6. A half-tsp of garlic powder
  7. A half-tsp of onion powder
  8. Half a teaspoon of cumin
  9. 1/4 tsp cooking spray with dried basil

DIRECTIONS

  • The chicken thighs should be put in a big Ziploc bag.
  • Over the chicken, drizzle the whole milk, lemon juice, and 1 teaspoon of salt. To mix in the components, shake the bag.
  • Allow all of the chicken thighs to sit in the milk mixture for thirty to forty-five minutes.
  • In a large basin, mix together the all-purpose flour, cumin, dried basil, ½ teaspoon salt, onion powder, and garlic powder. Blend thoroughly.
  • Preheat the air fryer to 360 degrees Fahrenheit and coat the basket with cooking spray
  • Before dipping each leg into the flour mixture, shake off any extra milk mixture.
  • After coating each thigh, arrange them in the basket in a uniform layer. Avoid piling up chicken thighs. You can cook the thighs in batches if your air fryer isn’t big enough to fit them in an even layer.
  • Apply cooking spray on each thigh.
  • Simmer for seventeen minutes. After 6 minutes, flip the chicken thighs over and continue cooking until the internal temperature reaches 165 degrees F.
  • Warm serving is preferred.

NOTES:

You can replace the whole milk and lemon juice with one cup of buttermilk

Air Fryer Pizookie

Air Fryer Pizookie

This air fryer pizookie, the easiest skillet cookie ever, bakes with crisp borders and a gooey, soft middle while enclosed in an aluminum foil packet. It tastes very good!

Ingredients:

  1. 1 stick softened butter (113g);
  2. 1/4 cup packed light or dark brown sugar (150g);
  3. 1/4 cup white sugar (50g);
  4. 1 egg, room temperature;
  5. 1 teaspoon vanilla extract;
  6. 1 3/4 cup all-purpose flour (220 g);
  7. 1/4 teaspoon baking soda;
  8. 1/4 teaspoon salt;
  9. 1 cup semi-sweet chocolate pieces or chips

Guidelines

  • Cream butter, brown sugar, and white sugar in the bowl of a stand mixer with a paddle attachment or with a handheld mixer on medium speed for 5 minutes, or until light and fluffy.
  • Add the egg and vanilla once the five minutes are up and stir until well blended.
  • Combine the flour, baking soda, and salt in a another basin and stir to blend them well. Using a low speed, add these dry ingredients to the butter mixture and stir just until incorporated.
  • Mix in chocolate chunks until well incorporated.
  • Using two sheets of aluminum foil, model an insert made of aluminum foil around the air fryer’s base. After taking off the foil, preheat the air fryer at 350°F (180°C) for 8 to 10 minutes.
  • Lightly mist the bottom of the improvised foil pan with nonstick cooking spray, then evenly press the cookie dough into the foil, forming a layer that is one inch thick. Depending on your preferred thickness for your pizookie, you might have surplus dough, which is ideal for making more cookies!
  • After the air fryer has heated up, put the cookie dough pan inside and cook for eight to ten minutes. After six minutes, begin checking, and continue every minute thereafter. Before removing, make sure the center is cooked sufficiently by scooping a little spoonful out of it. The top should be golden brown and the inside should still be sticky but not uncooked. My eight minutes were up
  • .After giving the pierogies a minute to solidify a bit, top with a generous helping of vanilla ice cream and savor. Delectable beyond words!

Air Fryer Grilled Cheese

Air Fryer Grilled Cheese

A recipe for Grilled Cheese made in the Air Fryer. A unique take on a classic that has a gooey, cheesy interior and is crispy and toasted!

AN ULTIMATE SANDWICH COOKED IN AN AIR FRYER

It looks as though everything can be prepared in an air fryer, even this Air Fryer Grilled Cheese! In addition to making the bread lovely and crispy without becoming soggy as it sometimes does when made on the stovetop, it’s a pleasant change of pace from cooking it that way. You can have a deliciously crispy sandwich with delightfully gooey melted cheese using just three ingredients. You must if you want to experiment with your air fryer or are searching for new ways to prepare some of your old favorites.

Ingredients:

  1. 2 tablespoons soft unsalted butter,
  2. 4 slices white bread (or bread of your choosing),
  3. and 6 slices American cheese

Guidelines

  • For five minutes, preheat the air fryer to 350°F.
  • Toast a single slice of bread by spreading 1/4 of the butter on one side.
  • Put the bread, butter side down, in the air fryer’s basket.
  • Place three cheese slices on top.
  • Spread 1/4 of the butter on one side of a second piece of bread. Put this slice of bread, butter side up, on top.
  • After closing the air fryer, cook for 4–5 minutes, or until softly golden brown. Then, turn it over and cook for a further 2–3 minutes, or until it’s toasted to your preference.
  • Continue using the remaining components. Accompany with your preferred side dishes.

Notes

  • Feel free to use any type of bread for this recipe!
  • It is not advised to freeze leftovers.
  • This is readily doubled.
  • Blend your cheese.

Air-Fried Sweet Potatoes

Air-Fried Sweet Potatoes

Air-Fried Sweet Potatoes Cheesy scalloped potatoes, also known as air-fried potatoes au gratin, are a creamy, simple side dish that goes well with holiday meals. Cooks in the air fryer oven incredibly quickly!

These creamy, cheesy potatoes au gratin are a great option for a simple holiday side dish. In an ordinary oven, they take around an hour to bake, but in an air fryer, they only take about 20 minutes!

Recipe By: Meatloaf and melodama

SETUP TIME: Ten minutes
COOK TIME: twenty minutes
TIME SPENT RESTING: 5 minutes
A total of thirty-five minutes
Servings: Eight Calories 253 Kcal


Ingredients For Air-Fried Sweet Potatoes:


  1. Thinly slice three medium Yukon Gold potatoes.
  2. ½ teaspoon each of sea salt and garlic powder
  3. ¼ teaspoon of black pepper, ground
  4. One-fourth cup heavy cream
  5. Three cups of shredded Colby Jack, cheddar, and cheddar cheese
  6. One spoonful of butter


Instructions For Air-Fried Sweet Potatoes:


  • Cut potatoes into ⅛-inch slices using a mandolin.
  • After lightly greasing a big, shallow baking dish, start arranging the potatoes with the ends barely overlapping.
  • Sprinkle salt, pepper, and garlic powder on each layer of potatoes, cover with a tablespoon of cream, and then cover with a thin layer of cheese.
  • Continue until you have four layers of potatoes, and then add the remaining cream, cheese, and spices on top. Apply a butter dot.
  • Put the dish in the air fryer and bake it for 20 minutes at 350 degrees, or until the potatoes are thoroughly cooked.
  • Let it sit for five minutes, then proceed to serve. The sauce will solidify when it cools.


The Distinction Between Au Gratin and Scalloped Potatoes
In summary, the cheese is everything. Potatoes cut thinly and either cream or milk are used in both baked potato recipes. However, the shredded cheese on top and in between the layers of au gratin potatoes creates a delicious crust that bakes while the dish bakes. Traditionally, scalloped potatoes are served without cheese. Therefore, it’s okay if you want to refer to this delectable side dish as “cheesy scalloped potatoes.”


NOTES:

Brands and models may differ in their cooking times.
For a cheesier meal, add extra cheese.

Nuitrion Facts for recipe: 253 kcal of calories 10g of carbohydrates 11g of protein 19g of fat Twelve grams of saturated fat 68 mg of cholesterol Sodium: 436mg Potassium: 312mg 2g of fibre 1g of sugar Vitamin A: 656IU Vitamin C: 7mg Calcium: 246mg Iron: 2mg  Information on nutrition is approximate. Please calculate on your own to accommodate unique diets.


Air Fryer Stuffed Chicken

Air Fryer Stuffed Chicken The filling of this 20-minute air fryer souffles chicken is a smooth blend of cream cheese, garlic, and spinach. This meal is quick to prepare and tastes like it was from a restaurant.

Without a doubt, chicken is the preferred protein in our home. It is widely accessible, adored by all, and incredibly versatile.

We adore air-fried chicken so much that I had no doubts that stuffed chicken would be even better!

We used a fast mixture of cream cheese, spinach, and a few other things to stuff these chicken breasts. In essence, it’s spinach dip inside a chicken!

The nicest thing about air fryers is that they cook chicken uniformly while retaining its juicy, succulent texture.


Recipe By: Karly Campbell

Ingredients:

  1. Four pieces of chicken breasts
  2. One tablespoon of olive oil
  3. One tsp of paprika
  4. One teaspoon, divided into halves
  5. half a teaspoon of powdered garlic
  6. Half a teaspoon of powdered onion
  7. Four ounces of softened cream cheese
  8. 1/4 cup finely chopped Parmesan
  9. Mayonnaise, two tablespoons
  10. one and a half cups of freshly chopped spinach
  11. two tsp finely chopped garlic
  12. ½ teaspoon, or to taste, red pepper flakes


Directions:

  1. After arranging the chicken breasts on a chopping board, cut a pocket into each breast’s side using a sharp knife.
  2. Coat the chicken in oil on both sides.
  3. In a small bowl, add the paprika, onion powder, garlic powder, and 1/2 teaspoon salt. Stir to mix. Sprinkle the chicken on both sides equally.
  4. In a small mixing bowl, add the cream cheese, Parmesan, mayonnaise, spinach, garlic, red pepper flakes, and remaining 1/2 teaspoon salt. Stir to thoroughly blend.
  5. Stuff each chicken breast with the mixture.
  6. In an air fryer basket that has been oiled, arrange the chicken breasts in a single layer. Depending on how big your air fryer is, you might have to work in batches. While the next batch cooks, keep the cooked chicken wrapped in foil in a low oven.
  7. Air fry at 375 degrees for 15-20 minutes or until a thermometer reads 165 degrees in the thickest portion of the chicken