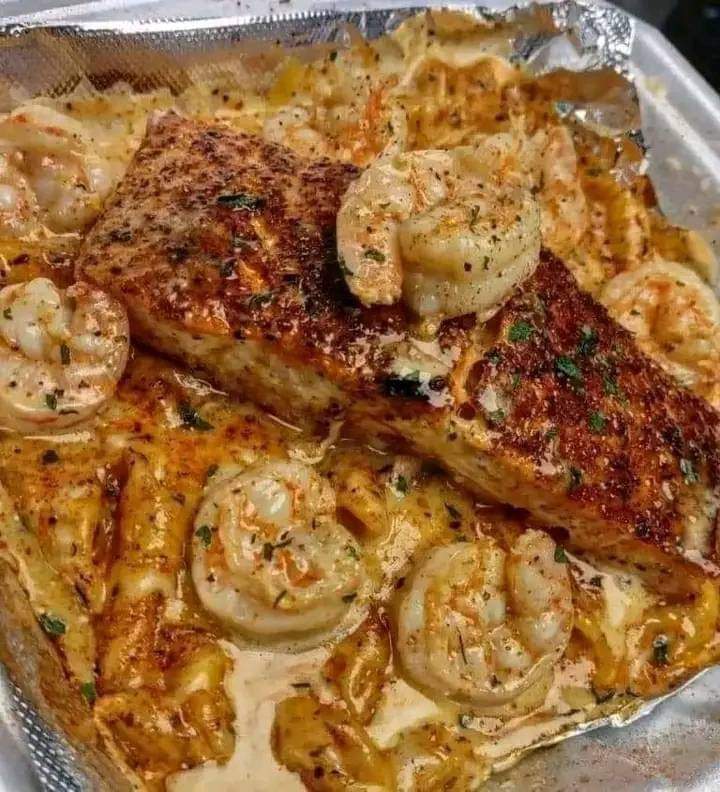
Salmon & Shrimp Alfredo Recipe
This dish for salmon and prawn alfredo is flavorful and creamy. If you’ve spent much time on this website, you are aware of my fondness for a fantastic pasta dish.
Ingredients
- 1/2 pound raw Shrimp, peeled/deveined
- 2 salmon fillets (4-6 ounces)
- 6-8 oz parmsean cheese,grated
- 1 pint heavy whipping cream
- 1 tbsp Prego Basil Pesto
- 1 stick of butter
- 2 tbsp seasoning salt
- 2 tbsp old bay
- 1/4 pepper
- 2 tbsp garlic powder
- 2 tbsp onion powder
- 3/4 box penne pasta
- 2 tsp minced garlic
- 1/8 tsp chili powder
- fresh parsley, finely chopped
Instructions;
- Wash shrimp and salmon then pat dry. Season the shrimp and salmon with seasoning salt, pepper, onion powder, garlic powder, chili powder, and old bay seasoning.
- For the pasta, cook according to the instructions on the back then drain it and set it aside.
- Add 1 tbsp of butter to a clean pan on medium heat and add your shrimp. Cook them for about 3 to 4 minutes on each side until their pink yet golden brown. Remove them and set aside.
- In a clean pan add 1 tbsp of butter on medium heat. Add the salmon to the pan and cook for about 7-8 minutes on each side or until done and golden brown.
- In a clean pan, melt 6 tbsp of butter on medium heat. Add the minced garlic cook for about a minute until fragrant. Add the heavy whipping cream and mix. Add the pesto mix again.
- Add Parmesan cheese and continuously mix. Season the sauce heavily. Mix until sauce starts to thicken (3-5 mins)
- Add the noodles to the sauce and make sure the noodle are coated. Season with salt, pepper, onion powder, garlic powder, and old bay seasoning. Add a pinch of fresh parsley and mix thoroughly.
- Grab a plate and add the noodles. Top with salmon and then shrimp. Garnish with parsley and parmsan cheese
Is it possible for me to prepare something in advance?
While it’s ideal to serve this dish right away, leftovers can be refrigerated in an airtight container and gently reheated over medium-low heat with a splash of water. It is not advisable to freeze the cream sauce since it may separate after thawing.