Discover the Surprising Benefits of Garlic in Boiling Milk: A 5-Minute Recipe
Garlic and milk combine their powerful medicinal qualities with the nourishing qualities of milk to create a treatment that is rooted in ancient knowledge when they are boiled together. Though uncommon in contemporary cooking, this special combination has several health advantages that have been acknowledged for centuries in many different civilizations. Here’s a closer look at the many health benefits this straightforward mixture can offer and the reasons you should think about include it in your routine.
Main advantages of boiling garlic in milk
To fight the flu and cold:
How It Works: Boiling garlic increases the bio availability of its Alicia component, which has antibacterial and antiviral qualities and helps ward against infections.
Benefits: Provides a natural immune system boost by reducing the intensity and duration of cold and flu symptoms.
Reduces Symptoms of Asthma:
How It Works: Garlic’s anti-inflammatory qualities can help asthmatics feel better by reducing inflammation in their airways.
Benefits: May relieve symptoms of typical asthma, like dyspnea and wheeze.
Lesses Insomnia Symptoms:
How It Works: The tryptophan in milk helps induce sleep, and the calming properties of garlic can amplify this benefit.
Benefits: Having a drink of this mixture before bed will help fight insomnia and enhance the quality of your sleep
Facilitates Digestion:
How It Works: Milk calms the stomach lining and garlic stimulates the digestive system, which helps with digestion.
Benefits: Good for easing constipation, bloating, and digestive discomfort.
Promotes Heart Health:
Mechanism of Action: Garlic aids in blood vessel dilatation, enhances blood flow, lowers cholesterol and blood pressure.
Benefits
Consistent use can enhance cardiovascular health in general.
Boosts Bone Health
How It Works: Milk has the essential calcium, while garlic raises oestrogen levels, which is good for bone health.
Advantages: This concoction aids in maintaining strong, healthy bones.
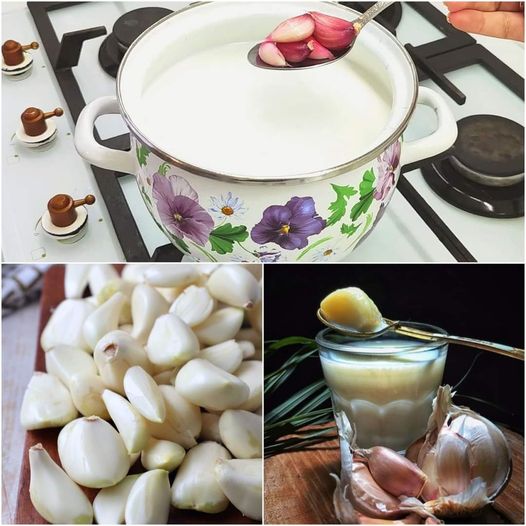
Getting Ready and Eating:
Ingredients:
- About a cup of milk
- a couple garlic cloves.
Method:
- Peel and roughly smash the garlic cloves to begin preparing the garlic. This facilitates the active ingredients’ release.
- Heat the Milk: Transfer the milk into a small saucepan and bring it to a simmer over a low heat, without letting it boil.
- Add the Garlic: After the milk begins to simmer, stir in the crushed garlic and cook for a further two minutes. To prevent scorching the milk, make careful to maintain a low flame.
- Simmer: With periodic stirring, let the mixture simmer gently for three to five minutes. This will allow the garlic to seep into the milk.
- Remove from the heat and drain the milk to get rid of the chunks of garlic before serving. For the greatest results, serve warm.
Tips for Enjoying Your Garlic Milk
- Sweeten It Up: To make the taste more pleasant if the flavour is too strong, you can add a spoonful of honey or a sprinkling of sugar.
- Add Spices: Before boiling, try adding a small sprinkle of turmeric or black pepper for added flavour. The drink’s anti-inflammatory qualities may be strengthened by these ingredients.
This easy-to-make recipe for garlic milk demonstrates how useful and straightforward it may be to incorporate more natural medicines into your everyday routine. Tonight, give this calming, nutritious beverage a try; you might be surprised at how enjoyable and reassuring it is!