Mashed Air Fryer Potato Pancakes

Mashed Air Fryer Potato Pancakes

The greatest approach to repurpose leftover mashed potatoes into a different entrée or side dish is to make air fryer potato pancakes. Cheese within, crispy exterior.

Make a Fabulous Lasagna

Make a Fabulous Lasagna

Make a Fabulous Lasagna. This dish is something you’ll want to share, or else you’ll be eating it for a week. Remember that it freezes really nicely!
Yes, feel free to grab some cheese, a jar of sauce, and some noodles. Warm up and consume.

Ingredients To Make Fabulous Lasagna:

Step 1 For Recipe:

The foundation of meat:

  1. One pound of mild Italian sausage
  2. 3/4 pound lean ground beef (do not use cheap hamburgers; they make greasy lasagna).
  3. I understand that the hamburger appears pink due to the lighting. It wasn’t.
  4. Two minced garlic cloves * Half a cup of finely chopped onion
  5. The mix-ins: (Hunts brand tomato products are the best option in our shopping region.) Yes, a little variation in size is acceptable.
  6. Two 6-ounce cans of tomato paste; one 28-ounce can of crushed tomatoes; and two 6.5-ounce cans of tomato sauce
  7. Half a cup of water

Spice, sugar, and all things lovely

  1. 1/2 teaspoon dried basil leaves
  2. 1/2 teaspoon fennel seeds
  3. 2 tablespoons white sugar
  4. One tsp of Italian spice

savoury, sage, oregano, basil, marjoram, thyme, and rosemary

  • One tablespoon of salt, one-fourth teaspoon of ground black pepper, and four tablespoons of freshly chopped parsley, divided (use two tablespoons for the cheese mixture and two tablespoons for the sauce).

Cheese as a topping and filler for pasta

  • Twelve lasagna noodles.
  • One egg
  • 1/2 teaspoon salt
  • 3/4 pound sliced or shredded mozzarella cheese
  • 3/4 cup grated Parmesan cheese (not the cheap stinky stuff)
  • 16 ounces of ricotta cheese (don’t be cheap, get the good stuff, like Polly-O brand)

*TIP* Ricotta cheese and cottage cheese are not the same.
Made from curds, cottage cheese has lumps, while ricotta is smooth and made from whey.

Step 2 For Recipe:

  • Cook the hamburger, sausage, onions, and garlic in a big pot, such a Dutch oven, over medium heat until they are thoroughly cooked. Make sure this is cooked all the way through; no pink, people.

Step 3 For Recipe:

  • That neat-looking tool for chopping the beef in the cooking process

Step 4 For Recipe:

After the beef is cooked all the way through, add the following:

  • Add the water, sugar (see note below), dried basil leaves, fennel seeds, Italian seasoning, two tablespoons of parsley, smashed tomatoes, tomato paste, tomato sauce, and salt and pepper.
    *TIP* The significance of preparing one’s herbs and spices before combining cannot be emphasised enough.
    Cooks with easily preoccupied minds, like me, could easily forget if they applied salt or not.

Step 5 For Recipe:

  • Give your sauce a full hour and a half to simmer, not boil.Stir occasionally. Now would be a good time to set your oven temperature to 375 degrees.
  • Add the salt to the water in a big saucepan and heat it up.
  • To speed up the boiling process, cover the pot.
  • Even though the original recipe only called for twelve noodles, I should have cooked more, in retrospect. Cook the whole package, hell. The lasagna was quite tasty, however I felt like there was a lot of sauce on it. However, the surplus might be wiped off using a delicious toasted bread, I believe adding another layer of noodles would be fantastic.

Step 6 For Recipe:

  • After the water is boiling, add the noodles. Instead of packing them in, gently submerge them in the water and let them sink gradually.
    My preference is to arrange them so that you can see their sides.
  • To prevent the noodles from sticking, simply move a spoon handle, knife, or other object between them periodically.
  • Before you add the noodles, make sure the water is boiling and maintain that boiling point. If necessary, add the noodles to the pot, cover it, and keep an eye on it. A pot that is covered returns to a boil much more quickly. Once the cover is off, proceed with cooking as normal.
  • Lasagna noodles usually need to cook for 8 to 10 minutes, but you should always double-check the box. Once the cooking process is over, remove the noodles.

Assemble the components. Refer to the following action.

  • In a large mixing bowl, add the ricotta cheese, egg, salt, and the remaining 2 Tablespoons of parsley. Make sure to thoroughly mix everything together.
  • Cover the bottom of a sizable casserole dish (at least 9 by 13) with 1 1/2 cups of sauce.
  • You can adjust the following if you’d like, based on the quantity of noodles you cooked and the amount of layers you want to make.
  • Evenly distribute half of the cheese mixture onto the noodles. Use one-third of the mozzarella cheese to cover the cheese mixture.
  • Cover the top layer with 1 1/2 cups of the beef sauce. Be cautious when spreading; you don’t want to mix it.
  • Avoid making a mess by not pouring the sauce into the centre of the pan and trying to spread it. Make even tiny mounds all over the dish, then distribute each one equally, or make a lengthy trail down the centre.
  • Over the meat sauce, scatter 1/4 cup of Parmesan cheese.
  • When your meal is baking, use a non-stick cooking spray to coat the back of a wide sheet of aluminium foil to prevent the delicious cheese from adhering to the foil.
  • A 25-minute timer should be set. Bake the lasagna for 25 minutes at 375° while covered with foil.
  • Without the foil, bake for a further twenty-five minutes. The lasagna should be watched carefully because oven temperatures vary. If you cook it for the full 25 minutes, you might find the edges to be a little too brown for your taste.

Keep in mind, there is a lot of lasagna here. Take cautious taking it out of the oven.

  • Move to a heat-resistant surface safely. Before you begin to cook, gather the family around to witness your culinary prowess.
  • To prevent the notorious cheese string from moving from the serving dish to the plate, let the lasagna cool for a short while.

The easiest approach to preserve leftovers is to leave them in the pan and let them cool overnight rather than scooping everything out. After the cheese has solidified the following day, the lasagna is ready to be sliced into nice little pieces.

You succeeded! It was also simple!
Thank you for reading my instructable, and bon apetit. I really hope you will think about preparing this delicious lasagna.

Recipe By: WUVIE

HOW TO CLEAN AN AIR FRYER BASKET

HOW TO CLEAN AN AIR FRYER BASKET

HOW TO CLEAN AN AIR FRYER BASKET

It’s not as difficult as it sounds to clean an air fryer with baked-on fat. A little patience and the appropriate instruments are all you need!

Why a clean air fryer is necessary

Compared to, example, your microwave, you should clean your air fryer more frequently. In this manner, the baked-on, stuck-on grease that tends to accumulate over time is avoided. If your air fryer is clean, it will function much better!

If you want to learn how to clean an air fryer and get baked grease off for good, there are a few tried and true solutions. Possessing an air fryer requires knowing how to clean it properly, and more especially, how to clean the basket!

Every time you use your air fryer, you should make it a habit to clean at least the basic parts of the appliance. Your air fryer may break down as a result of leftover food particles getting into places they shouldn’t be.

Or even worse, you might break your really unclean air fryer!


AIR FRYER CLEANING TIPS
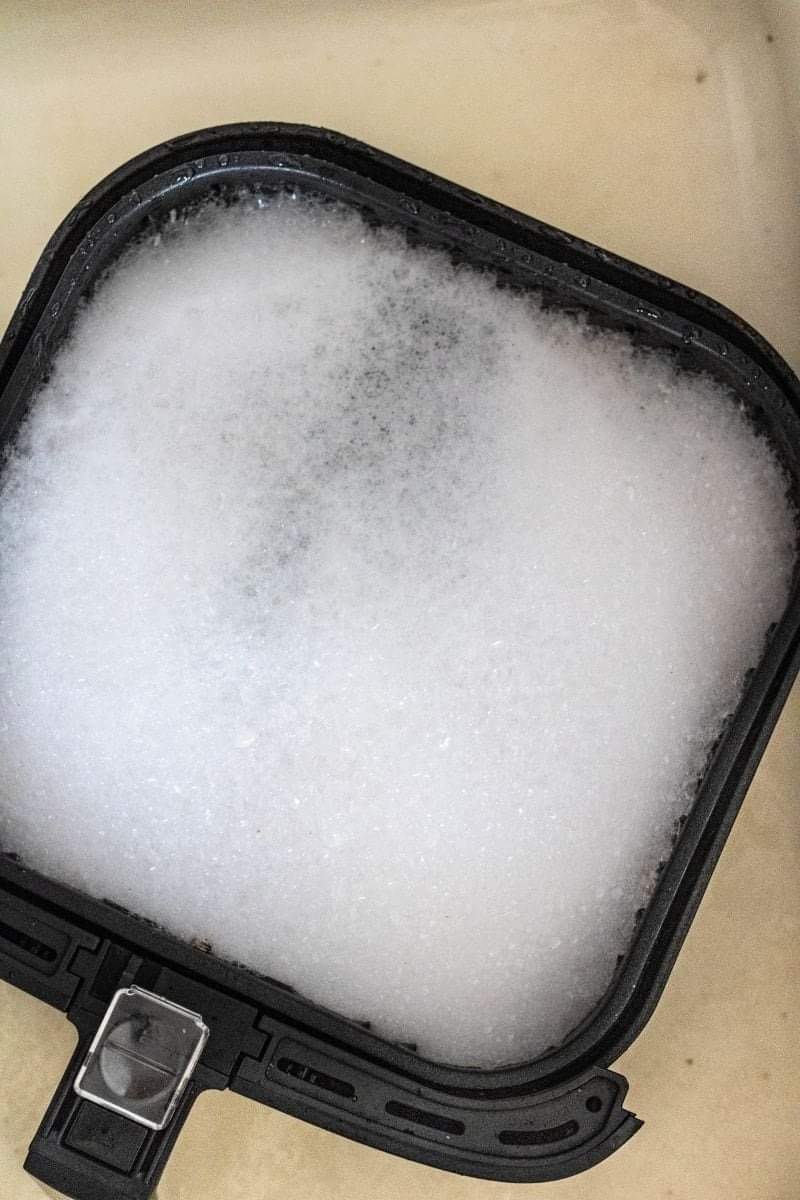
Disassembling an air fryer is the best way to clean it. Make sure you have cleared the air fryer of all large food particles before you begin. Remove the air fryer’s basket and drawer, then fill them with hot water and Dawn dish soap. Dish soap works well as a degreaser.

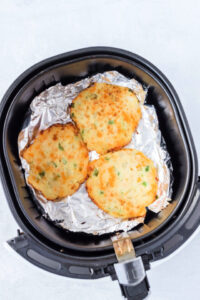
Enjoy the delectable food you just prepared in your air fryer while the basket and drawer soak!

Here’s how to clean the basket and drawer of an air fryer after eating. Use a sponge that isn’t too rough to thoroughly clean the basket and drawer.

Avoid the temptation to soak the drawer and basket overnight as this may make the baked-on grease more difficult to get rid of.


TIPS FOR CLEANING THE OVEN OF AN AIR FRYER
Is there a worse thing than the sticky grease found inside air fryers? There are few things that are more annoying than cleaning kitchen appliances! You should keep the following air fryer cleaning tips in mind:

Avoid using anything abrasive, such as scrubbers and some products.
It is crucial to keep in mind that the majority of air fryers, despite what the handbook may state, are not dishwasher safe.
To prevent burns, let your air fryer cool down before cleaning it.
A kitchen fire may result from an extremely unclean air fryer.
Your air fryer will last longer if you maintain it properly!


HOW OFTEN IS IT SUITABLE TO CLEAN AN AIR FRYER?
Your air fryer has certain parts that require cleaning more frequently than others. Understanding how to clean the basket and drawer of an air fryer is crucial, as it should be done after each usage.

Every month or so, you should also perform a thorough cleaning. Note that attachments for your air fryer, such as silicone liners, parchment liners, and silicone baskets, might make cleanup easier. Your air fryer will require less frequent cleaning if you use them!

Making sure that the basket and drawer are cleaned as frequently as possible is the best approach to maintain an air fryer.


AN IN-DEPTH CLEANING OF AN AIR FRYER
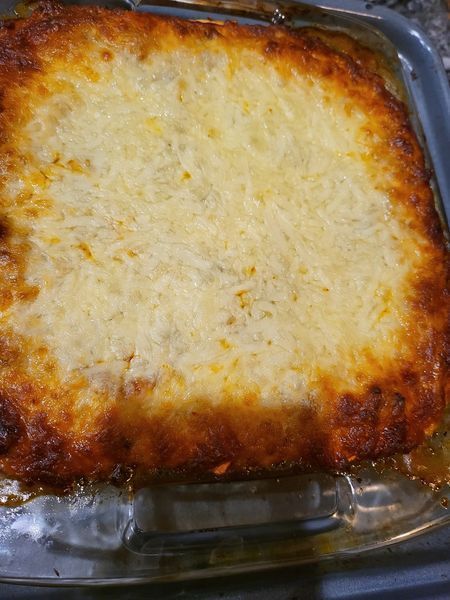
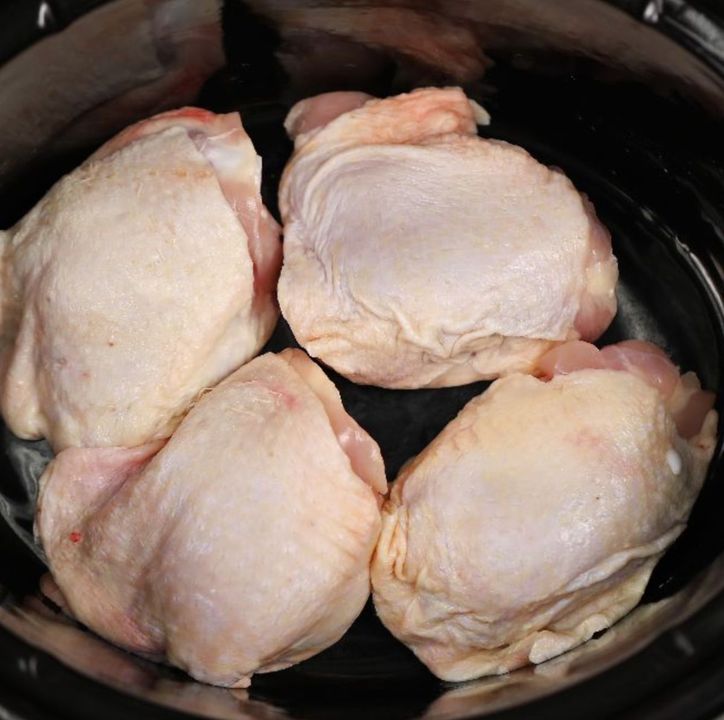
Once a month or after preparing something extremely greasy, like air fryer bacon or air fryer hamburgers, you should give your air fryer a thorough cleaning.

If this is the first time you’ve cleaned your air fryer thoroughly or if it needs a monthly cleaning, follow these instructions! What you’ll need is

Powerwash Spray by Dawn
A sponge that isn’t rough
A toothbrush
Take off the drawer and basket from the air fryer, then replace them with hot water and Dawn dish soap. After letting it sit, carefully remove any remaining sticky grease with the non-abrasive sponge.

Apply Dawn Powerwash Spray after that. After letting it set for ten to fifteen minutes, thoroughly clean your air fryer with a toothbrush to remove any remaining grease. After rinsing, let the air fryer to dry.

Note: Before you use the Dawn Powerwash Spray, test a small part of your air fryer. All air fryers are made differently so it’s important to know how yours will react to the spray.


How to clean the heating element in an air fryer?
Make sure the air fryer is absolutely cold before you start. Simply spray the bottom of the air fryer with Dawn Powerwash Spray or a baking soda mixture, and then use a toothbrush or non-abrasive sponge to scrape it clean. Make sure the cleaner does not get on the coils.

After flipping the air fryer over to see the interior, thoroughly clean the area surrounding the heating coil and the air fryer’s top with a moist, non-abrasive microfiber cloth. To avoid breaking the coil, you should only use water and gently clean the area surrounding the air fryer heating element. Using both an air fryer oven and basket, this method is really effective!

Use this tutorial instead if you want to use an air fryer to clean a wall oven.


WAYS TO CLEAN AN AIR FRYER’S BAKED-ON GREASE
There exist multiple methods for cleaning baked-on grease from an air fryer. Dish soap, hot water, Dawn Powerwash Spray, and a toothbrush can all be used. Alternatively, you can use a mixture of baking soda and water in place of the spray.


AIR FRYER BASKET CLEANING: IDEAL DEGREASER AND CLEANING SPRAY
It’s likely that if you’re looking to buy a new air fryer, you want one that is simple to clean! The following are some of the top choices for an air fryer that is simple to clean:

The Cosori 6.8QT Dual Blaze Air Fryer has a dishwasher-safe, detachable basket. I also use an air fryer just like this one.

The 4 Qt Ninja AF101 Air Fryer has a multi-layered rack, a crisper plate, and a dishwasher-safe basket. For the simplest method of cleaning your air fryer after cooking, just remove the detachable parts and place them in the dishwasher!
The basket, baking pan, and oven rack of the Cuisinart AFR-25 AirFryer are simple to remove and clean.


WHICH CLEANING AND DEGREASER SPRAY IS BEST FOR AIR FRYERS?
You’re undoubtedly curious about how to clear baked-on fat from an air fryer if you’re reading this post. I’ve tried a lot of various air fryer cleaning sprays and degreasers, and the Dawn Powerwash Spray is by far the best. It will save you a tonne of needless scrubbing as it dissolves the baked-on grease that other cleaners miss.


WHICH CLEANING BRUSH IS BEST FOR AN AIR FRYER?
It’s important to know the kind of brush to use while cleaning an air fryer. It’s likely that you’ve seen innumerable cleaning brushes for air fryers if you’re shopping for one!

I’m here to inform you that all you need is a reliable, high-quality toothbrush! I promise not to sell you anything that I don’t need. A toothbrush is the most affordable solution available and does the job well!

OVERALL AIR FRYER CLEANING TIPS
For a multitude of reasons, an air fryer is among the best kitchen appliances available. It makes cooking a breeze, and with the right tips and tools, cleaning up can be just as easy.

Additionally, you don’t have to shell out a bunch for pricey cleaning goods. With a non-abrasive sponge, toothbrush, Dawn Powerwash Spray, and a microfiber cloth, you’ll have everything you need to keep your air fryer sparkling.

Always read the instructions included with your air fryer before cleaning it, disassembling it, or using any kind of product on it. If you’re still in the market for an air fryer, get some ideas from the top models that are also the easiest to clean!

Lemon muffins

Ingredients For Lemon Muffins:

The recipe for tender and aromatic glazed cakes is called lemon muffins. In our version, we glazed the muffins with a mixture of powdered sugar and lemon juice, then topped them with a slice of citrus fruit and fresh mint leaves for a visually striking and impactful outcome. This allows the sweet citrus taste of the dough to contrast with the sour notes of the topping, giving you a pleasing range of flavours. If desired, you can offer the desserts as part of a party buffet or Sunday brunch, or serve them as a stand-alone dessert served with a glass of limoncello after the meal.

Ingredients For Lemon Muffins:

  1. Two chunks of organic lemons
  2. 150 g of powdered sugar
  3. 130 g of flour (Type 405)
  4. 70 millilitres of milk
  5. 50g cornflour
  6. 40 ml of sunflower oil
  7. Eight grams of baking powder
  8. Two slices of eggs

Regarding the lemon glaze:

  1. 80g of powdered sugar
  2. Three tablespoons of lemon juice

To sum up:

  1. One organic lemon
  2. Mint leaves that are fresh
  3. The zesty and invigorating take on the traditional American muffin is the lemon muffin.
  4. These delectable lemon sweets are produced from organic citrus peel and juice.

Instructions For Lemon Muffins:

  • Step 1: Gather the powdered sugar into a bowl and add the shredded lemon peel for seasoning.
  • Step 2: Stir in baking powder, cornflour, and sifted flour.
  • Step 3. Combine the granules.
  • Step 4: Include milk.
  • Step 5: Add the seed oil in step five.
  • Step 6: Add the lemon juice, squeezed, to the other ingredients.
  • Step 7: Complete the egg process.
  • Step 8: Using a hand mixer, thoroughly combine everything.
  • Step 9: The finished product ought to be a creamy, lump-free blend.
  • Step 10: Spoon the prepared mixture into a muffin tin that has been lined with paper cases, filling it about two thirds of the way. Bake in a static oven at 180°C for about 20 minutes. The cakes should be taken out of the oven, taken out of the tin, and allowed to cool when the allotted time has passed.
  • Step 11: Make the icing in the meanwhile. Pour the lemon juice into a bowl with the sifted powdered sugar. Next, thoroughly stir with a spoon until the desired consistency of liquid sauce is achieved.
  • Step 12: Spread the muffin tops with the lemon icing.
  • Step 13: Add a half-lemon slice, a fresh mint leaf, and allow it to set.
  • Step 14: Transfer the lemon muffins to a platter, present them at the table, and cut them into pieces.

Suggestion For Lemon Muffins:

  • We suggest using delicious and low-acid lemons, like Sfusato Amalfitano, for this dish because they are fragrant and juicy. Or any other variety you happen to have at home works just fine, provided it hasn’t been chemically treated to make it safe to eat whole, skin and all, without posing any health hazards.
  • If desired, you can enhance the cakes with candied fruit, rehydrated raisins, or white chocolate chips. Alternatively, you can experiment with a more delicate and smooth version by incorporating well-drained cow’s milk ricotta from the whey into the other components.
  • If you’d rather, you can use oranges or tangerines in place of the lemons, or swap out the seed oil for 50 grams of soft butter.
  • For a maximum of four to five days, the lemon muffins can be kept at room temperature under a baking tray.


Burgers with Smoked Beef Birria

Burgers with Smoked Beef Birria

Thirty minutes for preparation 

4 hours for cooking

Yield: About 5 servings


Ingredients:

Borria

  1.  4 cups water
  2. 2 cups beef broth
  3. 3 garlic cloves
  4. 1 tablespoon Mexican oregano
  5. 1 teaspoon dried thyme
  6. 1 teaspoon ground cinnamon
  7. 5 dried guajillo chiles
  8. 2 dried ancho chiles
  9. 2 dried chipotle chiles
  10. One teaspoon of kosher salt
  11. Four pounds of chopped chuck roast
  12. Two tablespoons of canola oil
  13. Two teaspoons of kosher salt
  14. Two teaspoons of black pepper

Burgers:

  1. Two pounds of ground beef (ideally 85/15)
  2. Six buns;
  3. one cup chopped cilantro
  4. one cup sliced white onion
  5. Kosher salt and pepper to taste

Guidelines:

1. To enable two-zone grilling, preheat the grill to medium-high heat (about 375°F). Place coals on one side of the grill.

2. Drizzle with boiling water after briefly toasting the chilies over fire.for ten minutes.

3. Take off the stems and seeds from the chiles and mix until smooth with water, broth, garlic, thyme, oregano, cinnamon, and salt.

4. Cut the chuck roast into 2-inch pieces, sprinkle with salt and pepper, and cook in high oil in a Dutch oven.

5. Fill the Dutch oven with the seared beef and chile broth, cover the grill, and cook for two to three hours.

6. Strain consommé, shred beef, and set aside.

7. Using wood chips, shape the ground beef into patties, season, and smoke for 20 to 30 minutes over warm embers.

8. Toast the buns if you’d like and finish the burgers over coals to your preferred doneness.

9. Put the shredded briga, onions, cilantro, and meat on the bun to assemble the burgers. Take a bite out of consommé.

Practical Advice: – You can prepare the beef birria ahead of time, even the day before, to

One-pot honey garlic chicken

One-pot honey garlic chicken

One-pot honey garlic chicken, Place chicken in a slow cooker, but the topping makes this a family favourite.

Are you trying to find a dish that will make your in-laws or house guests believe you’ve been in the kitchen all day? Try this delicious honey garlic chicken recipe in the slow cooker; it’s so easy to prepare and clean up, requiring only a few minutes, as everything is done in one pot!
You can replace potatoes and carrots if you don’t like them with other veggies that your family likes. As the chicken cooks in the slow cooker, the vegetables will absorb the juices from the bird. Do not bother with the trouble of assembling sides. Here’s the formula to obtain them right now.

4 servings
Ten minutes for preparation
8 hours to cook
Time total: 8 hours, 10 minutes

Ingredients For One-pot honey garlic chicken

  1. Eight complete chicken thighs (skin and bone intact)
  2. One pound of little red potatoes
  3. One 16-oz package of tiny carrote
  4. One pound of cleaned and trimmed green beans
  5. Half a cup each of honey and soy sauce
  6. One tablespoon of lemon juice
  7. Four minced garlic cloves
  8. One tsp of dried basil
  9. One-half tsp dried oregano
  10. Half a teaspoon of red pepper flakes
  11. 1/2 teaspoon pepper

Instructions For One-pot honey garlic chicken

  • In a bowl, mix together honey, soy sauce, lemon juice, garlic, and spices.
  • Mix thoroughly.
  • Fill the 6-quart slow cooker with 4 thighs.
  • Transfer half of the sauce on top.
  • Add the carrots and potatoes after the remaining thighs.
  • Cover with remaining sauce.
  • Cook with a cover on for 8 hours on low or 4 hours on high.
  • Add the green beans 30 minutes before the cook time expires.
  • Put on a plate and enjoy!

Philly Cheesesteak Stuffed Portobello Mushrooms

Philly Cheesesteak Stuffed Portobello Mushrooms

A portobello mushroom stuffed with a low-carb Philly cheesesteak is about as good as it gets!

Prepare in five minutes. Cook for 25 minutes. In all, thirty minutes

Ingredients:

  1. 6 ounces of thinly sliced sirloin steaks;
  2. 1/8 teaspoon kosher salt;
  3. black pepper to taste;
  4. cooking spray;
  5. 3/4 cup diced onion;
  6. 1/4 cup diced green pepper;
  7. 1/4 cup light sour cream;
  8. 2 tablespoons light mayonnaise;
  9. 2 ounces softened light cream cheese;
  10. 3 ounces shredded mild provolone cheese,
  11. or your preferred cheese; 4 medium portobello mushrooms, without cracks

Guidelines

  • Set the oven temperature to 400°F. Apply oil spray on a baking sheet.
  • Remove the stems gently, remove the gills, and lightly oil the mushroom tops. Season with freshly ground pepper and 1/8 tsp salt.
  • On both sides, season the steak with salt and pepper.
  • Coat a big skillet with cooking spray and place it over high heat. Allow the pan to become extremely hot before adding the steak, which should be cooked through after 1 to 1 1/2 minutes on each side.
  • After transferring to a chopping board, thinly slice and set aside.
  • Turn down the heat to medium-low, add more oil, and sauté the onions and peppers for five to six minutes, or until they are tender.
  • Mix all the ingredients together in a medium-sized bowl. Transfer to each of the roughly 1/2 cup mushroom caps.
  • Bake for about 20 minutes, or until the cheese is melted and the mushrooms are soft.


Nutella Filled Baked Donuts

Nutella Filled Baked Donuts

For all donut enthusiasts, these handmade baked donuts with their crispy cinnamon-sugar crust and oozy Nutella inside are an incredible treat. With this recipe for donuts, you may now enjoy two of your favorite things together: DONUTS and NUTELLA!

Ingredients

Donut batter:

  1. One cup of flour for all purposes
  2. One tsp baking powder
  3. A pinch of salt
  4. One-third cup unsalted butter, melted (one-third for pan greasing and three-quarters for dough).
  5. .25 teaspoons of sugar
  6. One-half teaspoon of cinnamon
  7. One egg
  8. One-half teaspoon of vanilla
  9. Seven tablespoons of milk
  10. ¾ cup (8 oz or 220 grams) of

Nutella is used as the filling and topping.

  1. Two tablespoons of ¼ sugar or light brown sugar mixed with unsalted butter
  2. One teaspoon of cinnamon, adjusted to taste.

Guidelines

  • Use plastic wrap to line the donut pan. Spoon Nutella into a piping bag (or cut the corner off a zip-lock bag). To form the ring, pipe Nutella into the middle of each cavity. Then, freeze until firm. When you’re ready to construct the donuts, take the Nutella rings out of the pan, put them on a plate, and put them back in the freezer.
  • Set oven temperature to 350°F. Melt butter in the donut pan and set it aside.
  • Mix the flour, baking powder, and salt in a small bowl.
  • Mix the remaining 3 ½ tablespoons of melted butter and 2 ½ tablespoons of sugar in a separate bowl. Whisk in the egg, milk, vanilla, and cinnamon until well combined. Add flour mixture and whisk.
  • Spoon the mixture into a piping bag (or snip the corner off a zip-lock bag). Pour half of the batter into the donut pan. Place the Nutella rings on top after taking them out of the freezer. Pour the remaining batter over Nutella.
  • Preheat the air fryer (or oven) to 350 degrees F, Bake for 13 to 15 minutes, or until firm to the touch and golden brown.
  • After 5 minutes in the pan, flip the donuts over onto a cooling rack.
  • Combine sugar and cinnamon in a bowl.
  • Melt two tablespoons of butter.
  • After dipping each donut in the cinnamon sugar mixture, brush with melted butter.


Sauerkraut Soup

Sauerkraut Soup

Polish sauerkraut soup is an easy-to-make, filling dish that tastes great on a chilly day. Known by another name, kapusniak, this naturally vegan sauerkraut soup is easily tailored to your preferences.

Ten minutes for preparation

50 minutes for cooking

One hour in total

INGREDIENTS

  1. two tsp of sunflower oil
  2. one large onion, chopped
  3. One medium leek, chopped thinly, with just the white and light green sections
  4. one medium-sized chopped carrot
  5. Diced one medium parsnip
  6. two big cloves of coarsely sliced garlic
  7. Half a teaspoon of caraway seeds
  8. One tsp of dried marjoram
  9. One teaspoon of allspice
  10. six to eight berries of juniper
  11. two to three bay leaves
  12. Three potatoes, peeled and chopped into 1-inch cubes (approximately 500 g) and 400 g (1 lb) of sauerkraut
  13. Six cups (about 1.5 liters) of vegetable stock
  14. To taste, add salt and freshly ground pepper.

Guidelines

  • In a large stockpot or Dutch oven, heat the oil and sauté the onion over medium heat for two to three minutes.
  • Cook the leek, carrot, and parsnip for an additional 8 to 10 minutes, or until the vegetables are tender.
  • Add the bay leaves, juniper berries, caraway seeds, marjoram, allspice, and garlic. Cook, stirring from time to time, for one to two minutes.
  • Cook for a further one to two minutes after adding the sauerkraut. After that, simmer for ten minutes while adding a ladle of veggie stock.
  • When the potatoes are fork-tender, add the remaining liquid and simmer over low heat for 25 minutes.
  • Serve with your preferred crusty bread, such as rye bread, and season to taste.

Keto Scalloped “Potatoes”

Keto Scalloped “Potatoes”

Instead of using potatoes in this recipe for scalloped fauxtatoes, try using a low-carb daikon radish! This low-carb comfort food side dish is rich, creamy, and delicious; it’s ideal for any day of the week.

Ingredients

  1. a big daikon radish;
  2. one tablespoon olive oil;
  3. one clove of garlic;
  4. four ounces cream cheese;
  5. two tablespoons butter;
  6. one cup chicken broth;
  7. one cup heavy cream;
  8. and one cup cheddar cheese

guidelines

  • Turn the oven on to 375°F.
  • Apply butter grease to a 3-quart baking dish.
  • After peeling, cut the daikon radish into ¼-inch slices. Put the slices in a pot of boiling water. Simmer for 7–9 minutes, or until crisp-tender. Thoroughly drain and add salt and pepper to taste.
  • In a skillet, melt and smooth out the cream cheese and butter. Add the cream, broth, and garlic. Simmer for about five minutes, or until somewhat thickened. Half of the daikon slices should be placed in the baking dish.
  • Put half of the onions and half of the cream sauce on top. Stir in remaining cream sauce and daikon.
  • After 40 minutes, cook with foil cover.
  • Take off the foil, sprinkle some cheese on top if you’re using it, and simmer for further 15 to 20 minutes, or until the cheese is browned and soft

Notes

  • This dish can be prepared the day before and chilled.Daikon does not freeze well, so simply prepare what you will consume and keep it chilled.
  • Eat any leftovers within two to three days.