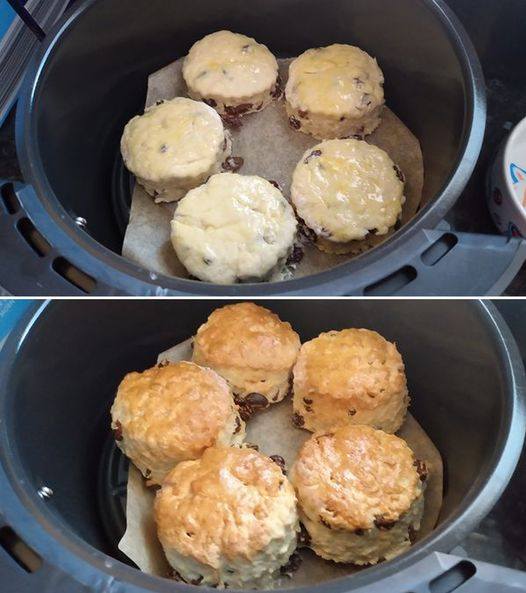
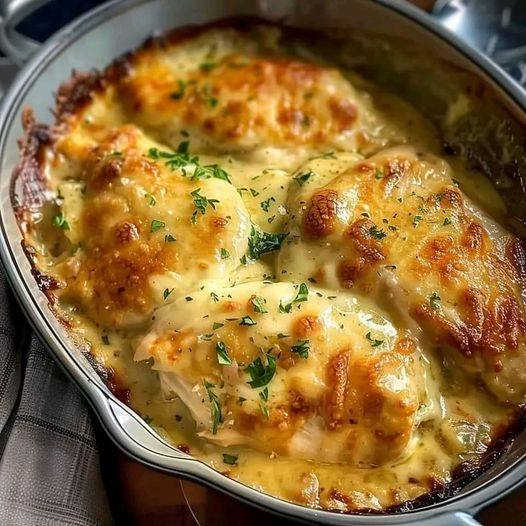
Tender Chicken Delight

Tender Chicken Delight

Tender Chicken Delight

Where every bite is a journey of flavor and satisfaction! Welcome to a culinary oasis where succulent chicken meets the finest herbs and spices, creating a symphony for your taste buds. Whether you’re craving crispy tenders, juicy rotisserie, or flavorful grilled delights, we’ve got you covered. Dive into a world of culinary excellence with Tender Chicken Delight – your destination for mouthwatering chicken experiences!

Ingredients:

  1. 4 boneless chicken breasts approximately 1 lb. or 450g
  2. 1 cup mayonnaise or Greek yogurt
  3. 1 tsp garlic powder
  4. 1 cup Parmesan cheese divided
  5. 1 tsp seasoning salt
  6. ½ tsp black pepper
  7. 2 tablespoons olive oil
  8. 1 teaspoon dried oregano
  9. 1 teaspoon dried thyme
How To Make Tender Chicken Delight
  1. Begin by cutting each chicken breast into three equal pieces.
  2. Place the chicken pieces in a bowl and let them marinate in the refrigerator overnight.
  3. Preheat your air fryer to 360°F (180°C) for about 3-5 minutes.
  4. In a small bowl, combine mayonnaise (or Greek yogurt), half of the Parmesan cheese, garlic powder, seasoning salt, and black pepper. Mix until well combined.
  5. Spread the mayonnaise mixture over each chicken breast, ensuring they are evenly coated.
  6. Sprinkle the tops of the chicken breasts with the remaining Parmesan cheese.
  1. Place the chicken breasts in the air fryer basket in a single layer, leaving some space between each piece. Depending on the size of your air fryer, you may need to cook the chicken in batches.
  2.  Cook the chicken in the air fryer at 360°F (180°C) for 18-20 minutes, flipping halfway through the cooking time. The chicken is done when it reaches an internal temperature of 165°F (74°C) and is golden brown on the outside.
  3. Once cooked, remove from the oven and serve this delightful dish to your eagerly awaiting guests or family members.

TIPS AND TRICkS

  1. Preheat the Air Fryer: Preheating ensures even cooking and crispiness. Most air fryers require just a few minutes to preheat.
  2. Seasoning: Season your chicken generously with your favorite herbs, spices, and marinades for maximum flavor.
  3. Lightly Oil: While one of the benefits of using an air fryer is reducing oil, a light coating of oil on the chicken can help achieve a crispy exterior. Consider using cooking spray or brushing the chicken with a small amount of oil before cooking.
  4. Arrange Evenly: Arrange the chicken pieces in a single layer in the air fryer basket. Avoid overcrowding to allow proper air circulation, which ensures even cooking and crispiness.
  5. Monitor Cooking Time: Cooking times may vary depending on the size and thickness of the chicken pieces and the specific air fryer model. Start with the recommended cooking time in your air fryer’s manual and adjust as needed.
  6. Flip or Shake: To ensure even cooking, flip the chicken halfway through the cooking process or shake the basket gently to redistribute the pieces.
  7. Check for Doneness: Use a meat thermometer to ensure the chicken reaches a safe internal temperature of 165°F (75°C). This ensures that the chicken is fully cooked and safe to eat while maintaining its juiciness.
  8. Serve Immediately: Once the chicken is cooked to perfection, serve it immediately to enjoy it at its crispiest and juiciest.
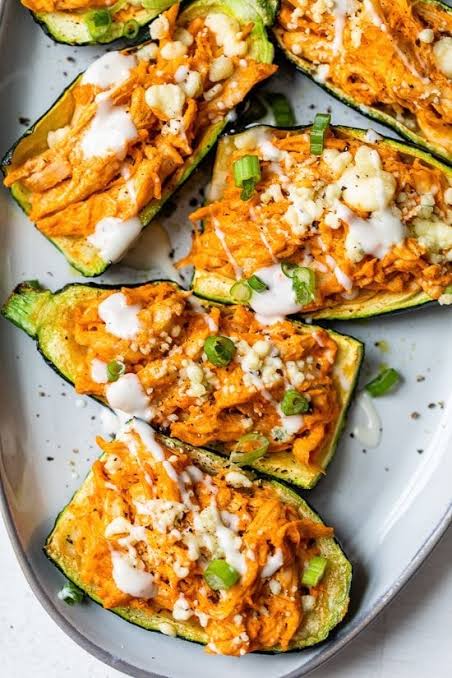
Air Fryer Buffalo Chicken Zucchini Skins

Air Fryer Buffalo Chicken Zucchini Skins

These air-fried, low-carb zucchini skins with buffalo chicken and cheese will make you forget about the carbohydrates!

Ingredients:

  1. Two big zucchini, each weighing around nine ounces
  2. olive oil spray
  3. half a teaspoon of salt
  4. 1/4 teaspoon of garlic powder
  5. One-fourth teaspoon of paprika
  6. Chicken with Buffalo Wings Using rotisserie chicken or a slow cooker  shred 7 ounces of skinless chicken breasts for stuffing
  7. One ounce Softened cream cheese with one-third less fat
  8. Four tablespoons of crumbled blue cheese or gorgonzola
  9. 1/4 cup light blue cheese or ranch dressing
  10. plus additional for pouring over top
  11. Two tsp finely chopped scallions

Method:

  1. In a medium bowl, blend together the cream cheese and spicy sauce until smooth. Include the chicken.
  2. To get eight pieces, cut the zucchini in half lengthwise and then again in half. Save the pulp for later purpose and scoop out the pulp on each piece, leaving a 1/4-inch shell on both edges.
  3. Lay the peels of the zucchini onto a surface. Olive oil should be sprayed on both sides, followed by salt and garlic powder and paprika on the sliced side.
  4. Cook in batches for 8 minutes at 350°F, or until crisp-tender. Spoon three to four teaspoons of buffalo chicken onto each skin, then evenly divide half a teaspoon of cheese on top. Simmer for a further two minutes or until cheese is melted. Serve immediately with scallions on top and a sprinkle of half a spoonful of blue cheese dressing.

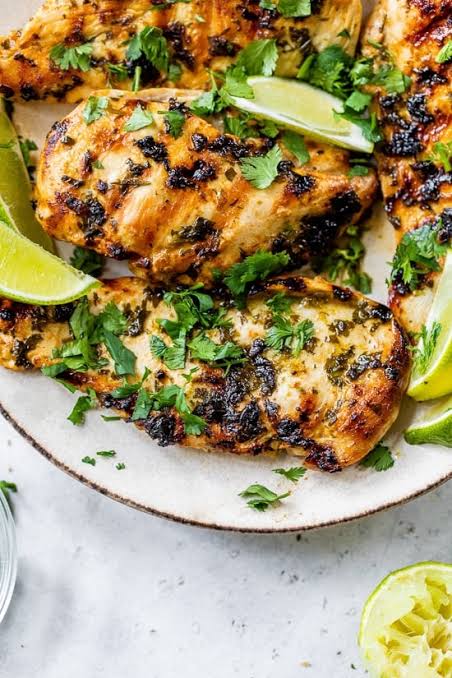
Cilantro Lime Chicken Breast (Grilled or Air Fryer)

Cilantro Lime Chicken Breast (Grilled or Air Fryer)

Sausage and Broccoli Rabe Egg Rolls

Sausage and Broccoli Rabe Egg Rolls

For a tasty holiday appetiser, try these Italian-inspired Chicken Sausage and Broccoli Rabe Egg Rolls! Bake them in the oven or cook them in an air fryer.

Ingredients:

  1. 1 big onion, chopped
  2. 3 cups uncooked broccoli rabe, Rapini, chopped discard large stems use thinner stems only
  3. 16 oz. uncooked sweet Italian chicken sausage casing removed
  4. One ounce of white wine,
  5. two chopped garlic cloves
  6. 1/2 teaspoon kosher salt
  7. 1/8 teaspoon black pepper
  8. 1/4 teaspoon crushed red pepper flakes
  9. 1/4 cup grated Parmesan cheese
  10. twelve egg roll wrappers Nasoya, and optional marinara for serving

Directions:

  1. Using a spatula, break up the sausage in a big pan over medium-high heat for about two minutes.
  2. After adding the shallots and broccoli rabe, simmer for approximately 7 minutes, breaking up the sausage as you go.
  3. Incorporate the wine, garlic, salt and pepper flakes. Cook over medium heat for several minutes, breaking down the sausage and reducing the alcohol content.
  4. After turning off the heat, transfer the sausage mixture to a mixing bowl and let it to cool for ten or so minutes.
  5. Make sure there is no excess liquid by draining in a sieve before transferring to a mixing dish and thoroughly mixing in the parmesan cheese.
  6. Put the egg rolls together: Place each egg roll wrapper individually, points pointing up and down like a diamond, on a spotless surface. Place a quarter of the sausage mixture onto the wrapper’s lower third.
  7. Run your finger over the edges of the wrapper after dipping it into a small basin of water. Lift the lowest point that is closest to you and encircle the filling.
  8. Roll into a tight cylinder by folding the left and right corners in towards the centre.
  9. Repeat with the remaining wrappers and filling, setting aside.

Method of Air Fryer:

  1. Using your fingers, evenly cover both sides of the egg rolls with oil.
  2. Cook in batches at 370°F for 7 minutes, rotating them halfway through, or until they turn golden brown.
  3. Serve right away, topped with more marinara sauce if preferred.

Oven Method:

  1. Set oven temperature to 400F for baking.
  2. Arrange the rolls onto an oil-sprayed baking sheet that has been buttered. Evenly mist each roll with oil.
  3. Bake until the rolls are crisp and golden brown, 6 to 8 minutes on each side.

Recipe Adapted from: Skinny taste

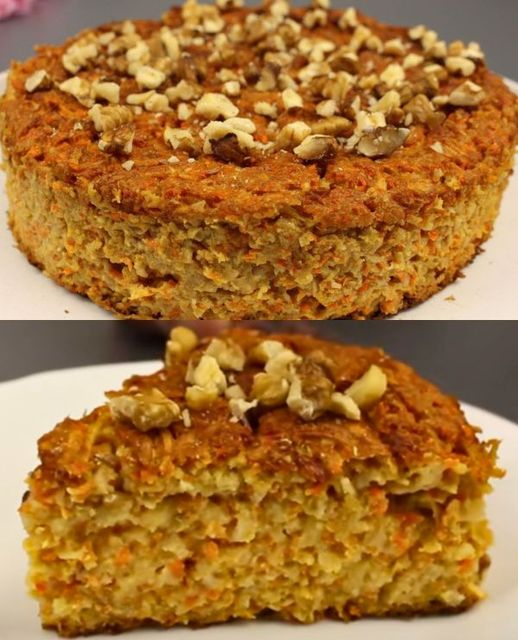
How to Make a Flourless Oatmeal and Carrot Pie

How to Make a Flourless Oatmeal and Carrot Pie

A Healthy Delight

Are you trying to find a tasty and healthful dessert that doesn’t include butter, flour, or white sugar? There’s nowhere else to look! This post will walk you through the process of making a delicious, fulfilling and healthy flourless muesli and carrot pie. For people who wish to satisfy their sweet taste without sacrificing a healthy diet, this dish is ideal.

Ingredients:

  1. 1 cup of Oats (approximately 130 g): Oats are rich in fiber and provide a hearty base for our pie.
  2. 1 cup of natural yogurt (250 ml): Natural yogurt adds creaminess and a tangy flavor to the pie.
  3. 2 units of Egg: Eggs act as a binding agent and contribute to the pie’s structure.
  4. 2 tablespoons of honey or syrup (about 50 g): Sweeten your pie naturally with honey or syrup for that irresistible taste.
  5. 2 units of Carrots (approximately 300 g): Carrots not only add a beautiful orange hue but also provide vitamins and antioxidants.
  6. 2 units of Apples (approximately 320 g): Apples bring a hint of sweetness and additional nutrients to the mix.
  7. Walnuts (amount to taste to decorate): Walnuts will be used to decorate and add a delightful crunch to your pie.

Method:

Prepare the Oat and Yogurt Mixture

Place the oats and natural yoghurt in a bowl and let sit for approximately five minutes. This will provide a creamy foundation and help soften the oats.

Add the sweetener and eggs.
Then, combine the yoghurt and oat mixture with the eggs and your preferred sweetener (honey or syrup). Make sure you stir everything well to include all of the ingredients.

Grate the Carrots

Grate the carrots finely and stir them into the mixture. Carrots give the pie a splash of colour and a natural sweetness.

Slice and chop the apples.
Add the grated and peeled apples to the mixture. Apples give our pie moisture and a delicious flavour.

Pour the Mixture into a Mold

Line a pie mould with parchment paper or grease it. Evenly distribute the prepared mixture into the mould as you pour it in.
Use walnuts as decorations.
To enhance the taste and texture of the pie, scatter some walnuts over its surface. Your bite will have a satisfying crunch as a result.
Cook to Glory
Set the oven temperature to 180°C (350°F), and bake the pie for 40 to 45 minutes. When a toothpick poked into the pie comes out clean, it’s done.
Give It Time to Cool
Let the pie cool completely before cutting. This will guarantee that it sets correctly and makes slicing easier.

Air Fryer Method:

  1. Place the filled pie pan into the preheated air fryer basket. Cook at 350°F (180°C) for about 20-25 minutes, or until the pie is set and the top is golden brown.
  2. Check Doneness: After 20 minutes, insert a toothpick into the center of the pie. If it comes out clean, the pie is done. If not, continue cooking for a few more minutes and check again.
Conclusion

Best wishes! You just made a delicious, decadent and nutritious flourless muesli and carrot pie. For anybody who enjoys a guilt-free dessert or who has dietary constraints, this dish is ideal.


Air Fried Lasagna

Air Fried Lasagna

Components:

  1. Half a cup of ricotta
  2. One cup of finely shredded mozzarella cheese
  3. A half-cup of Parmesan cheese, shredded
  4. Two cups of marinara sauce
  5. 1/2 pound of cooked and drained ground beef or Italian sausage
  6. One and two tsp dried basil
  7. One-half tsp dried oregano
  8. To taste, add salt and pepper.
  9. Olive oil for lubrication

SETTLEMENT:

  • Place the ricotta cheese, dried oregano, dried basil, and half of the mozzarella and parmesan cheese in a bowl. Combine the pepper and salt. Blend until thoroughly blended.
  • To keep the air fryer from sticking, lightly coat the basket with olive oil.
  • Layer the bottom of the air fryer basket with cooked lasagna noodles first. the spaghetti with a layer of the ricotta and cheese mixture, then a layer of of sausage or cooked ground beef  .Over the meat, cover it with a layer of marinara sauce and top it with mozzarella and parmesan cheese.
  • Once all the ingredients have been utilized, continue layering the mixture and top with a layer of cheese.
  • Set your deep fryer to 175°C/350°F.
  • Put the lasagna inside the basket of the air fryer. To make the lasagna fit in the basket, you might need to trim it.The lasagne should be air-fried for 15 to 20 minutes. After ten minutes, check to make sure it hasn’t burned. The lasagna should be hot and crispy on the edges, with the cheese bubbling and melting.
  • Using tongs or a spatula, carefully remove the lasagne from the fryer.
  • Before slicing, let it cool for a few minutes.
  • as well as serving. Have fun!

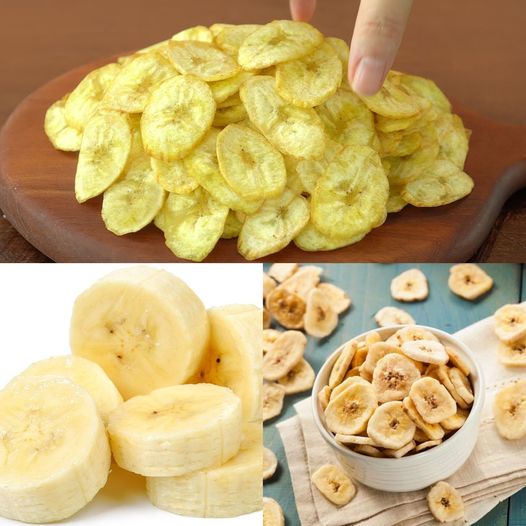
How to Make Crispy Banana Chips in 10 Minutes

How to Make Crispy Banana Chips in 10 Minutes

Are you in the mood for a fast, nutritious, and crunchy snack? Without frying, banana chips are a tasty alternative that you can make in about ten minutes. These deliciously crunchy, simple-to-make banana chips are ideal as a light snack.

What You’ll Need:

  1. Two firm, ripe bananas
  2. One tablespoon of lemon juice
  3. One spoonful of honey, if desired
  4. A dash of salt (if desired)

With just a few basic items, you can quickly make a delicious and nutritious snack.

Why These Ingredients?

  1. Bananas: Naturally delicious, they also include fibre and potassium, two important minerals.
  2. Lemon Juice: Lemon juice gives a slightly tangy flavour and keeps the bananas from browning.
  3. Honey: Honey crisps up the chips and provides a hint of natural sweetness.
  4. Salt: The flavour of the banana chips is improved with a small teaspoon of salt.

How to Prepare Your Crispy Banana Chips:

  1. Preheat the Oven: Set the oven’s temperature to 350°F (175°C). This will guarantee that your banana chips crisp up and cook through.
  2. Prepare the Bananas: After peeling, cut the bananas into uniformly thin rounds that are approximately 1/8 inch thick. The chips will be crispier if the slices are narrower.
  3. Coat the Bananas: Combine the honey and lemon juice (if using) in a small basin. To add flavour and stop the banana slices from browning, lightly brush each one with the mixture.
  4. Arrange on Baking Sheet: Spread out the banana slices on a baking sheet covered with parchment paper in a single layer. Make sure the slices are not touching to ensure even baking.
  5. Bake the Banana Chips: Bake for 8 to 10 minutes in a preheated oven. To avoid burning them, keep a watch on them. To make sure the slices crisp up equally on both sides, you may rotate them halfway through the baking time.
  6. After the banana chips are crispy and golden, take them out of the oven and let cool before enjoying. To allow them to solidify even more, let them cool on the baking sheet for a few minutes. If preferred, add a small sprinkle of salt.

Air fryer method:

  • Preheat your air fryer to 350°F (180°C).
  • Arrange the banana slices in a single layer in the air fryer basket. Make sure they’re not overlapping to ensure even cooking.
  • Air fry the banana slices for about 8-10 minutes, flipping them halfway through the cooking time. Keep an eye on them towards the end to prevent burning; cooking time may vary depending on the thickness of the slices and the efficiency of your air fryer.
  • Once they’re golden brown and crispy, remove the banana chips from the air fryer and let them cool completely before serving.


Final Tips:

  • Select Firm Bananas: To achieve the greatest texture for your chips, use ripe yet firm bananas.
  • Watch Carefully: Depending on your oven, baking times might vary, so keep a watch on the chips to avoid them burning.
  • Storage: To maintain their crispy texture, store any remaining banana chips in an airtight container.


You may have these delicious, healthful homemade crispy banana chips at any time. They taste great, are simple to create, and are superior than store-bought alternatives. Savour your crispy delight!

Air fryer mozzarella sticks

Air fryer mozzarella sticks

Components:

  1. Twelve string cheese sticks made of mozzarella
  2. One cup, or 125 grams whole-wheat flour two big eggs
  3. two tsp milk
  4. Two cups, or 240 grams bread crumbs in the Italian style
  5. 50g, or half a cup Parmesan cheese, grated (optional)
  6. one tsp powdered garlic
  7. One tsp powdered onion
  8. One tsp of dehydrated oregano
  9. One tsp of dried basil
  10. Cooking mist
  11. To serve, marinara sauce

Guidelines:

  • Get the cheese sticks ready: To create 24 shorter sticks, cut the mozzarella string cheese sticks in half. Transfer them onto a baking sheet and freeze for a minimum of 60 minutes or until fully solidified. In order to keep the cheese from melting too soon while cooking, this step is essential.
    Get the breading stations ready:
  • Fill a small plate with flour.
  • Whisk the eggs and milk in a separate shallow dish.
    Within a In a third shallow dish, mix together the bread crumbs, basil, oregano, onion, garlic, and Parmesan cheese (if desired).
  • Spread the Cheese on the Sticks:
    Shake off excess flour after rolling each frozen cheese stick in the flour.
  • Make sure it’s well covered by dipping it into the egg mixture.
  • Gently press the bread crumbs onto it as you roll it in the mixture.
  • You can coat each stick with an extra-crispy coating by repeating the procedures with the egg and bread crumbs.
    Reposition the breaded cheese sticks onto the baking sheet, then freeze for an additional half hour. This keeps the cheese from seeping out during cooking and helps the coating set.
  • Warm up the air fryer. For around five minutes, preheat your air fryer to 400°F (200°C).
  • Cook the sticks of mozzarella:
  • Gently mist the Cooking spray-coated basket for air fryers.
  • Make sure the breaded mozzarella sticks in the basket are arranged in a single layer and away from one another. They might need to be cooked in batches.
  • To help the mozzarella sticks crisp up, lightly mist the tops with cooking spray.
  • For 6 to 8 minutes, or until golden brown and crispy, air fried at 400°F (200°C). To guarantee consistent cooking, inspect them midway through and give the basket a gentle shake.
  • To serve, take the mozzarella sticks out of the air fryer and give them a minute to cool. Present alongside marinara sauce for dunks.

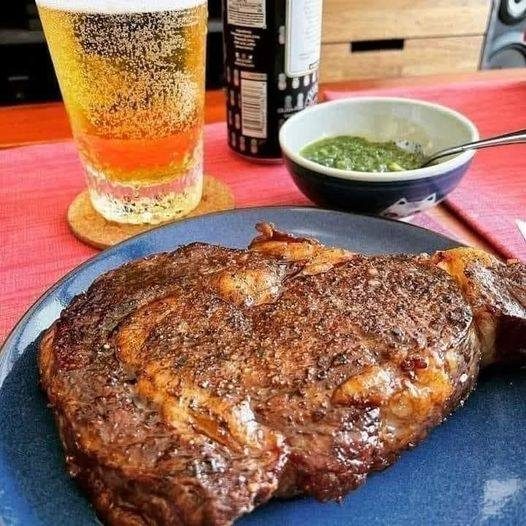
AIR FRYER RIBEYE STEAK

AIR FRYER RIBEYE STEAK

Learn how to prepare a succulent, soft, and flavorful Air Fryer Ribeye Steak that has a rich, meaty taste. It’s surprising that this delicious steak, made with just three ingredients and cooked in less than 15 minutes, has a rich garlic and herb butter on top.

Put the grill away. For a tender steak that tastes just as excellent as the best from restaurants, coat rib-eye steak with seasonings and cook it in an air fryer. (Warning of spoilers: Even better.) For a real meal at home, don’t forget to drizzle some herb garlic butter over the air fryer steak.

Components

  1. Two 10-ounce, one-inch-thick ribeye steaks
  2. One tsp olive oil
  3. One tablespoon of spice for steak
    Regarding Herbal Garlic Butter
  4. three tablespoons of melted butter
  5. one minced garlic clove
  6. One tablespoon of finely chopped parsley

Directions

  • After removing the steak from the refrigerator, give it approximately half an hour to come to room temperature.
    For ten minutes, preheat the air fryer to 400°F.
  • Prepare the steak by patting it dry with paper towels in the interim.
  • Apply a thin layer of olive oil all over the steak. Apply a coating of steak spice and firmly press it in.
  • The seasoned steak should be placed in the air fryer basket. Cook the steak for medium-rare, or until the internal temperature reaches the desired level of doneness, 10 minutes.
  • To help keep the fluids within, take the steak out of the air fryer and let it rest for five minutes. Serve with your preferred sides and drizzle with garlic herb butter.
  • Garlic Herb Butter Combine minced garlic with softened butter.
  • Put finely chopped parsley in a little dish. Roll into a log after transferring to parchment paper or cling film.
  • Refrigerate for approximately half an hour to solidify. Cut into pieces and present.

Air Fryer Scones {Banana Chocolate Chip}

Air Fryer Scones {Banana Chocolate Chip}

Chocolate chip and banana scones from an air fryer are delicious at any time of day. This simple recipe takes only a few minutes to prepare and yields soft, fluffy interiors with a crisp, golden brown crust. This scone recipe is perfect for you if you enjoy banana bread! Savor it with afternoon tea, morning coffee, or a tasty snack!

Writer: Julia

Prep Duration: ten minutes

Seven minutes to cook
17 minutes in total
Productivity: 8 1x
Cuisine: United States

Components

  1. Two cups of all-purpose flour,
  2. five teaspoons of sugar,
  3. and one teaspoon of baking powder
  4. Half a teaspoon of salt
  5. One tsp vanilla essence
  6. Six tablespoons of chilled, unsalted butter, divided into tiny bits
  7. Add 1 tablespoon to 2/3 cup half-and-half.
  8. one mashed, ripe banana
  9. one-third cup tiny chocolate chips

Guidelines

  • Mix the flour, baking powder, and salt, powder, and sugar.
    Using a pastry blender or two knives, cut in butter until the mixture is the consistency of coarse crumbs.
  • Add vanilla essence and 2/3 cup of half-and-half, stirring until barely moistened.
  • Add the chocolate chips and mashed banana and fold gently.
  • Work the dough gently five to ten times on a surface dusted with flour.
  • Pat into a round about 1 inch thick.
  • Using a 2-inch biscuit or cookie cutter, cut into 6–8 rounds and set in an air fryer basket lined with parchment paper.
  • Drizzle each with a tablespoon of half-and-half and dust with sugar.
  • For seven minutes, cook at 390 degrees in the air fryer.
    Allow to cool on a wire stand.