French Onion Soup Burgers

French Onion soup burger

🍔🧅 French Onion Soup Burgers 🍔🧅

I have finally found a burger that I just want to eat all the time. And I’m not normally a big burger person! These French Onion Soup Burgers are everything a burger shoul

They’re juicy and super flavorful and can I just say Caramelized Onions and melty Provolone or Gruyere and an Onion Bun just to drive those flavors home? Do I even need to say anything else?

Prep Time: 20 minutes

Cooking Time: 30 minutes

Total Time: 50 minutes

Ingredients:

  1. 1 1/2 pounds ground beef
  2. 1 packet or about 4 to 6 tablespoons Lipton Onion Soup Mix
  3. 2 1/2 tablespoons butter
  4. 2 large onions, thinly sliced
  5. a pinch of thyme
  6. water as needed, about a 3/4 cup
  7. 1 tablespoon brandy or Sherry (optional, but recommended)
  8. 4 to 8 ounces Swiss or Provolone cheese
  9. 4 buns and a little butter or oil to brush them with

Directions:

  • Mix ground beef with onion soup mix; set aside to rest as the onions are caramelized.
  • Add the butter to a skillet, when hot, add the onions and thyme and about 1/4 cup of water. Add lid and allow to simmer for three or four minutes until onions are tender are the water is nearly evaporated.
  • (Check during cooking time to make sure all the water hasn’t evaporated early.) Remove lid and continue to cook, stirring often and adding a splash of water now and then if the onions are beginning to darken unevenly and stick to the pan. When onions are soft and beautifully browned, add dash of the brandy or Sherry and remove from heat.
  • Place a dent in the top of each burger so they’ll cook up flat and not rounded. Cook on the stovetop in a medium-hot pan or on the grill over medium-high heat, turning once, for about three minutes on the first side. Turn and add a spoonful of caramelized onions and a slice or two of cheese to the top of each burger, lower the heat to medium and continue to cook until burger is desired doneness, two to four minutes longer. Cover if needed, for a minute or two to get the cheese to melt.
  • In the meantime, brush the cut side of the buns with butter or oil and toast in a hot pan or on the grill.

Notes on temperature:

We like ours at 143 degrees F. which is just slightly pink in the middle.

  • rare: 125 degrees (dark purple-red, just warm, tender)
  • medium rare: 135 degrees (bright purple-red, warm, tender, very juicy)
  • medium: 145 degrees (rich pink, yielding, slightly tender, juicy)
  • medium well: 155 degrees (tan with slight pink, firm, some juice)
  • well: 160 (tan to brown, no pink, chewy, little if any juice)

If you need more or less than four burgers, for each burger:

For each burger:

  • 6 ounces ground beef
  • 1 to 1 1/2 tablespoons onion soup mix
  • 2 teaspoons butter
  • 1/2 large onion, thinly sliced
  • a small pinch of thyme
  • water as needed
  • 1/2 teaspoon brandy or Sherry (optional, but recommended)
  • 1 to 2 ounces Gruyere (Swiss) or Provolone cheese (one or two slices)
  • 1 bun and a little butter or oil to brush it with

Air Fryer Method;

  1. Line the air fryer basket with foil or parchment and spray with olive oil spray.
  2. Place the patties evenly in the basket.
  3. Air Fry for 5 minutes at 375 Degrees.
  4. Carefully open and turn and cook an additional 5 minutes at 375 degrees.
  5. Open up the air fryer and see if they are to your desired doneness or at least 165 degrees.
  6. If they need additional time, add an additional 2 minutes to the cook time.

EASY CHOCOLATE CREAM CHEESE POUND CAKE

EASY CHOCOLATE CREAM CHEESE POUND CAKE

This simple pound cake with chocolate cream cheese gets together very quickly, yet it tastes fantastic. It’s an easy cake that everyone will enjoy to make.

Ingredients for the Dreamy Cream Cheese Chocolate Pound Cake:

  1. Two ounces of chopped dark chocolate,
  2. or 3/4 cup (105 g) all-purpose gluten-free flour; Better Batter was used by me.If xanthan gum is already present in your blend, omit the 1/2 teaspoon.
  3. 1/4 cup (36 g) cornstarch (you can also use potato starch or arrowroot)
  4. One tsp of kosher salt
  5. sixty grams, or 3/4 cup Dutch-processed cocoa powder (plus 1/8 teaspoon baking soda if using natural cocoa powder)
  6. sixteen tablespoons (224 grams) of room-temperature unsalted butter
  7. One cup (200 grams) of powdered sugar, plus additional for sprinkling
  8. 9 ounces (252 g) of room-temperature eggs (approximately 5 large eggs)
  9. Two tsp finely ground vanilla extract
  10. Two fluid ounces, or 1/4 cup made coffee (or milk, but let’s focus on the coffee!), at room temperature

 Regarding the Chocolate Glaze:

  1. diced four ounces of dark chocolate 
  2. and one-fourth cup (2 fluid ounces) of heavy cream
  3. One teaspoon of pure vanilla

SETTLEMENT:

  • Set the broiler temperature to 325°F. Grease or line normal 9-by-5-inch part skillet with parchment paper and store it. Put the chopped chocolate in small, microwave-safe bowl and melt it in 30-second bursts at 60% power until it’s smooth and liquefied (or use double evaporator).
  • Set the bowl aside to cool for bit. Filter the flour, thickener, cornstarch, and cocoa powder into medium-sized bowl. Add the salt and mix until thoroughly combined. Close up the basin. In the oar connection-equipped bowl of stand blender (or an Using a hand blender in a large bowl, beat the sugar and margarine until the mixture falls from the mixer in a lace when the oar is lifted, about 3 minutes.
  • Beat in the vanilla and eggs one at a time until everything is well combined. After each choice, beat to combine the chocolate with the fermented espresso.

Finally, add the flour and cocoa powder mixture slowly while the blender is running on low. briefly till they recently joined. The player should pour thickly and be smooth.

After emptying the hitter into the prepared dish, use a damp spatula to smooth the surface. Put in the center of the preheated broiler and cook until a toothpick inserted in the center comes out clean.

compared to a few clammy pieces joined (around 60 minutes). Remove from the broiler and let cool in the prospect for a few minutes before transferring to a wire rack to cool completely.

Prepare the covering. Put the broken chocolate into a small, heatproof bowl. Put the cream and vanilla into a small saucepan and heat over medium-low heat until the mixture thickens. Drizzle the heated cream over the chopped chocolate and allow to sit for about a minute, or until the chocolate begins to melt.

Process the chocolate until it’s smooth and dissolved. Using a large blade or tiny counterbalanced spatula, spread the icing evenly over the cooled pound cake. Let the coating settle at room temperature for the duration. Slice generously and proceed to serve.

Inspired by and styled by Donna Hay. modified from my recipe for gluten-free chocolate cinnamon pound cake in the Starbucks style.

Have fun

Easy Croissants Recipe

Easy Croissants Recipe

This simplified croissant recipe will have you baking croissants like a pro. Flaky, buttery, and deliciously authentic, yet so easy to make!

Prep Time: 20 minutes + chilling time

Cooking Time: 15-18 minutes

Total Time: 1 hour 40 minutes

Ingredients:

  1. 2 1/4 cups all-purpose flour
  2. 1/4 cup granulated sugar
  3.  1 1/4 teaspoons active dry yeast
  4.  1 teaspoon salt
  5.  1 cup unsalted butter, cold
  6.  2/3 cup milk, cold
  7.  1 egg for egg wash

Directions:

  1. In a bowl, combine the flour, sugar, yeast, and salt. Mix well.
  2.  Cut the cold butter into small cubes and add it to the flour mixture. Use a pastry cutter or your fingers to work the butter into the flour until you have a coarse, crumbly mixture.
  3.  Gradually add the cold milk and mix until a dough forms.
  4.  Turn the dough out onto a floured surface and knead it briefly, just until it comes together
  5. . Roll the dough into a rectangle, then fold it into thirds like a letter.
  6.  Repeat the rolling and folding process two more times.
  7. Wrap the dough in plastic wrap and refrigerate for at least 1 hour or overnight
  8. . Preheat your oven to 425°F (220°C).
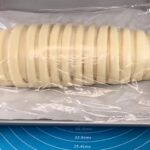
  9.  Roll out the dough into a large rectangle. Cut it into triangles.
  10. Roll each triangle tightly, starting from the wide end, to form croissants.
  11. Place the croissants on a baking sheet lined with parchment paper.
  12. Beat the egg and brush it over the croissants for a golden finish.
  13. Bake for 15-18 minutes or until the croissants are golden brown and flaky.
  14.  Enjoy your freshly baked, buttery croissants!
    (including chilling time)

Air Fryer Method:

  1. Preheat the Air Fryer to 350°F/175℃ for 3 minutes while you brush the rolls with egg wash
  2. Now put the rolls into the Air Fryer. Put the rolls in a single layer and prevent them from touching
  3. Cook for 7 minutes or until golden brown and completely cooked

Q/A

How should croissants be stored?
Store these handmade croissants in a container that can seal tightly. They keep well for up to a week and are still wonderful the next day.

Their shelf life will be extended to around 10 to 14 days in the refrigerator.

Are croissants freezer-friendly?

After baking, croissants can absolutely be frozen. Similar to numerous other pastry or bread recipes, these freeze admirably and can be thawed at room temperature in less than an hour.

On the other hand, I would advise against freezing croissant dough or unbaked croissants. While many bread doughs may be stored for up to two weeks, there’s always the possibility that the yeast won’t make it.

Notes:

*Instant yeast may be substituted.  Rise time may need to be reduced by 10 to 15 minutes.  You’ll know your dough is done rising when it has doubled in volume.

quick homemade bread recipe

I don’t buy bread anymore! New perfect recipe for quick bread in 5 minutes. Just bake! Simple and tasty! Let’s make this bread! This oven baked bread is way better than the store! This bread does not need a bread maker, it is only baked in the oven. It takes very little time to cook. This quick soft bread recipe contains a minimum of the simplest ingredients and is chemical free. With me you will learn how to bake white bread! Simple and tasty! How to make white bread I show practical recipes on my cooking channel! This is a quick homemade bread recipe that you are definitely going to love! It only takes 5-10 minutes and time to bake bread like this! Everything is very simple, healthy and delicious! Be sure to try this homemade bread at home – you will love it and bake it every day! The main thing is to

cook with joy and love!

Ingredients:

  1. 3 cups of flour 300 gr
  2. 1 tablespoon of sugar 30 grams
  3. 1 level teaspoon of salt 4 grams.
  4. 0.5 tablespoons of dry yeast 10 grams.
  5. 200 ml of warm milk.
  6. 2 tablespoons of vegetable oil.

Instructions:

Step 1:

Knead the dough.

Step 2:

spread dry four dust on the rolling pad.

Step 3:

Roll out the dough into an oval shape. Roll out the dough. Make cuts. Roll out the bread.

Step 4:

Place the bread on a baking sheet lined with parchment paper. Cover the bread with a towel or cling film,

Step 5:

put it in a warm place and wait 15-30 minutes.

Step 6:

1 egg. Grease the bread.

Bake in the oven at 200 ° C (390 ° F) for 25 minutes.

Lush bread ready

Recipe Adapted from: schnelll Lecker schon

Cranberry Orange Bread

Cranberry Orange Bread

The combination of cranberries and oranges adds a delicious explosion of flavour and is completely amazing, especially when combined to make a soft, moist bread. This beautiful marriage is demonstrated by our Cranberry Orange Bread recipe, which yields a colourful, zesty loaf that is equally pleasant to the appearance and the palate. This bread fills the air with its zesty scent and is ideal for breakfast, a mid-afternoon snack, or a sweet way to close the day. Every mouthful is guaranteed to be an experience you won’t soon forget. Together, let’s take on this baking adventure and produce a masterpiece that will undoubtedly end up as a treasured addition to your repertoire of recipes.

Preparation Time: 20 minutes prep, 55 minutes baking, 15 minutes cooling – total of 1 hour and 30 minutes.

Servings: Yields one 9×5 inch loaf, serving 8-10 slices.

Ingredients:

  • 1 1/2 cups + 1 extra tablespoon all-purpose flour (for dusting)
  • 2 teaspoons baking powder
  • 1/2 teaspoon kosher salt
  • 1 cup whole-milk yogurt (unflavored)
  • 1 cup granulated sugar
  • 3 large eggs
  • 2 teaspoons finely grated orange zest
  • A dash of pure vanilla extract
  • 1/2 cup vegetable oil
  • 1 1/2 cups cranberries (fresh or thawed from frozen)

Orange Elixir:

  • 1/3 cup freshly squeezed orange juice
  • 1/3 cup granulated sugar

Citrus Glaze:

  • 1 cup sifted confectioners’ sugar
  • 2 to 3 tablespoons freshly squeezed orange juice

Directions & How to Prepare

  1. Preparation: Preheat your oven to 350°F (175°C). Grease and flour a 9 x 5-inch loaf pan, shaking out any excess flour.
  2. Dry Mix: Sift together the flour, baking powder, and salt in a medium bowl and set aside.
  3. Yogurt Fusion: In a large bowl, vigorously whisk together the yogurt, sugar, eggs, orange zest, vanilla extract, and vegetable oil. Gradually fold in the dry ingredients, mixing until just combined.
  4. Berry Blend: Toss the cranberries with the extra tablespoon of flour in a separate bowl, then gently fold them into the batter, ensuring even distribution without crushing the berries.
  5. Bake: Pour the batter into the prepared loaf pan and bake for 50-55 minutes, or until a toothpick inserted into the center comes out with just a few moist crumbs.
  6. Orange Syrup: Combine the orange juice and sugar in a small saucepan over medium heat. Allow the mixture to simmer for about 3 minutes after the sugar has dissolved. Remove from heat.
  7. Syrup Soak: Once the bread is slightly cooled, use a toothpick to poke holes throughout. Generously brush the orange syrup over the top and sides, allowing it to soak in. Apply a second coat for extra moisture and flavor.
  8. Glaze: Whisk together the confectioners’ sugar and orange juice to create a thick glaze. Drizzle over the cooled loaf, letting it cascade down the sides. Wait 15 minutes for the glaze to set before slicing.


Mini Boston Cream Pie Bites

mini boston bites

Mini Boston Cream Pie Bites Something about the rich chocolate frosting and layers of fluffy cake encasing the creamy custard makes dinner feel like a long time away. However, let’s face it, on a hectic workday, who has time to prepare an entire pie? Not me!

For that reason, I’ve created these sweet take on the traditional: Boston Cream Pie Cookie Bites. These are all the delicious flavours of pie, only smaller and easier to create with a few shortcuts (shh, we won’t tell!). Ideal for rewarding yourself after a hard day or impressing your pals at book club.

Servings: Makes about 24 cookie bites

Recipe By: Maria Williams


Ingredients For Mini Boston Cream Pie Bites

  • One yellow cake mix box
  • Two big eggs
  • One (3.4 oz) packet of instant vanilla custard mix
  • Half a cup of vegetable oil
  • 1/2 cup of chilled milk
  • One cup of chocolate chips, semisweet
  • Two tablespoons of milk or heavy cream


Instructions For Mini Boston Cream Pie Bites

  • Lightly grease a tiny muffin tin and preheat the oven to 350°F.
  • To make a soft dough, combine the eggs, vegetable oil, and yellow cake mix in a large mixing basin.
  • Fill each cup of your mini muffin tin with dough using a little cookie scoop or spoon. Press to create a tiny well at the bottom.
  • Bake for ten to twelve minutes, or until the centres are set and the borders are light golden brown.
  • 5. In a medium bowl, stir together the instant vanilla custard mix and cool milk until smooth while the cookies bake. Let it thicken in the refrigerator for approximately five minutes.
  • After the cookies are done, take them out of the oven and press down on the centre of each one to create a more defined well for the filling. You may do this by using the back of a teaspoon. After five minutes of cooling in the pan, move the food to a wire rack to finish cooling.
  • Spoon the vanilla pudding into each well of the cooled cookie cups.
  • To make the glaze, heat the heavy cream and chocolate chips in a bowl that is safe to use in the microwave for 20 seconds at a time, stirring, until the mixture is smooth and glossy.
  • Cover the filled cookies with a spoonful or a thin layer of chocolate glaze. Give it a few minutes to settle.
  • To allow the custard to set before serving, place the bits in the refrigerator for about an hour.


Changes & Advice:

  • To achieve a more flavorful cookie base, substitute butter for oil.
  • Use a store-bought chocolate ganache or frosting in favour of the homemade glaze if you’re pressed for time.
  • Before the chocolate hardens, add some colourful sprinkles or chopped almonds to the tops for an interesting variation.
  • Storage advice: To keep the pudding from going bad, store your Boston Cream Pie Bites in the refrigerator in an airtight container.
  • Getting ahead? Prepare your cookie cups ahead of time and keep them chilled. Just before serving, fill with custard and drizzle with glaze to keep everything incredibly fresh!With that, you’ve got a delectable homemade delicacy that has all the charm of a Boston cream pie in just one flawless bite. Savour each luscious, creamy bite.

This mouth-watering meat and potato roll

mouth watering roll ups

This mouth-watering meat and potato roll. Finding the best elements of anything is always the goal of getting to the “meat and potatoes” of anything. Although that’s a humorous statement, there is some truth to it. Potatoes and meat go together like clockwork.

So what particular recipe should you make when you start to crave meat and potatoes? This could be of assistance to you.

This is a simple and savoury recipe for beef and potatoes. If you’re looking for that particular combo, why not give it a shot?


Ingredients and Instructions mouth-watering meat and potato roll:

  1. Take out a few potatoes; three should do the trick. Cut them into the flat shapes you see here by slicing them lengthwise.
  2. Next, take out 300 grams of cheddar cheese and some baking paper. You are aware of the procedure: cover the paper with cheese thereafter.
  3. The potatoes will not remain in that state for the entire day. Sprinkle salt on them as you begin to arrange them like this over the cheese on the tray.
  4. Avoid using too much salt. Just enough should be added so that each slice has a noticeable, thin layer of salt on it.
  5. After sparingly seasoning the potatoes with salt, drizzle two tablespoons of vegetable oil over them.
  6. After that, bake that bad boy for 30 minutes at 200°C.
  7. To make the filling, use additional 2 teaspoons of vegetable oil!
  8. Place the specified quantity of vegetable oil and around 500g of ground beef in a sauce pan. It’s obvious this filling will work well right away.


Stir it frequently until you notice it starting to fry.

  • Next, finely chop one onion and three green peppers, then add them to the mixture.
  • Beef and onions together are usually a sure sign. It’s a mixture that works well even with steak.
  • Mix that well as well, then add additional veggies.


Add roughly 2 tablespoons of tomato sauce along with 3 cloves of garlic this time. Add 20 grams of tomato sauce after that.
  • This dish is making my mouth water, so let’s get it finished soon!
  • Let’s add a few additional ingredients because we want this filling to be as delicious as possible! Black pepper, cumin, thyme, chilli flakes, and salt.
  • Next, add three to four parsley sprigs.
  • The potatoes are now prepared to be taken out of the oven after those thirty minutes. It’s time to cover them in extra cheese.
  • Cover it with the minced meat filling that you just prepared. After adding extra cheese, roll it up.


Now, doesn’t that seem extremely appetising?

  • Before putting it back in the oven for a second time, add some extra cheese and parsley. Ten minutes at 200°C this time.
  • Once that’s finished, you can reward yourself with a delicious roll made with meat and potatoes.

strawberry cheesecake donut holes

strawberry cheesecake donut holes

In order to make amends and in light of Valentine’s Day quickly approaching, these 52-calorie strawberry cheesecake donut holes had to step forward and take centre stage. No, it’s not as simple as realising that you’re gaining 20 pounds just by staring at them! Oh, yeah. Thank me later. They’re low fat, low calorie, and safe. They’re also compatible with weight watchers.

INGREDIENTS

  1. One cup self-rising flour (or plain/all-purpose flour) is required for donut holes.
  2. Two teaspoons of sugar (raw, coconut, or white)
  3. Half a teaspoon baking powder (or half a teaspoon baking soda if using plain or all-purpose flour)
  4. ¼ teaspoon salt
  5. Two tablespoons of melted coconut oil, canola oil, or olive oil
  6. One big egg
  7. Two tsp finely ground vanilla extract
  8. Half a cup of unsweetened almond milk (or skim or low-fat milk)
  9. 1/4 cup sugar for coating, or a sweetener with a moderate flavour

filling

  1. 1/3 cup (70g | 2 12 oz)cream cheese with less fat, spreadable or in a block
  2. Two teaspoons of icing sugar powder
  3. Two tablespoons of strawberry jelly or jam, or topping, if desired

Instructions:

  1. Set oven temperature to 176C/350F. Apply cooking oil spray to a 24-count mini muffin pan; use a paper towel to remove any excess and set aside. As an alternative, use a cake pop maker or tray.
  2. Combine all the dry ingredients in a big bowl and mix them together. In the centre, create a well and pour in the milk, egg, vanilla, and oil. Beat the mixture until it’s lump-free and smooth.
  3. Pour approximately two teaspoons of batter into each muffin hole, filling it to a quarter of the way. A toothpick put into the centre of a donut should come out clean after baking for 10 to 15 minutes, or until they are brown in colour. Give them a full five minutes to cool. Gently roll each donut hole in the sugar while it’s still warm.
  4. While the donuts are baking, make the cheesecake filling. Combine the cream cheese together in a small bowl with the sugar. Beat until smooth and combined. Add the strawberry jam,jelly or topping and mix through slowly until creating an almost marble/swirl effect (if using jam, make sure any bigger fruit pieces are removed before using, or they will get jammed in the nozzle).
  5. Fill a piping bag with the cheesecake filling, and using a narrow nozzle, fill each donut with the strawberry cheesecake until they puff up and expand (not too much or the donuts will overflow).

Equipment:


Sponge Cake Recipe

Sponge Cake Recipe

One basic cake recipe that any person should be able to make is the Easy Sponge Cake. Basic cupboard and refrigerator staples including flour, baking powder, eggs, sugar, oil, and milk are used to make it. This cake can be fashioned into layer cakes or served as a snack cake because of its extreme versatility and adaptability.

INGREDIENTS

  1. ¾ cup (90 grams) of all-purpose flour;
  2. cup (100 grams) of caster sugar
  3. 1 tsp baking powder;
  4. ⅛ tsp baking soda;
  5. ½ cup (120 milliliters) of any refined oil;
  6. ¼ cup (60 milliliters) of milk;
  7. 2 tsp vanilla extract

GUIDELINES

  • Set oven temperature to 180°C. Using parchment paper, line a 7-inch square cake pan.
  • Sift the flour, baking powder, and baking soda into a bowl using a sifter
  • In a bowl, thoroughly combine milk, oil, and vanilla.
  • Place the eggs in a large bowl and whisk them until foamy using an electric beater or a stand mixer.
  • Gradually add the sugar and continue whisking until the mixture is light and fluffy.
  • Gently combine the wet mixture with the dry ingredients.
  • Transfer the mixture into the pan and bake it for thirty minutes.
  • Take out and let it cool down fully.
  • Serve and enenjo

Notes

  • Beat the egg until it becomes light and fluffy, then mix it into the dry mixture. This is a crucial step for fluffy sponges. Gently incorporate the dry and wet mixture into the whipped eggs, or combine it once with a mixer.
  • Avoid overmixing. Avoid letting the batter sit out too long. As soon as it’s finished, bake it. Avoid baking the cakes too much. It might get arid.
  • This cake can be used as a layer cake for fresh cream cakes or as a snack cake.

Cherry Cheesecake Swirl Brownies

Cherry Cheesecake Swirl Brownies

INGREDIENTS

Regarding the Brownies:

  1. two melted sticks of butter
  2. Sugar (2 1/4 cups) and four big eggs
  3. One spoonful of vanilla
  4. One quarter cup of cocoa powder
  5. Half a teaspoon of salt
  6. One tsp baking powder
  7. One and a half cups all-purpose flour (I used this gluten-free blend)
  8. One cup chocolate chips, my personal preference

For the cheesecake with cherries:

  1. 8 ounces of softer cream cheese
  2. one-third cup sour cream
  3. half a cup of sugar
  4. one-half teaspoon of vanilla
  5. One egg
  6. Can of cherry pie filling, 21 oz.

INSTRUCTIONS

  • Preheat the oven to 350o and grease a 9×13-inch pan.
  • In a pot over the stove or the microwave, melt the butter and sugar together until bubbling, whisking occasionally. Let cool for a minimum of five minutes. Blend in the vanilla and eggs until smooth. Mix thoroughly to combine the flour, baking powder, cocoa powder, and salt. Add the chocolate chunks and stir. Fill the pan with the batter.
  • Combine the cream cheese, sour cream, sugar, vanilla, and egg in a another bowl.
  • Using the end of a wooden spoon (or your finger), create approximately five long trenches (long ways) in the batter. Overflowing with the cream cheese mixture, pour it over the trenches. Between each strip, spoon the cherry pie filling.
  • With a knife, cut rows of batter in the opposite direction from the trenches all the way through (or swirl, if you want).
  • Bake for approximately forty minutes. Store in the fridge until you’re ready to serve.