Carrot Cake Recipe

Carrot Cake Recipe

We’re going to share our go-to carrot cake recipe with you today! The flavours of the carrots, spices, pecans, coconut, and crushed pineapple combine to create an incredible scratch recipe.

Ingredients:

  1. 2 ½ cups (325g) all-purpose flour
  2. One and a half teaspoons baking soda
  3. one and a half teaspoons baking powder
  4. two teaspoons ground cinnamon
  5. one and a half teaspoons salt
  6. two cups (400g) sugar
  7. four large eggs
  8. one cup vegetable oil
  9. two teaspoons vanilla extract
  10. two cups (180g) grated (small pieces) carrots (do not use packaged pre-shredded carrots, they are too dry)
  11. one and a half cups (50g) sweetened coconut (we used Baker’s Angel Flake sweetened coconut)
  12. one and a half can crushed pineapple placed in a strainer and allowed the liquid to drain off
  13. one eight ounce can of pineapple.I use a fork to squeeze out some of the liquid, but not all of it.

FOR THE CREAM CHEESE FROSTING (IF YOU PLAN TO DO A LOT OF PIPING

YOU CAN EASILY DOUBLE THIS RECIPE)

  1.  Two sticks (226g) of softened, unsalted butter
  2. 16 ounces of cream cheese (two 8-ounce containers were used) (Not fat-free)
  3. Two teaspoons (8g) of vanilla essence
  4. one-half teaspoon (2g) of salt
  5. six to six and a half cups (690g to 747g) of confectioners’ sugar

Instructions

 For making the carrot cake

  1. Heat the oven to 350°F.
  2. Grease the bottoms of 3 (8-inch) or 2 (9-inch) round pans with shortening, line the pans with parchment paper or wax and flour the paper and pans to make turning them out easier.Use the parchment paper; carrot cake tends to stick.
  3. Mix the flour, baking powder, baking soda, cinnamon, and salt for 30 seconds. Put Aside.
  4. Add 2 cups sugar, 4 eggs, 1 cup oil, and 1 tsp vanilla to the bowl of your mixer. At medium speed, mix for two to three minutes until well combined and light in colour.
  5. Once the flour mixture is moistened, add the coconut, crushed pineapple, pecans, and carrots. Stir with a spoon.
  6. After inserting a toothpick into the centre, bake for 35 minutes at 350 degrees until it comes out clean.
  7. The cake may sink slightly in the centre if you open the oven door too soon or check the doneness of the cake by touching the centre until very close to the finish of baking.
  8. Yields a batter of 6 ½ cups.
  9. After 10 minutes of cooling on a wire rack, remove the cake layers from the pan. Before icing, let everything cool fully.

For the frosting of cream cheese

  1. Slice up the butter and put it to the mixing bowl. Beat the butter until it becomes smooth and soft, using a low to medium speed.
  2. After chopping the chilled cream cheese into small bits, mix it with the butter and beat on low to medium speed until combined. You might need to soften the cream cheese a little bit more if you’re using a hand mixer.
  3. Include the vanilla. Add the powdered sugar gradually and beat on low speed until well combined.
    Up the speed of the mixer and mix until frothy. Avoid overbeating, as it may turn out overly tender. Simply chill it for a little period of time to slightly firm it up if it gets too soft.
  4. When applied while still refrigerated, this frosting will pipe more easily. It can be prepared ahead of time, chilled, and then let to soften slightly (do not microwave) before remixing when needed.
  5. Frost an 8-inch cake with three layers.

Zucchini Muffins

Zucchini Muffins: the easy and healthy muffin recipe

You can prepare these zucchini muffins quickly and easily during the summer. It’s the ideal choice for a quick snack or to carry in lunchboxes because it’s full of healthy vegetables. Savoury in flavour, the zucchini bread muffins are airy and moist. Just a few basic cupboard ingredients—zucchini, red pepper, eggs, cheese, flour, baking powder, salt and pepper—are needed to prepare them. Just combine the ingredients for the batter, transfer it into the moulds, and bake it! Since these muffins are a spin on the traditional zucchini bread, they can be eaten as a light lunch, a snack or even as a side dish. It’s a fantastic method to consume extra veggies! It’s so simple to create that everyone.

Ingredients:

  1. One ZUCCHINI
  2. 1/4 one red pepper
  3.  EGGS Two
  4. Gratted Cheese One cup, 200 grammes
  5. 4 g (1 tsp) SALT
  6. 4 g (1 tsp) of pepper
  7. 125 g (1 cup) of flour
  8. Baking Powder  5 g (one teaspoon

Directions:

  1. Place two eggs in a bowl, season with salt and pepper, and whisk.
  2. Add the grated zucchini to the bowl.
  3. Add the shredded cheese and diced red pepper.
  4. Add the flour and baking powder after mixing.
  5.  Thoroughly combine and transfer to a muffin pan.
  6. Bake for 25 minutes at 180°C. Assist.

For Air fryer:

  1. Set the air fryer’s temperature to 400°F, or 200°C.
  2. Muffins are air-fried for four minutes at 400°F/200°C.
  3. Avoid opening the air fryer once the cooking time has elapsed. After lowering the temperature to 320°F/160°C, air fried the cake for a further 14–16 minutes, or until a toothpick or cake tester comes out clean.
  4. After taking the muffins out of the air fryer, place them on a cooling rack to cool.

Notes :

Warm the muffins in the microwave or serve them at room temperature.

Storage Ideas for Zucchini Muffins

The zucchini bread muffins can be kept for up to five days at room temperature in an airtight container. Alternatively, you might wrap each one separately in plastic wrap.

Tips for Making Zucchini Bread Muffins

Because they are loaded with vegetables, these muffins are nutritious. They are therefore ideal for toddlers!

  • Any other cheese, such as feta, cheddar, or even ricotta, will work.
  • A mixture made with ¾ cup flour, ½ cup sugar, ¼ tsp baking powder, baking soda, ground cinnamon, and salt, one egg, ¼ cup canola oil, one cup grated zucchini, ½ cup walnuts, and ¼ cup cranberries or currants can also be used to make sweet zucchini muffins. You can also add chocolate chips, dried banana chips, lemon extract, or even a chocolate drizzle to this batter.
  • Mix the liquid ingredients (1/4 cup melted coconut oil, ¼ cup coconut sugar, ¼ cup maple syrup, 1 ½ egg replacements, 1 tsp vanilla extract) with the dry ingredients (2 cups oat flour, ½ tsp baking soda, 1 tsp baking powder, 1 tsp ground cinnamon, and ¼ tsp salt) to make a vegan and gluten-free muffin. Add one cup of vegan chocolate chips and one cup of grated zucchini.
  • Use a kitchen towel to drain out the extra water from the grated zucchini for best results!
  • Measure out scoops using an ice cream scoop to ensure muffins are precisely the right size.

Recipe for Zucchini Muffins:

Grate the zucchini first, and then mix it with the other ingredients to make a batter. Fill muffin liners with batter, then bake for golden brown. Present and savour!

Equipment:

Blood Orange Loaf Cake

A great recipe that really highlights blood oranges is this Blood Orange Loaf Cake. The lovely citrus flavour appears in the cake, syrup, zest, and topping. This exquisite cake is sure to wow!

Cake Ingredients:

  1. ½ cup cake flour
  2. ½ cup flour for all purposes
  3. One tsp baking powder
  4. One-half teaspoon of baking soda
  5. Half a teaspoon of salt
  6. 1 cup plus 2 tablespoons of powdered sugar
  7. Four substantial eggs, room temperature
  8. Grated blood orange zest, 2 TBSP
  9. Freshly squeezed blood orange juice, two tablespoons
  10. Two sticks (1 cup) of melted, unsalted butter
  11. ¼ cup of Greek yoghurt, plain
  12. One tsp vanilla essence

Syrup:

  1. 3 TBSP granulated sugar
  2. 3 TBSP freshly squeezed blood orange juice
  3. Candied orange slices
  4. 1 blood orange, preferably organic
  5. ½ cup granulated sugar
  6. ½ cup water

Glaze:

  1. 1 cup confectioners’ sugar
  2. 2-3 TBSP freshly squeezed blood orange juice

Guidelines:

  1. Prepare the cake: Start the oven at 350 degrees Fahrenheit. Grease a normal 9″ x 5″ loaf pan generously, then set it aside. Mix the flours, baking soda, baking powder, and salt in a big bowl. Put aside.
  2. Mix the sugar, eggs, orange zest, and orange juice in a large basin or the bowl of a stand mixer fitted with the paddle attachment. Mix on medium speed for two to three minutes, or until thoroughly combined. Melt the butter and add it while the mixer is on low. The dry ingredients should then be added gradually until just mixed. Once combined, add the vanilla and Greek yoghurt. Don’t overmix; instead, add the remaining dry ingredients until everything just comes together.
  3. After transferring the batter to the loaf pan that you have prepared, bake it for 20 minutes in a preheated oven. After rotating the pan, reduce the oven’s temperature to 325 degrees Fahrenheit and continue baking for a further 30 to 35 minutes, or until a toothpick inserted in the centre comes out clean.
  4. Take the pan out of the oven and let it cool for at least ten to fifteen minutes (I can tell you from experience that if you skip this step, your loaf won’t hold together and you’ll end up with a huge mess!). After that, take the cake out of the pan and let it cool fully on a wire rack.
  5. To prepare the syrup, place the sugar and orange juice in a glass measuring cup or bowl that is safe to microwave for 45 seconds, or until the sugar is completely dissolved. When you’re ready to assemble, set the syrup aside.
  6. To prepare the candied orange slices, wash your blood orange well and let it air dry. Cut the orange in half width-wise, cutting through the fruit’s “equator” with a paring knife. Slice the orange extremely thinly with a serrated knife. Ensure that all seeds are removed.
  7. Heat the water and sugar in a medium saucepan over medium-high heat until the mixture bubbles. Make sure the orange slices do not overlap by adding them in a single layer. After reducing the heat to medium low, simmer the oranges for ten minutes. After 10 more minutes of simmering, flip them (tongs come in handy here).
  8. After removing the orange slices, arrange them on a wire rack that is placed on waxed or parchment paper.
  9. Prepare the glaze: Blend the juice and powdered sugar until the mixture is thick enough to pour or spread, without being too thin. If necessary, add extra juice or powdered sugar.
  10. Put the cake together: After the cake has completely cooled, use a toothpick to poke holes all over the top. Over the cake’s top, pour the syrup. Using a spatula, evenly distribute the glaze over the cake. Place the candied orange slices on top after that. Let the glaze set up before cutting and serving.
  11. Cake can keep for approximately four to five days at room temperature if stored in an airtight container.

Recipe By: Mandy recipe box


Pineapple Cake Bars

Pineapple Cake Bars

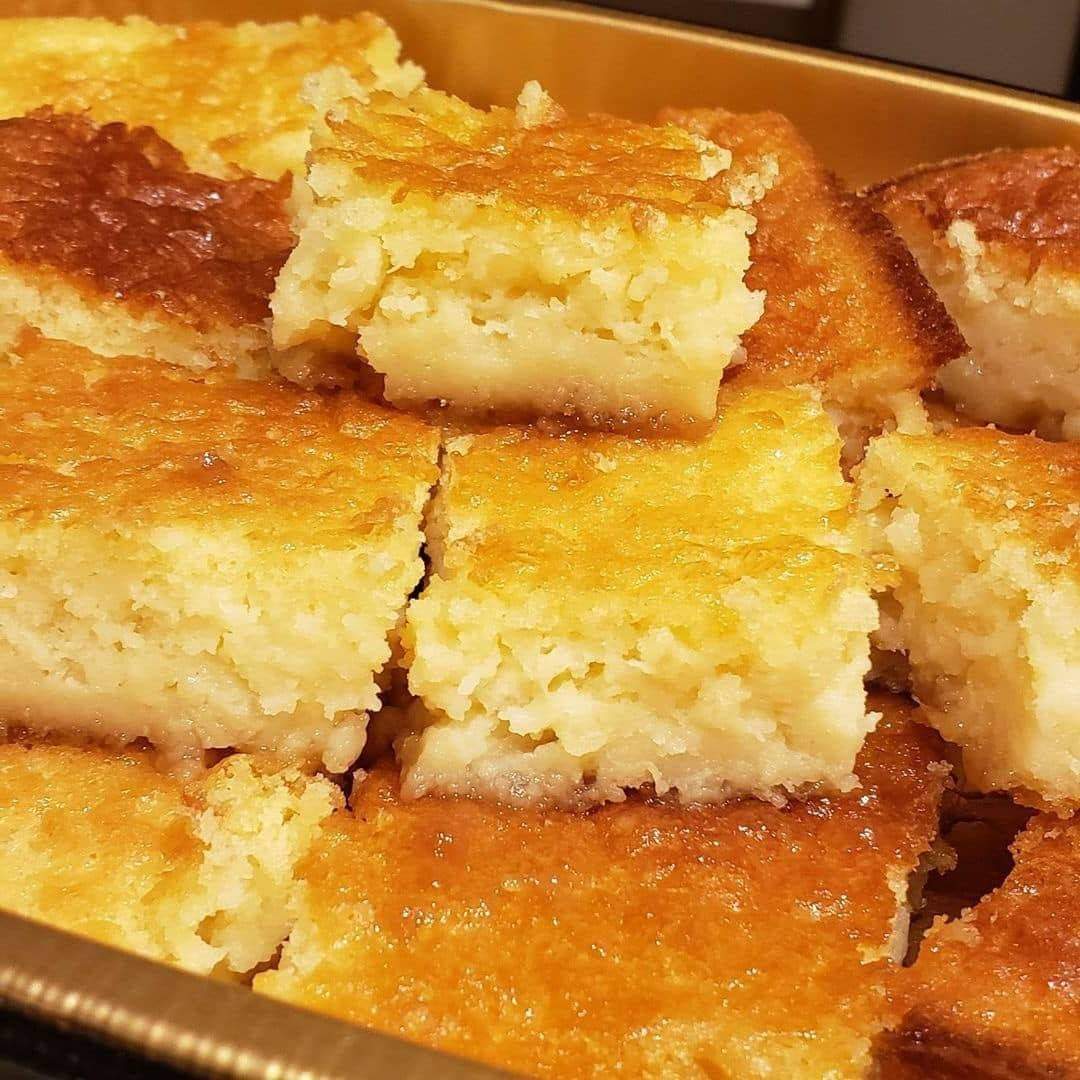
What a cheerful dessert these pineapple bars are! They are the ideal treat for spring and summer, packed full of pineapple pieces.

Ingredients:

Filling of Pineapples

  1. two cups of crushed pineapple in a can (with juice)
  2. Half a cup of sugar
  3. Cornflour, two teaspoons

for the cake base and topping

  1. Two cups of all-purpose flour
  2. Half a cup of sugar
  3. One-half teaspoon of baking soda
  4. One cup of cold, unsalted butter that has been sliced
  5. Two big eggs
  6. One tsp vanilla essence
  7. ½ cup of optionally shredded coconut
  8. ½ cup of optionally chopped pecans or walnuts

Guidelines:

Preheat the oven and get the pan ready.

  1. Set the oven temperature to 350°F (175°C).
  2. Line a 9 x 13-inch baking pan with parchment paper or grease it.

Prepare the Pineapple Filling.

  1. Put the crushed pineapple, juice, sugar, and cornflour into a saucepan.
  2. Stirring regularly, cook over medium heat until the mixture thickens and turns clear.
  3. Remove from the heat and leave to cool once thickened.

Prepare the cake’s topping and base.

  1. Mix the flour, sugar, baking soda, and salt in a sizable bowl.
  2. Using a pastry cutter or fork, cut in the cold butter until the mixture is the consistency of coarse crumbs.
  3. Beat the eggs and vanilla essence in a small bowl, and then add into the flour mixture just until incorporated. There will be crumbly dough.

Put the Bars Together

  1. To create a base, evenly press half of the crumbly dough into the pan that has been prepared.
  2. Cover the bottom with the cooled pineapple filling.
  3. Sprinkle nuts and coconut on top of the pineapple layer, if using.
  4. Over the pineapple layer, crumble the leftover dough.

Bake:

  1. Bake for around 30 to 35 minutes, or until the top is beginning to turn a light golden colour.
  2. Take out of the oven and let cool in the pan entirely.
  3. Cut into bars and present. You can serve these bars cold or room temperature.
  4. Savour the Pineapple Cake Bars

you Make it yourself! They are a delicious treat that have a creamy, buttery crust with the tropical flavour of pineapple.

Creamy Lemon Bars

Creamy Lemon Bars

This dessert is the epitome of light and refreshing… Buttery shortbread crust, bright and tangy lemon filling, and creamy, homemade lemon squares! These lemon bars are so simple that anyone can make them!

Ingredients for Creamy Lemon Bars

  1. 4 tbsp (1/2 stick) for the crust Melted and chilled unsalted butter plus enough for the pan
  2. 1/4 cup, or around 24 squares Crumbled Graham Cracker
  3. one-fourth cup sugar

Regarding the Filling

  1. Two enormous yolks from an egg
  2. One can, or fourteen ounces sweetened condensed milk
  3. I used 3 lemons to get 1/2 cup of fresh lemon juice

Instructions for Creamy Lemon Bars

  • Set the oven’s temperature to 350. Melt the butter and brush an 8-inch square baking dish with it. Line the bottom with parchment paper, allowing two inches to overhang.
  • Grind the Graham Cracker squares finely in a food processor. Next, mix in butter and sugar by blending them in. Fill prepared pan with mixture, pressing it into bottom and 1 inch up sides. Bake for 8 to 12 minutes, or until lightly browned. Allow crust to cool for thirty minutes.
  • To prepare the filling, beat the egg yolks and condensed milk together in a sizable bowl. Whisk in the lemon juice until smooth. Scatter filling over chilled crust, being careful to cover the edges.
  • Bake for about 15 minutes, or until set. Chill in the pan on the rack for at least an hour before serving. Extricate from pan using overhanging parchment paper, then move to a chopping board. Cut into 16 squares using a serrated knife, making sure to wipe the knife after each cut with a moist dish towel.

PISTACHIO PINEAPPLE CAKE

PISTACHIO PINEAPPLE CAKE

I simply adore simple dessert recipes that begin with cake mixes. Making this pistachio cake is so easy that nobody would ever suspect that it begins with a package of instant pudding and a cake mix.

Ingredients for Pistachio and Pineapple Cake:

  1. One package (15.25 ounces) Mixture of yellow cake
  2. One box, weighing 3.4 ounces Pistachio pudding mix in a flash
  3. half a cup of vegetable or canola oil
  4. Three big eggs
  5. One can (20 ounces) pineapple chunks (do not drain)
  6. For the Frosting of Pistachio Pudding:
  7. Three-quarter cup of nonfat milk
  8. Half a cup of heavy cream
  9. One box, weighing 3.4 ounces Pistachio pudding mix in a flash
  10. Eight ounces Thawed Cool Whip
  11. Pistachios, chopped (optional) as a topping

Guidelines

  • Set oven temperature to 350°F. Apply cooking spray to a 9 x 13 baking pan.
  • Mix the cake mix, instant pudding mix, canola oil, eggs, and crushed pineapple (with juice) in a large mixing basin or the bowl of a stand mixer. Using a handheld mixer, mix on medium-high speed for approximately two minutes, or until thoroughly mixed.
  • Evenly distribute the batter after pouring it into the baking dish that has been ready.
  • A toothpick put into the center of the cake should come out clean after 35 to 40 minutes of baking.
  • On a cooling rack, let the cake cool fully.
  • Hold off on frosting the cake with pistachios until it has cooled fully. Combine the heavy cream and half-and-half milk in a mixing dish. Whisk in the until thoroughly blended, about one to two minutes, using the instant pistachio pudding mix. Give it five-minute rest to thicken.
  • Add the thawed Cool Whip and stir until thoroughly combined. Use the pistachio pudding icing to cover the cake. Before serving, place cover or piece of tin foil over the pan and refrigerate for four to six hours or overnight.
  • NoteRefrigerating the cake before serving is not necessary, although it is advised for optimal flavor and texture.
  • For an even more pleasant treat, the icing gets thicker and the cake absorbs all the flavorful goodness!

New York Cheesecake

New York Cheesecake

The greatest cheesecake is this traditional New York cheesecake. It is really simple to create, and unlike most cheesecake recipes, it doesn’t require a water bath. It is dense, rich, and creamy. It really is among the greatest cheesecakes I’ve ever had! This is how you get perfection.

INGREDIENTS

Crust

  1. One and a half cups (150g) of finely ground vanilla wafer crumbs, digestive biscuits, or graham cracker crumbs (pulse in a food processor).
  2. Two teaspoons of sugar, granulated
  3. Four and a half tablespoons (65g) of melted unsalted butter

Stuffing

  1. Four cups (900g) of room-temperature full-fat cream cheese
  2. Scoop and ⅛ cup (225g) powdered sugar
  3. two tsp cornstarch
  4. Four sizable eggs and one yolk, room temperature
  5. ½ cup, or 120 milliliters thick cream
  6. A teaspoon and a half of pure vanilla extract
  7. grated zest from one lemon one small spoon

Guidelines

Cook the crust.

  • Heat the oven to 350°F, or 180°C. Grease the 9-inch springform pan from bottom to side.
  • Crumbs, 2T sugar, and melted butter should all be combined and moistened in a medium-sized basin. Evenly press mixture into bottom of prepared pan to create crumb layer. Roast for 8 to 9 minutes, or until well-browned. Let cool fully on a wire cooling rack. Meanwhile, get the filling ready.

Cheesecake Filling

  • Raise the oven’s setting to 425°F/220°C.
  • Beat the cream cheese on medium-low speed for one to two minutes, or until it is smooth and lump-free, using an electric mixer fitted with the paddle attachment or a handheld mixer. Beat in sugar until well combined. Using a rubber spatula, scrape down the sides and bottom of the bowl as needed. Stir in cornstarch until well combined. When the eggs are added, beat them in completely. Beat in the cream, vanilla essence, and zest from the lemon until smooth and well mixed. Evenly distribute batter over chilled crust after pouring
  • After 10 minutes of baking, reduce the oven temperature to 225°F/110°C and bake the cake for an additional 60 minutes, or until the sides are set but the center is still slightly jiggly. Some people have commented that this was not a long enough baking time. This is something I’ve baked a lot, and it works. You can add an extra 10 to 20 minutes to baking times if you’re not sure if your oven is correct or if you generally bake for longer than what recipes ask for (but try not to open the oven door too frequently). It’s okay if your cheesecake doesn’t get golden brown around the edges; simply follow the directions 🙂. After turning off the oven, partially or fully open the door to let cool air in, and let the cake for sixty minutes in the oven. This will keep the cake from cracking and keep its creamy texture. Once the cake has cooled to room temperature, move it to a wire rack. Place plastic wrap over the cake and place it in the fridge for a minimum of 12 hours or overnight.
  • Refrigerated cheesecake can last for up to five days.

Mango Float

Mango Float

Layers of graham crackers, sweetened whipped cream, and luscious mango make up this Filipino icebox delicacy. Everything should be chilled, including the cream, condensed milk, mixing bowl, glass dish, and mixer beaters. This will speed up the cream whipping process and ensure that everything fits together perfectly when assembled. Before serving, thaw the float or serve it slightly frozen. Enjoy with your preferred tea, coffee, wine, or cocktail for dessert!

INGREDIENTS

  1. Five ripe but firm mangoes
  2. Four cups (960 mL) of heavy cream or chilled canned all-purpose cream
  3. One can of condensed milk, kept cold all night
  4. two tsp of essence from vanilla
  5. ½ teaspoon kosher salt
  6. 21 crackers graham cracker, plus more, crushed, for topping

procedure

  • Remove the peel off the mangoes and trim the lobes as close to the pit as you can. Slice ¹⁄₁₆ of an inch (15 mm) thick on each side of the mango lobes, being careful to keep the slices whole, and place them on a tray or plate. Before assembling, place a lid on and keep chilled. Chop the remaining mango into cubes measuring ½ inch (1.24 cm). When ready to assemble, transfer to a bowl, cover, and chill.
  1. In a large, refrigerated bowl, add 2 cups of cream. Beat on medium-high speed for 3–5 minutes, or until firm peaks form, using an electric hand mixer. Add the remaining two cups of cream and beat for an additional three to five minutes, or until stiff peaks form.
  • After adding half of the condensed milk, beat it in completely. After adding the salt, vanilla, and remaining condensed milk, beat for 5-7 minutes, or until stiff peaks form. Finally, use a rubber spatula to whisk the mixture.
  • Press parchment paper into a refrigerated 7 x 11 (17 x 27 cm) glass dish, allowing overhang on all sides.
  • Graham crackers should be layered one layer deep on the bottom of the plate, broken to fill in spaces as needed. Evenly cover the graham crackers with 2-3 cups (480-720 ml) of the whipped cream mixture, ensuring that it reaches the corners and borders of the dish. Add ½ of the diced mango on top. To create a second layer, repeat. In the last layer, set up the Place the chopped mango over graham crackers and cover with 2-3 cups of whipped cream. Decoratively arrange the thinly sliced mango on top. Break up the Graham Crackers and scatter them about the float’s perimeter.
  • Refrigerate the mango float for four to six hours, or until the cream solidifies and the graham crackers become pliable and absorb some liquid. Cover the float with plastic wrap. Place the float in the freezer for a duration of eight hours or overnight.
  • Take the float out of the freezer and pull it out of the dish using the parchment paper. Thaw for five to ten minutes prior to slicing.
  • Accompany with your preferred dessert wine, drink, .tea, or coffee.


Cheeseburger Quiche

Cheeseburger Quiche

Cheeseburger Quiche: Indeed, this is a delectable crustless quiche that combines all the best parts of a cheeseburger, according to Slimming World. Make this if you make anything at all!

INGREDIENTS

  1. 350g (12.5oz) of exceptionally lean minced beef
  2. A quarter-tsp sea salt
  3. Use passata or ¾ cup (180ml) of smashed tomatoes.
  4. Two tablespoons of tomato paste (purée); if passata is being used, use three to four tablespoons.
  5. One tablespoon of sweetener in granule form
  6. One-half tsp onion powder
  7. A tsp of powdered garlic
  8. One teaspoon each of black pepper, salt, and paprika
  9. One-teaspooned Worcestershire sauce
  10. One large onion, cut into slices
  11. One cup (225g) of cottage cheese without fat
  12. Four big eggs
  13. 120g (4 oz) of Red Leicester cooking oil spray or cheddar cheese

Guidelines

  • Set oven temperature to 200°C or 400°F (gas mark 6).
  • Combine the sea salt and beef mince in a big bowl and stir to blend.
  • Spray oil can be used to grease a quiche plate. Then, add the meat mixture to the dish and press it down firmly to create a thin layer that covers the bottom.
  • Put in the oven and bake for ten minutes or so, or until just starting to brown. When cooked, the beef mixture will shrink on the base; nevertheless, this is to be expected since more layers will be added to cover it. Clean up any extra fluids that come out with a kitchen towel. Put aside.
  • Apply some spray oil to a frying pan, then add the onions and cook until they become tender and brown.
  • In a bowl, combine the crushed tomatoes, Worcestershire sauce, paprika, garlic powder, onion powder, sweetener, and salt and pepper.
  • In a blender, combine the cottage cheese, eggs, and half of the cheddar cheese; blend until smooth.
  • You can now begin stacking the subsequent levels.
  • Spread the tomato mixture over the meat layer with a spatula.
  • Pour in the cottage cheese mixture after adding the softened onions.
  • Sprinkle the remaining cheddar cheese on top.
  • Return to the oven and continue baking for about 30 minutes, or until the mixture is set and the cheese is melted and has a light golden hue on top.
  • Let it stand for ten minutes before to slicing.
  • Enjoy and pair with a side salad!

No Bake Lemon Cheesecake

No Bake Lemon Cheesecake

An very creamy and silky prepared without the use of artificial flavors, this No Bake Lemon Cheesecake is prepared using lemon zest and juice! It can withstand being chopped because of its firmness.

INGREDIENTS

Crust:

  1. ½ cup melted butter;
  2. 2 ¼ cups graham cracker crumbs (270g);

Filling:

  1. 3 packages (24 oz or 750g total) of cream cheese whole fat
  2. 1 ½ cups powdered icing sugar
  3. cup heavy whipping cream (30-35% fat ONLY)
  4. 3 tablespoons freshly squeezed lemon juice (approximately 1 lemon)
  5. zest of 2 lemons (or just 1 if you prefer a softer flavor)
  6. 1 teaspoon vanilla extract

Guidelines

  • Using parchment paper to line a 9-inch Springform pan is optional, but it facilitates simple removal when it’s set.
  • Press the butter and graham cracker crumbs mixture into the pan that has been prepared, going approximately 1/2″ up the sides.
  • Using an electric mixer set to medium speed, whip the cream cheese in a large bowl until it becomes smooth.
  • Beat in the vanilla, lemon zest, juice, and powdered sugar until smooth.
  • Beat in the vanilla, lemon zest, juice, and powdered sugar until smooth.
  • Beat the heavy cream on high speed in a another medium-sized bowl until firm peaks form. Using a spatula, carefully fold the whipped cream and cream cheese together, being cautious not to deflate the cream.
  • If you want the filling to be sweeter or more lemony, taste it and add extra sugar or lemon zest.
  • After pouring filling onto crust, cover and chill for at least 6 hours, or better yet, overnight! Accompany with confectionery cream.

NOTE: Since the creation of this film, the recipe has undergone significant modifications.