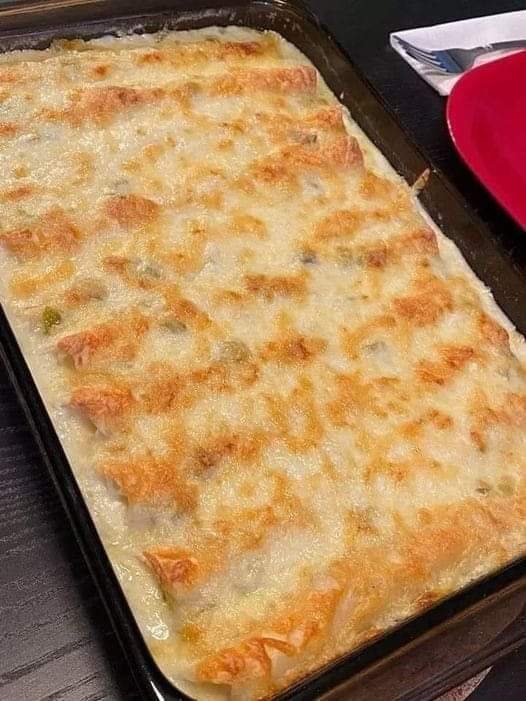
Easy Loaded Creamy Shrimp Baked Potato Recipe
When it comes to baking potatoes, I always make sure to serve my family the best and tastiest version I can find—and by best, I mean something like this recipe from Whip It Up With Jay on YouTube! This dish is so delicious that you won’t be able to eat it all in a matter of minutes once you put it on the table. If you would like to try this dish, please read the directions below and watch the tutorial video while you work.
INGREDIENTS
- Two big russet potatoes
- 1.5 pounds of big shrimp
- One teaspoon of your preferred seasoning or “slap your mama once” seasoning
- One teaspoon One teaspoon full seasoning
- One-half teaspoon of parsley
- 1/2 teaspoon ground black pepper
- One teaspoon of paprika
Rich Sauce
- One tablespoon of garlic paste
- One cup of heavy cream
- ¼ cup parmesan cheese and one cup Colby Jack cheese
- One teaspoon full seasoning
- 1/2 teaspoon ground black pepper
- 1 tsp of seasoned cilantro
- One teaspoon of paprika
- ½ little onion
- bell peppers
- Unsalted butter
- Parsley
INSTRUCTIONS
Step 1
- Adjust the oven temperature to 400°F and get a baking pan ready. Make indentations all over the potatoes with a fork, then cover them with a generous amount of oil, rubbing it in until fully covered, and then toss in some salt. Place the potatoes on a baking sheet, cover them nicely with foil, and bake in a preheated oven for approximately one hour, or until fork tender (the larger the the potato, the longer cooking is required). After the shrimp have been deveined and their skin removed, put them in a big bowl and pour some oil over them.
Step Two
- After giving them a thorough massage or tossing them to coat, season them thoroughly using your preferred brand of seasoning and the entire amount of seasoning. Put a pan on the stove over medium-high heat, add a little oil, and let it get hot before adding the shrimp with seasoning. Make sure they are well charred on all sides by tossing them every so often and letting them cook for 4 to 5 minutes.
Step Three
- After the shrimp are cooked, remove from the pan and place the butter in it. Melt the butter and add the diced onions and bell peppers after that. Toss them well and cook for 4 minutes or until they become tender. Add the creole seasoning and all of the seasonings, stir well, and pour in the heavy cream. Reduce the heat to medium. After giving them a thorough swirl, add the Colby Jack and Parmesan cheeses and stir until they melt. After removing the sauce from the pan and turning off the heat, leave it aside.
Step Four
- As demonstrated in the video, cut off the potatoes’ tops and scrape off the insides before putting them in a big dish. Add the cheese and a small amount of the cream sauce to the bowl of mashed potatoes and stir to incorporate. Season with salt and pepper. Evenly load the potatoes with the mixture, top with a little more cheese, and then gently arrange the shrimp on top. Re-place them in the baking dish, pour additional sauce over them, and bake for a further ten minutes. Present and savor!