The Carrot Cleanse: A Refreshing Path to Vitality ‎‎

The Carrot Cleanse: A Refreshing Path to Vitality

A Natural Flush for Your System

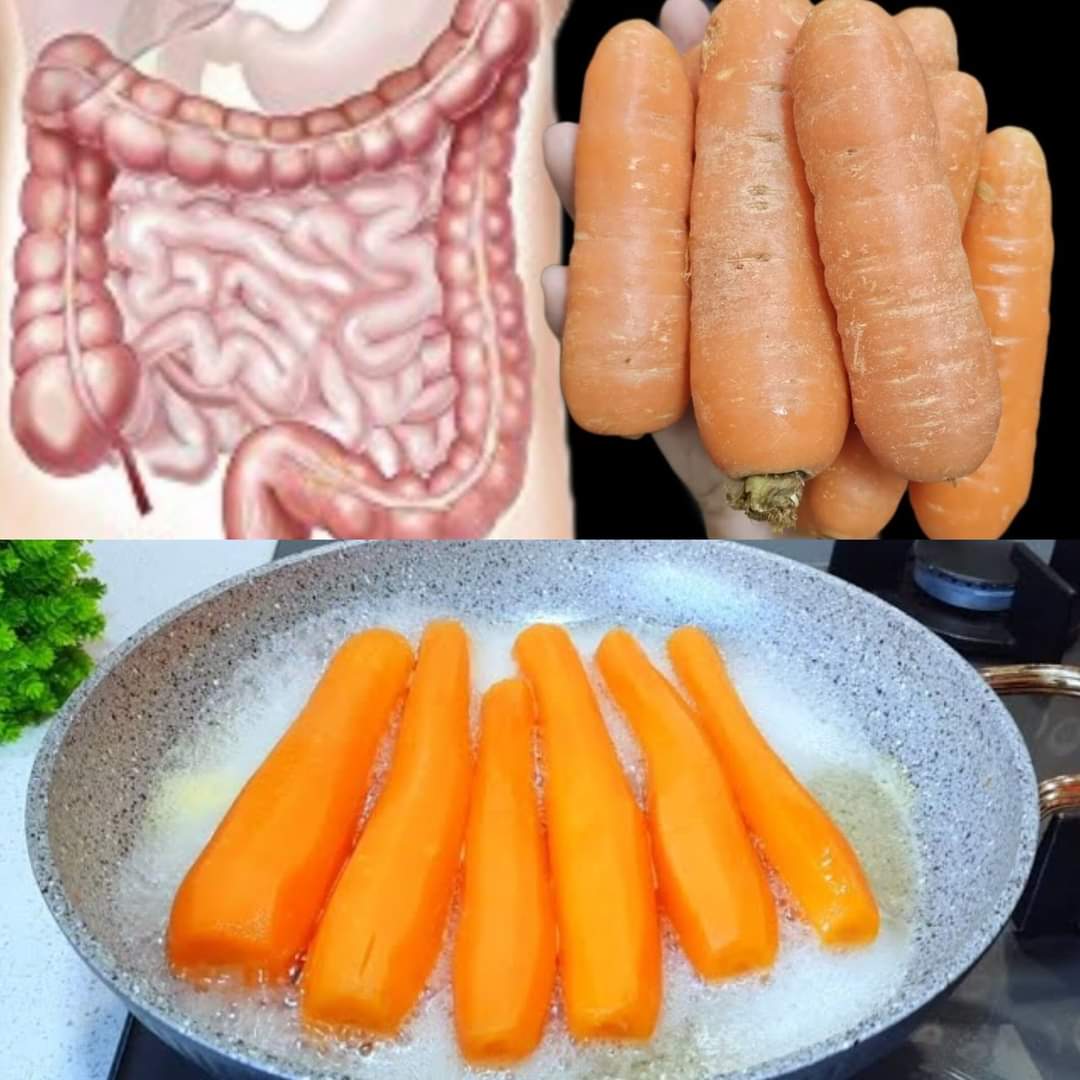
Rich in fiber, antioxidants, and other nutrients, carrots are a veritable gold mine for digestive health. Basically, you’re aiding your liver and intestines in their removal of undesirable materials when you eat more carrots. The fiber in carrots gives your stool more volume, promoting regular bowel motions and intestinal wall cleaning. It removes anything that doesn’t belong inside of you like a soft, natural brush.

With Every Bite, Liver Love

The minerals in carrots are extremely beneficial to the liver, which is your body’s detoxifying powerhouse. Carrots’ orange pigment, beta-carotene, is transformed by the body into vitamin A, which promotes liver function. This procedure can help your liver get the much-needed rest and rejuvenation it needs by maximizing its capacity to filter and eliminate pollutants from your blood.

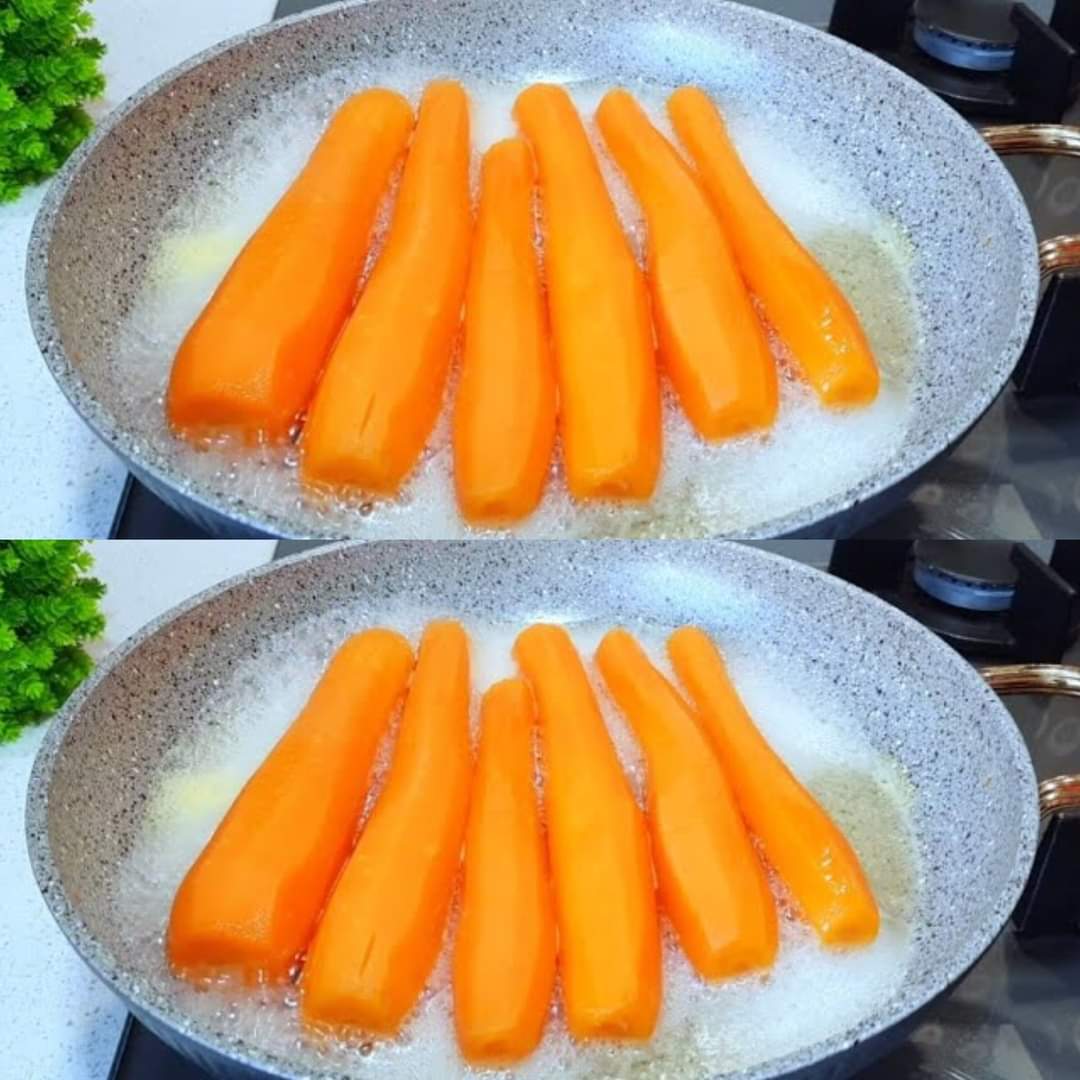
How to Accept the Carrot Fast

Using a carrot-centric strategy for three days doesn’t have to be difficult or tedious. Have a refreshing carrot and ginger drink to start your day. Crunchy carrot sticks as a snack, a filling lunch of carrot and lentil soup, and a satisfying dinner of roasted carrot and beetroot salad await you. When it comes to making these nutrient-dense recipes, the secret is diversity and ingenuity.

Past the Purge

Although your body’s cleansing process might be accelerated by focusing on carrots for a brief period of time, it’s crucial to continue eating a balanced diet afterward. Because of their many health advantages, carrots should continue to be a staple food in addition to their cleansing properties. Maintaining a healthy balance of whole grains, lean proteins, fruits, and vegetables will support your body’s natural detoxifying processes.

A Celebration of Rejuvenation

Thus, let’s embrace the modest carrot in our pursuit of vitality and wellness. A three-day commitment alone can initiate a restored sense of wellbeing, demonstrating that often the most basic components can have the most significant results. Together, let’s raise our carrot sticks—or juice glasses—to a more energetic, well-being!

Carrots: The Boiling Point of Delicious Simplicity

Carrots: The Boiling Point of Delicious Simplicity Who would have thought that bringing carrots to a boil could lead to such a gourmet breakthrough? This unassuming technique, which is frequently disregarded, is reappearing with great fanfare, demonstrating that sometimes the most flavorful combinations originate from simplicity. If you’ve just now come to appreciate the wonders of boiling carrots at home, you’re opening yourself up to a world of tasty and simple cuisine as well as abundant health advantages and sustainable living.

A Splash of Color and Nutrition

Carrots are more than simply a visual treat because of their vivid orange color. They are rich in beta-carotene, which our bodies process to produce vitamin A, which is necessary for healthy skin, eyesight, and immune systems. You’re cooking up a nutritional pot of gold when you put carrots in boiling water. What’s the best thing, then? Because so much of the vegetable’s inherent goodness is preserved, this approach makes it a healthy option for your regular meals.

The Joy of Home-Cooked Carrots

Making your own carrots brings a great sense of satisfaction. Maybe it’s the delicious simplicity of the technique itself, or maybe it’s the way they change in boiling water, becoming sweet and soft. To ensure that every bite of carrot soup is precisely to your taste, you may control the texture and spice by boiling them at home instead of buying pre-cooked or processed alternatives from the store.

Savoring the Flavor.

The variety of boiling carrots is what really makes them beautiful. Their inherent sweetness and mild crunch give depth and complexity to any meal, whether they are added to soups and stews, served as a side dish, or mashed with a little butter and herbs. And for those who enjoy a little ingenuity, how about incorporating boiling carrots into a smooth puree for sauces or dips? The possibilities are endless.

A Sustainable

Choice

Not only is boiling carrots at home healthy for your taste buds, but it’s also a step toward more sustainable eating practices. Making your own vegetable preparations lowers waste, supports a more environmentally responsible lifestyle, and lessens the need for packaged or processed foods.

Embracing the Simplicity

Thus, keep this in mind the next time you have an abundance of carrots: simply place them in boiling water. Cooking is only one aspect of this simple gesture; it’s also a celebration of natural flavors, a nod to eating healthfully, and a demonstration of the happiness that comes from cooking meals at home. Who would have thought that something so simple could be so fulfilling?

air fryer cheese fries

air fryer cheese fries One of the easiest recipes you can prepare in your air fryer is Air Fryer Cheese Fries, which are really delicious.

My family adores these to pieces. They’re also terrific quick lunch or snack. These are made with just two ingredients, which is the greatest part—you can addsour cream, sliced olives, or anything else you like. They are very adaptable dish. These days, you can have cheese fries for almost nothing by using package of frozen french fries and some cheese instead of paying premium for them at restaurant. Fantastic!

By fork to spoon

Expert Advice for the Greatest Air Fryer Cheese Fries

  • Any air fryer, such as the Ninja Foodi, Instant Pot Vortex, Instant Pot Crisp Lid, or even the Mealthy Food Lid, can be used with this recipe.
  • To ensure consistent cooking, shake the basket a few times while it’s cooking.
  • Any kind of shredded cheese will do, but shred it yourself for optimal results, as the cellulose in the packaged cheese keeps some of the cheese from melting all the way through.
  • While the French fries are heating in the Air Fryer, you can add bacon bits or fry up a batch if you’re pressed for time.
  • To make delicious Air Fryer Loaded French fries, add any of your preferred toppings. The recipe won’t change.

Components

  1. Frozen french fries, 16 ounces
  2. One cup of shredded cheddar cheese
  3. One tsp kosher salt, or additional to taste

Guidelines

  • Place the french fries in the air fryer basket in a single layer to begin. You might need to work on two batches.
  • For 12 to 14 minutes, set the temperature of your air fryer to 400 degrees Fahrenheit. Give your basket a shake every two minutes.
  • Add the cheese and continue air-frying for 45 seconds once the fries have begun to brown.
  • Arrange, present, and savor!


air fryer easy poutine french fries

air fryer easy poutine french fries

It’s wonderful, Air Fryer Easy Poutine French Fries. You can have a true Canadian meal, complete with cheese curds, in a matter of minutes.

How to Keep Easy Poutine French Fries in an Air Fryer

  • You should keep the French fries and any leftover poutine apart in storage. The French fries stay dry in this manner.
  • Thus, put your French fries in one container and your leftover brown gravy in another.
  • Re-add the French fries to the air fryer basket and warm the Poutine in the microwave or on the stove.

Poutine: What is it?

  • When you order poutine at any Canadian restaurant, you’ll quickly discover that what you get is a meal of French fries topped with cheese curds and brown gravy.
  • The English word pudding is where the name poutine originates. Because when you put it on a platter with French fries, it looks like a pudding dish.
  • Poutine is available in a variety of ways. Some of the more well-liked variants after you get north are:
  • Sweet potato fries, mushroom gravy, , sliced avocados, and duck

Components

  1. Two big potatoes
  2. Four tablespoons of unsalted butter
  3. two tsp cornstarch
  4. Two tablespoons of flour (all-purpose)
  5. Half a teaspoon of black pepper, or more to taste
  6. A single cup of beef stock
  7. sixty-five-degree white cheddar curds

Guidelines

  • Cut potatoes into fries and put them in the basket of an air fryer. Apply a frying oil spray and use the air fryer setting for 15 minutes at 370 degrees Fahrenheit, shaking the basket several times while cooking. Depending on the type of air fryer you have, you might need to cook two batches.
  • Melt the butter in a saucepan over medium-high heat and pour in the beef stock. When the broth reaches a gentle boil, whisk in the pepper. One spoonful at a time, add the cornstarch and flour, stirring to create the desired thickness of gravy.
  • Take the fries out of the air fryer and add gravy and cheese curds on top.
  • Arrange, present, and savor!

air fryer black pepper steak kabob

air fryer black pepper steak kabob

Try this recipe for an Air Fryer Black Pepper Steak Kabob if you’re searching for a healthier way to cook your steak. It has exactly the proper amount of spice and is quick and simple to prepare. You’ll adore that this dish tastes great without the requirement for butter or spice!

What Are Kabobs of Steak?

If you’re looking for a quick and simple dinner, this is the recipe for you. Fortunately, kabobs are just what we have been lacking! Various meats are layered over fruits or vegetables to add an additional flavorful burst to their rich flavors.

Components

Kebabs:

  1. 1 pound of 1-inch-thick slices of sirloin steak
  2. One large bell pepper, cut into pieces measuring one inch
  3. one huge red onion, Chop into pieces that are one inch in size.

Marinade:

  1. One teaspoon of garlic and one teaspoon
  2. One-fourth cup soy sauce
  3. Two tsp olive oil
  4. Two teaspoons vinegar from red wine
  5. One tsp black pepper
  6. One tsp freshly shredded ginger

Guidelines

  • Cut your meat into 1-inch pieces to begin.
  • Next, roughly chop your bell pepper and red onion into 1-inch pieces.
  • Combine the grated ginger, olive oil, red wine vinegar, minced garlic, black pepper, and soy sauce in a small bowl. Blend thoroughly.
  • After the marinade has been poured, put the steak, bell pepper, and red onion in a big plastic bag. Thread the steak, red onions, and bell pepper through the skewers after sealing and putting in the fridge to marinate for at least a few hours.
  • Put in your air fryer and cook for five minutes at 350 degrees. After five minutes, flip it over and continue cooking for five more minutes. Prior to plating, make sure your steak is done.
  • Arrange, present, and savor!

air fryer beef kabobs

air fryer beef kabobs

Are you ready for a tasty and simple air fryer recipe? These kabobs of beef are ideal for an easy evening supper. The best part is that you can throw the skewers in the dishwasher and almost never have to clean up! Serve with quinoa or rice and a green vegetable for a filling and healthful supper.

Changes

  • The versatility of this dish is one of its best features. Any vegetable that is in season can be included, and it will still turn out beautifully. Among my top picks for adaptations are:
  • Cherry tomatoes, yellow squash, zucchini, red bell peppers, and mushrooms
  • Add fresh fruit, such as pineapple, watermelon, pears, or apples, especially during the summer.
  • Alternate proteins such as shrimp, fish, chicken, steak, etc.
  • For a spicy touch, sprinkle some red pepper flakes on top.
  • Soy sauce can be substituted with Worcestershire sauce.
  • You can just prepare vegetable kabobs without the protein if you’re a vegetarian.

Components

Kabobs of steak:

  1. One-pound beef tenderloin,
  2. three tablespoons olive oil,
  3. and four minced garlic cloves
  4. One tsp black pepper
  5. three tsp of soy sauce
  6. Two bell peppers, medium
  7. One huge red onion

Sauce Teriyaki:

  1. half a cup of water
  2. two tsp cornstarch
  3. half a cup of soy sauce
  4. half a cup rice wine
  5. One tablespoon of sesame oil
  6. One-half tablespoon of hoisin sauce
  7. One tsp of ginger paste
  8. half a tablespoon of finely chopped garlic
  9. One tsp red pepper flakes
  10. half a teaspoon of pepper, black

Guidelines

  • In a medium-sized bowl, whisk together olive oil, soy sauce, pepper, and garlic cloves. Chop tenderloin into 1-inch segments. After adding the meat, marinade it for two hours.
  • Make the sauce teriyaki. Stir cornstarch into water until dissolved. Transfer cornstarch mixture to a saucepan and add other ingredients; heat over medium heat. Cook for about ten minutes, or until thickened.
  • Soak skewers of bamboo in water.
  • From the marinade, remove the tenderloin. Dice onions and peppers into large pieces. Alternately skewer meat, onions, and peppers
  • Set the air fryer to 390° for five minutes.
  • Put the steak kabobs in a single layer within the air fryer basket. Cook for ten minutes, turning halfway through.
  • Apply some teriyaki sauce to the steak. Serve with leftover and garnish with sesame seeds.

Air Fryer New York Strip Roast

Air Fryer New York Strip Roast

The ideal dish for a special occasion is Air Fryer New York Strip Roast. The roast’s liquids are preserved by the Air Fryer, making the meat succulent and tasty. Additionally, you can cook the roast at a higher temperature with the Air Fryer, giving the outside of the roast a gorgeous sear. Your visitors will be amazed by this dish and will want more.

The Greatest Air-Fried New York Strip Roast Advice

  • You need look no further than the New York strip roast for flavorful, juicy, and tender steak.
  • This cattle cut is prized for its superb marbling and rich flavor, which contribute to its ability to hold its flavor and moisture when cooked.
  • The strip roast is also comparatively lean, which makes it great option for anyone who are limiting their fat consumption.
  • You can cook the ideal New York strip roast in your air fryer by using the following advice.
  • To begin, liberally sprinkle the roast with salt and pepper.
  • To taste, you might also choose to add other herbs and spices.Roast the meat at a high temperature until it’s done to your preference. Cook for 4–5 minutes on each side for rare. Sear each side for 6–7 minutes for medium-rare. Cook for 8 to 9 minutes on each side for medium. Cook for 10 to 11 minutes on each side for well done.
  • Let the roast rest for a half hour to an hour or so before slicing and serving. Have fun!

INGREDIENTS

  1. One-pound New York Strip Roast steak
  2. One tsp olive oil
  3. 1/4 teaspoon black pepper
  4. and 1/2 teaspoon salt
  5. Two tablespoons of room temperature butter,
  6. made with lemon one tsp lemon juice
  7. One teaspoon chives and half
  8. a teaspoon lemon zest

Instructions:

  • LET THE MEATS REST FOR AT LEAST 30 MINUTES at room temperature.
  • As one of the few dishes I preheat the air fryer for, start by preheating the appliance for steak.
  • However, the meat will turn out better if you use the air fryer basket/oven for five minutes at 400 degrees Fahrenheit.
  • After that, coat the steak completely with butter or olive oil and season with salt and pepper.
  • After six minutes, turn the steaks over and continue to air fry for an additional six minutes.
  • Before slicing, give the steak at least five minutes to rest.
  • To prepare Lemon Butter, just combine the butter, zest, juice, and chives in a small mixing bowl. Either way, you can serve them.
  • Alternatively, I wrapped the butter with plastic wrap, and After rolling it into a log shape and freezing it, take off a few pieces for each serving

Sides For Steak

Side For Steak

These air fryer recipes are amazing if you’re looking for some excellent side dishes to go with your steak—whether it’s a T-bone, porterhouse, or ribeye!

Components

  1. Two pounds of chopped and peeled russet or Yukon gold potatoes
  2. Four tsp unsalted butter
  3. half a cup of milk
  4. To taste, add salt and pepper.
  5. Extra toppings at , chopped chives, and grated cheese

Guidelines

  • Turn the oven on to 375°F, or 190°C. Put the chopped potatoes in a big pot and pour cold water over them. After bringing to a boil over high heat, lower the heat to medium-low and simmer the potatoes until they are soft, about 15 minutes. After completely draining, add the potatoes back to the pot.
  • When the potatoes are in the pot, add the butter and milk. Mash the potatoes with a fork or potato masher until they are smooth and creamy.
  • To taste, add salt and pepper for seasoning. Spread out the mashed potatoes equally in a baking dish after transferring them there
  • . For extra flavor, top the mashed potatoes with  minced chives, or shredded cheese, if preferred.
  • After preheating the oven, place the baking dish inside and bake for 25 minutes, or until the potatoes are thoroughly roasted and the top is brown.
  • Before serving, take out of the oven and allow it cool for a few minutes. Savor your mouthwatering baked mashed potatoes as a cozy side dish to go with your preferred steak or any other main course!

Unleash the Power of Banana Peels

Unleash the Power of Banana Peels

Unleash the Power of Banana Peels: A Simple Trick for a Better Home and Garden

Ever ponder what to do with banana peels that frequently wind up in the trash? We do, however, have an unexpected fix for you! You can make something amazing with a water bottle and a few banana peels. Anyone can benefit from this simple and efficient trick, especially in the warmer months. Don’t worry though, it still functions great in the winter. Let us explain this special method in more detail.

The Hidden Benefits of Banana Peels

Banana peels contain amazing qualities that should never be overlooked, despite their seeming simplicity as garbage. Think about reusing them rather than throwing them away. Even though they might not smell the best, there are a number of uses for them.

Banana peels are frequently used as a natural plant fertiliser. Rich in vitamins and minerals, they offer vital elements that support the growth and well-being of plants. They also have antibacterial and anti-inflammatory qualities that are advantageous for personal hygiene and gardening. Banana peels have the surprising ability to relieve bug stings. Applying them to the injured region can help promote healing and provide immediate relief.

The Expert’s Guide to Banana Peels

Banana peels, as previously said, are an organic waste that is multipurpose and adaptable. They can even be used as an all-natural insect and mosquito repellant in the spring and summer. Let’s now explore a basic, do-it-yourself technique for maximising their power.

What you’ll need is as follows:

  1. 400 millilitres of water
  2. 200 millilitres of apple cider vinegar or wine vinegar
  3. Two hundred grammes of sugar
  4. One banana peel
  5. two-liter bottle of water

Using scissors or a cutter, carefully cut the plastic bottle in half to begin. First and foremost, safety! Next, combine the vinegar and water in a basin, then toss in the sugar and mix until thoroughly mixed. After filling half of the plastic bottle with this liquid, insert the banana peel inside.

While the sugar serves as an alluring lure, the mixture’s fragrance deters flies and mosquitoes. With the help of this all-natural insect repellent, you may live in a bug-free house. To get the best results, just set the bottle in any part of your home and repeat the procedure every two days.

Thus, don’t throw away those banana peels. Rather, capitalise on their amazing qualities and explore a plethora of options for your house and landscape. Try this easy way to see the benefits of banana peels for yourself!

Uncover the Secret of Good Sleep

Uncover the Secret of Good Sleep

Uncover the Secret of Good Sleep Boil Bananas and Drink the Liquid for Stunning Sleep Before Bed! As we age, getting a decent night’s sleep becomes more and more crucial, and many of us have been frustrated by tossing and turning in the early hours of the night. Banana tea is an easy and friendly remedy that you may make in your home if you’re among the 50+ generation and you find yourself longing for restful sleep! It has a wonderful flavour and natural qualities that might promote relaxation and better sleep.

Recipe By: Greentricks

The Sleep-Inducing Properties of Bananas:

In addition to being a delicious fruit, bananas are an excellent source of potassium and magnesium, two vital elements that support sound sleep. It’s interesting to note that banana peels have even higher quantities of these healthy minerals. However, using organic bananas in this recipe is essential to maximising the advantages of improved sleep.

In particular, magnesium is well known for its ability to relax muscles, which can improve sleep quality and lessen the likelihood of restless nights. Because of this, adding banana tea to your evening routine is a great idea.


Ingredients for the Recipe:

You only need a few items to make this calming elixir:

  • One Ripe Banana: To reap the greatest benefits, choose a banana that is lovely and ripe.
  • Sufficient Water to Fill a Small Pot: Make sure the banana is submerged in enough water.


Instructions for the Recipe:

Here’s how to make tea with bananas:

  • To prepare the banana, begin by slicing it in half lengthwise and scraping out any tough bits.
  • To boil the banana, put it in a saucepan of water once it has been prepared. After bringing the water to a low boil, cook the banana for ten minutes or so.
  • Pour the Infused Water: Into a cup, slowly transfer a portion of the banana-infused water, allowing room for more flavouring.
  • Add the optional cinnamon: Add a teaspoon of cinnamon and mix for a wonderful change. This has its own calming qualities in addition to improving the flavour.


The Enchantment of Banana Tea:

  • We suggest sipping this calming tea about an hour before going to bed for best effects. It aids in relaxation and gets you ready for a good night’s sleep, much like a light massage. Bid adieu to those sleepless evenings and welcome the revitalising influence of sleep.
  • More than just a luxury, getting a good night’s sleep is crucial for preserving general wellbeing, particularly as we become older. Thus, why not try this natural banana tea? Your body will appreciate it, and you’ll wake up feeling rejuvenated and full of energy to take on the day.


The Multifaceted Advantages of Banana Tea:
In addition to helping people go asleep, banana tea has several other holistic advantages, especially for those over 50+.

  • Stress Reduction: Banana tea’s cosy, warm qualities can aid in lowering tension and anxiety and fostering a more peaceful frame of mind before bed.
  • Hydration: Drinking enough water is essential, and drinking banana tea adds to your fluid intake, which benefits your general health.
  • Nutrient Boost: Bananas are a nutritious addition to your diet because they offer key nutrients including vitamin C, vitamin B6, and dietary fibre in addition to magnesium and potassium.
  • Digestive Aid: Banana tea is a great option for people with sensitive stomachs because it can help ease digestive discomfort.


In summary:
In addition to being a tasty beverage, banana tea is a natural cure that can improve the quality of your sleep. Being in the 50+ group, you have the right to comfortable sleep and revitalising sleep. You can discover the key to restful, uninterrupted sleep by including banana tea into your bedtime routine. This is a gift that will benefit your general health and wellbeing for years to come. Why not attempt it then? Make a cup of banana tea, welcome the calm it provides, and savour the advantages of a genuinely peaceful sleep.