Philly Cheese steak Balls
These Air Fryer Philly Cheese steaks are a perfect example of how quick and simple it is to prepare dinner with an Air Fryer, which is one of its best features.
Total time: 45 minuteszxs
Ingredients:
- 3/4 lb of ground beef
- 1 onion
- 1 red pepper
- 1 1/3 cups of beer
- 1 tbsp of Worcester shire sauce
- 3 1/3 lbs of potatoes
- 1 1/2 tbsp of butter
- 3/4 cup of flour
- 9 slices of provolone cheese
- vegetable oil
- parsley
- salt & pepper
- flour, egg, and breadcrumbs for breading
Directions:
Step 1:
Cook ground beef with chopped onion, diced pepper, salt and pepper. Once cooked, pour in beer and Worcestershire sauce and cook until reduced.


Step 2:
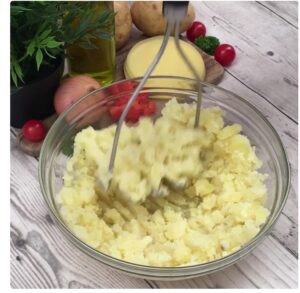
Peel the potatoes, cook in boiling salted water until tender, then mash.
Add melted butter, salt and pepper to taste.
Step 3:
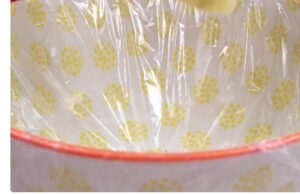
Line bowl with plastic wrap.
Step 4:
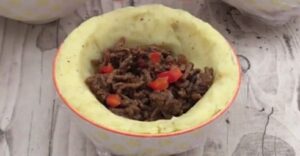
cover with mashed potatoes, leaving a hollow centre.

Step 5:
Fill the bowl with the beef mixture.
Step 6:
close the ball, covering the meat with the mashed potatoes. Seal the plastic wrap. Repeat 8 time.

Step 7:
place all the balls in the freezer for at least 1 hour.

Once frozen, remove the plastic wrap.
Step 8:
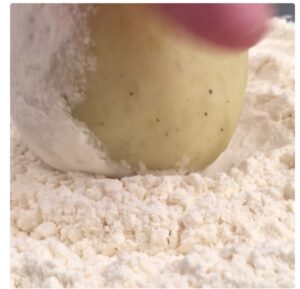
Roll the mashed balls in flour, egg, then breadcrumbs.
Step 9:
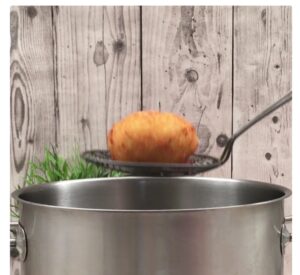
deep fry all rolls.
Step 10:
Drain the balls, removing excess oil, and place in a silicone baking dish.
Step 11:
Place 1 slice of cheese on each ball.
step 12:
preheat the air fryer to 350 °F. bake for 4-5 mins at 350 °F.
Step 13:
Once out of oven, sprinkle with chopped parsley and enjoy.
For oven:
- preheat the oven to 350 °F.
- Drain the balls, removing excess oil, and place in a square baking dish. Place 1 slice of provolone on each ball and bake for 15 mins at 350 °F.
Notes:
Store the leftover cheesesteaks in an airtight container in the fridge for 2-3 days.
Equipment: