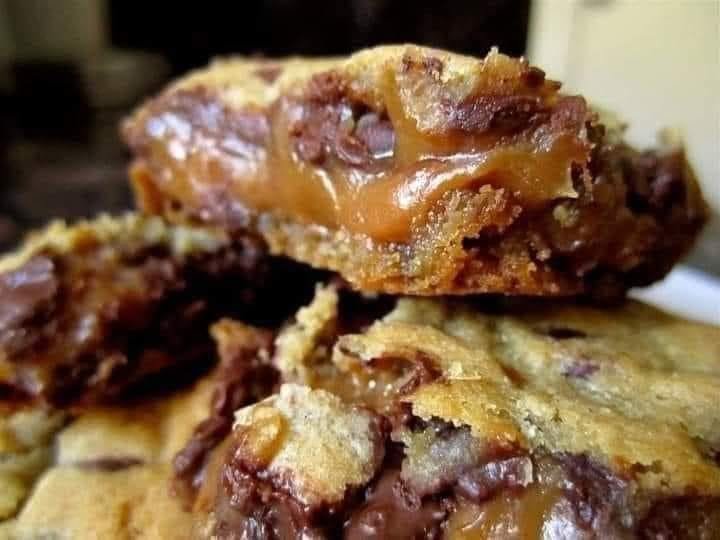
Knock You Naked Bars
These knock You Naked Bars Delicious Caramel Bars with a flavor of peanut butter and an incredible coating of gooey caramel between the layers. You won’t ever bake cookie bars again; these are THAT GOOD!
Ingredients For knock You Naked Bars:
- 2 1/4 cups all-purpose flour
- 1 teaspoon baking soda
- 1 teaspoon salt
- 1 cup butter, softened
- 3/4 cup sugar
- 3/4 cup packed brown sugar
- 1 teaspoon vanilla extract
- 2 eggs
- 2 cups semi-sweet chocolate chips
Caramel Sauce:
- 5 oz evaporated milk
- 1 bag (14 oz) caramels
- 1/2 cup peanut butter
Instructions For knock You Naked Bars:
- Preheat the oven to 375 degrees Fahrenheit (190 degrees Celsius). Grease a 9 x 13-inch pan.
- In a small bowl, combine flour, baking soda, and salt. In a large mixing bowl, beat together butter, sugar, brown sugar, and vanilla until creamy. Add eggs one at a time, beating well after each addition. Gradually mix in the flour mixture. Stir in the chocolate chips.
- Spread half of the cookie dough into the prepared pan. Bake for 8-10 minutes. Remove from the oven.
- While the cookie dough is baking, melt caramels and evaporated milk in a double boiler. After the caramels are melted, add peanut butter and melt thoroughly. Spread this caramel-peanut butter mixture over the baked cookie dough base.
- Using the remaining cookie dough, drop spoonfuls onto the caramel mixture. Bake for 15-20 minutes or until light golden brown.
Notes:
- Experiment with different flavors of spreadable fillings for an alternative to the caramel sauce.
- Vary the flavor of the bars by using different types of chocolate chips such as milk, dark, or white.
- These bars are rich, so consider cutting them into small squares. They make an excellent gift or treat for special occasions.
I’ve been making these Knock You Naked Bars for the past ten years, and each time I do so, I have a little nibble before putting them in the fridge to set for serving to guests and family. And after that little nibble, I end up consuming almost half of the pan, so very, very small bites of brownies are presented at my dinner party. I apologize; I am who I am. When it comes to caramel and chocolate, I have very little self control.