Introducing the latest flourless crispy dessert for a delightful family treat

Introducing the latest flourless crispy dessert for a delightful family treat

Ingredients:

  1. 200g egg whites (4-5 eggs) for the Meringue Dough
  2. A small amount of salt
  3. 200 grams, or 1.5 cups sugar powder
  4. One lemon’s juice
  5. 20g (two tablespoons) cornmeal
  6. baking sheet measuring 32 by 37 centimeters

Guidelines:

  • Beat egg whites until stiff peaks form, adding a sprinkle of salt as needed.
  • Add cornstarch, lemon juice, and powdered sugar gradually. Gently stir.
  • Transfer the batter onto a baking pan measuring 32 by 37 cm.
  • Bake for 35 to 40 minutes at 302°F (150°C) in a preheated oven.

Regarding Cream:

  • 300 grams, or 1.3 cups cream cheese
  • 1/3 fat, 100g (1/2 cup) cream
  • 30g (two tablespoons) sugar
  • One hundred grams of raspberries

Guidelines:

  • Combine sugar, cream, and cream cheese and beat until smooth.
  • Fold in raspberries gently.
  • Place it in the refrigerator for four hours.
  • Present and enjoy this delicious dessert.

No oven, no gelatin no cream, cheesecake easy and delicious

No oven, no gelatin, no cream cheesecake easy and delicious

In the modern world of hectic schedules and time constraints, discovering simple and quick dessert recipes might come in rather handy. And you’re in luck if you love cheesecake but don’t want to bother with baking or using cream and gelatin! We have the ideal recipe for you: a simple, yet incredibly tasty, no-bake, no-gelatin, no-cream cheesecake.

Components Required for the Base:

  1. Two cups of crushed biscuits equals 200 grams of biscuits.
  2. A half-cup of butter
  3. A half-cup of sugar
  4. Three tablespoons of flour
  5. three tablespoons of starch
  6. Three glasses of milk
  7. A half-cup of milk powder
  8. A half-cup of cheesecake
  9. A half-cup of yogurt Vanilla

Regarding the layer of pudding:

  • mug of strawberry-flavored juice
  • Four tsp sugar
  • One spoonful starch and two teaspoons of strawberry jelly
  • Two cups of strawberries
  • one tsp lemon juice

Guidelines for Getting Ready

Now let’s get started on the detailed instructions for creating this delicious cheesecake:

Creating the Foundation

  • Grind 200 grams of biscuits to a fine powder in a deep dish.
  • Stir in the crumbled biscuits and 1/2 cup melted butter over low heat until a sand-like consistency develops.
  • Once the foundation of the cheesecake is formed, press this mixture evenly into a 26 cm mold and place it in the refrigerator.

The Cheesecake Filling’s preparation

  • Mix 3 tablespoons flour, 3 tablespoons starch, and 1/2 cup sugar with 3 cups milk in a bowl.
  • Blend in 1/2 cup of powdered milk well.

Warmth

  • Stir the mixture continuously over medium heat until it thickens and boils.
  • Take off the heat and mix in the vanilla essence, 1/2 cup cream cheese, and 1/2 cup yogurt.
  • Transfer this blend onto the cold biscuit foundation and smooth the surface.
  • Place a plastic wrap over it and chill.

How to Make the Strawberry Layer

  • 1 cup of strawberry juice, 4 teaspoons sugar, 2 tablespoons strawberry jelly, and 1 tablespoon starch should all be combined in a pot.
  • Cook until the mixture thickens, on low heat.
  • Add 1 teaspoon of lemon juice and 2 cups of chopped strawberries.
  • After cooking for a further two minutes, allow it to cool somewhat.
  • Evenly cover the chilled cheesecake layer with the strawberry mixture, spreading it out.
  • For at least two hours, refrigerate.to get fixed.

Last Details and Serving

  • After the cheesecake has solidified, take it out of the shape and slice it.
  • Enjoy the delectable flavor after serving cold!

Suggestions for Change

  • Try a variety of fruit toppings, including peaches, raspberries, or blueberries.
  • For an even more decadent touch, sprinkle some chocolate sauce or caramel over it.
  • For further variation, experiment with different flavored biscuits for the foundation.

Advantages for Health

  • Probiotics are found in yogurt and cream cheese and are good for intestinal health.
  • Antioxidants and vitamin C are abundant in strawberries, supporting immunity and general well-being.

In summary

This easy and delicious no-bake cheesecake recipe will help you quickly sate your sweet desire. This cheesecake will wow everyone, whether you’re serving it at a dinner party or you’re just in the need for something rich and creamy. Thus, assemble your components and give it a go right now!

3-Minute Flourless Banana Chocolate Mug Cake

3-Minute Flourless Banana Chocolate Mug Cake

Additions:

  1. 1 ripe banana
  2. One egg
  3. 80g of dark chocolate

for the garnish:

  • Greek dairy
  • 30g of dark chocolate, or coating chocolate

Guidelines:

  • In a cup that is microwave-safe, mash a ripe banana.
    To the mashed banana, add 1 egg and stir thoroughly.
  • Add the 80g of dark chocolate, broken up into small pieces, to the mug. Mix everything together.
  • The mixture should be microwaved for two to three minutes, or until it rises and sets. Watch the time as it could change according on the power of your microwave.
  • As the cup cake cools down a bit, use a double boiler or the microwave to melt thirty grams of dark chocolate for coating.
  • After the cup cake cools down a little, pour the melted chocolate on top.
  • Include a dollop as a creamy garnish made with Greek yogurt.
  • In just three minutes, enjoy your tasty and fast banana chocolate cup cake! This is the ideal method to finish up those extra bananas.

Making the Most of Zucchini A Quick and Easy Recipe

Making the Most of Zucchini A Quick and Easy Recipe

Are you sick of eating zucchini the same old way? It’s time to make some changes! We’ll provide a delicious meal that will quickly become a family favorite in this post. Prepare to turn plain zucchini into a delicious meal that can be prepared quickly, cheaply, and easily. Now let’s get started!

Ingredients:

  1. 4 zucchini
  2. One hundred grams
  3. , sliced from cooked chicken (around 3.5 ounces)
  4. 60 g of breadcrumbs plus salt
  5. and pepper to taste (about 1/2 cup)
  6. 40 grams, or about half a cup, of grated Parmesan cheese
  7. Five small slices of light galbanino cheese
  8. One spring onion, cut
  9. A couple of tsp olive oil
  10. Just the right amount of pepper
  11. Just the right amount of salt

Getting Ready

  • Warm up and get ready: Turn the oven on to 180°C. In the meantime, thinly slice the zucchini, arranging them in circles. within a bowl. Add a little salt and stir thoroughly.
  • Season and Coat: Give the zucchinis some pepper and a light coating of olive oil. Then, evenly distribute the breadcrumbs and grated Parmesan cheese.
  • Layer and Fill: Grease a rectangle baking dish, then scatter breadcrumbs over the bottom. Arrange half of the zucchinis in the plate, then top with cheese, chicken, and spring onion pieces. Add a final drizzle of olive oil, breadcrumbs, and the leftover zucchini on top.
  • Making the Delight
    Place your dish in the oven and bake it for 40 to 45 minutes, or until it is bubbling and golden brown. When finished, take it out of the oven and let it a few minutes to cool down before serving.

Serving Ideas
This masterpiece of zucchini is ideal served with a fresh salad or as an accompaniment to your preferred protein. Watch it vanish in a matter of minutes by serving it hot!

Advantages for Health

This dish is nutrient-rich in addition to being tasty. Zucchinis are high in antioxidants, fiber, vitamins A and C, and low in calories. It’s a healthy dinner option since lean chicken provides protein to the dish.

Changes
Use your imagination when preparing this dish! For a vegetarian variation, substitute chicken or tofu for the chicken. You may alter the flavor to your preference by adding your preferred herbs and spices.

Cooking Advice

  • Slice Evenly: Try slicing your zucchini into even circles for even cooking.
  • Grease Well: To avoid sticking, make sure your baking dish is well-greased.
  • Examine for Doneness: Before taking the zucchinis out of the oven, make sure they are soft by piercing them with a fork.

you can keep a clean and fresh home naturally

you can keep a clean and fresh home naturally

Cleaning your home doesn’t have to involve harsh chemicals that are harmful to the environment and to you. By using baking soda, you can keep a clean and fresh home naturally. Here are some quick recipes to use baking soda around the house.

which is natural and safe for you and the environment:

  1. Air Freshener: Mix 2 teaspoons of baking soda with half a liter of warm water and 10 drops of lemon essential oil in a bottle. Shake well and spray around your house for a natural and refreshing scent.
  2. Bathroom cleaner: in a spray bottle, combine 2 cups of water, 2 tablespoons of liquid soap, 2 tablespoons of baking soda and 1 teaspoon of tea tree, lemon or eucalyptus essential oil
    Shake well and use for a sparkling clean bathroom.
  3. Laundry report: Add 125 ml (1/2 cup) of baking soda to your liquid laundry to make whites whiter and colors brighter. It also softens water, allowing you to use less soap.
  4. DIY Dishwasher Tablets: Mix 2 tablespoons of baking soda, 1/2 cup citric acid, 2 cups baking soda, 20 drops essential oil, and optionally 1/2 cup coarse salt.
    Gradually add water to form a powdery texture, then press into an ice cube tray and refrigerate for 24 hours before use.


Avocado Egg Salad Roll-ups

Avocado Egg Salad Roll-ups

Introducing Avocado Egg Salad Roll-ups – a delightful twist on a classic favorite. These roll-ups combine the creamy goodness of avocado with the rich, savory flavor of egg salad, all wrapped in a soft tortilla. Perfect for a quick lunch, a picnic, or a light snack, these roll-ups are as nutritious as they are delicious.

why you choose:

1.Health-Focused

Say hello to your new favorite healthy snack – Avocado Egg Salad Roll-ups! Packed with protein, healthy fats, and essential nutrients, these roll-ups are a perfect balance of flavor and nutrition. The creamy avocado pairs beautifully with the classic egg salad, making it a satisfying and wholesome choice for any meal.

2.Gourmet Appeal

Elevate your lunch game with Avocado Egg Salad Roll-ups. These roll-ups offer a gourmet twist on traditional egg salad by incorporating the rich, buttery texture of ripe avocados. Wrapped in a soft tortilla, each bite is a delightful blend of creamy, tangy, and savory flavors. Ideal for an elegant brunch or a sophisticated snack, these roll-ups are sure to impress.

3.Kid-Friendly

Looking for a tasty and nutritious meal that your kids will love? Try Avocado Egg Salad Roll-ups! These roll-ups are fun to make and even more fun to eat. With the creamy avocado and the familiar taste of egg salad, they’re a hit with kids and adults alike. Perfect for lunchboxes, picnics, or an easy family meal, these roll-ups are a winner.

4.Quick and Convenient

Need a quick and convenient meal option? Avocado Egg Salad Roll-ups are your answer! Easy to prepare and incredibly satisfying, these roll-ups are perfect for busy days when you need a nutritious meal in a hurry. The combination of avocado and egg salad wrapped in a soft tortilla makes for a delicious and filling snack or lunch.

Feel free to choose the one that best fits your audience or use them as inspiration to create your own introduction.

Creamy Avocado and Egg Salad Wraps

Ingredients:

  1. 2 avocados, ripe and peeled
  2. 4 hard-boiled eggs, chopped
  3. 2 tablespoons mayonnaise
  4. 1 tablespoon Dijon mustard
  5. 1 tablespoon lemon juice
  6. 1/4 cup red onion, finely chopped
  7. Salt and black pepper to taste
  8. 4 large tortillas
  9. Fresh arugula or lettuce leaves

Directions:

  1. In a medium bowl, mash the avocados with a fork until smooth.
  2. Add the chopped hard-boiled eggs, mayonnaise, Dijon mustard, and lemon juice to the mashed avocados. Mix well.
  3. Stir in the chopped red onion, and season with salt and pepper.
  4. Lay a tortilla flat on a clean surface. Spread the avocado and egg mixture evenly over the tortilla.
  5. Add a layer of arugula or lettuce on top of the mixture.
  6. Roll up the tortilla tightly, then slice into 1-inch sections to serve.

12 Natural Ways to Get Rid of Cockroaches Permanently

12 Natural Ways to Get Rid of Cockroaches Permanently

In any house, cockroaches may be an ongoing annoyance. Fortunately, there are a number of natural solutions available that avoid using harmful chemicals to control these pests. These are 12 natural and efficient methods for getting rid of cockroaches once and for all.

1. Maintain a Clean Home
Cockroaches are less drawn to a tidy house. Particularly in the kitchen and dining rooms, clean, mop, and sweep surfaces on a regular basis. Food should always be kept in sealed containers.

2. Plug holes and cracks
Cockroaches may squeeze through even the smallest cracks in your house. Look for gaps and cracks in your house, particularly around baseboards, windows, and doors, and caulk those areas.

3. Add sugar and baking soda.

Sprinkle areas with a mixture of equal parts sugar and baking soda. where cockroaches have been spotted. While the baking soda functions as a natural toxin, the sugar draws them in.

4. Use of Essential Oils
Certain essential oils are unpleasant to cockroaches to smell. Apply a little amount of water to a few drops of peppermint, eucalyptus, or tea tree oil, and spritz the area around potential access points and hiding spots.

5. Bay Leaves:

Bay leaves naturally ward against cockroaches. In drawers, cabinets, and other places where cockroaches are prone to hide, stuff dried bay leaves.

6. Earth made with diatoms
In regions where cockroaches roam, scatter diatomaceous earth suitable for food use. It is harmless for people and pets, yet it kills and dehydrates them.
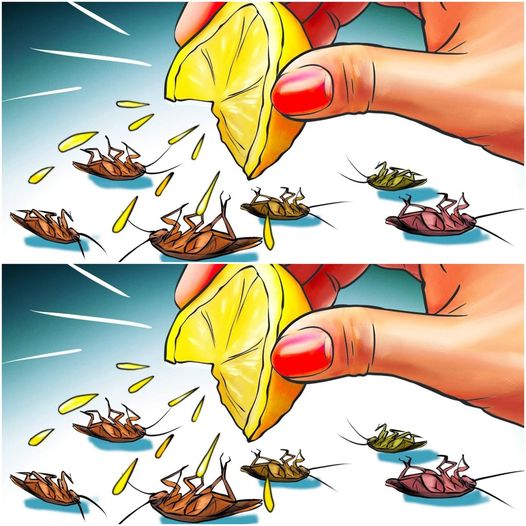
7. Peeled lemons
Lemon smells repellent to cockroaches. If cockroaches are an issue, place lemon peels there or clean the surfaces. with a squeeze of lemon.

8. Acid Boric
To produce dough, combine sugar, flour, and boric acid. Put little dough balls in nooks and other concealed areas. Cockroaches may be effectively killed using boric acid.

9. Cat nip
Nepetalactone, a naturally occurring cockroach repellant, is found in catnip. Disperse catnip in trouble spots or prepare a tea and mist your house with it.
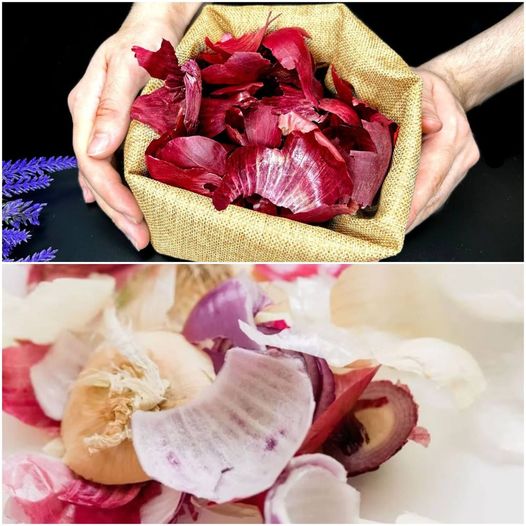
10. Onion
Garlic has an unpleasant scent to cockroaches. In regions where you have observed cockroaches, scatter crushed garlic cloves.

11. Slices of cucumber
Cockroaches can be repelled by fresh cucumber slices. Put them in places where you’ve observed movement.

12. Cover your trash
Ensure that the lids on all garbage cans fit tightly, and empty them often. This eliminates a significant source of food for cockroaches.

In summary
You may have a pest-free home and prevent cockroaches by employing these natural ways. Recall that consistency is essential. To get the best effects, use these natural repellents often, seal access spots, and keep your house clean. Cockroaches are no more, and your home will be cleaner and healthier.

At 60 and No Longer Have Wrinkles

At 60 and No Longer Have Wrinkles

My Grandmother Removed All the Wrinkles from Her Face with Cream from Onion Peels

If you’re seeking for a safe and all-natural way to address wrinkles, this amazing onion peel cream is all you need. My 60-year-old grandmother thinks she has no wrinkles anymore after using this remedy! Let’s examine how to create this incredible anti-aging lotion at home so that you may have youthful, bright skin.

Components

  1. two huge onions’ peels
  2. one cup of water
  3. One tablespoon of olive oil
  4. One tablespoon of coconut oil
  5. One tsp of bee wax
  6. two pills of vitamin E

Guidelines

1. Get the infusion of onion peel ready:

  • Boil Water: Fill a small pot with one cup of water and heat it to a boil.
  • Add Onion Peels: Add the onion peels to the boiling water. Reduce the heat and simmer it for 10 minutes or more.
  • Take the liquid off the heat source and strain it into a sterile container, making sure to discard the peels. Let the onion peel infusion cool.

2. Prepare the Base of Cream:

  • Melt Beeswax and Oils: In a double boiler, combine the beeswax, coconut oil, and olive oil. Cook, stirring, slowly, until all the ingredients are melted and well combined.
  • Cool somewhat: Remove the mixture from the heat source and allow it to cool somewhat, but not sufficiently to solidify.

3. Combine the ingredients:

  • Mix Infusion and Oils: Slowly incorporate the cooled onion peel infusion into the oil mixture while stirring continuously. The mixture should start to thicken as it cools.
  • Squeeze the vitamin E out of the capsules after opening them. the ingredients into the mixture. Give it a thorough swirl to mix.

4. Maintain the Cold Cream:

  • Transfer the cream into a clean and sterile container. Let it cool completely before placing a lid on it.
  • Chill: Store the cream in the refrigerator to keep it cool. The duration is up to two weeks.

How to Utilize

  • Daily Use: Rub the cream all over your face and neck just before going to bed. Massage it into your skin using light circular strokes.
  • For best results, use the cream consistently. You should see a reduction in wrinkles and an improvement in the texture of your skin after a few weeks of regular use.

Benefits of the Ingredients

  • Peel the onions: Given their high content of Quercetin and antioxidants help reduce inflammation and combat free radicals, which are known to cause aging.
  • Olive Oil: Packed with vitamins and antioxidants, olive oil calms.
  • Beeswax: Creates a protective barrier over the skin, holding onto moisture and enhancing skin hydration.
  • Vitamin E: A strong antioxidant that protects and promotes skin renewal.

To sum up
This homemade onion peel cream is a very effective and simple wrinkle cure. My grandma’s youthful appearance at sixty proves that it works. For smoother, younger-looking skin, try including this natural cream into your skincare routine. Let’s toast to a smooth, radiant complexion!

How To Clean Your Toilet Using Toothpaste: A Simple and Effective Method

How To Clean Your Toilet Using Toothpaste: A Simple and Effective Method

While it may not be the most attractive task, keeping the bathroom clean and hygienic depends on cleaning the toilet. Try using your toothpaste as a cleaning solution; it’s an inexpensive and efficient option. Yes, your toilet may benefit greatly from the same cleaning solution that you use for your teeth! Let’s investigate utilizing toothpaste to clean your toilet.

The Reasons Toothpaste Is Effective
Toothpaste may help remove stains, get rid of smells, and leave your toilet looking like new since it includes mild abrasives, detergents, and antibacterial agents. It’s also easily accessible in the majority of homes.

ingredients

Items You’ll Require

  1. A standard toothpaste tube (avoid the gel and whitening varieties)
  2. A brush for the toilet
  3. Gloves made of rubber
  4. a spotless sponge or towel
  5. A pail of hot water

Guidelines

1 Get ready the restroom

Put on Gloves: To shield your hands from bacteria and cleaning products, put on rubber gloves. Start by flushing the toilet to remove any leftover waste and to moisten the bowl’s edges.

2. Use the paste for teeth:

Squeeze the Toothpaste: Immediately onto the interior of the toilet bowl, squeeze a large quantity of toothpaste. Concentrate on stained spots and the space beneath the rim where dirt often accumulates.

Spread It Out: Make sure to cover every surface in the bowl by using your toilet brush to distribute the toothpaste equally throughout it.

3. Give the restroom a scrub: Thoroughly Scrub: Make sure you scrub the whole bowl with the toilet brush. The toothpaste’s gentle abrasives will aid in removing stains, while the Detergents are able to disinfect and clean.

Emphasis on hard Stains: Pay close attention to any discoloration or hard stains. The toothpaste’s antimicrobial ingredients will aid in eradicating microorganisms and leaving the bowl smelling fresh.

4. Permit It to Sit:

Soak Time: Give the toothpaste ten to fifteen minutes to soak in the bowl. This gives the cleaning solutions time to perform their magic on any lingering dirt and smells.

5. Last Rinse:

After the toothpaste has soaked for some time, flush the toilet to remove any remaining residue.

Wipe off: Wipe off the exterior of the toilet, including the seat and handle, with a fresh cloth or sponge immersed in warm water.

Advice for the Best Outcomes

  • Continual Cleaning: Include this on a regular basis in your cleaning schedule to maintain a fresh and clean toilet over time.
  • Use Ordinary Toothpaste: For optimal results, use ordinary toothpaste that isn’t gelled. There may be extra chemicals in whitening toothpaste that aren’t required for cleaning.
  • Mix with Other Cleaners: You may use toothpaste in conjunction with other all-natural cleaners, such as vinegar or baking soda, for more stubborn stains or buildup.

In summary
Toothpaste is an easy, economical, and efficient way to clean your toilet and make your bathroom seem brand new. When it comes to eliminating stains and smells from your toilet bowl, toothpaste is a great option because of its gentle abrasives and antibacterial qualities. Try it out and take pleasure in the clear, fresh outcomes. Cheers to your housekeeping!

Erases All Wrinkles on Your Face! Effective Anti-Aging Mask Tightens the Skin

Erases All Wrinkles on Your Face! Effective Anti-Aging Mask Tightens the Skin

This anti-aging mask can tighten your skin and remove wrinkles naturally if that’s what you’re searching for. This mask, which is made of basic materials like potato and carrot, is nutrient-rich and will revitalize your skin, leaving it looking younger. Let’s examine how to create and utilize this incredible mask.

Ingredients:

  1. 1 carrot
  2. One potato
  3. One tsp powdered gelatin

Guidelines

1. Get the carrot ready:

Peel the Carrot: To begin, peel the carrot in order to remove its outer layer.

Grate the Carrot: Grate the carrot into tiny, fine pieces using a fine-mesh grater.

2. Get the potato ready:

  • Peel the Potato: To get rid of the skin, peel the potato.
  • Potato Grate: Using a similar method to that of the carrot, fine-grained cheese.

3. Take the Juice Out:

  • To extract carrot juice, grate the carrot and then press the liquid into a dish using a clean towel or cheesecloth.
  • Extract Potato Juice: To extract the juice, repeat the process with the shredded potato. In the same bowl, mix the juices of the potatoes and carrots.

4. Include the powdered gelatin:

Stir in Gelatin: Stir the blended fluids with 1 tsp of powdered gelatin. To guarantee the gelatin fully dissolves, stir thoroughly.

5. Get the mask ready:

Heat the Mixture: Using a double boiler or a microwave, gently reheat the mixture until the gelatin completely dissolves and it thickens to a gel-like consistency. Before applying it to your face, let it cool.

How to Wear the Mask

1. Application: Evenly apply the mask over your cleansed face, taking care to avoid the eye region. To distribute it evenly, you can use your fingers or a brush.

2. Unwind: Allow the mask to dry and tighten your skin by leaving it on your face for 20 to 30 minutes.

3. Rinse Off: Use warm water to rinse the mask off when it has dried. Dry your skin using a fresh towel.

4. Moisturize: To seal in moisture, use your preferred moisturizer afterward.

Advantages of the Substances

  • Carrot: Packed in antioxidants and vitamin A, carrots aid in cell regeneration, smoother skin, and a decrease in aging symptoms.
  • Potato: Potato juice, which is well-known for its brightening qualities, helps lighten dark spots and even out skin tone. Additionally, it’s calming and anti-inflammatory.
  • Gelatin: A natural source of collagen, gelatin helps to tighten and firm the skin, minimizing the look of wrinkles and fine lines.

Advice for the Best Outcomes

  • Consistency: For optimal effects, apply this mask two to three times each week. With continued application, wrinkles will gradually disappear and the texture of your skin will improve.
  • Patch Test: To be sure you won’t be allergic to any of the components, always conduct a patch test before putting the mask on your whole face.

In summary
With ingredients like carrot, potato, and gelatin, this straightforward yet effective anti-aging mask is an excellent natural way to smooth away wrinkles and tighten your skin. It’s a terrific complement to your skincare regimen, simple to prepare, and full of nutrients that are good for your skin. Try using this mask, then take pleasure in the advantages of a glowing, young complexion!