AIR FRYER EGGPLANT

AIR FRYER EGGPLANT

In 15 minutes, prepare simple eggplant using an air fryer and just 4 ingredients! It has a tasty crispy, cheesy coating and cooks more quickly than other techniques.

INGREDIENTS

  1. one medium-sized sliced eggplant
  2. Two tablespoons of olive oil
  3. One teaspoon sea salt
  4. Black pepper, 1/2 teaspoon
  5. Grated parmesan cheese, one cup
  6. Two tsp of Italian spice

INSTRUCTIONS

  • Set the air fryer’s temperature to 375°F, or 190°C.
  • Cut the eggplant crosswise into rounds that are approximately 1/2 inch (1.25 cm) thick. Only trim off the leafy end after you have finished slicing, so that you have more surface area to hold onto. Using paper towels, pat the slices dry.
  • Olive oil can be brushed or drizzled over the eggplant slices. Add Italian spice, Parmesan cheese, black pepper, and sea salt.
  • Place the eggplant slices in the air fryer basket in a single layer. Simmer for ten to twelve minutes, or until the cheese is golden brown and the eggplant is tender. With the remaining eggplant slices, repeat in batches.

APPETIZERS FOR AIR-FRIED EGGPLANT

  • This vegetable is delicious as an appetizer (dunk it in tomato sauce or marinara sauce!) or as a simple side dish to go with a variety of main dishes:
  • Chicken: This dish pairs well with nearly any type of chicken preparation, but my personal favorites are air fryer chicken wings or lemon garlic chicken.
  • Fish: Try the flaky air fryer cod (or bake the cod), pan-seared salmon (it has the finest lemon butter sauce!), or halibut for a nicer meal.
  • Steak: Try it with an air fryer steak for a meal prepared right there, or try a chimichurri steak for a little different twist. You can even cook a basic sirloin steak while the eggplant is air frying.
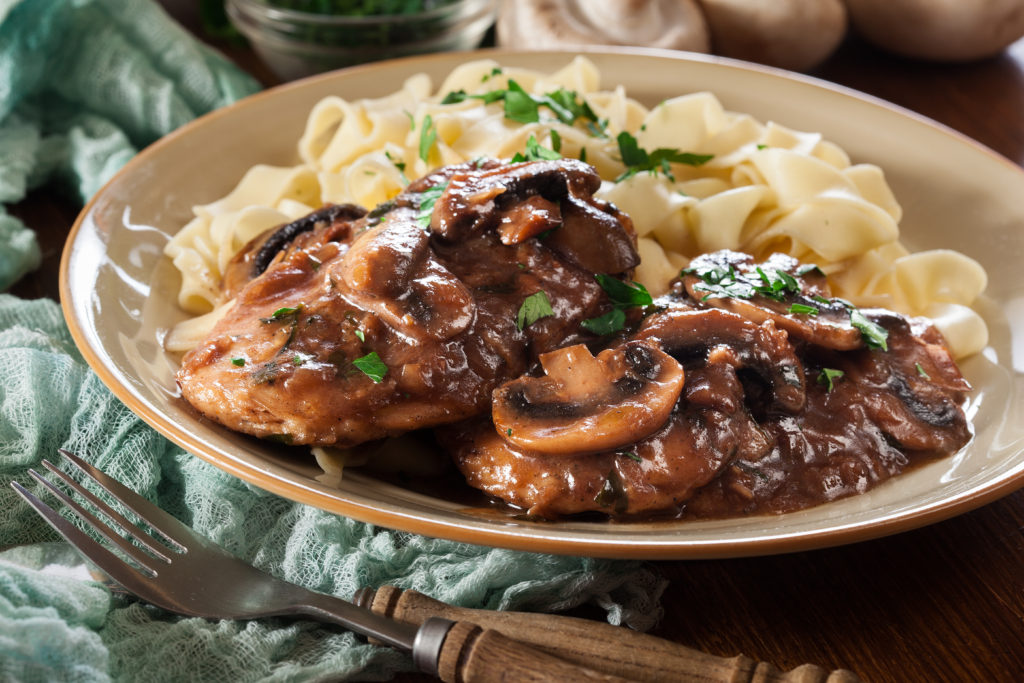
  • Noodles: You may serve it with your preferred pasta or go for more vegetarian options like spaghetti squash or zucchini noodles.
  • Eggplant Lasagna: This recipe calls for air-fried eggplant instead of roasted chunks of eggplant! It can also be used to make eggplant parmesan by adding mozzarella cheese and marinara sauce to it, then finishing with fresh basil.


ONE-POT SAUSAGE TOMATO PASTA

ONE-POT SAUSAGE TOMATO PASTA RECIPE

This recipe for one-pot sausage tomato pasta just requires one pot, which means minimal cleanup in only thirty minutes!

What flavor does my recipe for sausage tomato pasta made in one pot taste like?One of my favorite tomato sauces is this one; it’s flavorful and creamy, I always look forward to eating this dish in its entirety, and you can easily customize it by varying the veggies, protein, and spices

Can substitute vegetables for red pepper? Yes, you can actually make your own version of this recipe! Here are some more vegetable substitutions you could try:

  1. Mushrooms with onions
  2. florets of Courgette broccoli
  3. frozen peas

INGREDIENTS

  1. Two tablespoons of garlicky oil
  2. 400 g sausages free of gluten
  3. One red pepper, cut into large pieces
  4. 1/2 tsp paprika smoked
  5. 1 teaspoon ground fennel or fennel seeds
  6. Two teaspoons of dried oregano
  7. one-half teaspoon dried chili flakes
  8. Can of chopped tomatoes, 400 g
  9. 500 ml stock devoid of gluten
  10. One tablespoon of tomato puree
  11. 250 g pasta without gluten
  12. Two tablespoons of cream cheese
  13. A tsp of parmesan and a touch of salt and pepper
  14. small handful of fresh basil

DIRECTIONS

  • After taking off the skins, chop the sausages into smaller pieces.
  • In a large pan, heat the oil flavored with garlic over medium heat.
  • Sausage chunks and red pepper should be added to the pan and cooked for 5 minutes or until the sausage is just beginning to brown.
  • Add the chilli flakes, fennel seeds, oregano, and smoked paprika and continue cooking for a few more minutes.
  • After adding the pasta, thoroughly mix in the chopped tomatoes, stock, and tomato puree.
  • When the pasta is cooked, reduce heat to a simmer, cover the pan, and cook for about 12 minutes.
  • To create a creamy, richer sauce, spoon in the cream cheese and parmesan and mix.
  • Add a little salt and pepper for seasoning, mix well, and garnish with fresh basil.

AIR FRYER SAUSAGE ROLLS

AIR FRYER SAUSAGE ROLLS RECIPE

This recipe for air fryer sausage rolls just calls for four tasty ingredients and can be prepared in under thirty minutes! Coeliac-friendly and free of gluten.

Recipe for sausage rolls made in an air fryer, anyone? Because the air fryer’s dry environment prevents soggy pastry, they turn out even better than when baked! The best part is that it just takes 30 minutes to prepare.

INGREDIENTS

  1. One bag of 280 g gluten-free puff pastry
  2. 400 g of gluten-free sausages
  3. One tablespoon wholegrain mustard
  4. One beaten egg

DIRECTIONS

  • After removing the sausages from their skins, combine them in a bowl and mash until they are smooth.
  • Once the puff pastry is unrolled, cut it in half lengthwise to create two long strips.
  • Distribute a lengthy mustard strip lengthwise, slightly off center, down each strip. then place a line of sausage meat on top.
  • On each of the strips, spread a long line of mustard slightly off center, and then place a line of sausage meat on top.
  • Using a fork, seal the pastry by folding it over and brushing the somewhat thinner edge with beaten egg.
  • Using a sharp knife, make slashes down the top of the pastry after brushing it with beaten egg. Proceed with the remaining sausage meat and the second strip of pastry by following the preceding procedures.
  • Cut the sausage rolls with a sharp knife to the desired size or to fit in the basket of your air fryer; I produced four large ones!
  • Place in the 200°C air fryer and cook for 12 to 14 minutes, or until cooked through and golden. (If your air fryer needs to be preheated, make sure to do so; some don’t.)
  • Take out of the air fryer, let cool for five to ten minutes, and then savor!

citrus-infused vinegar

citrus-infused vinegar

Beyond their luscious flesh, citrus fruits like oranges and lemons have a lot of promise in addition to being delicious and refreshing. These fruits’ peels, which are frequently thrown away without a second thought, are rich sources of organic substances that can be used for a variety of domestic tasks. Orange and lemon peels make powerful materials for air fresheners, homemade cleansers, and other household products when mixed with vinegar, another multipurpose basic. We’ll explore the benefits of storing orange and lemon peels in this post and how to combine them with vinegar to make useful and sustainable solutions.

1.Essential oils with potent degreasing and antimicrobial qualities, such as limonene and citral, are found in orange and lemon peels. These oils make a natural cleaning solution that works wonders on grease, filth, and stains on a variety of surfaces when mixed with vinegar.

Acidity of Vinegar: White vinegar in particular has an acidic quality that makes it a mild deodorizer and disinfectant. It works well as a cleaner for kitchens, bathrooms, and other areas because it breaks down residues, soap scum, and mineral deposits.

Repurpose citrus peels and store them in a jar for a homemade all-purpose cleaner. For a few weeks, let the peels absorb after covering them with white vinegar. After straining and diluting with water as needed, use the combination as an all-purpose, multipurpose cleaner for floors, counters, sinks, and glass surfaces.

2. A Clean and Aromatic House: All-Natural Deodorizer: Because citrus peels contain essential oils, they smell energizing and pleasant. They help eliminate smells and leave behind a lovely citrus scent when mixed with vinegar.

Make Your Own Air Freshener Spray: Fill a spray bottle with water and filter vinegar scented with citrus. Use it to freshen linens, upholstery, and rooms without adding chemicals or artificial fragrances

.3. Economical and environmentally friendly:

Cut Down on Waste: Orange and lemon peels can be used for household cleaning and freshening instead of being thrown in the garbage or compost bin. This maximizes the use of natural components and minimizes waste.

Cost-effective: Creating your own vinegar cleaner and air freshener with citrus extracts is less expensive than buying store-bought items. Additionally, you can adjust the aroma and strength to suit your tastes.

How to Make Vinegar with Citrus Infusion:

Compile the Peels:

  • After using the fruit, gather the peels from oranges and lemons. Make sure there is no fruit residue on the peels and that they are clean.

Method of Infusion:

  • Put the peels in a glass jar and pour all of the white or apple cider vinegar over them.

Infusion Time:

  • Close the jar and leave it in a dark, cold area for two to four weeks so that the oils and chemicals from the peels can seep into the vinegar.
  • After infusing, filter and dilute the vinegar to get rid of the peels. For a gentler cleaning solution, dilute the infused vinegar with equal parts water, or use it straight for more difficult cleaning jobs.

Safety Advice:

  • Ensure that homemade cleaning solutions are properly labeled and kept out of the reach of children and animals.
  • on ensure compatibility, test the infused vinegar on a tiny area before applying it on fragile surfaces.
  • By preserving orange and lemon peels and mixing them with vinegar, you can take use of their inherent cleaning and deodorizing abilities while also making your daily routine more environmentally friendly and sustainable. Accept the adaptability of these basic components and take pleasure in a clean, fresh environment free of harsh chemicals and false scents.

Two-Ingredient Banana Cake:

Two-Ingredient Banana Cake:

This Two-Ingredient Banana Cake is the perfect snack if you’re searching for something quick, wholesome, and helps you lose weight. You may make a tasty and filling dessert that you can eat at home or take to work with just ripe bananas and oat flakes. Prepare a pen and paper so that you can write down the ingredients and easily follow the directions to make this delicious cake.

Ingredients:

  1. 2 ripe bananas
  2.  1 cup oat flakes

Directions:

  • Begin by mashing the ripe bananas until you achieve a smooth consistency. You can use a fork or a potato masher to do this.
  •  Once the bananas are mashed, add the oat flakes to the bowl. Mix well to combine the ingredients thoroughly. The oats will help bind the mixture and provide texture.
  • Grease a baking pan to prevent the cake from sticking. You can use cooking spray or a small amount of oil.
  • Pour the banana and oat mixture into the greased pan, spreading it evenly.
  •  Preheat your oven to 350°F (180°C Place the pan with the batter in the preheated oven.
  • Bake for about twenty-five minutes, or until the cake is golden brown. Depending on your oven, the baking time may differ somewhat, so pay attention to it.
  •  After the cake is done, take it out of the oven and allow it to cool for a little while in the pan.
  •  You can slice and serve the cake after it has cooled. It’s a fantastic choice for an easy and wholesome snack.
  • In conclusion, this is the recipe for a two-ingredient banana cake that is easy to prepare, nutrient-dense, and ideal for anyone trying to keep their weight in check. You may make a tasty and filling treat that can be consumed at work or elsewhere with just ripe bananas and oat flakes.

Weight Watchers Chicken Marsala

Weight Watchers Chicken Marsala

You’ll fall back in love with chicken after trying this Weight Watchers Chicken Marsala recipe. It tastes wonderful and requires little preparation or cooking time. What more could a recipe ask for?

I’m scared of that, that’s why. Until I tried this recipe, that is.

INGREDIENTS

  1. Six skinless, boneless chicken breasts, or roughly 16 ounces of meat
  2. Fresh baby Portobello mushrooms, one pound
  3. Use three-quarters cup of this dressing.
  4. One tablespoon of white all-purpose flour
  5. Two minced garlic cloves or 1/2 tsp garlic powder
  6. 1/4 teaspoon of ground pepper
  7. One-fourth teaspoon salt
  8. Two teaspoons pure olive oil
  9. One tablespoon of canola oil-based light butter
  10. Half a cup low-sodium, fat-free chicken broth
  11. half a cup of cooking wine marsala
  12. Use green onions or fresh parsley for garnish
  13. Cooking spray

Guidelines

  • Every boneless chicken breast should be pounded to a thickness of 1/2 inch by sandwiching it between two pieces of plastic wrap. It is more effective to practice on each one separately.
  • Add Italian dressing to a big gallon-sized zip plastic bag containing all of the chicken breasts. Marinate in the fridge for at least eight hours or overnight.
  • Set the oven’s temperature to 350.
  • Take the chicken breasts out of the zip-lock bag and discard any remaining dressing.
  • Combine the flour, salt, pepper, and garlic powder. Coat each chicken breast completely with the mixture. Garlic cloves can be substituted for garlic powder; first, cut the cloves, allow them to cool, and then add them to the flour mixture.
  • The size of the chicken breasts will determine whether or not you need to prepare another batch of the mixture.
  • Apply cooking spray to the bottom of a big nonstick skillet.
  • Add 1 tablespoon extra virgin olive oil to the skillet along with the butter, and over medium-high heat, fry until browned on both sides.
  • Put onto a baking sheet sprayed with cooking spray.
  • Whisk any browned bits of chicken on the bottom of the pan before adding the chicken stock and wine to the frying skillet. Much of the flavor originates from here.
  • After bringing the mixture to a boil and cooking it for four to five minutes, use a sieve to remove the pieces from the marsala wine sauce. I enjoy
  • this particular one. Sauce should be put aside for later. Place the freshly cleaned and chopped mushrooms in the empty skillet. Spread spoonful of olive oil on it. After roughly three minutes of sautéing the mushrooms, add the reserved sauce. Cover the chicken with the marsala sauce.
  • Bake the chicken breasts with sauce for 25 to 35 minutes, or until the internal temperature of the chicken reaches 165 degrees. You’ll get the tastiest chicken this way.
  • To taste, add salt and pepper to the chicken.
  • To achieve the greatest uniform flavor, make sure you distribute the mushrooms equally throughout each breast.

Hard Boiled Eggs to Have Perfect Peels

Peel hard eggs easy pizzy

Hard Boiled Eggs to Have Perfect Peels Are you getting the willies from peeling hard-boiled eggs? You are not alone in this common kitchen situation. Hard-boiled eggs are a popular and nutritious snack even if peeling them is a filthy task due to their tightly sticking shells. But don’t worry! Jacques Pépin, the renowned French chef, cookbook author, and television broadcaster, has a clever method for simplifying the process of peeling eggs.


When hard-boiled, the shells have a tendency to adhere to the egg white, breaking into small pieces and giving the eggs an unappealing appearance. However, Pépin’s method modifies the cooking process in a simple yet effective way. Is that the key to it all? Before putting the egg in the boiling water, make a small cut on its broad end.


This procedure may make it easier to remove the eggshell since the air pocket inside the egg gradually releases while it cooks. When the air pocket remains trapped, the white sticks to the shell and peeling becomes more challenging. When you release this air, the eggshell will slide off smoothly and easily.


  • It doesn’t take any specialised tools to drill this small hole. A simple pin or thumbtack would suffice.
  • Carefully puncture the broad end of the eggshell to make a hole that is big enough to allow air to escape without breaking the egg. Once the hole is formed, just boil the egg. The air pocket is eliminated while cooking, which facilitates peeling.
  • Because it doesn’t require any specialised equipment or training, this method is ideal for both seasoned chefs and novice cooks. This is a lifesaver for busy mornings when you still want a high-protein snack or breakfast.
  • A hard-boiled egg can have its shell removed with ease using Pépin’s method, revealing a perfectly formed white egg inside. By employing this technique, you may elevate your cooking skills to a professional level and accelerate and clean up the peeling process.
  • Therefore, the next time you wish to create hard-boiled eggs, remember Jacques Pépin’s straightforward yet extremely helpful advice. Only a small hole in the eggshell can enhance your salads, snacks, and breakfasts, making a laborious task quick and simple.

Weight Watchers Friendly Taco Casserole Recipe

Weight Watchers Friendly Taco Casserole Recipe 

enjoy creating casseroles for many occasions, but particularly for holidays, family feasts, and big occasions like the Super Bowl. These are usually delicious and simple to make, and this one is especially good for just one WW point

If you enjoy tacos, you should definitely try my Zero Point Chicken Taco Soup and Weight Watchers Friendly Taco Dip! Everything is permissible as long as you follow Weight Watchers guidelines. I’m always switching up the ingredients to get more flavor for less calories. For instance, replace ground beef with ground turkey or plain, nonfat Greek yogurt with sour cream. enjoy keeping things lively! Additionally, want to include new WW-friendly items into my regular meals whenever can to reduce the point value, whether locate them in the grocery store or learn about them from my WW group. You already understand what mean if you follow Weight Watchers.

INGREDIENTS

  1. One pound of meat turkey or chicken;
  2. half a diced white onion;
  3. one can of whole kernel corn;
  4. one can of black beans;
  5. one tablespoon taco seasoning;
  6. two tablespoons taco sauce;
  7. one and a half cups fat-free sour cream;
  8. one cup diced fresh tomatoes;
  9. one and a third cup green onions

Guidelines

  • Over medium-high heat, sauté the meat, beans, onions, taco seasoning, sauce, and corn until the meat is browned, or until the soy crumbles are cooked through.
  • Evenly spoon half of the meat mixture into the casserole dish, then cover with a thin layer of sour cream and cheese.
  • Repeat. Spread cheese on top.
  • After 15 minutes of baking at 350 degrees, top with chopped tomatoes and green onions and serve.

How to Make Weight Watchers Taco Casserole: Some Advice

  • You can get the recipe for the SALT-FREE taco seasoning here if you missed it.
  • Do you want to have chips with your taco casserole? For every 24 chips, Mini Tostitos only cost points! If you love avocados, this creamy, luscious guacamole would be excellent for you!
  • This recipe’s low point count is result of using several foods that have zero points; the whole list is provided here.
  • These Ole Wellness Wraps are really great—they’re only one point and huge!

Air-fryer chicken tenders recipe

Air-fryer chicken tenders recipe

The air fryer is used only to make these crispy chicken tenders. Accompany with a gooey mustard and honey sauce for dipping.

Components

  1. Mini chicken fillets, 650g
  2. 50 grams of ordinary flour
  3. 1/2 tsp paprika smoked1 tsp finely chopped garlic
  4. One teaspoon of dried parsley
  5. two beaten medium eggs
  6. 150g of cornflakes
  7. spritz motor oil
  8. Two tablespoons of mayonnaise
  9. One tablespoon of runny honey
  10. American yellow mustard, 1 tablespoon
  11. A teaspoon of wholegrain mustard

INSTRUCTIONS

  • Method 1: Set the air fryer’s temperature to 200°C. Apply a little layer of oil to the basket.
  • 2. Combine the flour, granulated garlic, parsley, smoked paprika, and a generous pinch of salt and black pepper in a bowl. Transfer the whisked eggs to a another bowl.
  • 3. Place half of the cornflakes in a big zip-seal bag and use a rolling pin to crush them into fine crumbs.
  • 4. Working in two batches, thoroughly coat the chicken small fillets by dredging them in the seasoned flour, then the egg, and then the cornflakes bag.
  • 5. Place the strips in the air fryer in a single layer and mist the tops with additional oil. Cook, stirring after 8 minutes, for 12 to 15 minutes, or until cooked through.
  • 6. In the interim, crush the remaining 75g of cornflakes and dispose of the soggy cornflake crumbs. Cover the remaining chicken so it’s ready to cook.
  • 7. To make the sauce, combine the honey, mayonnaise, and both mustards; add a dash of black pepper. Toss into a small serving bowl and serve immediately.
  • 8. Prepare the remaining chicken tenders in the same manner.

Advice: To make them free of gluten,substituting the plain flour for a gluten-free flour blend.

Airfryer Apple Pie dish

Airfryer Apple Pie dish

Get ready for a dessert that will not go away! Made in only a few minutes, this Airfryer Apple Pie dish has the ideal balance of crispy, golden crust and fresh apples.


Ingredients For Airfryer Apple Pie dish:


  • One cup of wheat flour for mass
  • One-fourth cup sugar
  • Half a teaspoon of salt
  • Half a cup of chilled butter, tiny cubes
  • Two to three tablespoons ice water
  • Four peeled and thinly sliced apples will be used as the filling.
  • One-fourth cup sugar
  • One tsp powdered cinnamon
  • One tablespoon of lemon juice


Instructions For Airfryer Apple Pie dish:


  1. Combine the flour, sugar, and salt in a sizable bowl.
  2. Using a pastry cutter or your fingers, add the cubed cold butter to the flour mixture and stir until the mixture resembles coarse crumbs.
  3. One tablespoon at a time, add the ice water and stir until the dough begins to come together. It can take two to three teaspoons of water to reach the desired consistency.
  4. Refrigerate the dough for a minimum of half an hour after forming it into a ball and covering it with plastic wrap.
  5. In a bowl, mix together the apple pieces, sugar, cinnamon, and lemon juice while the dough is refrigerated.
  6. Using a floured surface, roll out the dough until you get a circle big enough to line the sides and bottom of an Airfryer pie dish.
  7. Press the dough firmly against the sides and bottom of the pie pan.
  8. Cover the dough with the apple mixture.
  9. Set your Airfryer’s temperature to 180°C.
  10. After putting the pie dish with the dough and filling inside the Airfryer, bake it for 20 to 25 minutes, or until the apples are tender and the crust is golden.
  11. Before serving, take the pie out of the Airfryer and allow it to cool a little.
  12. If you’d like, you may serve this apple pie with whipped cream or a scoop of vanilla ice cream. Have fun!