Vanquish Throat Pain and Inflammation

Vanquish Throat Pain and Inflammation

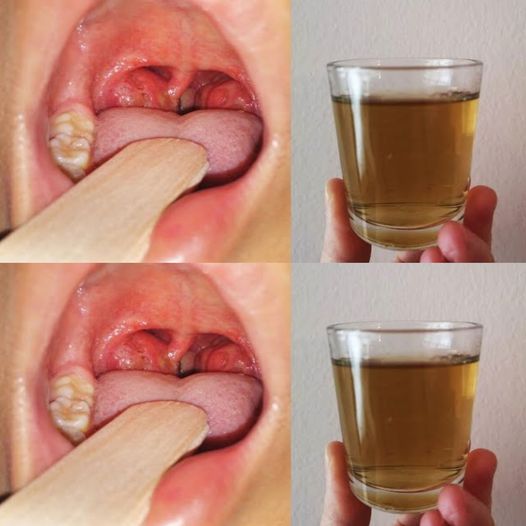
Vanquish Throat Pain and Inflammation in Just One Day with These Simple Recipes!


It can be quite uncomfortable to have throat pain and inflammation, which can make it difficult to breathe, swallow, and speak. But relief can be closer and easier to get than you might believe. These two natural cures, which only require three ingredients apiece, are not only incredibly simple to make but also incredibly effective at relieving sore throats. Let’s investigate these all-natural remedies, which guarantee to provide you with relaxation and comfort in no time at all.

Recipe 1: Honey, Ginger, and Lemon Tea

  1. One tsp honey
  2. One inch of newly cut ginger
  3. Juice from one-half lemon

Guidelines:

  1. Peel and thinly slice the ginger root first.
  2. Sliced ginger is added to a cup of boiling water.
  3. Allow the ginger to infuse by letting it boil for around five minutes.
  4. Take the ginger tea off the stove and pour it into a cup.
  5. Add the juice from half a lemon and stir.
  6. One tablespoon of honey should be added to the mixture and thoroughly mixed.

The Reason It Works:

  1. Due to its well-known antibacterial and anti-inflammatory qualities, ginger can help relieve sore throats and fight infections.
  2. Lemons are rich in vitamin C, which helps to break down mucus and strengthen your immune system.
  3. Honey’s inherent soothing and antimicrobial qualities coat the throat, providing instant relief from discomfort and inflammation.

Recipe 2: Apple Cider Vinegar, Honey, and Warm Water Gargle

  1. One spoonful of vinegar made from apple cider
  2. One tsp honey
  3. One cup of hot water

Guidelines:

  1. Combine the honey and apple cider vinegar in a cup of heated water.
  2. Mix thoroughly until all of the vinegar and honey is dissolved.
  3. Gargle with this combination a few times a day.

The Reason It Works

  1. Acetic acid, which is found in apple cider vinegar, has strong antibacterial properties that help prevent illness.
  2. Honey soothes and lessens irritability and discomfort.
  3. Warm water improves the benefits of vinegar and honey while relieving sore throats.

Conclusion:

These two straightforward yet effective recipes quickly relieve inflammation and sore throats by utilising the inherent healing qualities of just three items apiece. These treatments, which include gargling with a medicinal mixture or drinking a calming tea, can improve your symptoms in as little as a day. Recall that even if these remedies provide short-term relief, seeing a doctor is advised if symptoms worsen or continue. I hope to feel better very soon!

air fryer cheesy potato recipe

air fryer cheesy potato recipe

air fryer cheesy potato recipe

Ingredients:

  1. Four big Russet potatoes
  2. Two tablespoons of melted, unsalted butter
  3. Half a cup of shredded cheddar cheese
  4. One tsp of kosher salt
  5. half a teaspoon of pepper, black
  6. Half a teaspoon of paprika
  7. one tsp powdered garlic
  8. Serve with sour cream, cooked bacon, sliced green onions, etc.

Guidelines:

  1. Set your air fryer to 400°F (200°C) for three to five minutes of preheating. Cut potatoes into 1/4 to 1/2 thick slices after placing the bottom of the potato on a cutting board.
  2. In a small bowl, mix together the melted butter, salt, black pepper, paprika, and garlic powder. Toss in the cut potatoes and coat them with the butter mixture after adding them to the basin.
  3. Apply cooking spray, smear with olive oil or line with parchment paper to your air fryer basket. Arrange the potato mixture in a single layer within the air fryer basket. To guarantee equal cooking, set the cooking duration for 15 minutes and shake the basket every 5 minutes.
  4. Once the potatoes have cooked for 15 minutes, top them with the shredded cheese and continue cooking for an additional 2 to 3 minutes, or until the cheese is bubbling and melted.
  5. If preferred, garnish with fresh herbs and serve right away.


TIPS:

  • Choose the correct kind of potato: Yukon Gold or Russet red potatoes are excellent choices because they can be baked well. Because of their high starch content, these potatoes have a crispy outside and a fluffy inside.
    Chop the potatoes uniformly. Cut the potatoes into regular pieces for consistent cooking. Aim for slices that are 1/4 to 1/2 inch thick.
  • Before adding the potatoes, make sure the air fryer has been preheated for a few minutes. They will cook more evenly as a result.
  • Cook Times: Depending on the type of air fryer you’re using, the cook times will change. The recipe remains unchanged whether you use a 5-quart air fryer or a Ninja Foodi.
  • Add some oil to the potatoes: Adding some butter or olive oil to the potatoes will aid in their crisping in the air fryer. Make careful to coat the potatoes evenly with a neutral oil, such as vegetable or canola.
  • Properly season: Don’t be afraid to add seasoning! To add flavour to the potatoes, use your preferred spices. Garlic powder, paprika, salt, and pepper are all excellent options.
  • Add the cheese towards the end: To prevent it from burning, add it to the potatoes during the last few minutes of cooking.
  • Don’t overcrowd the air fryer: Make sure to cook the potatoes in a single layer in the air fryer. Overcrowding the fryer will result in unevenly cooked potatoes.
  • Shake the basket: To guarantee that the potatoes cook equally on all sides, shake the air fryer basket a few times while the potatoes are cooking.
  • Let them rest: Before serving, let the potatoes sit in the air fryer for a few minutes after they have finished frying. They will become even more sharp as a result.
    Serve right away: Hot and crisp cheesy potatoes are best served right away.

How to Keep Things:

Once the cheese potatoes have cooled to room temperature, save any leftovers. After that, store them in the refrigerator for two to three days by placing them in an airtight container or carefully wrapping them in plastic wrap. You can use a microwave or air fryer to reheat them. Once the cheese has melted, add some more and continue cooking.

Empowering Dental Health

Empowering Dental Health

Secrets Your Dentist Wants You to Know: Empowering Dental Health


Talking about trade secrets that dentists purport not to want you to know can get awkward. But it’s crucial to handle this subject carefully and concentrate on arming people with information about oral health that can enhance rather than replace professional dental treatment. Let’s look at some helpful hints and techniques that might improve your smile and maintain oral health.

The Foundation of Dental Health: Preventative Care

Regular and Proper Oral Hygiene

Dentists emphasise the value of consistent brushing and flossing, and they know a trick to maximising the benefits of these hygiene routines. It’s important to consider not just the frequency but also the consistency and technique. The cornerstones of proper oral hygiene are brushing twice a day with fluoride toothpaste and flossing every day. However, did you know that the bristle type, the angle of the brush, and even the technique—like gently circling the gumline—have a big impact on how successful these procedures are? You may keep a healthier smile and enhance your dental hygiene regimen by learning these specifics.

Diet Matters More Than You Think

Although sugary foods can cause cavities, diet has a much deeper impact on oral health than that. Eating meals high in calcium, phosphorus, and vitamin C helps maintain the health of your gums and teeth enamel. Crunchy fruits and vegetables can also naturally clean the surfaces of teeth. On the other hand, limiting acidic beverages like soda and citrus juices can protect your enamel from erosion. Thus, the next time you choose a meal, consider how it will improve your oral health.

A Supplementary Approach: Natural Remedies and Supplements

Oil Pulling

Do you know what oil pulling is? It’s an old custom that entails swishing oil—usually sunflower, sesame, or coconut oil—in the mouth for 15 to 20 minutes before expelling it. There is conflicting scientific data about its health advantages, although some people believe it might lessen oral bacteria and plaque. Keep in mind that oil pulling can be an additional hygiene activity you include in your routine, but it cannot replace brushing.

High-Quality Supplements

Supplements including calcium, vitamin D, and vitamin C can improve dental health for people who might not obtain enough nutrients from their diet. However, prior to beginning any new supplement regimen, it is imperative that you speak with a healthcare professional. They can help you identify the supplements that are best for your particular needs.

The Importance of Regular Dental Visits

Although these suggestions can help maintain dental health, they cannot take the place of routine dental examinations and cleanings. Dentists possess the knowledge and resources necessary to recognise and handle problems that at-home care cannot resolve. Frequent dental appointments are essential for treating problems that are beyond the scope of at-home treatment and for receiving individualised guidance based on each patient’s unique medical requirements.

Embracing a Holistic Approach to Dental Health

The true “secret” to good dental health isn’t avoiding visiting the dentist; rather, it’s adopting a comprehensive strategy that involves careful home maintenance, a balanced diet, and knowledge of other habits that might improve oral health. Combining these procedures with continuing care from your dentist will help you have a healthier smile and be in better health overall.

air fryer peanut butter bars

air fryer peanut butter bars

Are peanut butter bars your favorite? It’s impossible to resist the harmony of crunchy and chewy, sweet and salty. Because they contain a lot of sugar and processed components, they can be rather unhealthy. What if I told you that you could improve them even further in less than fifteen minutes? You can make wonderful, healthful peanut butter bars using an air fryer that are so excellent that no one will ever guess they’re not unhealthy. See how by continuing to read!How!

How to Keep Things

If you have any leftovers, let them to come to room temperature before storing them for up to seven days in an airtight container or Ziploc bag.

Components

  1. One cup unsalted butter
  2. one and a half cups dark brown sugar
  3. 1/3 cup of sugar, granulated
  4. Two big eggs
  5. One-tspn pure vanilla extract
  6. 24.75 ounces of all-purpose flour
  7. One tsp baking soda
  8. Two cups of chocolate chips
  9. Half a cup of creamy peanut butter

Guidelines

  • Grease a baking pan that is square and keep it aside.
  • Cream the butter, brown sugar, and granulated sugar in a sizable mixing basin until smooth.
  • Once mixed, stir in the eggs and vanilla essence.
  • Stir in baking soda and flour.
  • Add the chocolate chips and fold.
  • Fill the baking pan with the batter. (Depending on the size of the pan and your air fryer, this recipe yields two batches of small square pans or one large pan.)
  • Spoonfuls of peanut butter should be added to the batter’s top.
  • Swirl the peanut butter into the batter with a toothpick.
  • Bake for 10 to 14 minutes, or until the batter is thoroughly cooked, at 320°F on the air fry setting.

air fryer homemade cinnamon sugar donuts

air fryer homemade cinnamon sugar donuts

A delicious recipe for a classic baked donut may be found here. We made some extremely light and fluffy donuts today with our air fryer.

Different Recipes

Of course! It can be enjoyable to experiment with flavors and textures while making homemade cinnamon sugar donut variations using an air fryer. To get you going, consider these suggestions:

Nutty Crunch: To give the cinnamon sugar combination a bit more crunch, add finely chopped nuts (such walnuts, pecans, or almonds).

Lemon Sugar Donuts: For a zesty touch, incorporate some lemon zest into your dough and use a sugar coating laced with lemon juice instead of cinnamon.

Donuts with Coffee Flavor: To add a hint of coffee flavor, blend some espresso powder into your cinnamon sugar mixture.

Donuts with vanilla bean: – For an additional hit of vanilla flavor, scrape the seeds from a vanilla bean pod and stir them into the sugar coating.

Components

  1. 1/3 cup brown sugar for donuts
  2. Two tablespoons of melted butter
  3. One cup of flour for all purposes
  4. One tsp baking powder
  5. One tsp baking soda
  6. One tsp salt and one tsp ground nutmeg
  7. one tsp finely ground cinnamon
  8. one cup of milk
  9. 1/4 cup sour cream, plain yogurt, or yogurt
  10. One tsp vanilla essence

Coating:

  1. One cup of sugar crystals
  2. two tsp finely ground cinnamon
  3. Four teaspoons of melted butter

Guidelines

  • Melt the butter and stir in the brown sugar in a small bowl. This will contribute to the fluff of your donuts.
  • Combine the flour, baking soda, baking powder, salt, powdered nutmeg, and cinnamon in a sizable mixing bowl.
  • After that, combine the dry ingredients with the wet ones, then stir in the yogurt, milk, and vanilla essence.
  • Stir thoroughly, being cautious to scrape down the edges to incorporate all of the dry ingredients.
  • Apply some olive oil spray to your donut pan.
  • Pour the batter into the donut pans.
  • Place the loaded pan inside the air fryer and cook it for 12 to 16 minutes at 320 degrees Fahrenheit.
  • Before coating, allow to cool slightly.
  • Dip the donut into the cinnamon-sugar mixture and the melted butter. Lay them out to dry on a rack.

Air Fryer Cinnamon Toast Crunch Donuts

Air Fryer Cinnamon Toast Crunch Donuts

Donuts in the Air Fryer: If you’ve ever wanted to attempt creating your own doughnuts, this recipe may be just what you’ve been looking for.

Components

Components of doughnuts:

  1. One cup of crumbled Cinnamon Toast Crunch cereal
  2. one-third cup buttermilk
  3. One and a half cups all-purpose flour
  4. one and a half teaspoons of baking powder
  5. One-fourth teaspoon of baking soda
  6. half a stick of butter melted salted butter Four tsp
  7. One-fourth cup maple syrup
  8. One-fourth cup of light brown sugar
  9. One big egg
  10. Two teaspoons of sour cream or Greek yogurt
  11. Two teaspoons of vegetable or canola oil
  12. one and a half tablespoons of vanilla extract
  13. one tsp finely ground cinnamon

Glaze Ingredients:

  1. 1 1/2 cups of sugar powder
  2. three tablespoons of whole milk
  3. One spoonful of maple syrup
  4. One tsp vanilla essence
  5. half a teaspoon of cinnamon powder
  6. 1/2 cup of Crunch Cinnamon Toast Cereal

INSTRUCTIONS

  • In a large mixing basin, combine 1 cup of the crushed cinnamon toast crunch with the buttermilk. Stir just a little and set away. In a medium-sized mixing bowl, combine flour, cinnamon, baking soda, and baking powder; stir.
  • Before adding the egg to the bowl containing the cereal and buttermilk, give it a quick stir. To the bowl, also add the oil, brown sugar, melted butter, vanilla, maple syrup, and Greek yogurt. Mix everything up well by stirring. Bit by bit, add the flour mixture to the buttermilk mixture, stirring to fully incorporate.
  • Cooking spray or melted butter can be brushed onto your donut pan. Pore each cavity with roughly ¾ of completely filled. I use a piping bag, but feel free to use any method of your choice.
  • After inserting the donut pan into the air fryer basket, cook for ten to twelve minutes, or until the donut tops are pliable. After the donuts are cooked through, remove and allow to cool for 20 to 25 minutes, or until completely cool.
  • As the donuts cool, combine all glaze ingredients except cereal in a large bowl and stir until well blended. Carefully take out the donuts from the pan and coat the tops with the ready glaze before transferring them to a plate, pan, or piece of parchment paper.
  • Grind a portion of the leftover cinnamon toast crunches, ensuring that some remain whole. Put a few complete pieces there.


Boiled Melon Seed Tea

Boiled Melon Seed Tea

Occasionally, on our quest for natural health and wellbeing, we come across a hidden gem that leaves us wondering how we lived without it. We’re going to reveal to you one of these secrets today: cooked melon seed tea. This simple mixture, which is enjoyable to drink and simple to prepare, has several advantages that may make you glad you gave it a try.

How to Make Boiled Melon Seed Tea

Preparing this nourishing drink is as simple as it gets. Start with a handful of clean, dry melon seeds. You can use seeds from any melon variety you enjoy, such as cantaloupe or honeydew. Place the seeds in a pot of water and bring to a boil. Let them simmer for about 10 minutes, allowing their goodness to infuse the water. Strain the liquid into your favorite mug, and there you have it – a warm, soothing tea ready to enjoy. Feel free to add a hint of honey or lemon for a bit of extra flavor.

A Bundle of Benefits

This tea isn’t just about warmth and comfort; it’s a nutritional boost in a cup. Drinking it regularly can support heart health, thanks to the magnesium in the seeds which helps regulate blood pressure. It’s also great for digestion and can aid in maintaining a healthy immune system. The hydration factor can’t be overlooked either, especially for those who find plain water a bit too bland.

Incorporating Into Your Life


A small step toward a healthier living can be as easy as incorporating cooked melon seed tea into your everyday routine. It’s a simple and efficient approach to up the nutritional content of your diet, whether you do it as a morning ritual to get your day started or as an evening drink to relax with.

A Friendly Reminder


Although there are many advantages to using natural medicines like melon seed tea, it is important to incorporate them into a balanced diet. Remember always that moderation and variety are the keys to good health.

Thus, the next time you relish a melon, consider twice before discarding the seeds. They might be the tea that becomes your next favorite in the making.

Creamy dessert

Creamy dessert

Creamy dessert with very simple and easy to make

utilising just a few simple, easily accessible ingredients
Creamy ingredients come together to create a delicious and simple dessert.

In the dessert world, creamy sweets are by nature comforting. Rich and decadent, creamy desserts like velvety puddings and silky cheesecakes are the perfect way to indulge in sweets without sacrificing texture or flavor. Never worry if you’re in the mood for a creamy treat but despise spending a fortune on unusual ingredients or spending all day in the kitchen making it. With only a few simple ingredients, you can whip up this velvety dessert in no time at all. Indulge in a delectable dessert that will wow with its velvety smoothness and foolproof ease.

Ingredients:

  1. A pair of large cream cups
  2. Baby’s sweetened condensed milk
  3. 14 ounces (one can)
  4. one-eighth teaspoon vanillin
  5. Possible toppings include fruits, crumbled cookies, caramel sauce, chocolate shavings, sliced fruits, and fresh berries.

Guidelines:

  1. Put away to cool: Set aside at least fifteen to twenty minutes before you start to cool the bowl and beaters or whisk. Because of this, the cream will whip up more quickly and keep its form better.
  2. After the bowl and beaters have cooled, add in the heavy cream and whip until stiff peaks form. Whip the cream until it forms soft peaks using a hand mixer or stand mixer with the whisk attachment on medium-high speed. Overwhipping can cause gritty texture and stiff peaks, so be careful.
  3. Add Sweetened Condensed Milk Slowly while whisking continuously, add the sweetened condensed milk when the cream reaches soft peaks. Sweetened condensed milk adds richness and creaminess to the dish while aiding in the firming of the whipped cream.
  4. Integrate Vanilla Extract: Beat the mixture to a thick, silky whipped cream by gradually whisking in the vanilla extract. The addition of vanilla essence will enhance the flavour and aroma of the dessert.
  5. Set Aside and Chill: Ladle the whipped topping into individual dessert cups or a dish. Once the dessert has set and cooled fully, place the dish or glasses in the refrigerator for at least two or three hours. As it cools, the flavours can meld and the dessert can solidify into a creamy consistency.
  6. Present and Savour: After the dessert has cooled, remove it from the refrigerator and decorate it with any toppings you choose, such as caramel sauce, chocolate shavings, fresh berries, chopped fruits, or crushed cookies. Serve this simple dessert immediately because its creamy richness is best savoured that way.
    Various types:

Although the recipe given above provides a basic framework for a simple, quick, and creamy dessert, there are countless ways to customise and modify it. Consider the following alternatives:

  • Try adding cocoa powder, instant coffee granules, citrus zest, or fragrant extracts like peppermint, almond, or coconut to create your own unique flavour profile.
  • Options for Add-Ons: Before the creamy mixture is refrigerated, fold in chopped nuts, chocolate chips, crumbled cookies, or dried fruit to improve its texture and flavour.
  • Options Without Dairy: Instead of using heavy cream, try using coconut cream or a dairy-free whipped topping for a vegan-friendly twist.

Try some creamy desserts to satisfy your sweet tooth with the least amount of effort and the most flavour. They are wonderful and tasty. With just a few basic materials and straightforward instructions, you can create a creamy masterpiece that will wow your friends and family. You may eat this simple, creamy dessert simply or top it with all your favourite stuff, and it will quickly become a regular. So why not indulge on that creamy urge you have today? It will gratify your palate.

Say Goodbye to Bedbugs

Say Goodbye to Bedbugs

Say Goodbye to Bedbugs in Your Garden with These Natural Remedies Have you had enough of battling bothersome bedbugs in your garden? Try these all-natural solutions in instead of artificial pesticides. To get started, you only need a few basic components.

The Problem with Bedbugs in Your Yard

In addition to causing harm to plants, bedbugs are unwanted pests that can spread dangerous plant illnesses. Although these tiny green beetles pose no threat to your health, they can cause serious damage to your plant. They adhere to leaves, consume sap from plants, and have the power to completely destroy or severely slow down the growth of your plants.

The Solution: All-Natural Bug Spray

Instead of spending a fortune on insecticides, consider creating your own natural bug repellent. You can permanently get rid of bedbugs in your garden with just two ingredients. What you’ll need is as follows:

  1. powdered baking
  2. Water

To make a solution, combine baking powder with one litre of water. After the mixture is well combined, pour it into a spray bottle or nebulizer. Make sure the baking powder is fully dissolved in the water before spraying it on the soil and leaves of your plants.

Why Baking Powder Works

Baking powder is intolerant to bedbugs. The baking powder stuns the pests and keeps them from coming back when applied to the damaged areas of your garden. So, bid adieu to dangerous pesticides and safeguard your plants with this easy-to-use fix.

Other Natural Remedies to Keep Bedbugs Away

Here are a few more all-natural solutions you may try if you’re seeking for ways to keep bedbugs out of your garden:

  1. Garlic spray: In a litre of boiling water, combine one clove of garlic. To make the mixture more potent, let it remain in the refrigerator for a week. Once the seven days have passed, pour the mixture into a spray bottle and use it to sprinkle your plants. Garlic repels bedbugs, so they’ll swiftly move out of your garden.
  2. Diatomaceous earth is a natural product that works well against a range of pests, including bedbugs. You can find it in garden stores. In your garden, apply a small bit of diatomaceous earth to the trouble spots, and observe the bedbugs vanish.
  3. Strong-smelling herbs: Sage, basil, and rosemary are among the herbs that repel bedbugs since they don’t appreciate strong scents. Crushed these herbs and strewn about your garden to create a DIY repellant.

You may prevent bedbugs from bothering your plants or using dangerous insecticides by employing these natural treatments. Bid adieu to bedbugs and welcome a flourishing, wholesome garden!

air fryer almond cake

air fryer almond cake

Savor the nutty perfection of our Air Fryer Almond Cake, a treat that honors both the ease of airfrying and the rich flavor of almonds. This recipe provides an easy and enjoyable method to indulge in a soft and moist almond cake that will definitely satisfy your sweet tooth. This recipe for Almond Cake is a must-try for everyone who is new to air frying or an experienced baker. Come along on this culinary adventure with us as we walk you through the easy stages of making a delicious almond cake in your air fryer.

Components

  1. One-fourth cup almond flour
  2. Two teaspoons of sugar, granulated
  3. Two teaspoons softened unsalted butter
  4. One big egg
  5. One-fourth teaspoon of extract from almonds
  6. one-eighth teaspoon of powdered baking soda
  7. A pinch of salt

Optional Almond glaze

  1. Two tablespoons of sugar powder
  2. Half a teaspoon of extract from almonds
  3. half a teaspoon of water

Guidelines

  1. Beat softened butter and powdered sugar until frothy and light.
  2. Once the egg and almond extract are added, thoroughly mix them.
  3. Mix almond flour, baking powder, and a small amount of salt in a another basin.
  4. To make a smooth batter, gradually combine the dry components with the wet ones.
  5. Set your air fryer to 160°C, or 320°F.
  6. Grease a tiny cake pan or ramekin that will fit snugly in the air fryer basket.
  7. The cake pan or ramekin should be buttered before adding the almond cake mixture.
  8. In the basket of the preheated air fryer, place the cake pan or ramekin.
  9. To ensure a clean toothpick when pushed into the center, air fried for around 15 to 20 minutes. Watch it closely because cooking times can change.
  10. While the cake cools, make a simple almond glaze by combining water, almond essence, and powdered sugar and whisking until smooth.
  11. After the cake has cooled down a bit, cover the top with the almond glaze.
  12. Let the almond cake cool for a short while before cutting into your delicious little almond cake—it’s moist and full of delicious almond flavor.