citrus-infused vinegar

citrus-infused vinegar

Beyond their luscious flesh, citrus fruits like oranges and lemons have a lot of promise in addition to being delicious and refreshing. These fruits’ peels, which are frequently thrown away without a second thought, are rich sources of organic substances that can be used for a variety of domestic tasks. Orange and lemon peels make powerful materials for air fresheners, homemade cleansers, and other household products when mixed with vinegar, another multipurpose basic. We’ll explore the benefits of storing orange and lemon peels in this post and how to combine them with vinegar to make useful and sustainable solutions.

1.Essential oils with potent degreasing and antimicrobial qualities, such as limonene and citral, are found in orange and lemon peels. These oils make a natural cleaning solution that works wonders on grease, filth, and stains on a variety of surfaces when mixed with vinegar.

Acidity of Vinegar: White vinegar in particular has an acidic quality that makes it a mild deodorizer and disinfectant. It works well as a cleaner for kitchens, bathrooms, and other areas because it breaks down residues, soap scum, and mineral deposits.

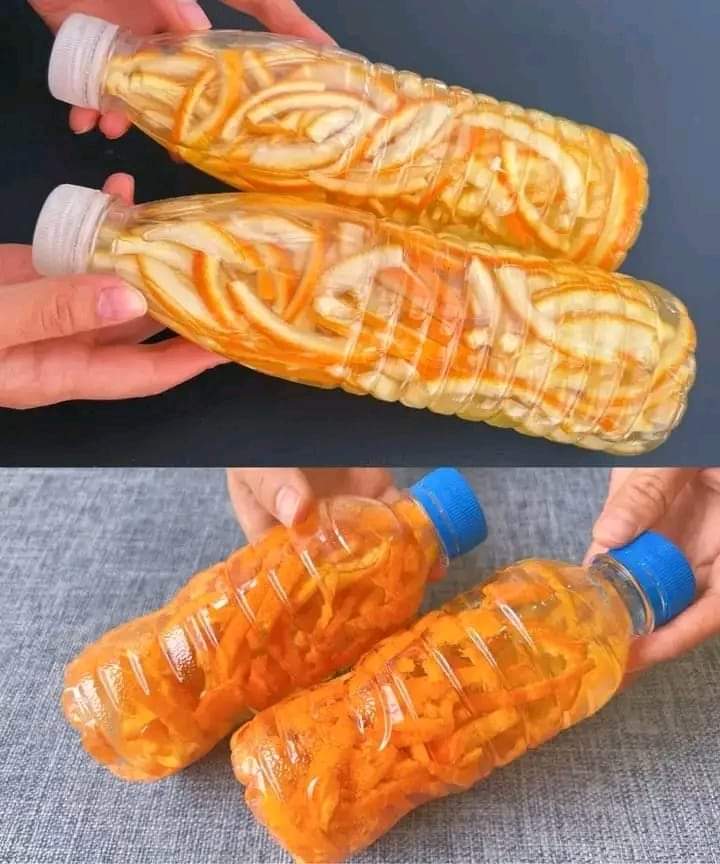
Repurpose citrus peels and store them in a jar for a homemade all-purpose cleaner. For a few weeks, let the peels absorb after covering them with white vinegar. After straining and diluting with water as needed, use the combination as an all-purpose, multipurpose cleaner for floors, counters, sinks, and glass surfaces.

2. A Clean and Aromatic House: All-Natural Deodorizer: Because citrus peels contain essential oils, they smell energizing and pleasant. They help eliminate smells and leave behind a lovely citrus scent when mixed with vinegar.

Make Your Own Air Freshener Spray: Fill a spray bottle with water and filter vinegar scented with citrus. Use it to freshen linens, upholstery, and rooms without adding chemicals or artificial fragrances

.3. Economical and environmentally friendly:

Cut Down on Waste: Orange and lemon peels can be used for household cleaning and freshening instead of being thrown in the garbage or compost bin. This maximizes the use of natural components and minimizes waste.

Cost-effective: Creating your own vinegar cleaner and air freshener with citrus extracts is less expensive than buying store-bought items. Additionally, you can adjust the aroma and strength to suit your tastes.

How to Make Vinegar with Citrus Infusion:

Compile the Peels:

  • After using the fruit, gather the peels from oranges and lemons. Make sure there is no fruit residue on the peels and that they are clean.

Method of Infusion:

  • Put the peels in a glass jar and pour all of the white or apple cider vinegar over them.

Infusion Time:

  • Close the jar and leave it in a dark, cold area for two to four weeks so that the oils and chemicals from the peels can seep into the vinegar.
  • After infusing, filter and dilute the vinegar to get rid of the peels. For a gentler cleaning solution, dilute the infused vinegar with equal parts water, or use it straight for more difficult cleaning jobs.

Safety Advice:

  • Ensure that homemade cleaning solutions are properly labeled and kept out of the reach of children and animals.
  • on ensure compatibility, test the infused vinegar on a tiny area before applying it on fragile surfaces.
  • By preserving orange and lemon peels and mixing them with vinegar, you can take use of their inherent cleaning and deodorizing abilities while also making your daily routine more environmentally friendly and sustainable. Accept the adaptability of these basic components and take pleasure in a clean, fresh environment free of harsh chemicals and false scents.
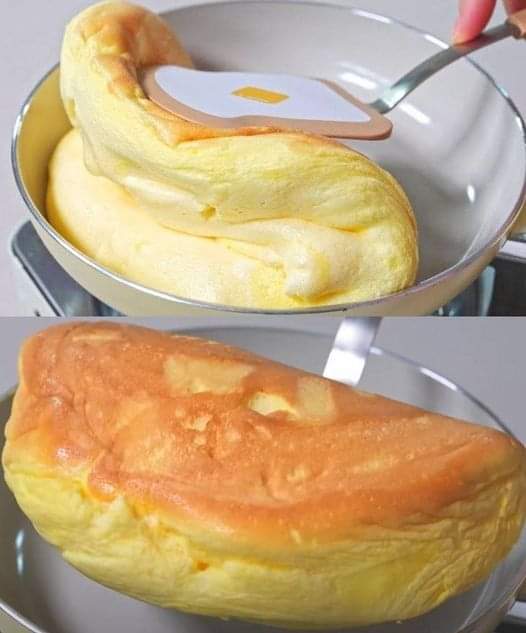
Two-Ingredient Banana Cake:

Two-Ingredient Banana Cake:

This Two-Ingredient Banana Cake is the perfect snack if you’re searching for something quick, wholesome, and helps you lose weight. You may make a tasty and filling dessert that you can eat at home or take to work with just ripe bananas and oat flakes. Prepare a pen and paper so that you can write down the ingredients and easily follow the directions to make this delicious cake.

Ingredients:

  1. 2 ripe bananas
  2.  1 cup oat flakes

Directions:

  • Begin by mashing the ripe bananas until you achieve a smooth consistency. You can use a fork or a potato masher to do this.
  •  Once the bananas are mashed, add the oat flakes to the bowl. Mix well to combine the ingredients thoroughly. The oats will help bind the mixture and provide texture.
  • Grease a baking pan to prevent the cake from sticking. You can use cooking spray or a small amount of oil.
  • Pour the banana and oat mixture into the greased pan, spreading it evenly.
  •  Preheat your oven to 350°F (180°C Place the pan with the batter in the preheated oven.
  • Bake for about twenty-five minutes, or until the cake is golden brown. Depending on your oven, the baking time may differ somewhat, so pay attention to it.
  •  After the cake is done, take it out of the oven and allow it to cool for a little while in the pan.
  •  You can slice and serve the cake after it has cooled. It’s a fantastic choice for an easy and wholesome snack.
  • In conclusion, this is the recipe for a two-ingredient banana cake that is easy to prepare, nutrient-dense, and ideal for anyone trying to keep their weight in check. You may make a tasty and filling treat that can be consumed at work or elsewhere with just ripe bananas and oat flakes.

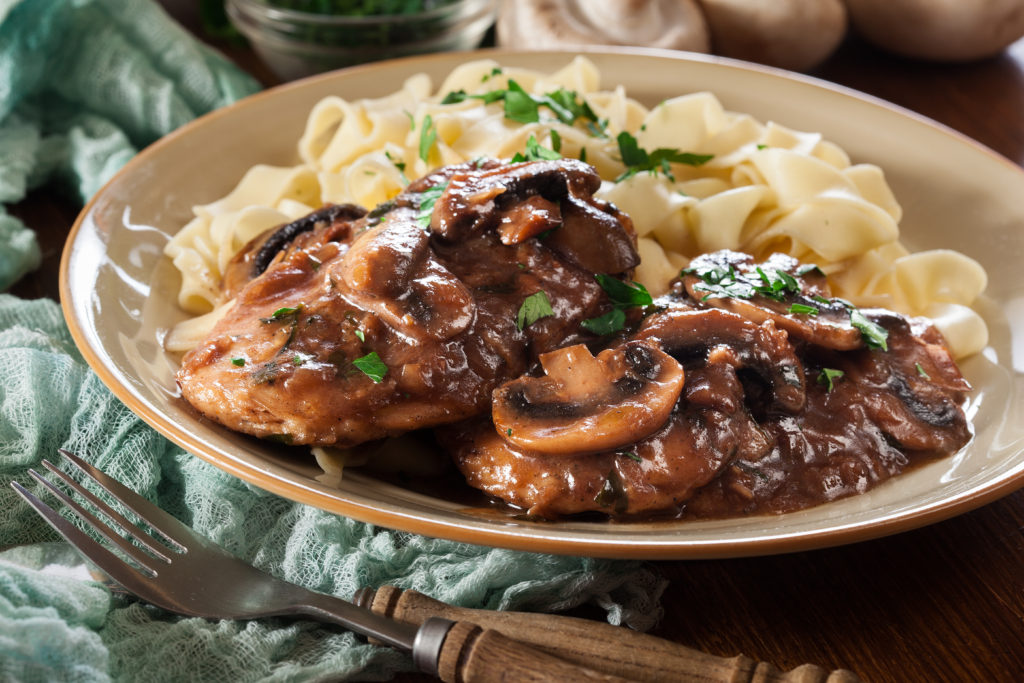
Weight Watchers Chicken Marsala

Weight Watchers Chicken Marsala

You’ll fall back in love with chicken after trying this Weight Watchers Chicken Marsala recipe. It tastes wonderful and requires little preparation or cooking time. What more could a recipe ask for?

I’m scared of that, that’s why. Until I tried this recipe, that is.

INGREDIENTS

  1. Six skinless, boneless chicken breasts, or roughly 16 ounces of meat
  2. Fresh baby Portobello mushrooms, one pound
  3. Use three-quarters cup of this dressing.
  4. One tablespoon of white all-purpose flour
  5. Two minced garlic cloves or 1/2 tsp garlic powder
  6. 1/4 teaspoon of ground pepper
  7. One-fourth teaspoon salt
  8. Two teaspoons pure olive oil
  9. One tablespoon of canola oil-based light butter
  10. Half a cup low-sodium, fat-free chicken broth
  11. half a cup of cooking wine marsala
  12. Use green onions or fresh parsley for garnish
  13. Cooking spray

Guidelines

  • Every boneless chicken breast should be pounded to a thickness of 1/2 inch by sandwiching it between two pieces of plastic wrap. It is more effective to practice on each one separately.
  • Add Italian dressing to a big gallon-sized zip plastic bag containing all of the chicken breasts. Marinate in the fridge for at least eight hours or overnight.
  • Set the oven’s temperature to 350.
  • Take the chicken breasts out of the zip-lock bag and discard any remaining dressing.
  • Combine the flour, salt, pepper, and garlic powder. Coat each chicken breast completely with the mixture. Garlic cloves can be substituted for garlic powder; first, cut the cloves, allow them to cool, and then add them to the flour mixture.
  • The size of the chicken breasts will determine whether or not you need to prepare another batch of the mixture.
  • Apply cooking spray to the bottom of a big nonstick skillet.
  • Add 1 tablespoon extra virgin olive oil to the skillet along with the butter, and over medium-high heat, fry until browned on both sides.
  • Put onto a baking sheet sprayed with cooking spray.
  • Whisk any browned bits of chicken on the bottom of the pan before adding the chicken stock and wine to the frying skillet. Much of the flavor originates from here.
  • After bringing the mixture to a boil and cooking it for four to five minutes, use a sieve to remove the pieces from the marsala wine sauce. I enjoy
  • this particular one. Sauce should be put aside for later. Place the freshly cleaned and chopped mushrooms in the empty skillet. Spread spoonful of olive oil on it. After roughly three minutes of sautéing the mushrooms, add the reserved sauce. Cover the chicken with the marsala sauce.
  • Bake the chicken breasts with sauce for 25 to 35 minutes, or until the internal temperature of the chicken reaches 165 degrees. You’ll get the tastiest chicken this way.
  • To taste, add salt and pepper to the chicken.
  • To achieve the greatest uniform flavor, make sure you distribute the mushrooms equally throughout each breast.

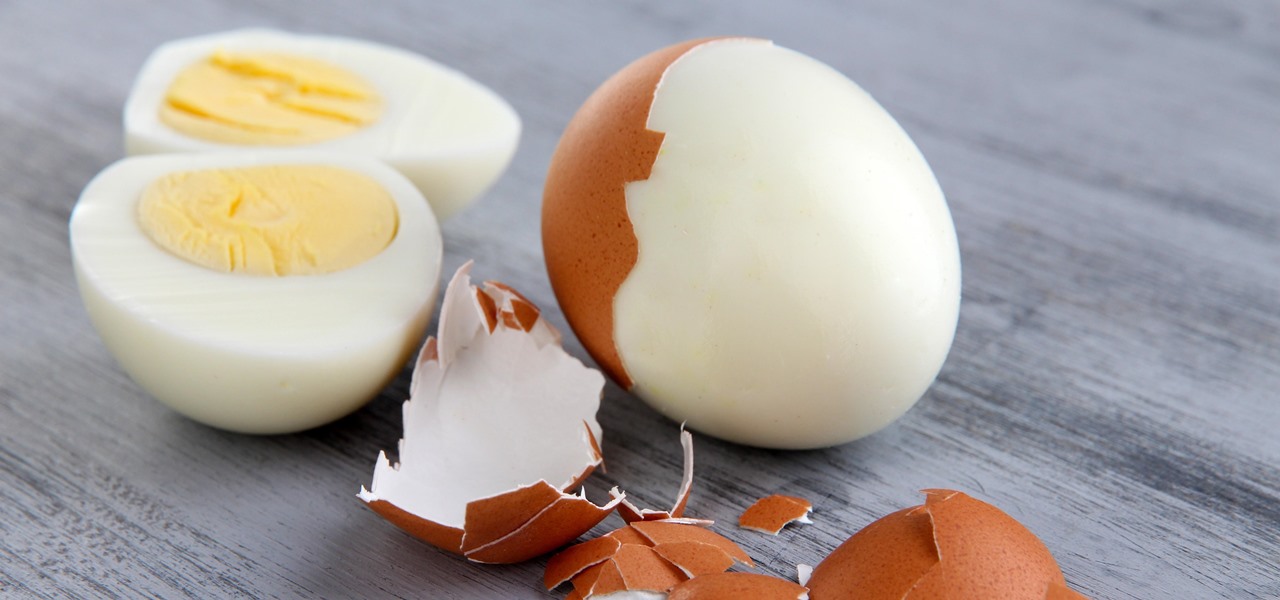
Hard Boiled Eggs to Have Perfect Peels

Peel hard eggs easy pizzy

Hard Boiled Eggs to Have Perfect Peels Are you getting the willies from peeling hard-boiled eggs? You are not alone in this common kitchen situation. Hard-boiled eggs are a popular and nutritious snack even if peeling them is a filthy task due to their tightly sticking shells. But don’t worry! Jacques Pépin, the renowned French chef, cookbook author, and television broadcaster, has a clever method for simplifying the process of peeling eggs.


When hard-boiled, the shells have a tendency to adhere to the egg white, breaking into small pieces and giving the eggs an unappealing appearance. However, Pépin’s method modifies the cooking process in a simple yet effective way. Is that the key to it all? Before putting the egg in the boiling water, make a small cut on its broad end.


This procedure may make it easier to remove the eggshell since the air pocket inside the egg gradually releases while it cooks. When the air pocket remains trapped, the white sticks to the shell and peeling becomes more challenging. When you release this air, the eggshell will slide off smoothly and easily.


  • It doesn’t take any specialised tools to drill this small hole. A simple pin or thumbtack would suffice.
  • Carefully puncture the broad end of the eggshell to make a hole that is big enough to allow air to escape without breaking the egg. Once the hole is formed, just boil the egg. The air pocket is eliminated while cooking, which facilitates peeling.
  • Because it doesn’t require any specialised equipment or training, this method is ideal for both seasoned chefs and novice cooks. This is a lifesaver for busy mornings when you still want a high-protein snack or breakfast.
  • A hard-boiled egg can have its shell removed with ease using Pépin’s method, revealing a perfectly formed white egg inside. By employing this technique, you may elevate your cooking skills to a professional level and accelerate and clean up the peeling process.
  • Therefore, the next time you wish to create hard-boiled eggs, remember Jacques Pépin’s straightforward yet extremely helpful advice. Only a small hole in the eggshell can enhance your salads, snacks, and breakfasts, making a laborious task quick and simple.

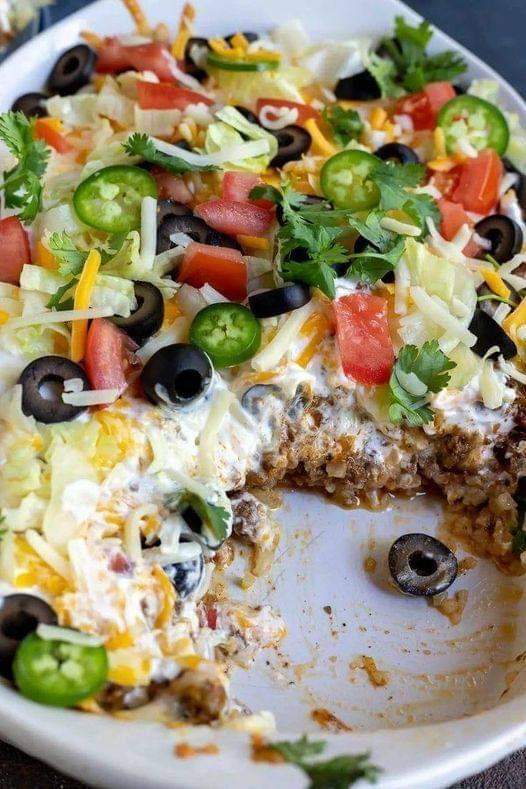
Weight Watchers Friendly Taco Casserole Recipe

Weight Watchers Friendly Taco Casserole Recipe 

enjoy creating casseroles for many occasions, but particularly for holidays, family feasts, and big occasions like the Super Bowl. These are usually delicious and simple to make, and this one is especially good for just one WW point

If you enjoy tacos, you should definitely try my Zero Point Chicken Taco Soup and Weight Watchers Friendly Taco Dip! Everything is permissible as long as you follow Weight Watchers guidelines. I’m always switching up the ingredients to get more flavor for less calories. For instance, replace ground beef with ground turkey or plain, nonfat Greek yogurt with sour cream. enjoy keeping things lively! Additionally, want to include new WW-friendly items into my regular meals whenever can to reduce the point value, whether locate them in the grocery store or learn about them from my WW group. You already understand what mean if you follow Weight Watchers.

INGREDIENTS

  1. One pound of meat turkey or chicken;
  2. half a diced white onion;
  3. one can of whole kernel corn;
  4. one can of black beans;
  5. one tablespoon taco seasoning;
  6. two tablespoons taco sauce;
  7. one and a half cups fat-free sour cream;
  8. one cup diced fresh tomatoes;
  9. one and a third cup green onions

Guidelines

  • Over medium-high heat, sauté the meat, beans, onions, taco seasoning, sauce, and corn until the meat is browned, or until the soy crumbles are cooked through.
  • Evenly spoon half of the meat mixture into the casserole dish, then cover with a thin layer of sour cream and cheese.
  • Repeat. Spread cheese on top.
  • After 15 minutes of baking at 350 degrees, top with chopped tomatoes and green onions and serve.

How to Make Weight Watchers Taco Casserole: Some Advice

  • You can get the recipe for the SALT-FREE taco seasoning here if you missed it.
  • Do you want to have chips with your taco casserole? For every 24 chips, Mini Tostitos only cost points! If you love avocados, this creamy, luscious guacamole would be excellent for you!
  • This recipe’s low point count is result of using several foods that have zero points; the whole list is provided here.
  • These Ole Wellness Wraps are really great—they’re only one point and huge!

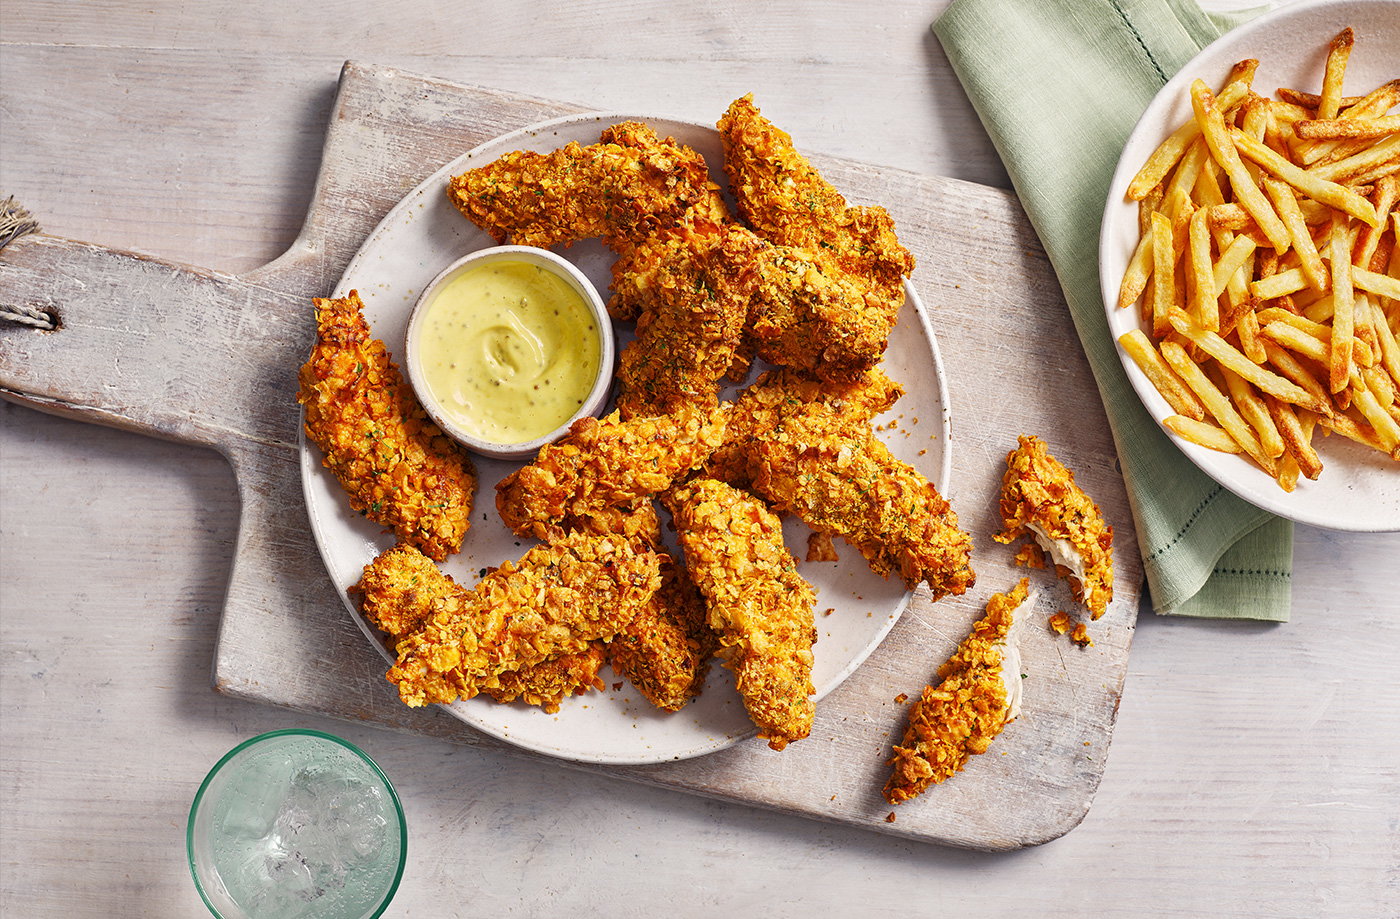
Air-fryer chicken tenders recipe

Air-fryer chicken tenders recipe

The air fryer is used only to make these crispy chicken tenders. Accompany with a gooey mustard and honey sauce for dipping.

Components

  1. Mini chicken fillets, 650g
  2. 50 grams of ordinary flour
  3. 1/2 tsp paprika smoked1 tsp finely chopped garlic
  4. One teaspoon of dried parsley
  5. two beaten medium eggs
  6. 150g of cornflakes
  7. spritz motor oil
  8. Two tablespoons of mayonnaise
  9. One tablespoon of runny honey
  10. American yellow mustard, 1 tablespoon
  11. A teaspoon of wholegrain mustard

INSTRUCTIONS

  • Method 1: Set the air fryer’s temperature to 200°C. Apply a little layer of oil to the basket.
  • 2. Combine the flour, granulated garlic, parsley, smoked paprika, and a generous pinch of salt and black pepper in a bowl. Transfer the whisked eggs to a another bowl.
  • 3. Place half of the cornflakes in a big zip-seal bag and use a rolling pin to crush them into fine crumbs.
  • 4. Working in two batches, thoroughly coat the chicken small fillets by dredging them in the seasoned flour, then the egg, and then the cornflakes bag.
  • 5. Place the strips in the air fryer in a single layer and mist the tops with additional oil. Cook, stirring after 8 minutes, for 12 to 15 minutes, or until cooked through.
  • 6. In the interim, crush the remaining 75g of cornflakes and dispose of the soggy cornflake crumbs. Cover the remaining chicken so it’s ready to cook.
  • 7. To make the sauce, combine the honey, mayonnaise, and both mustards; add a dash of black pepper. Toss into a small serving bowl and serve immediately.
  • 8. Prepare the remaining chicken tenders in the same manner.

Advice: To make them free of gluten,substituting the plain flour for a gluten-free flour blend.

Airfryer Apple Pie dish

Airfryer Apple Pie dish

Get ready for a dessert that will not go away! Made in only a few minutes, this Airfryer Apple Pie dish has the ideal balance of crispy, golden crust and fresh apples.


Ingredients For Airfryer Apple Pie dish:


  • One cup of wheat flour for mass
  • One-fourth cup sugar
  • Half a teaspoon of salt
  • Half a cup of chilled butter, tiny cubes
  • Two to three tablespoons ice water
  • Four peeled and thinly sliced apples will be used as the filling.
  • One-fourth cup sugar
  • One tsp powdered cinnamon
  • One tablespoon of lemon juice


Instructions For Airfryer Apple Pie dish:


  1. Combine the flour, sugar, and salt in a sizable bowl.
  2. Using a pastry cutter or your fingers, add the cubed cold butter to the flour mixture and stir until the mixture resembles coarse crumbs.
  3. One tablespoon at a time, add the ice water and stir until the dough begins to come together. It can take two to three teaspoons of water to reach the desired consistency.
  4. Refrigerate the dough for a minimum of half an hour after forming it into a ball and covering it with plastic wrap.
  5. In a bowl, mix together the apple pieces, sugar, cinnamon, and lemon juice while the dough is refrigerated.
  6. Using a floured surface, roll out the dough until you get a circle big enough to line the sides and bottom of an Airfryer pie dish.
  7. Press the dough firmly against the sides and bottom of the pie pan.
  8. Cover the dough with the apple mixture.
  9. Set your Airfryer’s temperature to 180°C.
  10. After putting the pie dish with the dough and filling inside the Airfryer, bake it for 20 to 25 minutes, or until the apples are tender and the crust is golden.
  11. Before serving, take the pie out of the Airfryer and allow it to cool a little.
  12. If you’d like, you may serve this apple pie with whipped cream or a scoop of vanilla ice cream. Have fun!


Enjoy a Delicious and Easy 3 Ingredient Danish Pastry

Enjoy a Delicious and Easy 3 Ingredient Danish Pastry

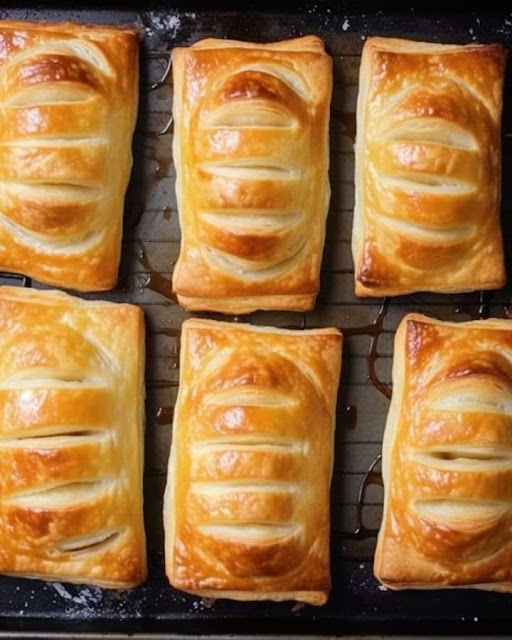
Enjoy a Delicious and Easy 3 Ingredient Danish Pastry You will enjoy this 3-Ingredient Apple Danish recipe if you enjoy pastries. It’s an easy and quick technique to create a delicious pastry that tastes just like Danish food. Puff pastry, apples, and confectioner’s sugar are all you need.

Fresh apples are sautéed with sugar in this dish and then wrapped in puff pastry. The finished product is a delicate, flaky pastry with a fruity, sweet filling. You can eat it right out of the oven, or you can put it in the refrigerator to reheat it later.

This 3-ingredient apple Danish is excellent as a snack or for breakfast. For a flavorful pairing, try it with your preferred beverage, such milk or coffee. For added indulgence, you can also add some extra toppings, such caramel sauce or vanilla ice cream. For a balanced supper, you could also serve it with some fresh fruit or a green salad.

Recipe By: Recipes Tarika Sahla

Ingredients For Recipe:


  • Two puff pastry sheets
  • Two apples of average size, quartered, cored, and peeled
  • 1/3 cup of confectioners’ sugar + additional for dusting


Instructions For Recipe:


1. Line a baking tray with parchment paper and preheat the oven to 425°F.

2. Cut the apples into quarters and peel them. Simmer them for approximately 4 minutes, or until they are just starting to soften, in a saucepan filled with enough water to cover them. When the apple mixture cools, drain the water, whisk in the sugar, and stir again.

3. After dividing each puff pastry sheet in half, cut each half into three rectangles. In total, you ought to have six parts.

4. Moisten the edges of one rectangle of dough, pour in part of the apple mixture, and then cover with another rectangle of pastry that has some slits cut in it. To seal, press the edges together. To make six apple parcels, repeat with the remaining pastry and apple mixture.

5. After dusting each parcel with a little more sugar, put them on the baking dish that has been ready.

6. Bake for 12 to 15 minutes, until puffed and brown.

7. You can either eat your 3-ingredient apple Danish warm or keep it in the refrigerator for up to two days in an airtight container. Before serving, reheat them for a few minutes in the oven.


Advice on Preparing a 3-Ingredient Danish Pastry:

  • You can use any kind of apple, but tart varieties, like Granny Smith, complement the sweetness of the dough and sugar perfectly. For extra flavour, you may also stir in some nutmeg, cinnamon, or lemon zest with the apple combination.
  • The puff pastry is easily sliced with a pizza cutter or a sharp knife.
  • The apple mixture can be prepared in advance and kept chilled until the pastries are assembled.
  • The unbaked apple packages can be stored for up to a month, at which point they can be baked after adding a few months.

Southern Cornmeal Hoecakes:

Southern Cornmeal Hoecakes:

You’re mistaken if you assume they resemble pancakes. You won’t forget these once you’ve tried them, I assure you.

Fried cornbread, or Southern cornmeal hoecakes, is a well-liked dish that captures the essence of the American South’s profound yet uncomplicated culinary traditions. This dish not only exemplifies the inventiveness of Southern cooking, but it also conveys the tenacity and narrative of its people. Let’s examine this wonderful recipe and its preparation in more detail:

INGREDIENTS

  1. 2.3 cups cornmeal
  2. 1/3 cup flour that self-raises
  3. pancake mix

Directions:

  • Heat oil: Fill a skillet with about 3 tablespoons of oil and place it over medium heat. You can use any oil you like, however coconut oil is suggested for its taste and health advantages.
  •  Fry the hoecakes: Add a tablespoon of batter to the pan as soon as the oil is hot. To guarantee even cooking and simple turning, take care not to pack the pan too full. This method is similar to frying pancakes: make sure the top has small bubbles and the edges are golden.
  • Bake until golden brown: Carefully flip the hoecakes over to cook the second side after frying them till golden brown on the first side. To get the ideal color and crispiness on each side, it should take a few minutes.
  • Drain and serve: To remove any excess oil, place the fried hoecakes on a platter covered with paper towels. To get rid of extra oil, gently press the hoecakes with another paper towel.
  • Savor: Present the warm hoecakes. They are quite adaptable and go well with a wide range of toppings, including as savory cheeses and sweet butters like honey, or they can even be eaten as an accompaniment to meat and veggies.

In summary,

  • Southern Cornmeal Hoecakes are more than just a dish; they pay homage to the region’s history and capture its friendliness, resiliency, and sense of community. Whether served for lunch, supper, or brunch, these hoecakes will provide a little southern warmth to any table.

Air Fryer Twice Baked Potato

Featured_Air-Fryer-Twice-Baked-Potato

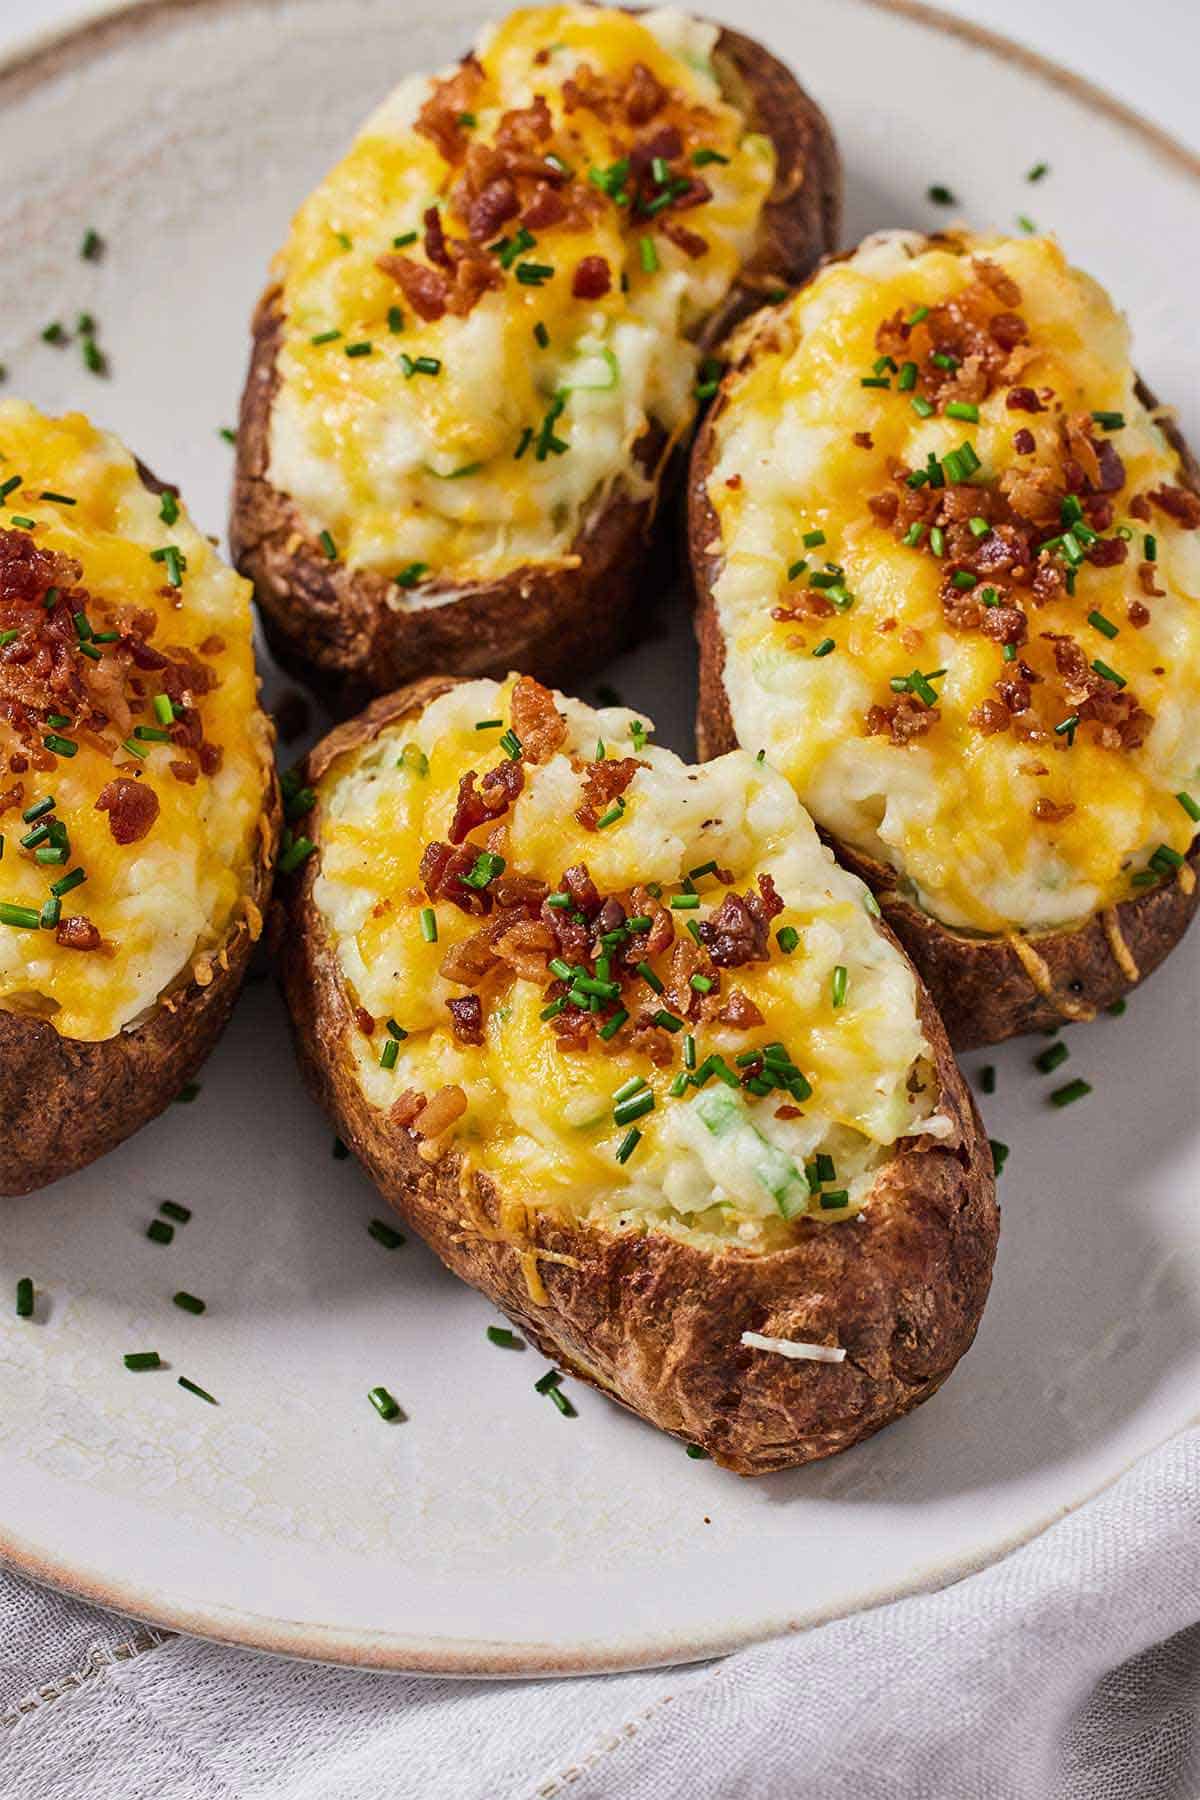
Air Fryer Twice Baked Potato The ideal creamy and cheesy side dish for any meal is this recipe for Air Fryer Twice Baked Potatoes! You’ll want to make them often since they’re so soft on the inside and crispy on the outside. They assemble so effortlessly and swiftly!

Using the air fryer, this dish for twice-baked potatoes comes together quickly. It’s the ideal side dish for any supper, including hectic weeknight meals and holiday dinners. I adore how the air fryer produces such a deliciously crispy potato shell. They’re usually a hit because they’re tasty, fluffy, and creamy.

These cheesy potatoes are stuffed with sour cream, cheddar cheese, bacon bits, and green onions and are made with basic ingredients. You’ll be shocked by how wonderful they are! Do you want another delicious side dish? Try my recipes for cauliflower steaks, mashed cauliflower, and crispy shallot green beans.

Recipe By: Cooking with Coit

Setup Time: 15 minutes
Cooking Time: 40 minutes
Overall Time: 55 minutes

Ingredients for Recipe:


  • ½ cup sour cream
  • 2 tablespoons olive oil
  • 4 big russet potatoes
  • 3 tablespoons softened butter
  • ½ cup milk
  • 2 thinly sliced green onions
  • 1 ½ tsp salt
  • 1 tsp black pepper
  • 1 cup divided cheddar cheese


ٰInstructions for Recipe:


  • After washing, use a fork to pierce the potatoes all over.
  • Toss the potatoes with olive oil and salt in a big bowl.
  • After adding the potatoes to the air fryer basket, cook them at 400 degrees for 35 to 40 minutes, or until they are fork-tender.
  • After taking the potatoes out of the basket, let them cool for a little while.
  • After the potatoes have cooled, cut them in half, then transfer the majority of the potatoes into a large mixing bowl. Potato skins should be put away.
  • To the bowl, add the green onions, sour cream, butter, milk, salt, and ½ cup of cheddar cheese. Mash the potatoes with a fork or masher until they have a creamy texture. Re-fill each potato skin with mashed potatoes, then sprinkle the leftover cheddar cheese on top. Reposition the potatoes in the air fryer basket and cook for a further two minutes at 350 degrees.


Notes: You can use Monterey Jack, mozzarella, swiss, or parmesan cheese in place of the shredded cheddar cheese.
You can add jalapeños, red pepper flakes, caramelised onions, garlic powder, paprika, onion powder, ranch dressing, and more to the potato filling. There are no limits.

To ensure consistent cooking, try to purchase potatoes of comparable sizes.
Since the skin of potatoes is edible, always give them a thorough cleaning before using. To ensure that the oil and seasoning stay better, pat them dry before dipping them in it.

Nourishment:
328 kcal of calories, 37 g of carbohydrates, 9 g of protein, 17 g of fat, 8 g of saturated fat, 1 g of polyunsaturated fat, 6 g of monounsaturated fat, 0.2 g of trans fat, 36 mg of cholesterol, 611 mg of sodium, 844 mg of potassium, 3 g of fibre, 3 g of sugar, 485 IU of vitamin A, 12 mg of vitamin C, 167 mg of calcium, and 2 mg of iron are included.