EASY AND SPONGY MILK BREAD RECIPE

EASY AND SPONGY MILK BREAD RECIPE

Have you ever wondered why Asian bread is consistently chewy yet still soft? Tangzhong is the cause of it. What is Tangzhong? It’s roux (flour and water) that keeps the bread incredibly soft and moist. You can be certain that your Milk Bread will always turn out perfectly if you add Tangzhong. To help you save time, suggest making your Tangzhong the night before and ensuring it has completely cooled before adding it to the other ingredients.

Ingredients:

  1. 4 cups all-purpose flour
  2. 1/4 cup granulated sugar
  3. 2 teaspoons instant yeast
  4. 1 teaspoon salt
  5. 1 cup warm milk
  6. 1/4 cup unsalted butter, melted
  7. 1 large egg, beaten

Directions:

  • In a large mixing bowl, combine the all-purpose flour, granulated sugar, instant yeast, and salt. Mix well.
    Make a well in the center of the dry ingredients and add the warm milk, melted butter, and beaten egg. Stir until a soft dough forms.
    Transfer the dough onto a lightly floured surface and knead for about 10 minutes or until the dough becomes smooth and elastic.
    Place the dough in a greased bowl and cover it with a clean kitchen towel or plastic wrap. Let it rise in a warm place for about 1-2 hours or until it doubles in size
  • Once the dough has risen, punch it down to release the air. Transfer it back to the floured surface and divide it into equal-sized portions.
    Shape each portion into a ball and place them in a greased loaf pan, leaving a little space between each ball.
  • Cover the loaf pan with a clean kitchen towel or plastic wrap and let the dough rise for another 30-45 minutes or until it fills the pan and becomes puffy.
  • Preheat the oven to 350°F (175°C) while the dough is rising.
    Bake the bread in the preheated oven for 25-30 minutes or until the top is golden brown and the bread sounds hollow when tapped on the bottom.
  • Remove the bread from the oven and let it cool in the pan for a few minutes. Then transfer it to a wire rack to cool completely before slicing.

Crock Pot Lemon Garlic Butter Chicken

Crock Pot Lemon Garlic Butter Chicken

A simple slow cooker supper of comfort food for the family. The chicken in the crockpot is cooked to perfection and incredibly soft, with a delicious sauce of lemon and butter.

Guidelines for Storage Any leftover chicken can be kept for up to three days in the refrigerator in an airtight container.

Is It Possible for Me to Freeze? Indeed, you may freeze his dish for up to three months, either before or after cooking.

INGREDIENTS LIST FOR THE CROCK POT LEMON GARLIC BUTTER CHICKEN

  1. Making this ASAP
    6-8 boneless chicken thighs, skinless or with skin
  2. Salt and pepper, to taste
  3. 1 tablespoon garlic powder
  4. 1 tablespoon onion powder
  5. 1/2 teaspoon crushed red chili
  6. pepper flakes, or Cayenne (optional)
  7. 1/2 teaspoon paprika
  8. 4 garlic cloves, sliced or minced
  9. 1 teaspoon Italian seasoning
  10. 1/2 stick butter, diced
  11. Zest of half a lemon
  12. Juice of one lemon
  13. 1/3 cup chicken stock
  14. Chopped fresh parsley and lemon slices, for garnish

DIRECTIONS

  •  To make this crockpot chicken recipe: Place chicken thighs at the bottom of your slow cooker. Combine 1/3 cup chicken stock, lemon juice, and zest, and pour over chicken thighs. In a small bowl, combine Italian seasoning, onion powder, garlic powder, paprika, crushed red chili pepper flakes, salt, and pepper. Sprinkle the spice mix over the chicken thighs. Top with fresh minced garlic and diced butter.
  • Cover the crockpot and cook for 3-4 hours on HIGH or 6-8 hours on LOW.
  • Garnish your crockpot chicken dinner with chopped parsley and garnish with lemon slices. Serve hot with cauliflower rice, spiralized zucchini noodles, rice, pasta or quinoa.


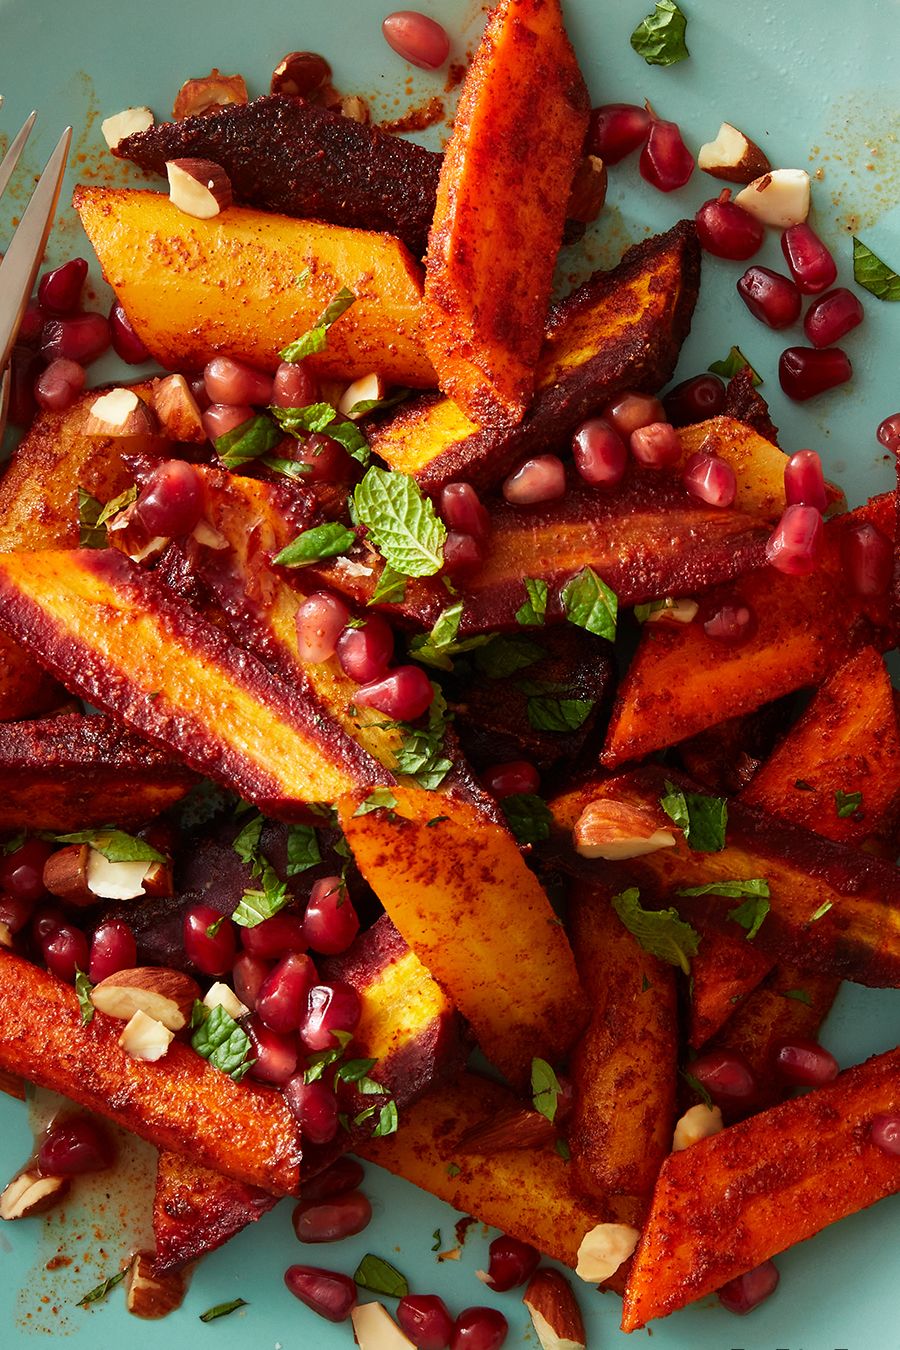
Air Fryer Moroccan-Spiced Carrots

Air Fryer Moroccan-Spiced Carrots

A mixture of spices gives those carrots—which might or might not have been left in the crisper for a week too long—a burst of flavor. Serve with halloumi or tofu or anything

ARE CARROTS IN THE AIR HYGIENE? Carrots do offer some nutritional advantages, such as antioxidants, vitamin A, and reasonable bit of fiber, if you’re going to serve higher-carb veggie with your holiday meal. (If you look at the nutritional data, you’ll probably be shocked!)

components

  1. Peel, trim, and cut 1 pound of medium carrots into ½-thick slices on the bias.
  2. One tablespoon of extra virgin olive oil
  3. 1/2 tsp of cinnamon powder
  4. Grind 1/2 teaspoon of coriander
  5. 1/2 teaspoon of ground cumin
  6. A half-tsp kosher salt
  7. A half-tsp of paprika smoked
  8. Double-scoop fresh orange juice
  9. two tsp. lemon juice, fresh
  10. 4.25 c. seeds of pomegranates
  11. Chop 2 tablespoons of toasted almonds.
  12. Tear up the fresh mint leaves to serve.

Guidelines

Step 1: Combine the carrots, oil, salt, paprika, coriander, cumin, and cinnamon in a medium-sized bowl. Scrape into the basket of an air fryer; set aside bowl. Cook for about 13 minutes at 370°, or until carrots are just soft.

Step 2: Mix lemon juice and orange juice in the bowl that was set aside. Toss to coat and add the heated carrots. Add mint, almonds, and pomegranate seeds over top.

NOTES For this dish,

  • powdered chile powder—which is prepared from dried ground chile peppers—works best. I used Penzeys Ancho Chile Powder. However, feel free to use the chili powder blend if that’s all you have!

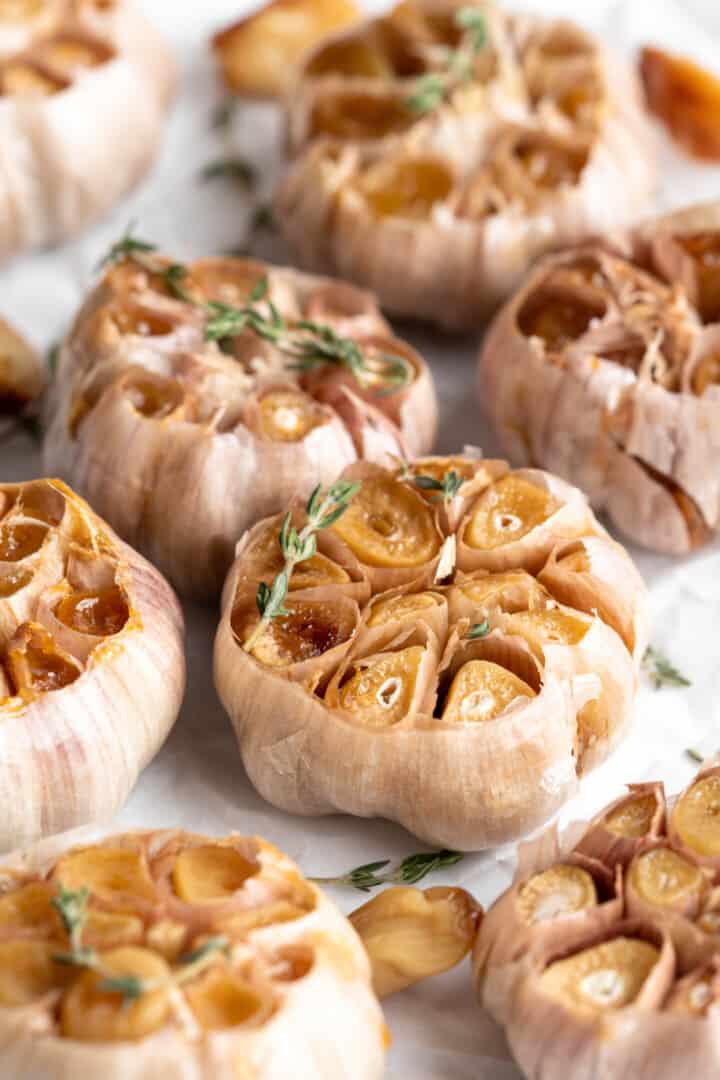
Air Fryer Roasted Garlic

Air Fryer Roasted Garlic

Air Fryer Roasted Garlic

This roasted garlic in the air fryer is a simple, quick, and ideal side dish for almost any savory dish!

Ten Uses for Roasted Garlic

  • And these are a few of my favorite applications for this roasted garlic from the air fryer!
  • For a taste boost, add it to homemade salad dressings.
    For an instant improvement, stir it into marinara sauce.
  • Spread it on sandwiches or plant-based burgers.
  • Blend it with the vegan meatballs, or place a single
  • roasted garlic clove in the middle of each one.
  • For the greatest garlic bread ever, spread it over a loaf of bread.
  • Combine it with roasted veggies and balsamic dressing for a more flavorful side dish.
  • Use it instead of normal garlic in your upcoming homemade hummus recipe.
  • Use mashed garlic cloves in place of regular pizza sauce, or scatter entire cloves over a pie.
  • Blend it into smooth soups, such as vegan potato soup.
    Make a white bean dip with toasted garlic.

Success Advice:

  • Although this recipe is fairly simple, there are a few things you should know before you begin.
  • Verify that every clove is visible. Occasionally, little cloves can be found on the side of the garlic head that are not visible when the top is cut off. Remember to cut those open as well!
  • Triple or quadruple the recipe. You can cook more than two heads of garlic in your air fryer as long as the basket isn’t overcrowded. It freezes well, so you might want to make a double batch!
  • Give it time to cool. The cloves within can burn your fingers if you try to squeeze them out, even though it feels cool on the surface.

Ingredients:

  1. two garlic heads
  2. One tsp olive oil

Directions:

  • Cut off the top of the head of garlic, with the cloves still connected, but just enough to expose them a bit. You want all the cloves slightly exposed. Place in some foil and drizzle 1 teaspoon of olive oil over the top of each head. Wrap the foil around the garlic and air fry at 380°F/193°C for 25 mins. Let it cool in the air fryer (with the door closed) for about 5/-10 minutes before squeezing – else it’ll probably burn your fingers!
  • Remove softened cloves from the skin if using in a recipe with a knife or a tiny spoon or squeeze the cloves out. If not using immediately, refrigerate for up to 4 days (or freeze). Enjoy!


Notes:
Roasted garlic will keep in the fridge for up to 4 days in an airtight container. To freeze roasted garlic, simply place the cloves in a freezer-safe bag or container and store in the freezer for up to six months.

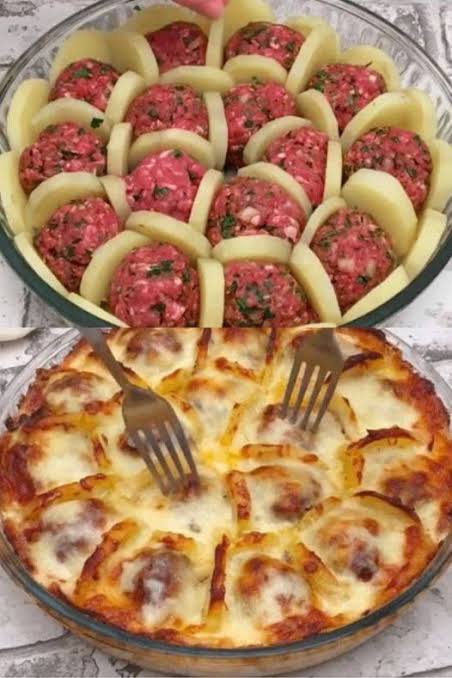
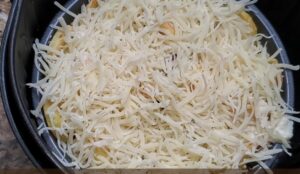
Air Fryer Baked Meatballs with Potatoes Bechamel Sauce Cheese

Air Fryer Baked Meatballs with Potatoes Bechamel Sauce Cheese

Air Fryer Baked Meatballs with Potatoes Bechamel Sauce Cheese

Slabs of potato, handmade meatballs dripping in spiced tomato sauce, creamy garlic sauce, and of course, cheese make up this delectable dinner! If you want to cut corners, you may use frozen meatballs, but I really suggest spending the extra time to prepare your own! In any case, the outcome is a meatball and sauce-topped creamy, cheesy potato bake. I promise you won’t want to miss this dish!

Ingredients:


FOR THE MEATBALLS:

  1. One pound of ground mince
  2. 1/2 cup coarsely chopped yellow onion
  3. One egg
  4. one-fourth cup panko bread crumbs
  5. One tsp finely chopped parsley
  6. one tsp finely chopped basil
  7. One teaspoon of oregano
  8. Juice from lemons
  9. To taste, add salt and pepper.

FOR THE BAKED POTATOES:

  1. Cut five medium-sized Yukon gold potatoes into rounds that are 1/4-inch thick.

Regarding the cream sauce:

  1. Three teaspoons of butter
  2. Four tsp full-purpose flour
  3. two cups of whole milk
  4. one tsp powdered garlic
  5. To taste, add salt and pepper.

For Garnishing;

  • Cream sauce
  • Mozarella shredded cheese.


DIRECTIONS:


RELATING TO THE MEATBALLS:

  1. Set the Air Fryer temperature to 385 degree F for 2 min.
  2. Put the ground mince , onions, panko, and egg into a medium-sized bowl. Toss to blend. Add the lemon juice, parsley, basil, and oregano.
  3. Cut into about 22 equal-sized balls. After drizzle some oil into baking pan transfer meatballs  and put into Airfryer.
  4.  bake for 12 to 15 minutes, or until brown. Let it cool.


FOR THE CREAM SAUCE:

  1. In a small saucepan, melt butter and add flour. Continue to stir until flour darkens slightly.
  2. Slowly pour in milk and continue to stir on medium-low heat until mixture thickens. Season with salt, pepper, and garlic powder and allow to cool slightly while bake is assembled.


For the potato bake:

  1.  Place four sliced potatoes in the bottom of a round baking pan. Put meatballs over the top. Arrange the meatballs and potatoes in alternating rows around the outside border of the baking pan. spray some oil on the top. and bake for 385 degree F, for 7-8 minutes.
  2. That’s the potatoes are baked properly.
  3. Once The potatoes are baked add Bechamel Sauce and Mozarella shredded cheese.
  4. again bake 385 degree F, for 5 mins or until the cheese is melt.

serving options:

Serve meatballs with tomato sauce on top. Add chopped herbs on top. Spoon the meatballs and potatoes with the cream sauce, then garnish with the grated cheese.


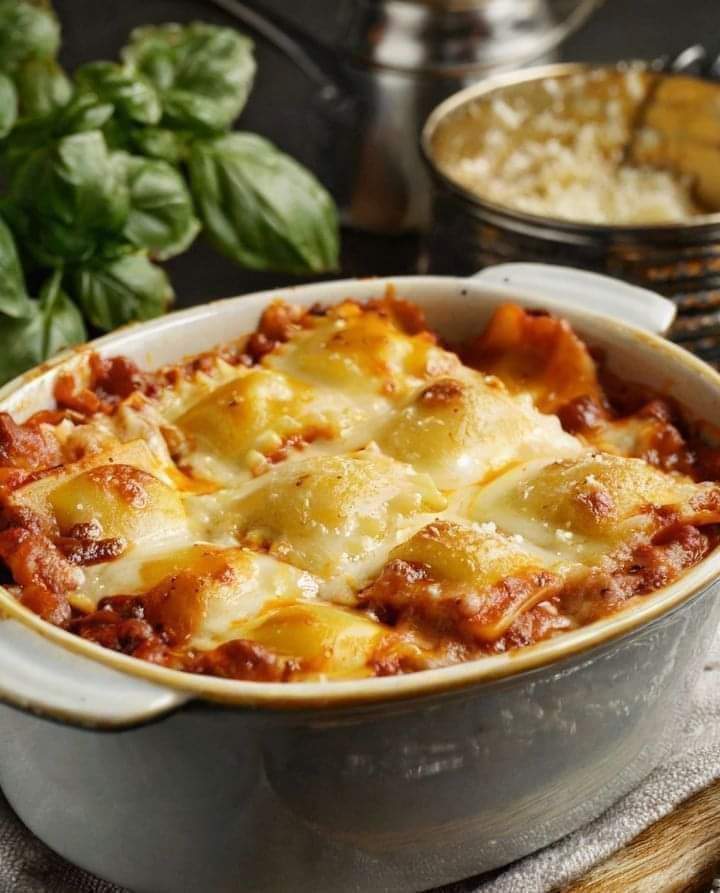
Crockpot Lasagna with Ravioli

Crockpot Lasagna with Ravioli

You’ll adore how simple this recipe for lasagna in the crock pot is. Your whole family will enjoy this dish!

Ingredients:

  1. 10 oz frozen ravioli bag;
  2. 1 pound mince beef;
  3. 24 oz container of your preferred spaghetti sauce;
  4. 1 cup shredded mozzarella cheese;
  5. 1 chopped yellow onion

Guidelines

  • Apply nonstick cooking spray to the slow cooker’s interior.
  • In a sizable skillet over the heat, brown the ground beef. If desired, drain fat. When the onions are tender and translucent, add the diced onion and simmer for a further three to five minutes.
  • In a slow cooker, put about one-third of the spaghetti sauce in the bottom.
  • Over the sauce, arrange half of the frozen ravioli in a uniform layer. Place half of the meat mixture and half of the leftover sauce on top.
  • Continue by layering another layer of ravioli, meat, and sauce before adding cheese. Leave uncovered and cook on low for two to three hours.

Variations

  • Thawing ravioli will alter how long they take to cook.
  • If you enjoy a very cheesy lasagna, try using ricotta cheese or a combination of cheeses. Ricotta cheese, mozzarella, parmesan, and Monterey Jack are good choices for this lasagna.
  • Use frozen ravioli filled with beef to make your crockpot lasagna more meaty, or top it with a layer of browned ground beef and Italian sausage. A tasty way to further bulk up this lasagna is to add frozen meatballs.
  • You may easily swap out the spaghetti sauce for crushed tomatoes from a can. If you enjoy a little heat, you might want to try Ro-Tel tomatoes.
  • Add some onion and garlic to your ground beef to enhance its flavor, or brown your ground beef

Tips

  • Before placing and layering the ingredients in the crockpot, spray it with nonstick cooking spray to make cleanup a joy.
  • If, after eating the lasagne, you still have trouble with food sticking to the pot, you might want to try adding a drier sheet and hot water to the pot. Because the dryer sheet helps to break down the molecules in solidified food, cleaning the pot after it has sat for two to twelve hours should be a pleasure.

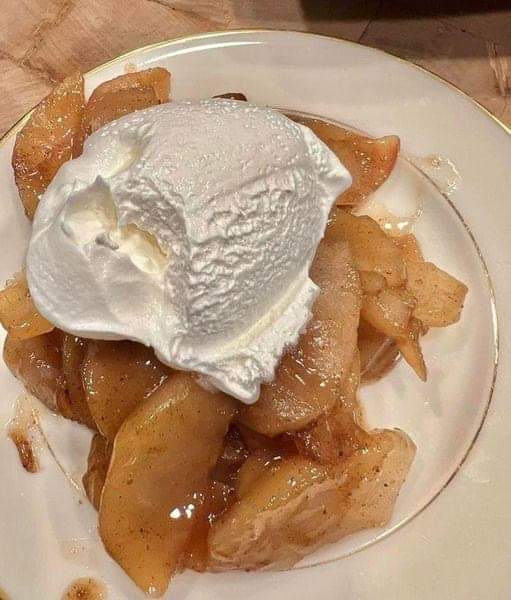
Baked cinnamon apples topped with cream

Baked cinnamon apples topped with cream

created this Three points for baked cinnamon apples with cream topping and two tablespoons of light cool whip added. This is the best dessert I’ve made on Weight Watchers so far!

Our mother used to bake baked apples frequently when we were young. Our go-to dessert during apple season was bowl of warm apples topped with dab of whipped cream. We also enjoyed them with scoop of vanilla ice cream or piece of angel food cake. Delicious. While they’re cooking, these cinnamon apples smell amazing, too. This dish is perfect if you’re searching for dessert that will make your family feel special and cozy.

Components

  1. four jets of spray Cooking mist
  2. three pounds, Peeled, cored, and thinly sliced fresh apple or apples
  3. Three tablespoons Brown sugar in a pack
  4. One tablespoon cornstarch
  5. One teaspoon ground cinnamon
  6. ½ teaspoon Kosher salt
  7. and ½ teaspoon ground nutmeg

Guidelines

  • Set oven temperature to 350°F. Put some cooking spray on a 13 x 9-inch baking dish.
  • Combine the apples, sugar, cornstarch, cinnamon, salt, and nutmeg in a big basin. Pour the mixture into the dish that has been ready. Pour a quarter-cup of water onto the apple mixture. Bake the dish for thirty minutes with the foil covering it.
  • Open the dish and Mix the mixture of apples.
  • Bake the apples uncovered for about 20 minutes, or until they are soft. Portion size: half cup Yields servings.

Cinnamon Roll Cake

Cinnamon Roll Cake

Cinnamon Roll Cake is a delectable, ooey cake made from cinnamon rolls! This cake is the best I’ve ever had, swirled with buttery brown sugar, cinnamon, and covered in a sweet glaze!

INGREDIENTS

  1. 3 cups floor
  2. ¼ teaspoon salt,
  3. 1 cup sugar,
  4. 4 teaspoons baking powder,
  5. 1½ cups milk
  6. , 2 eggs,
  7. 2 teaspoons vanilla,
  8. 4 tablespoons melted butter,
  9. and 2 sticks.
  10. 1 cup softened butter; 1
  11. cup brown sugar;
  12. 1 T cinnamon;
  13. ⅔ cups optional nuts

Glaze

  1. (2) cups powdered sugar;
  2. 4-5 T milk;
  3. 1 tsp vanilla;

Guidelines

  • Set the oven’s temperature to 350. Combine the flour, sugar, salt, baking powder, milk, eggs, and vanilla in stand mixer or electric mixer. After that is mixed together, add of melted butter and stir slowly. Fill 13-inch pan that has been oiled with batter.
  • Combine the softened butter, brown sugar, cinnamon, and, if using, nuts in medium-sized bowl. Place the cake mixture into 9-by-13-inch pan and spread evenly. Swirl and marble the cake with knife.
  • Bake for 25 to 30 minutes, or until toothpick inserted in the center comes out almost clean. In medium-sized bowl, combine the powdered sugar, milk, and vanilla to make the glaze.
  • Once smooth, whisk and pour over the warm cake. Warm up or at room temperature. 

How to Keep Leftovers

Do you have any leftovers of that delicious cinnamon roll cake? Don’t worry—the key is to enjoy the deliciousness later! After it cools, carefully wrap it in foil or plastic wrap and store it in the refrigerator. It is useful for three to four days. When you’re ready to dig in, a fast microwave warm-up or a slow oven reheat will restore the flavor of freshly baked goodness

.Advice and Adaptations

  • Prepare to explore the mouthwatering realm of cinnamon roll cakes. This is a very basic dish, but it can benefit greatly from a little insider knowledge. I’ve thus come up with some useful advice and original twists to assist you in making a cinnamon roll cake that you’ll adore!
  • Can My Cake Have Nuts in It? It is possible to add nuts to the butter, cinnamon, and brown sugar mixture in this recipe. For an even better cake, you may add chopped walnuts or pecans!
  • What Is The Sign That the Cake Is Done? Once a toothpick inserted into the middle comes out clean, the process is complete. The edges of the cinnamon roll cake will start to brown slightly.


CASTELLA CAKE

CASTELLA CAKE

Enjoy this incredibly delicate, bouncy, and super-moist Japanese sponge cake with hint of honey! Castella Cake, famous tea-time treat in Japan, is made with just four ingredients and is an ideal hostess or holiday present.

To store erap each item individually in plastic wrap to store for later. Store for maximum of 3–4 days at room temperature, 5–7 days in the fridge, and month in the freezer.

Ingredients:

  1. 4 medium eggs, at room temperature
  2. 110g of sugar
  3. 2-3 tablespoons of honey
  4. 100g of strong flour

Preparation:

  • In a metal bowl, break the eggs, add the sugar and beat with an electric mixer over boiling water on high speed for 6 minutes. The volume of beaten eggs will increase by about 4 times.
  • Add the honey to the egg mixture and beat on medium speed for about 30 seconds.
  • Sift 1/3 of the flour into the mixture, then lightly beat on medium speed, then add another 1/3 of the flour and beat. Add the last 1/3 of the flour and beat until blended, about 1 minute. Do not over mix as this will cause the cake to fall over or go flat.
  • Put parchment paper in a mold and pour the dough into the mold. With a skewer, draw a zigzag line to remove any large air bubbles from the dough. In this way, the cake will have a uniform texture.
  • Bake at 180°C in a preheated oven for 10-15 minutes until the top is deep brown. Then quickly cover with kitchen paper, lower the temperature to 170°C and continue baking. It will take about 55 minutes in total. Try a skewer, when it comes out clean the cake is done.
  • When done, remove the cake from the pan and immediately cover the surface with plastic wrap.
  • Turn the cake onto a flat plate and while it is hot put it in a plastic bag and leave it for 12 hours so that the cake has a moist texture.
  • Before serving, cut the sides of the cake. Accompany with tea or coffee and a spoonful of Chantilly cream for a greater decadence. See less

Savory Stuffed French Bread Rolls Recipe

Savory Stuffed French Bread Rolls Recipe

Savory Stuffed French Bread Rolls Recipe These flavorful packed French bread rolls are a light and delectable snack or appetizer. They’ll be a success at any event because they’re crispy on the outside and filled with tasty fillings.

Recipe By: Rimsha


Ingredients For Savory Stuffed French Bread Rolls Recipe:


  • One baguette in French
  • One cup of cooked, shredded chicken
  • Half a cup of chopped bell peppers, any color
  • 1/4 cup of red onion, chopped
  • Half a cup of shredded mozzarella cheese
  • 1/4 cup of Parmesan cheese, grated
  • 1/4 cup of mayonnaise
  • Two tsp Dijon mustard
  • One tablespoon of olive oil
  • Two minced garlic cloves
  • To taste, add salt and pepper.
  • Chopped fresh parsley (for garnish)


Instructions For Savory Stuffed French Bread Rolls Recipe:

  1. Turn the oven on to 375°F, or 190°C.
  2. Cut the French baguette in half lengthwise, then hollow out each half by scooping out a small amount of bread.
  3. This will provide a hollow space for the filling. Put aside. Cooked chicken, chopped red onion, diced bell peppers, grated Parmesan cheese, shredded mozzarella cheese, mayonnaise, Dijon mustard, olive oil, minced garlic, salt, and pepper should all be combined in a mixing dish. Blend until thoroughly blended.
  4. Fill the hollowed-out sections of the French bread halves with the filling mixture, gently pressing down to compress it in.
  5. Arrange the filled bread halves onto a parchment paper-lined baking sheet.
  6. Bake for 15 to 20 minutes in a preheated oven, or until the bread is crispy and the mixture is bubbling and heated through.
  7. When finished, take out of the oven and allow it cool for a short while.
  8. Cut the filled French bread rolls into smaller pieces, then sprinkle with finely chopped parsley.
  9. These flavorful packed French bread rolls make a great appetizer or snack. Serve warm.


Note for the Recipe:

You are welcome to add any preferred toppings, such as cooked sausage, diced tomatoes, olives, or other ingredients, to personalize the filling.