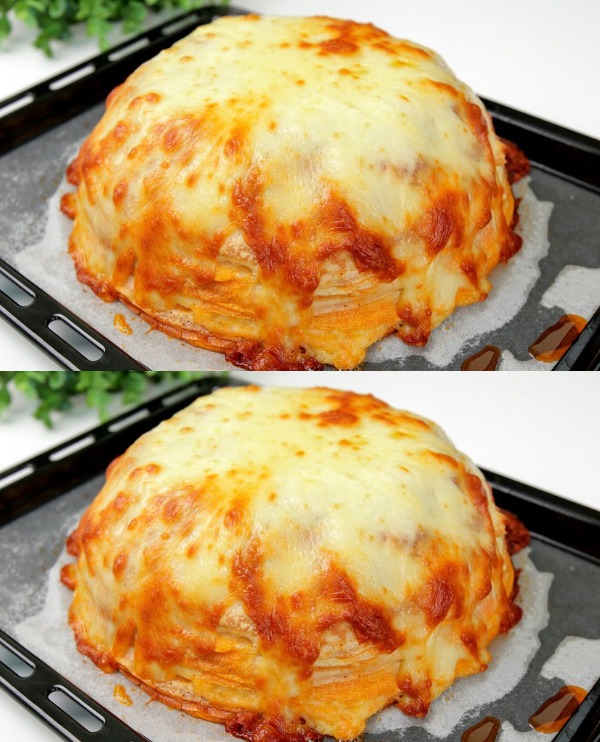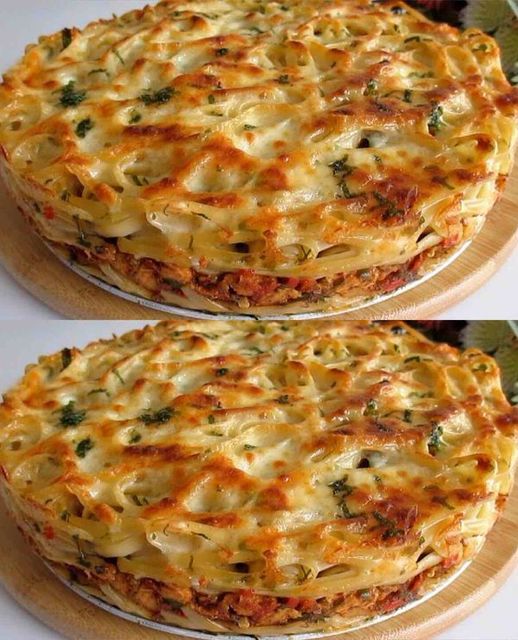
Million Dollar Spaghetti Casserole
A spaghetti dish with layers of noodles, cheese, and housemade beef sauce is called Million Dollar Spaghetti. It’s an inexpensive, simple-to-make supper that the entire family will enjoy.
Ingredients:
- 1 (8 ounce) package spaghetti
- 1 pound lean ground beef
- 1 (16 ounce) jar spaghetti sauce
- ½ cup butter, sliced – divided
- 1 (8 ounce) container cottage cheese
- 1 (8 ounce) package cream cheese, softened
- ¼ cup sour cream
- 1 (8 ounce) package shredded sharp Cheddar cheese
METHOD:
- Turn the oven on to 350 degrees Fahrenheit (175 degrees Celsius).
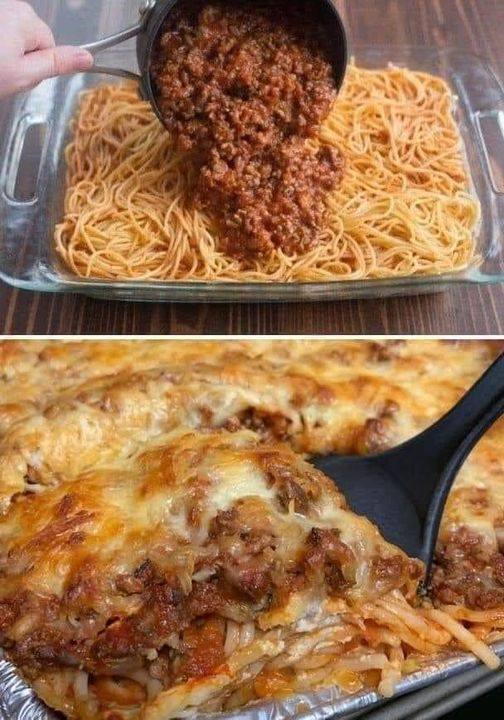
- Heavily salted water in a big saucepan should be brought to a boil. Boil the spaghetti for approximately 12 minutes, or until it is tender but still firm to the biting. Empty.
- A big skillet should be heated at medium-high heat. For 5 to 7 minutes, cook and toss the beef in the heated pan until it is browned and crumbly. Then, drain and discard the fat. Spoon into a bowl, then stir in the spaghetti sauce.
- Half of the butter slices should be positioned in the bottom of a 9-by-13-inch casserole dish. Spoon half of the spaghetti into the serving bowl.
- In a bowl, combine cottage cheese, cream cheese, and sour cream; pour mixture over spaghetti. Place remaining spaghetti on top, then top with remaining butter pieces.
- Over the pasta, pour the ground beef mixture and distribute it evenly.
- Bake for thirty minutes in a preheated oven. Top with Cheddar cheese and bake for a further 15 minutes or until cheese has melted and gently browned.
- Have fun!