Put 1 glass of salt in the car, this solves a very common problem among motorists

Put 1 glass of salt in the car, this solves a very common problem among motorists

A typical problem that drivers have as winter approaches is surprisingly simple to resolve: simply place a glass of salt in your car. This simple method is endorsed even by mechanics.

1.Salt’s Adaptability
Salt is a basic ingredient in cooking, but its applications are not limited to the stove. It frequently outperforms store-bought goods as the go-to household item for cleaning, descaling, and deodorising a variety of surfaces.

The Car Hack Suggested by Mechanics
Car issues including engine or battery difficulties are more likely in the winter. Moisture buildup within the vehicle, particularly on glass surfaces, can be rather bothersome.In the winter, moisture within an automobile can cause component damage and the growth of mould. This is where using salt becomes relevant. Salt aids in protecting the automobile and its interior components by regulating the humidity.

Using Salt to Reduce Humidity in Cars
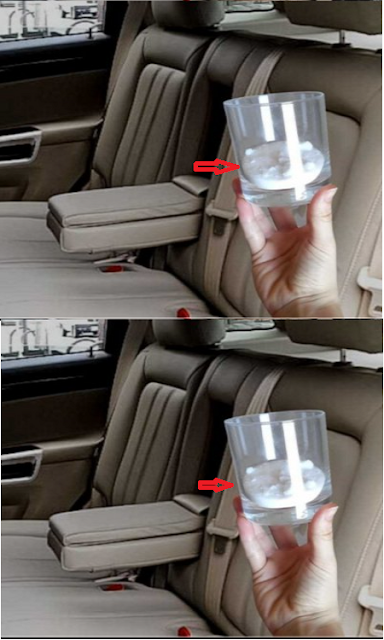
As a natural dehumidifier, a glass of salt placed inside your car helps to eliminate extra moisture and stop condensation on the windows. The ideal location for this? The cup holder in your car.

To maximise the effects, mix charcoal and salt. For best effects, put these components in a plastic container, cover with a sock, and place it beneath the seat or next to the air vents.

Alternative to Salt

While salt is a readily available remedy for moisture in cars, there are more efficient ways as well:

Newspapers: You may assist absorb moisture in your automobile by laying newspapers on the floor.

Silica Gel: To counteract humidity, silica gel balls, which are frequently included in tiny sachets with new purchases, can be wrapped in a cloth and left on the dashboard.
In conclusion, reducing car humidity in the winter doesn’t call for pricey devices or intricate methods. During the winter months, common household materials like silica gel, salt, charcoal, and newspapers can offer practical solutions that will make driving safer and more comfortable.

Tips adapted From :Foody Bloger


Delicious: Breakfast cake: 2 ingredients – Without sugar, flour, eggs or milk

Delicious: Breakfast cake: 2 ingredients – Without sugar, flour, eggs or milk
Ingredients:
  1. Two fully ripe bananas
  2. Two cups of sunflower seeds

Extras Not Required:

Use any of the following extra ingredients to enhance the flavour of your cake:

  1. extract from vanilla
  2. orange extract
  3. Leafy Rosewater Mint
  4. Turnip
  5. Cocoa or chocolate chips

Guidelines:

  1. Preheat the Oven: Turn the oven on to 350°F (175°C) to get started.
  2. Blend the Ingredients: Put the sesame seeds and ripe bananas in a blender. Blend until a thick and silky batter is achieved. If you want to customise the flavour of your cake, this is the time to add any optional flavour enhancers to the batter.
  3. get the pan ready: To keep a cake pan from sticking, lightly lubricate it with oil. Evenly pour and spread the batter into the pan that has been oiled.
  4. Bake: For 30 to 35 minutes, or until a toothpick inserted into the centre of the cake comes out clean, place the pan in your preheated oven.
  5. After the cake is perfectly done, take it out of the oven and allow it to cool for a few minutes before serving. Cut it into pieces and serve warm or room temperature. Savour it simply or top with your preferred toppings, like as yoghurt or fresh fruit.

How about you give it a go? Use your imagination and the available boosters to personalise this breakfast cake. You should have a tasty breakfast that is also quick and nutrient-dense. This healthy and filling breakfast cake only requires two ingredients and is free of sugar, flour, eggs, and milk.


Crispy Brown Sugar Air Fryer Chicken Legs

Crispy Brown Sugar Air Fryer Chicken Legs

Are you tired of the same old chicken supper recipes? Try these Air-fried Chicken Legs with Brown Sugar Crispiness! They just require thirty minutes to prepare and cook, and they have the ideal balance of sweetness and savory flavor.

Ten minutes for preparation;

twenty minutes for cooking

Thirty minutes in total

Ingredients

  1. Eight drumsticks or chicken legs
  2. Two tsp olive oil
  3. One-third cup brown sugar
  4. and one-half teaspoon Kosher salt
  5. one tsp powdered garlic
  6. One tsp powdered onion
  7. one tsp finely ground mustard
  8. One tsp of smoky paprika
  9. One-half teaspoon of cumin
  10. One-half teaspoon of black pepper

Instructions

  • After removing any surplus fat from each chicken leg, pat it dry. Put the chicken legs into a big dish or resealable plastic bag.
  • Using tongs, thoroughly coat each leg of the chicken after drizzling it with oil.
  • Toss the spices into the basin or bag, making sure to coat each chicken leg thoroughly.
  • Depending on your model, place the chicken in the air fryer basket or on trays, and air fried it for 20 minutes at 400°F. Halfway through the cooking process, turn the chicken.
  • When the chicken is done cooking, it should be 165°F internally, golden brown, and crispy on the outside.

How to Reheat and Store Leftovers

  • Air fryer chicken legs keep well in the refrigerator for three to four days or freeze for two to three months.
  • To reheat, take careful to let them thaw in the refrigerator for an entire night. You can either re-heat the chicken in the air fryer for few minutes or microwave it!
  • My preference is to air fried them for few more minutes because it brings back the crunchy texture!


Keto Chocolate Mousse

Keto Chocolate Mousse

Using just three ingredients, this naturally low-carb and keto chocolate mousse dish is incredibly thick and creamy without the need for added sugar.

With just a few basic ingredients and no need to cook, this quick and simple chocolate dessert can be prepared in about ten minutes from start to finish. It also doesn’t require gelatin or chocolate pudding mix.

If you’re vegan, as I am, you can simply make this dish dairy-free by substituting coconut cream or milk, which is naturally egg-free. If you’re not following a low-carb or sugar-free diet, feel free to use ordinary sugar or your preferred sweetener.

The prep time is five minutes.

Cooking Time: 0 minutes

The entire time was five minutes.

ingredients

  1. 1 can of full-fat coconut milk OR 1 and a half cups heavy cream
  2. 1/4 cup chocolate powder, unsweetened
  3. One tablespoon of dutch or extra regular cocoa powder
  4. 1/4 cup of your preferred sweetener (I used this blend of monk fruit)
  5. not required Optional: 1/2 tsp pure vanilla extract
  6. 1/4 teaspoon premade coffee

Guidelines

  • The liquid and a big mixing bowl should be chilled. Use only the thickest portion of the coconut milk (throw away the water underneath) if using it.
  • Beat using hand beaters or a stand mixer until stiff peaks form. Mix in the other ingredients and beat until a creamy mousse consistency is achieved.

One drop on the ground will eliminate household ants in two minutes

One drop on the ground will eliminate household ants in two minutes

One drop on the ground will eliminate household ants in two minutes is amazing .The methods you described for eliminating ants from your residence focus on using common household objects and natural cures, which are frequently chosen for their safety and environmental friendliness. These techniques are based on the idea that ants are repulsed by certain materials and odours, which keeps them out of your house. Here’s a summary and some additional information on the potential efficacy of various treatments:

Simple Vinegar Floor Cleaning
The Reason It Works Ants utilise scent trails to guide themselves and communicate with one another, but the potent smell of vinegar messes with these trails. Ants will have a tougher time returning to food sources if you erase these tracks.

Application: Mop your floors with a solution of white alcohol vinegar and hot water. Ants find vinegar’s pungent smell particularly repulsive.
Use caution when using vinegar on natural stone surfaces, such as marble. It can cause harm to these materials.

Making Use of Natural Juices and Essential Oils
Eucalyptus Oil: Its strong aroma helps freshen your home and keep ants away. The inherent qualities of eucalyptus oil make it a powerful deterrent.

The Hidden Treasure of the Mimosa Plant

The Hidden Treasure of the Mimosa Plant

Un-be-known to many, The Hidden Treasure of the Mimosa Plant—famous for its subtle charm and exquisite tactile sensitivity—is more than just a striking sight.

This little plant holds a secret as satisfying as finding a treasure trove in your own backyard. The magic of the mimosa plant goes much beyond its captivating habit of folding its leaves when touched; inside a single leaf is a wealth of health advantages.

Known by many as the “touch-me-not,” the mimosa is a delightful natural phenomena that has captured the attention of both botanists and enthusiasts.

Its leaves fold inward and droop in response to touch or motion, a cunning defence mechanism to fend off predators, only to unfold a short while later in a show of tenacity. But the real worth of this plant is much more than its fascinating movements; for those who know its secrets, there are chances aplenty.

The Mimosa plant is most known for its medicinal properties. Mimosa leaves have been used for their anti-inflammatory and reparative qualities in traditional medicine by cultures all over the world.

These leaves are used as an all-natural remedy for:

cuts, bruises, and other ailments.

Plant extracts have been used to treat skin conditions, reduce pain, and serve as a sedative to reduce tension and anxiety.

Furthermore, the plant’s potential extends beyond its ability to treat illnesses. Studies are investigating the Mimosa’s potential for air and soil purification, which makes it an important ally in environmental preservation campaigns. It is an obvious choice for reforestation efforts and the reclamation of lands affected by pollution or misuse because to its quick growth and durability.

To sum up, the mimosa plant is a gem that goes unnoticed in the world of plants. Its delicate look and touch-sensitive nature indicate a plant with a lot of promise and worth, not simply for show. The Mimosa is undoubtedly a plant worth more than gold, whether for its therapeutic qualities, advantages for the environment, or the simple delight of witnessing its leaves dance at the least touch. Thus, keep in mind that you are witnessing a veritable treasure trove of natural resources the next time you come across this modest yet remarkable plant.


Nothing beats my nana’s Ambrosia Salad Nana make it the best

Nothing beats my nana's Ambrosia Salad Nana make it the best

A traditional Nothing beats my nana’s Ambrosia Salad Nana make it the best, American dessert, ambrosia salad has been served on tables for many generations, usually during holiday parties or joyous family get-togethers. The word “ambrosia” means “food of the gods” in Greek mythology, suggesting that this dish is a delectable confection appropriate for heavenly creatures. Ambrosia salad is thought to have Southern beginnings and gained popularity in the United States in the late 19th century, despite its precise origins being rather obscure. This creamy, fruity mixture usually contains small marshmallows, coconut, and a variety of canned or fresh fruits, all of which are held together by a sweet binder like yoghurt, sour cream, or whipped topping.

The prep time: Ten minutes.
Overall Time: Ten minutes
8 servings

Recipe By: Georgia Lynn

This salad is excellent either as a light dessert or as a sweet side dish to go with a variety of main courses, especially at barbecues or potlucks. It is a cool contrast to hearty meals like creamy casseroles or grilled meats. Some people like to eat it as part of a brunch feast, where it goes well with pastries and egg dishes. A modern and health-conscious variation of Ambrosia Salad is sometimes served with a mixed greens salad. To make this adaptable meal look more beautiful during banquets or gatherings, it can also be served in individual serving glasses.

Ingredients For Ambrosia Salad:

  • 1 cup of drained canned pineapple chunks
  • One cup of drained canned mandarin oranges
  • One cup of halved and stemmed maraschino cherries
  • One cup of shredded coconut with sugar
  • One cup of little marshmallows
  • 1/2 cup (optional) chopped pecans or walnuts
  • One cup of whipped topping (such as Cool Whip) or sour cream

Instructions For Ambrosia Salad:

  1.  Put the maraschino cherries, mandarin oranges, and pineapple chunks into a sizable mixing bowl. Toss to combine the fruits gently.
  2. Fill the bowl with the small marshmallows and the crushed coconut. Now is the time to fold in the nuts, if you have chosen to use them.
  3. Depending on your desire, spoon in the whipped topping or sour cream. Fold in the mixture until all the ingredients are fully combined and the creamy element coats the fruit evenly.
  4. Before serving, cover the bowl with plastic wrap and chill the salad for at least one hour. The flavours combine during this chilling period, and the marshmallows soften a little.
  5. Gently toss the Ambrosia Salad before serving.

AMBROSIA SALAD: WHAT IS IT?

  • The ambrosia salad recipe from today is a little retro.
  • I have happy memories of my grandmother baking ambrosia for almost every church event.
  • Ambrosia comes in a variety of forms, and it seems that every grandmother has her own special recipe. This recipe has been made with cottage cheese, sour cream or vanilla custard; some variations even exclude the almonds.

Nourishment : 289 kcal, 41g of carbohydrates, 4g of protein, 14g of fat, 8g of saturated fat, 2g of polyunsaturated fat, 4g of monounsaturated fat, 5 mg of cholesterol, 46 mg of sodium, 250 mg of potassium, 4g of fibre, 32g of sugar, 599 IU of vitamin A, 16 mg of vitamin C, 90 mg of calcium, and 1 mg of iron.
US Customary is the measuring method that My Baking Addiction uses by default. Unit conversions are offered as a courtesy, but there might be some differences.


Sweet Onion Casserole

Sweet Onion Casserole

The mix of rice, Swiss cheese, and sweet onions in this recipe is delicious. It’s a great accompaniment to any meal, such as roasted fowl or grilled meats. Every time you serve it, you’ll receive compliments on it—it’s a family favorite.

Ingredients

  1. One-third cup of raw basmati rice
  2. Five cups of water
  3. Half a cup of butter
  4. Three pounds of finely chopped sweet onions
  5. One cup of half-and-half
  6. One and a half tablespoons of salt
  7. Two cups of Swiss cheese, shredded and divided

Guidelines

  • Turn the oven on to 350 degrees Fahrenheit (175 degrees Celsius). Grease a two-quart casserole dish.
  • In a big saucepan, bring the water to a boil and add the rice. For about five minutes, stir, lower the heat to low, and simmer the rice until it is halfway done. After draining, set rice aside
  • In a large skillet over medium heat, melt butter; sauté and stir onions for about 8 minutes, or until they are transparent but not browned. In the skillet with the rice, combine the sautéed onions and butter; add the half-and-half, salt, and 1 3/4 cups of Swiss cheese. Spoon mixture into the baking dish that has been prepared, and top with the remaining 1/4 cup of Swiss cheese.
  • Bake, uncovered, for approximately one hour in a preheated oven, or until rice is soft and top is gently browned.

Nutrition Information

(per serving)

323 Calories

32g Carbs,

11g Protein,

and 17g Fat

Keto Cheesecake Bites

Keto Cheesecake Bites

These easy Keto Cheesecake Bites are the low-carb, sugar-free, and gluten-free versions of one of the most popular desserts worldwide. Their base of almond and coconut flour combined with their creamy vanilla flavour will quickly make them one of your favourite keto cream cheese desserts.

SET UP TIME: 20 minutes
Cooking time: 30 minutes
COURSE: American

Servings: Dessert 12

Recipe By: Keto Diet

What Is The Carb Content Of Cheesecake?
The amount of carbohydrates (per serving) that each of my goods has is broken down here:
Carbohydrates per serving:
All six grams are made up of carbs.
4 g of total carbohydrates

Ingredients For Keto Cheesecake Bites:

  1. One and a quarter cups of almond flour
  2. Three teaspoons of granular sweetener
  3. Five tablespoons of melted butter
  4. Eight ounces of cream and room-temperature cheese
  5. A single large egg, room temperature
  6. 1/4 cup of sugar, granulated 1/4 cup sour cream at room temperature
  7. One tsp vanilla extract

Instructions For Keto Cheesecake Bites:

  • Preheat the oven to 350°F. Line a 12-cup muffin tin with liners.
  • To prepare the crust, combine the granulated sugar, butter, and almond flour. Fill each muffin cup to the brim with ingredients, pressing firmly with your fingertips.
  • Filling: Using a hand mixer, fully beat together the cream cheese, egg, sour cream, powdered sweetener, and vanilla extract. Evenly divide the mixture among the muffin tins. Approximately 2 tablespoons make 1 cup.
  • Preheat the oven and bake for TWENTY minutes. Take out of the oven and let cool completely. To firm up, refrigerate in the refrigerator for at least three hours. Serve.

Observations Nutritional value per serving: 12 One small cheesecake, 196 calories, 4 grams of carbs, 4 grams of protein, 15 grams of fat, and 1 grams of fibre is served.

Is cheesecake suitable for keto?

Cheesecake is one of the easiest desserts to convert to a ketogenic diet because it contains very few carbohydrates in any of its ingredients (well, except from the sugar and biscuit foundation).
How can you keep the cheesecake tasting original even after removing the sugar and replacing the biscuit base?

Which sweeteners work well with cheesecake that is keto?

I have substituted stevia for sugar in this recipe because it is far better for your stomach than sugar and doesn’t require the same physical properties (melting, solidifying, etc.).

If you dislike the taste of stevia, you can substitute erythritol; however, this will result in a considerable shift in the overall amount of carbohydrates. You can also use 1.3 times the amount of monk fruit as stevia to achieve a similar sweetness.


White velvet buttermilk cake recipe

White velvet buttermilk cake recipe

The charming little sister of red velvet cake is white velvet. One of the most popular cake flavors ever is definitely red velvet cake, which has been around for a very long time. However, not everyone desires to consume red food coloring, or perhaps they are unable to do so due to certain dietary restrictions. Either way, having options is usually a good thing.

Equipment

  • Mixer Stand
  • Whisk Ingredients for Attachment Paddle Attachment

Ingredients for White Velvet Cake

  1. 14 ounces of cake flour
  2. 13 oz of sugar, granulated
  3. One tsp salt
  4. One-third tsp baking powder
  5. One-half teaspoon of baking soda
  6. 5 ounces of room temperature egg whites
  7. Four ounces of vegetable oil
  8. Ten ounces of room temperature or slightly warm buttermilk
  9. Six ounces of softened, unsalted butter
  10. two tsp vanilla

Frosting Ermine Components

  1. Sugar, granulated, 14 oz.
  2. 3 ounces of flour
  3. sixteen ounces of whole milk
  4. 16 ounces of room temperature unsalted butter
  5. 1/2 teaspoon salt and 2 teaspoons vanilla essence

Guidelines

NOTE: To ensure proper mixing and incorporation, it is EXTREMELY IMPORTANT that all of the above-mentioned room temperature ingredients be measured by weight and kept at that temperature.

  • Preheat the oven to 335°F (168°C) to 350°F (177°C). To avoid my cakes turning too dark on the exterior before the middle is fully baked, I usually use the lower setting.
  • Use cake goop or your favorite pan spray to coat two 8″ x 2″ (or three 6″) cake pans (with some leftover batter). Pour batter into your pans until they are about ¾ filled.
  • In a bowl fitted with a paddle attachment on a stand mixer, mix together flour, sugar, baking soda, baking powder, and salt. Stir for ten seconds to blend.
  • Mix the oil and ½ cup of the milk together and set aside.
  • Whisk together the egg whites, vanilla, and remaining milk until the eggs are broken up and set aside.
  • When the mixture resembles coarse sand, add the softened butter to the dry ingredients and blend on low for about 30 seconds. Once the dry ingredients are moistened, add your milk/oil combination and continue mixing for two minutes. Next, increase the speed to medium (I used my KitchenAid’s setting 4). Your cake may collapse if you don’t let it combine at this stage.
  • After scraping your bowl, turn the speed down to low. In three batches, add your egg white mixture, mixing the batter for 15 seconds in between.
  • Pour into the prepared pans after scraping down the sides one more to ensure everything has been integrated. For 35 to 40 minutes, bake the cake, or until a toothpick inserted into the center comes out clean and the cake has not yet started to shrink from the pan’s sides.
  • Release the steam from the cake by firmly tapping the pan on the countertop immediately. This inhibits the cake’s shrinkage.
  • Before turning the cakes out of the pan, allow them to cool for ten minutes within. That’s normal—the cake will shrink a little. Place on a cooling rack and allow to cool completely. To retain moisture in the cake, you can either cover the cakes in plastic wrap and freeze them, or personally cool them before handling.
  • Before icing, thaw on the countertop while still wrapped

Instructions for Ermine Frosting

In medium saucepan, whisk together  sugar and flour over medium heat. Toast the flour for around minutes. Increase the heat to medium-high and whisk in the milk gradually. Continue whisking until mixture becomes pudding-like and thick.

Wrap in plastic wrap and allow to cool. Using stand mixer bowl, add the butter and beat on high until the butter is light and fluffy.

As you beat, gradually add one spoonful of your cooled flour mixture at time. smooth buttercream is ensured by incorporating gradually.

Once everything is creamy, add the salt and vanilla, and then frost the cooled cake.